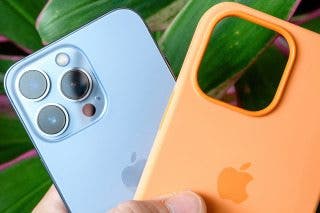
How to Adjust Portrait Mode Lighting on the iPhone
Perfect your Portrait Mode shots by easily adjusting every setting for your highest quality photos.


This article will tell you how to adjust the lighting in Portrait mode shots. Portrait mode has been making folks look great since the iPhone 7 Plus and 8 Plus—taking great portraits has never been so easy as picking a Portrait Lighting mode and letting the iPhone work its magic. With iOS 13, Apple added even more flexibility: you could adjust the intensity of the lighting effect applied in Portrait mode. iOS 14 has made the process even smoother, which we'll look at below. To avoid your photo looking like a bad Photoshop job, just tap the lighting intensity icon at the top of the screen and swipe on the slider left or right to tune the effect up or down. A little goes a long way! Let's get started.
Related: Express Your Selfie: Your Guide to Selfie Basics
How to Adjust Portrait Mode Lighting on the iPhone
Note that this feature is only available on the iPhone XR, XS, 11, or 11 Pro, and all of the iPhone 12 models.
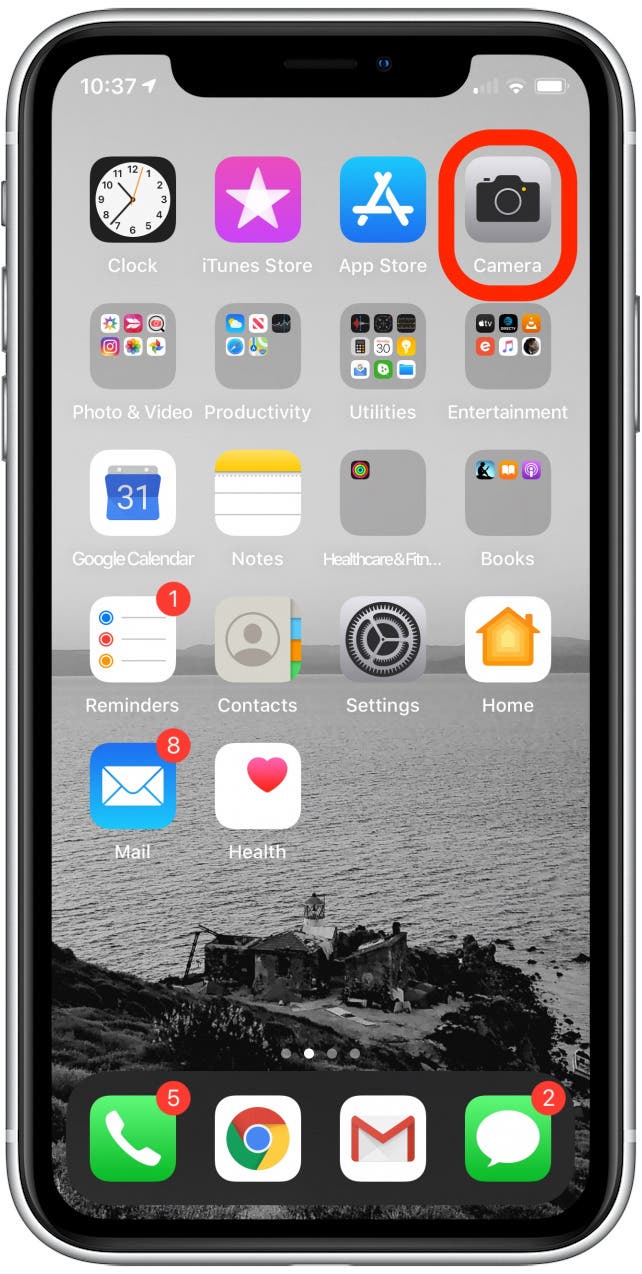
- Open the Camera app.
- Tap Portrait or slide left or right until you select it.
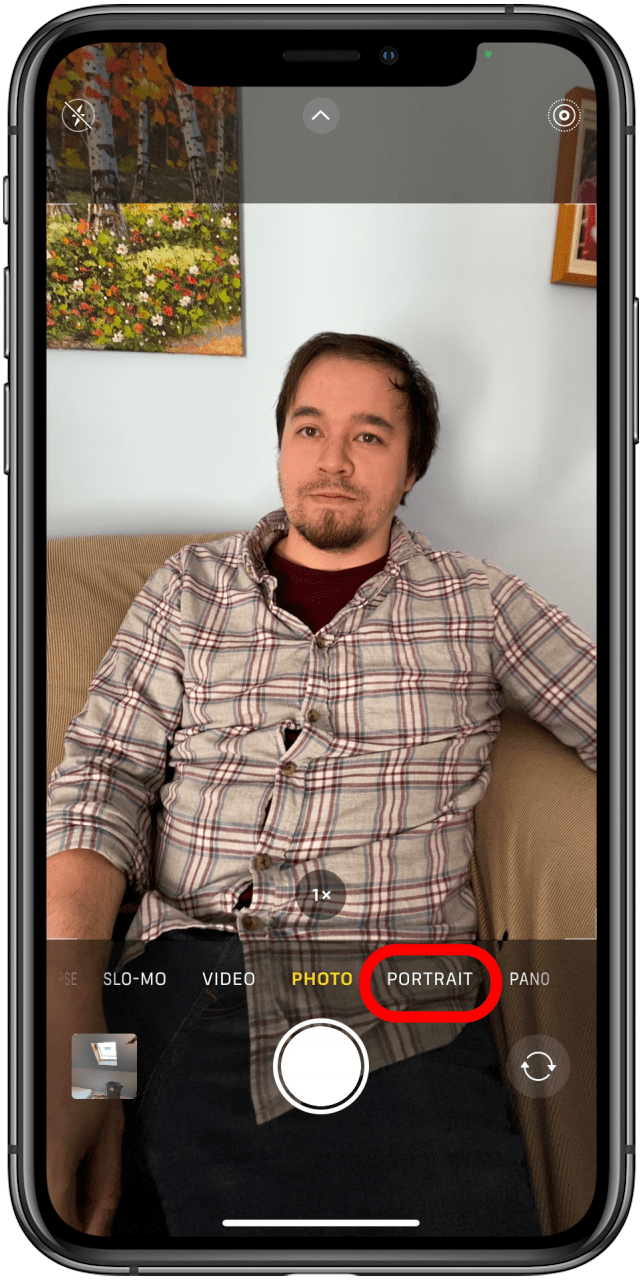
- A menu of lighting options will appear. Slide to select your mode. I’ll demonstrate with the Studio Light effect.
- Tap the light intensity icon at the top of the screen, which looks like a dot and circle inside a six sided polygon (a regular hexagram if you’re feeling precise).
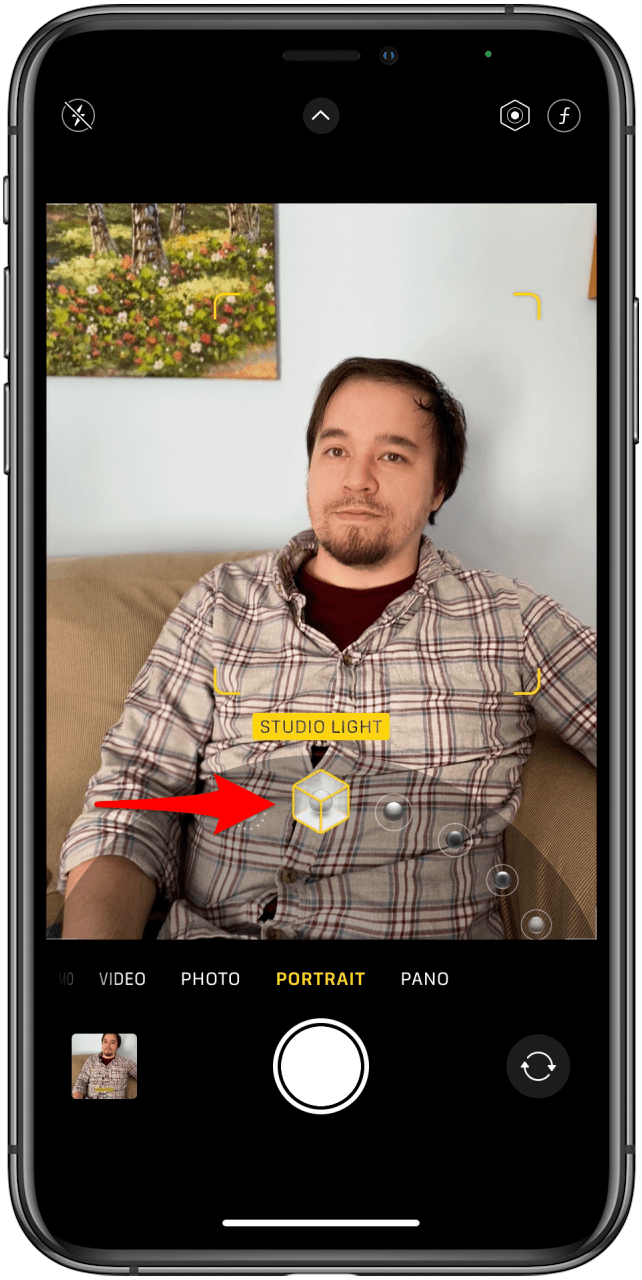
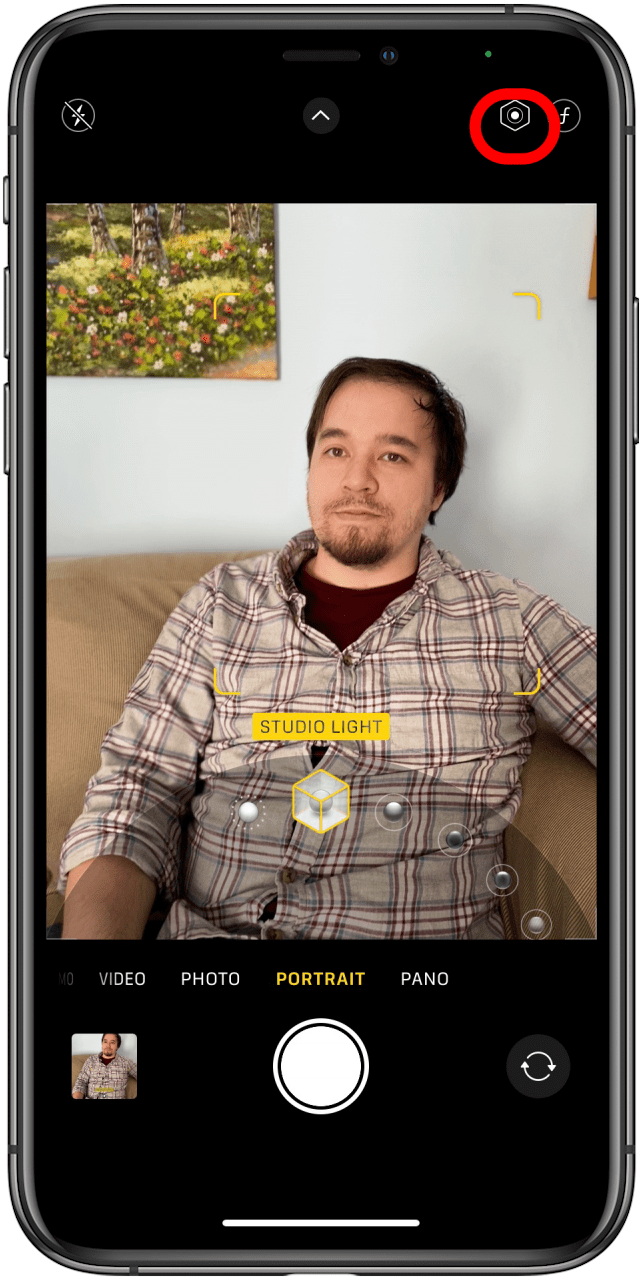
- Once you've selected this, the viewfinder will slide up, and the camera mode selection slider will be replaced by a light intensity slider. Touch it and slide left or right to adjust your lighting effect.
- You can also tap the f-stop icon at the top right of the screen—a cursive f and a number—to adjust how blurry the background is, using the same slider.
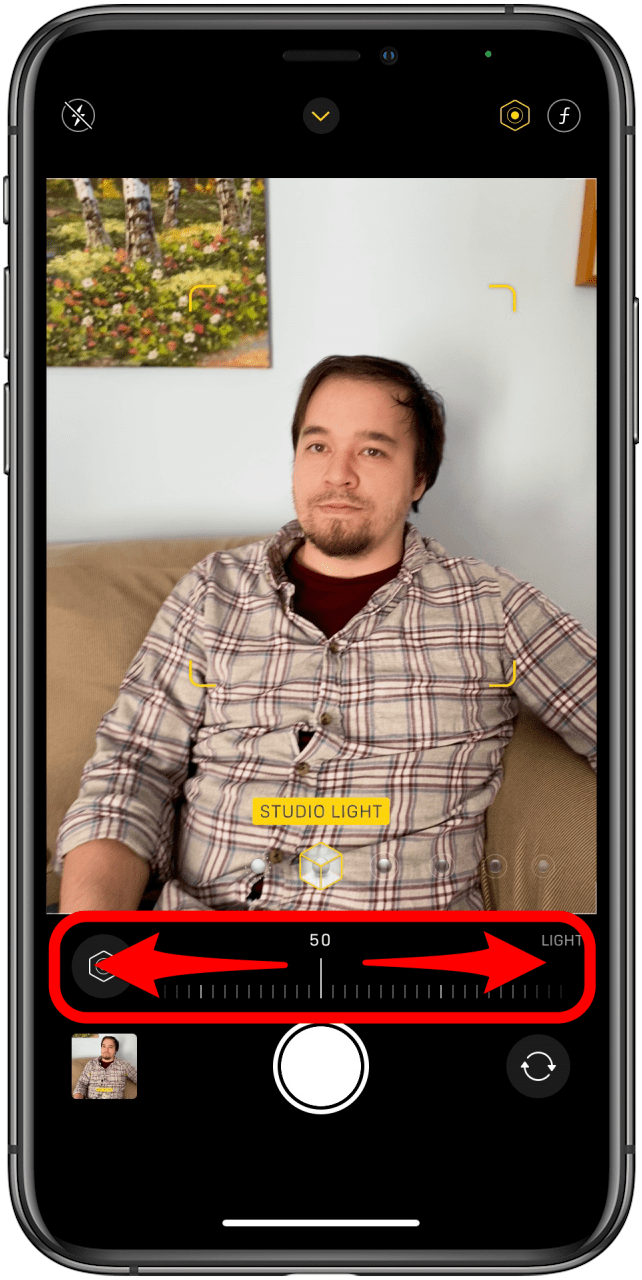
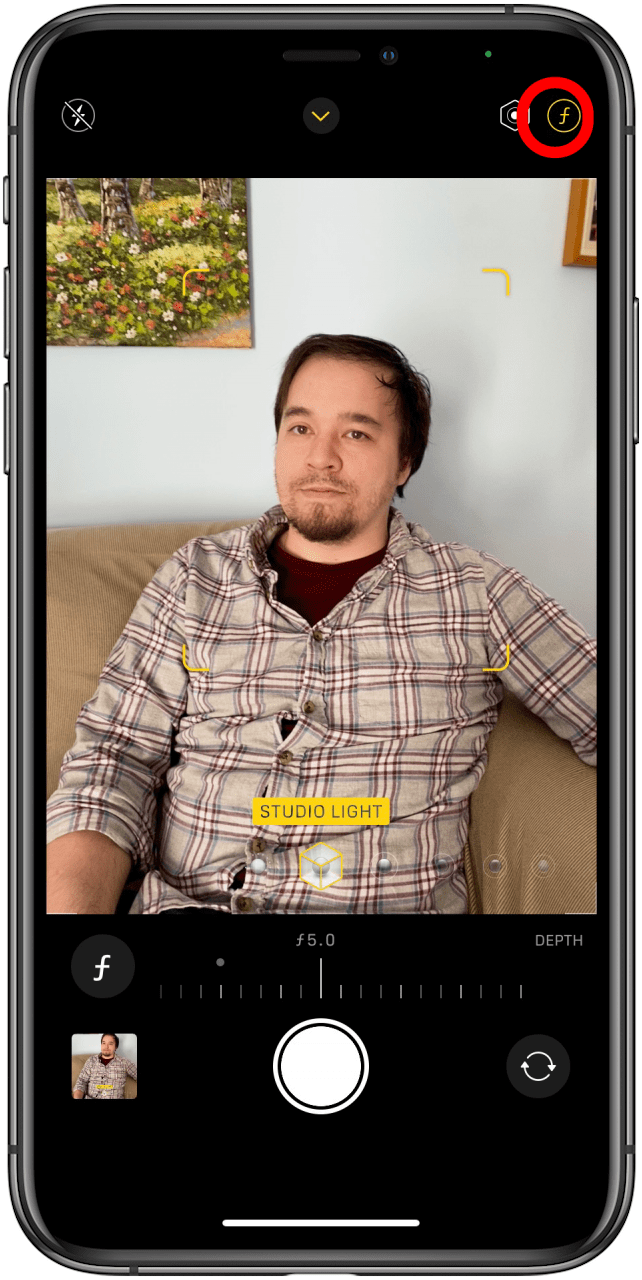
- When you’re done, you can snap your picture with confidence: the Portrait Lighting effect can be tweaked or removed later in the Photos app.
Now you know how to adjust the lighting mode in your iPhone’s Portrait mode!
Every day, we send useful tips with screenshots and step-by-step instructions to over 600,000 subscribers for free. You'll be surprised what your Apple devices can really do.

Cullen Thomas
Cullen Thomas is a senior instructor at iPhone Life. For ten years as faculty at Maharishi University, Cullen taught subjects ranging from camera and audio hardware to game design. Cullen applies a passion for gadgetry to answer questions about iPhones, iPads, Macs, and Apple cloud services; to teach live classes; and to specialize in the privacy and security aspects of the Apple ecosystem. Cullen has dual degrees in Media & Communications and Literature, and a Masters degree from the David Lynch Graduate School of Cinematic Arts.
Offline, Cullen designs videogames with Thought Spike Games, writes fiction, and studies new nerdery.
Mastodon: @CullenWritesTech@infosec.exchange
Email: cullen@iphonelife.com
Signal: @cullen.99
 Leanne Hays
 Amy Spitzfaden Both
 Rhett Intriago
 Donna Schill
 Olena Kagui

 Susan Misuraca

 Rachel Needell