How to Shoot an Overhead Picture with Your iPhone Camera


Some of my favorite features of the iPhone are the Camera and the Photos app, and there's always something new to discover. I love learning iPhone photo hacks so I can fully utilize my phone to take great pictures! Here's a tip that I want to pass on to you: how to take an overhead shot on your iPhone. Let's get started!
Why You'll Love This Tip:
- Perfectly line up your overhead shots with a built-in grid feature.
- Take great food shots and more with bird's-eye-view photos.
How to Take the Perfect Overhead Shot with Your iPhone Camera
System Requirements
This tip was performed on an iPhone 14 running iOS 18. Learn how to update to the latest iOS.
Overhead photography is excellent for taking shots of items where you want to show maximum detail. Food photography, of course, but also snapshots of drawings or even another photo where you'd like to preserve the perspective of the original artist. To learn more about your iPad and iPhone cameras and other native apps, check out our Tip of the Day newsletter.
Believe it or not, your first step to taking great overhead pics is not opening the Camera app; that comes later. First, you'll need to enable the Grid in your Camera settings, which will help you line up your overhead shots and visualize how your image is balanced.
- Open the Settings app.
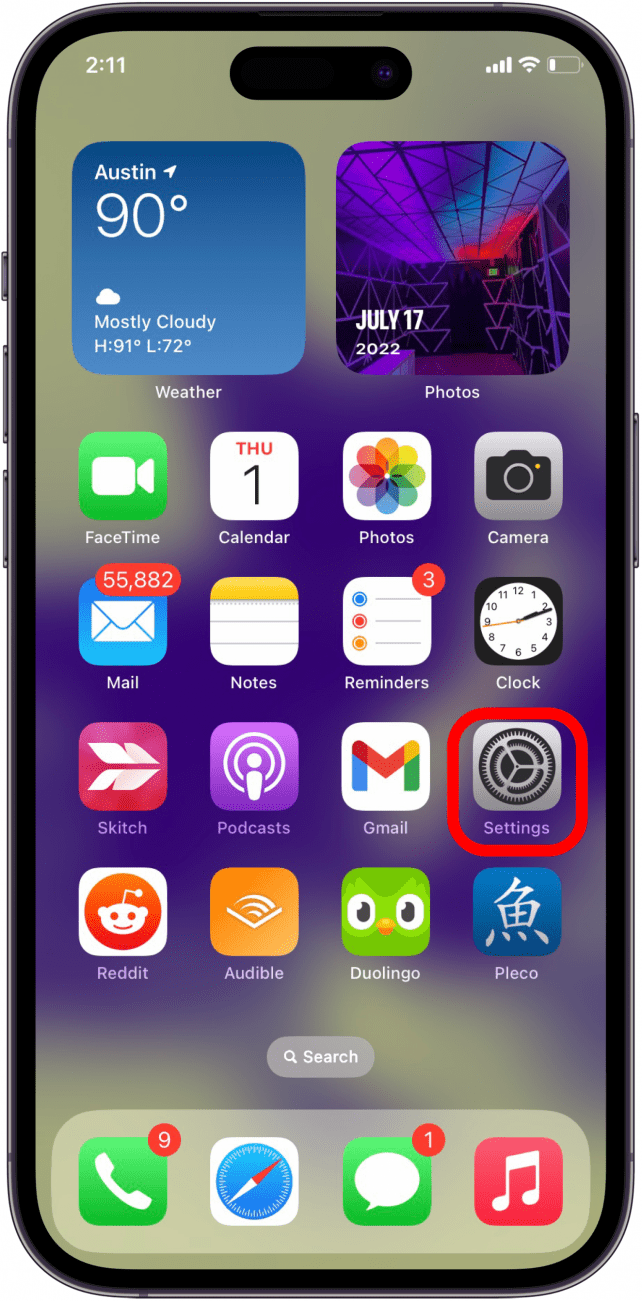
- Scroll down and tap on Camera.
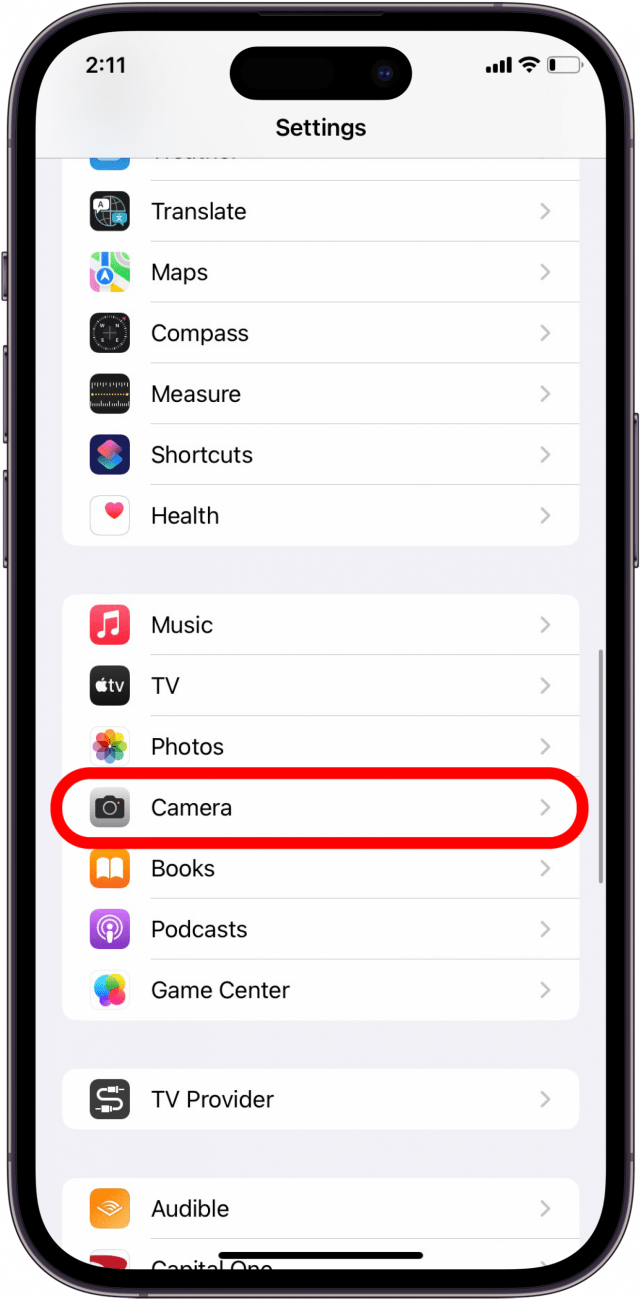
- Toggle on Grid.
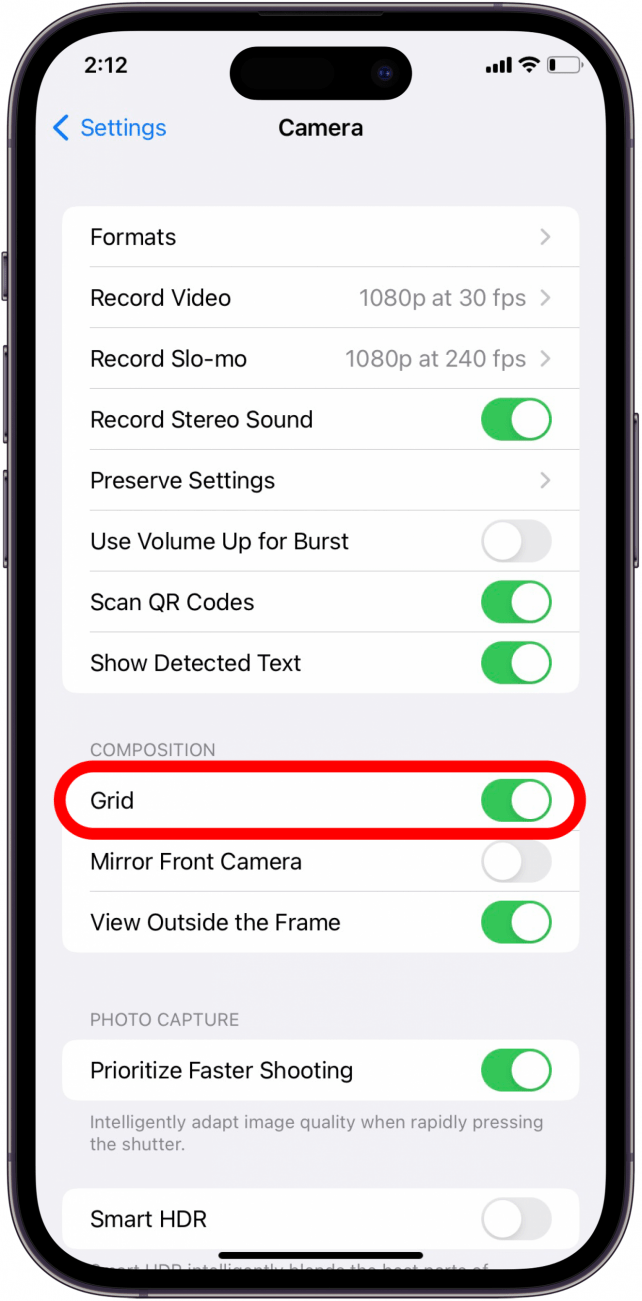 Pro Tip: Now you can start thinking about the lighting for your shot. One important tip is to avoid overhead lighting, as it will cast the shadow of your hand and camera into your shot.
 - Exit the Settings app, and open the Camera app.
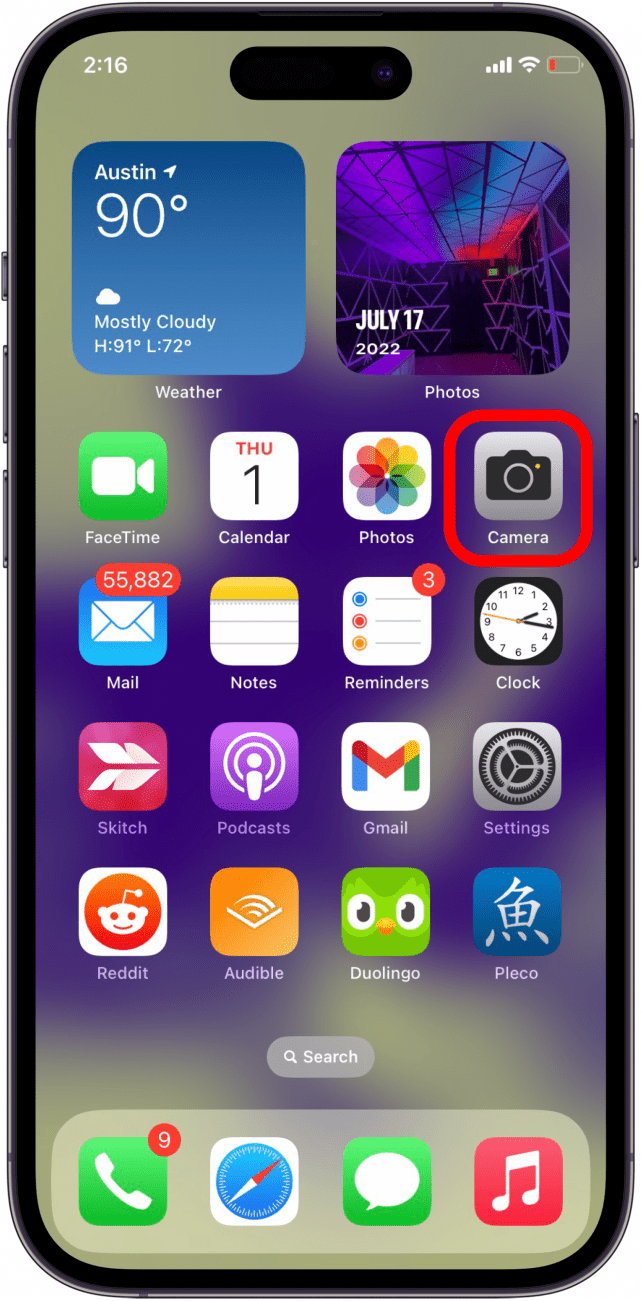
- Get your subject into view and lined up how you want in your grid.
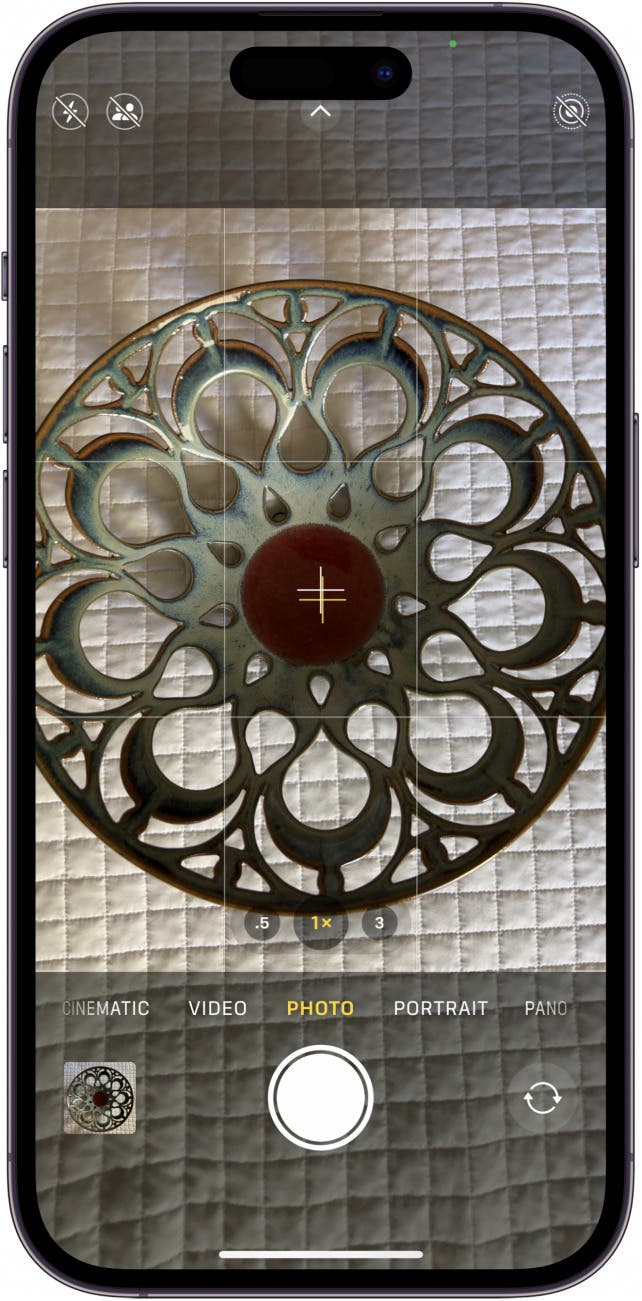
- Slightly move and tilt your iPhone until the two plus symbols on your display line up and turn yellow. This indicates that your iPhone is level.
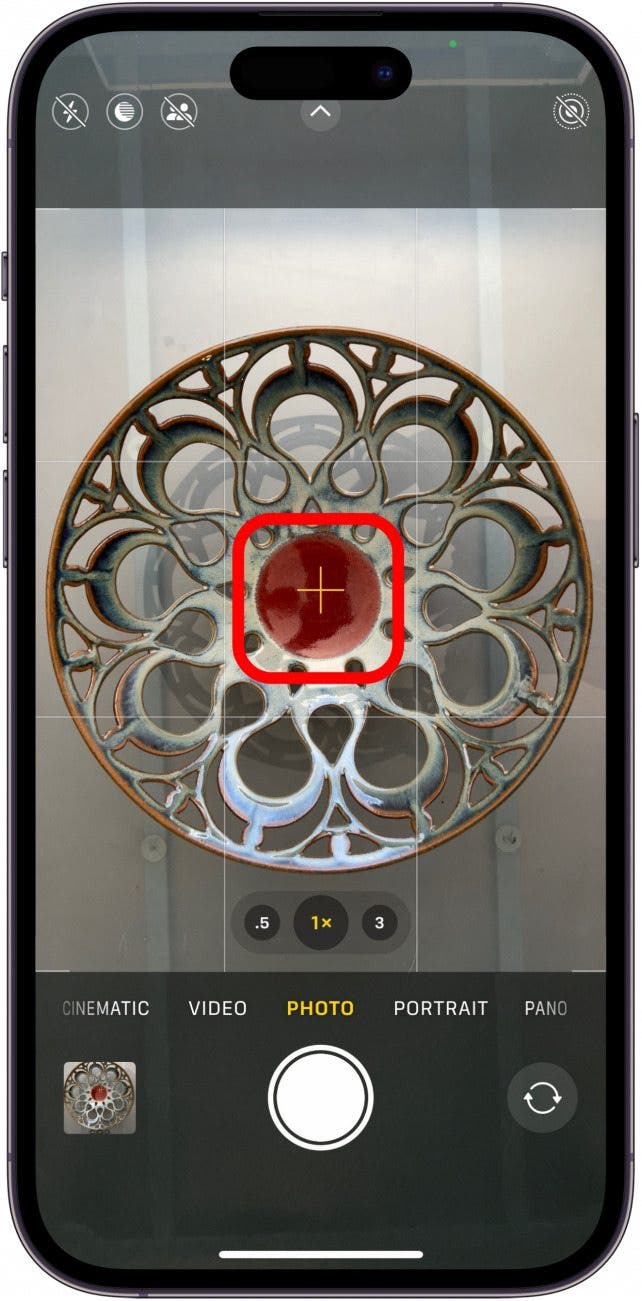
- It's useful to keep your elbows by your sides, and your feet braced apart for stability. Also, slowly releasing your breath before you take your photo helps prevent wiggling. Tap the Shutter button to snap your picture when you're ready.
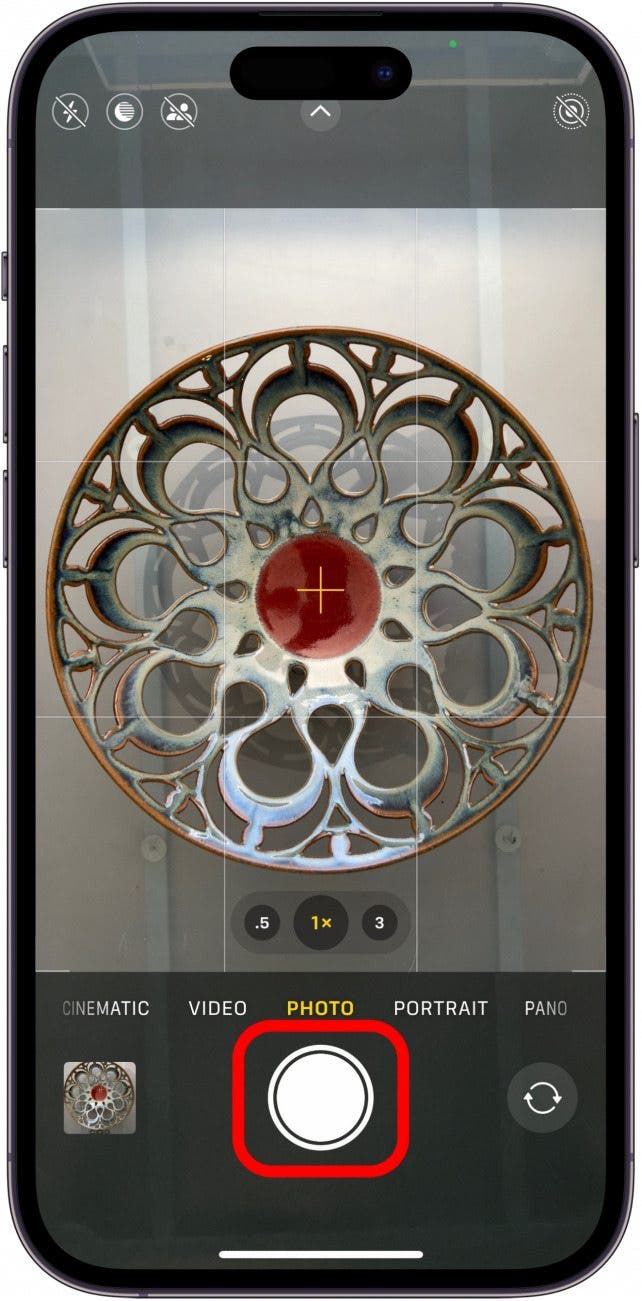
Don't be afraid to take many pictures, so you have lots to choose from; you can always delete the photos that didn't work out well!
More on iPhone Photography
Image of cut-rim bowl used by permission. Artist credit: Zoe Keeland
Every day, we send useful tips with screenshots and step-by-step instructions to over 600,000 subscribers for free. You'll be surprised what your Apple devices can really do.

Leanne Hays
Leanne Hays has over a dozen years of experience writing for online publications. As a Feature Writer for iPhone Life, she has authored hundreds of how-to, Apple news, and gear review articles, as well as a comprehensive Photos App guide. Leanne holds degrees in education and science and loves troubleshooting and repair. This combination makes her a perfect fit as manager of our Ask an Expert service, which helps iPhone Life Insiders with Apple hardware and software issues.
In off-work hours, Leanne is a mother of two, homesteader, audiobook fanatic, musician, and learning enthusiast.
 Rhett Intriago
 Sean Dugan

 Olena Kagui


 Donna Schill

 Rachel Needell

 Leanne Hays
 Cullen Thomas
