How to Crop a Screenshot on iPhone before Saving or Sharing
Reduce clutter and avoid duplicate images with this iOS screenshot shortcut.

Ashleigh has written and tested hundreds of articles about devices and features within Apple's ecosystem, specializing in iPhone, iPad, AirPods, and Mac content.
Learn More Ashleigh has written and tested hundreds of articles about devices and features within Apple's ecosystem, specializing in iPhone, iPad, AirPods, and Mac content.
Learn MoreCan't get an image or meme to download? Want to share content but crop out private info? Take a screenshot and crop it before you save it! We'll walk you through how to crop a screenshot on iPhone and then save, share, or delete the image afterward.
Related: How to Transfer Photos from iPhone to Computer (Mac, PC, iCloud & AirDrop)
Why You’ll Love This Tip
- Reduce clutter by cropping and sharing screenshots without saving them to your iPhone.
- Avoid duplicates by cropping an iPhone screenshot before saving it.
How to Crop a Screenshot before Saving or Sharing
If you need a reminder on how to do a screenshot on an iPhone, review those steps first and then come back and give this a try! For more iPhone tips and tricks, sign up for our free Tip of the Day newsletter.
Here's how to crop a screenshot on your iPhone:
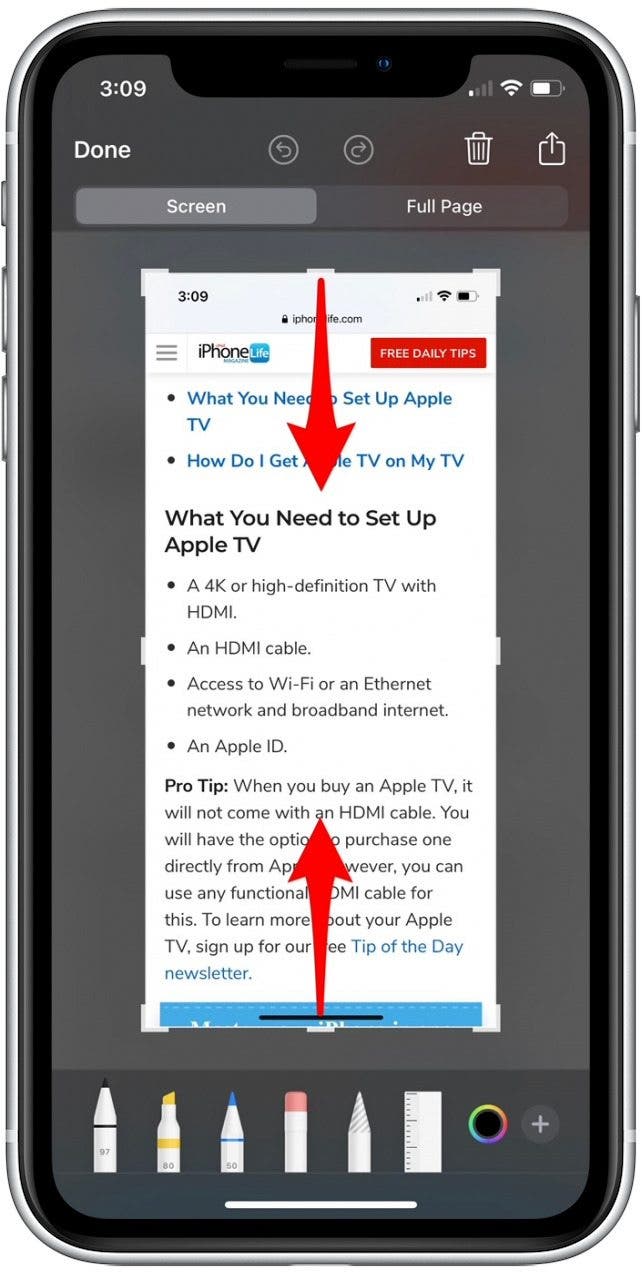
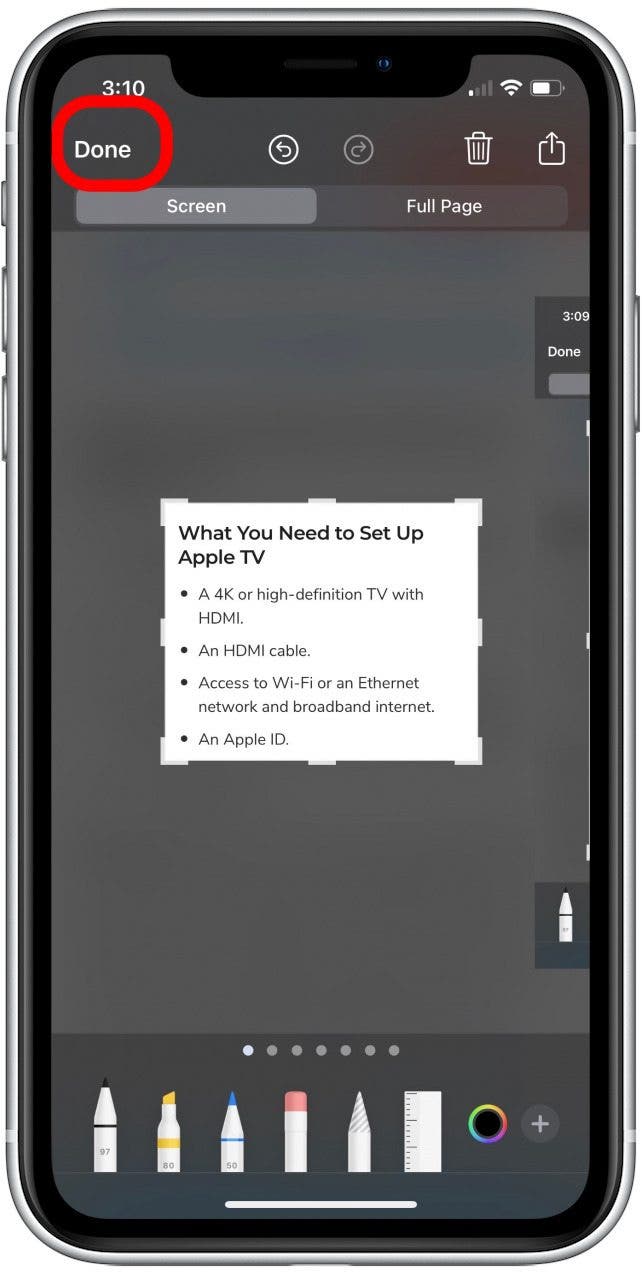
- Take a screenshot of the content you want to save or share.
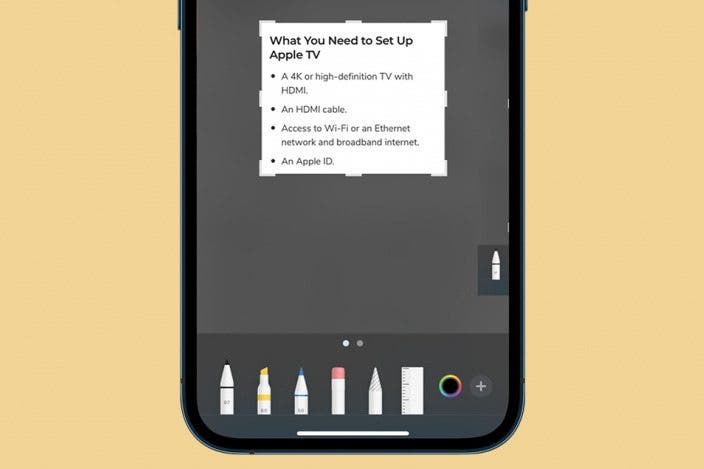
- Tap the thumbnail image that immediately appears in the lower-left corner of your screen.
- Tap and drag the white frame around your photo from any of the bold side or corner bars to crop out unwanted information.
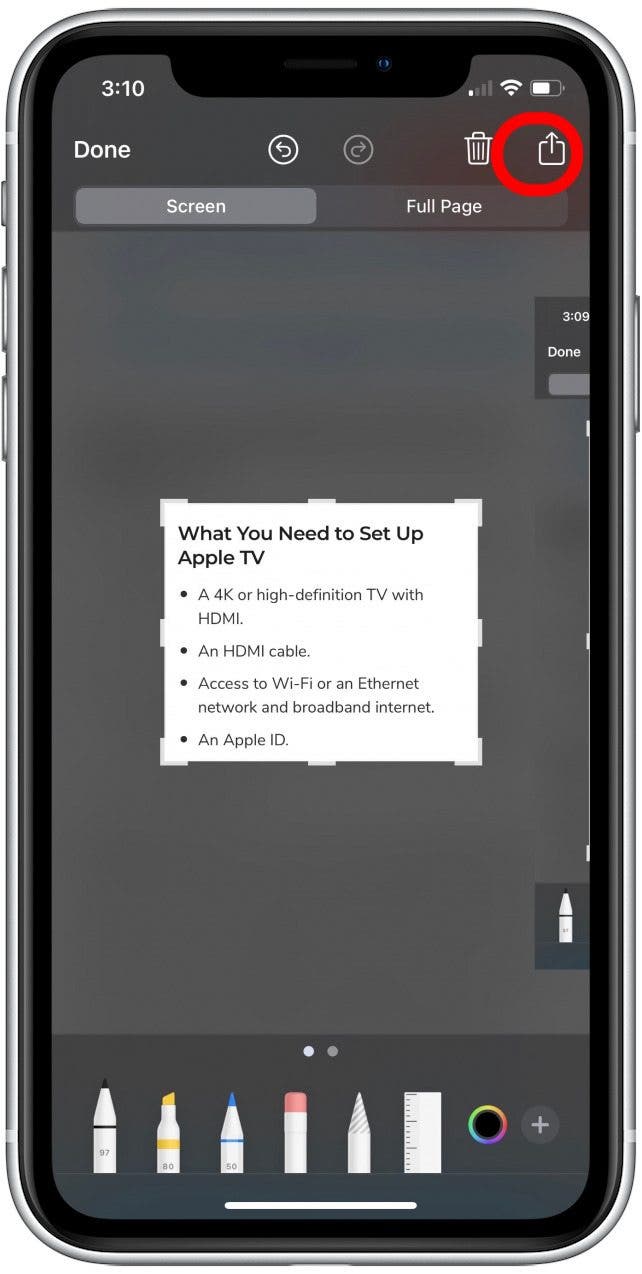
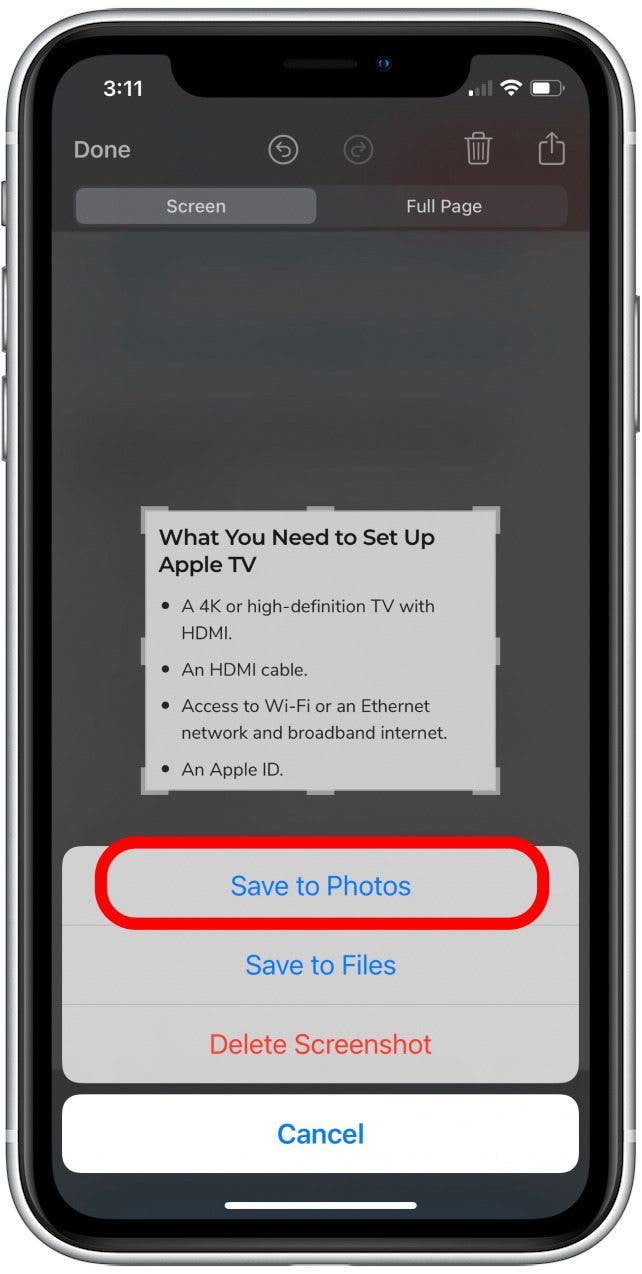
- If you want to share your screenshot, tap the Share icon.
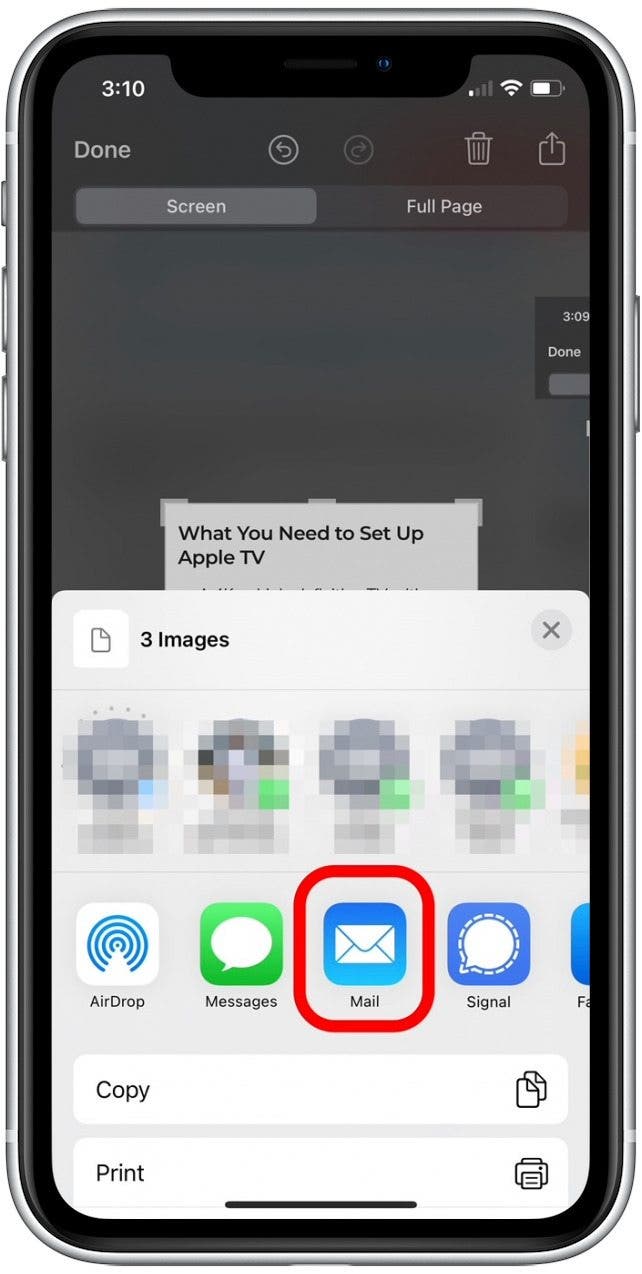
- Select your preferred app, such as Mail or Messages, and follow the on-screen prompts to share the screenshot.
- If you'd like to save your screenshot or delete it, tap Done.
- To save your screenshot to your Photos Library, tap Save to Photos.
- To save your screenshot to a document folder, tap Save to Files.
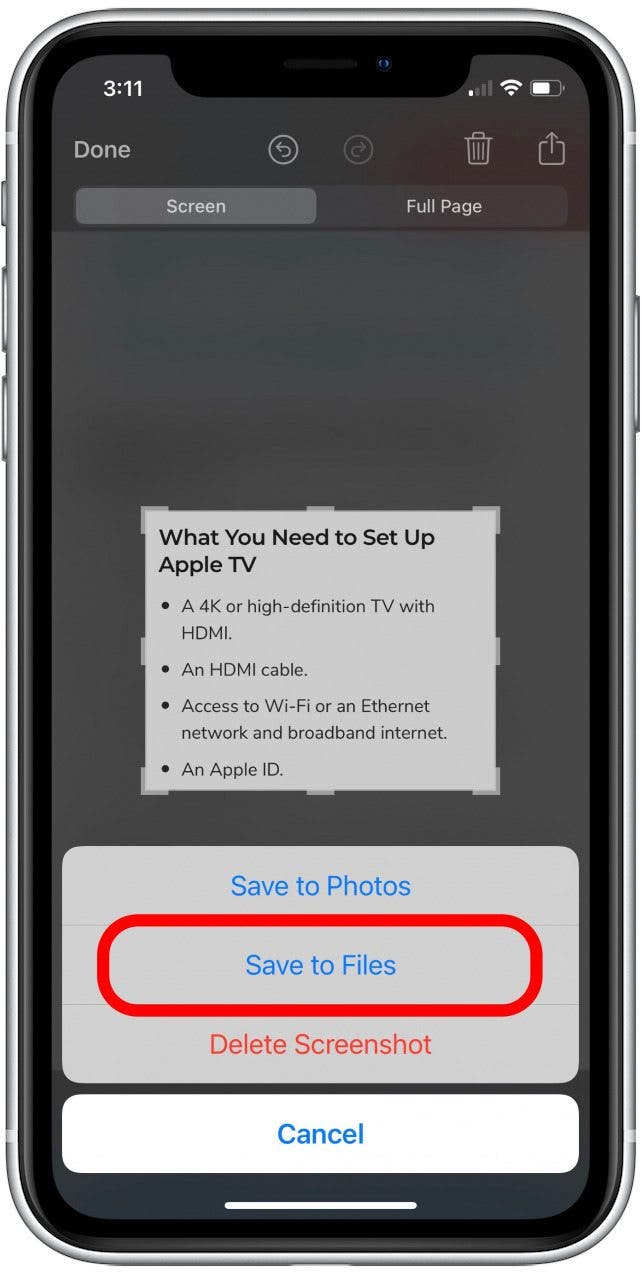
- Select the document folder you wish to save your screenshot in, and follow the on-screen prompts to save the screenshot.
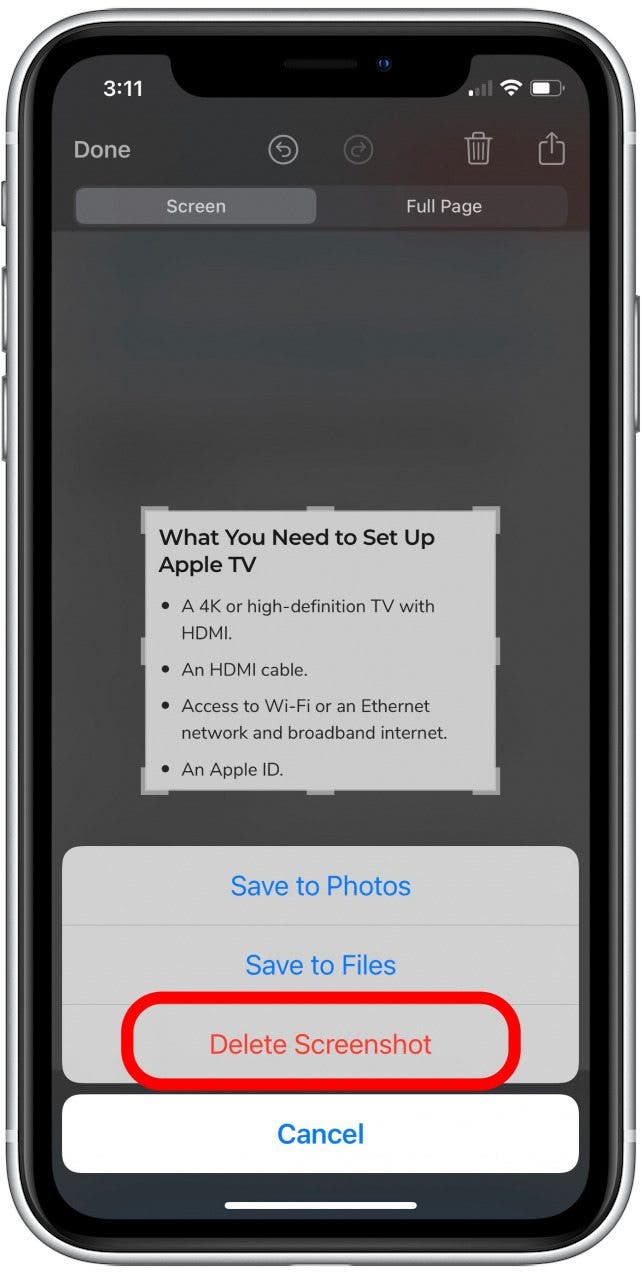
- To delete your screenshot without saving, tap Delete Screenshot.
This simple screenshot shortcut will help you make your screenshot cropping, saving, and sharing much more efficient.

Every day, we send useful tips with screenshots and step-by-step instructions to over 600,000 subscribers for free. You'll be surprised what your Apple devices can really do.


 Olena Kagui
 Rhett Intriago
 Amy Spitzfaden Both
 Leanne Hays
 Nicholas Naioti

 Cullen Thomas
 Devala Rees

 Rachel Needell