How to Remove the U2 Album from iPhone in 2018


A few years back, Apple decided to give U2’s album Songs of Innocence to all iPhone users. To which iPhone users replied, “how do I remove this damn thing?” If you’ve recently discovered this album on your iPhone, you may have wondered how it got there. Well, now you know. If you want to remove that U2 album, we’ll cover how to delete the U2 album on iPhone and from your iTunes library. Deleting U2’s Songs of Innocence album from your iPhone is easy, but there’s a special trick for deleting the U2 album from iTunes. No worries, we’ll cover everything you need to know. Here’s how to remove U2 album Songs of Innocence from iPhone and iTunes.
Related: 4 Ways to Delete Music from iPhone, iPad, iCloud, or iTunes
For reasons beyond my understanding, Apple made removing the U2 album from your iTunes library a special little process. Since it’s not part of your purchased items, once you remove the album, there’s no getting it back for free. Unless, of course, you have Apple Music, in which case you can stream it whenever you want. Despite this album having been gifted to iPhone users years ago, I only realized it was there waiting to be deleted about six months ago. Perhaps you've recently stumbled upon it too. We’ll cover how to delete the U2 album from your iTunes Music Library first, because that’s where it can be a little tricky. Then we’ll cover how to delete the U2 album from the iPhone in case you want to keep it in your iTunes Library.
How to Remove U2 Album from iTunes Library
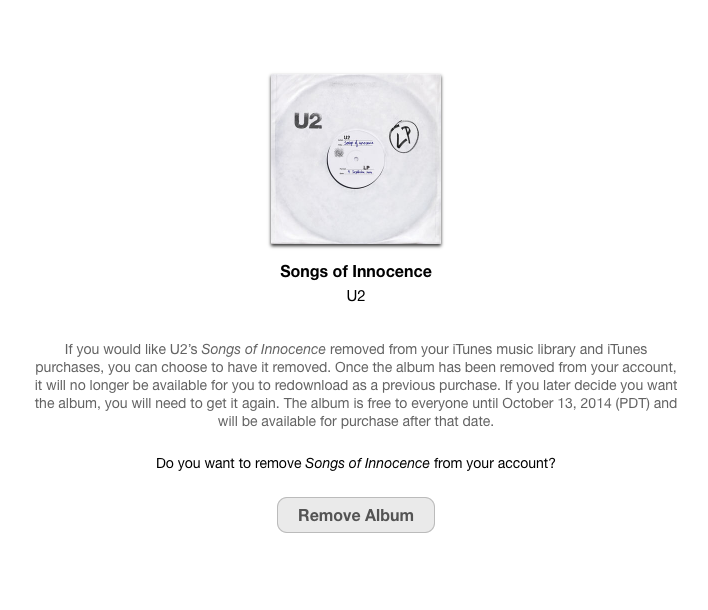
- Visit: https://itunes.com/soi-remove.
- Click Remove Album.
- Sign in with your Apple ID and password.
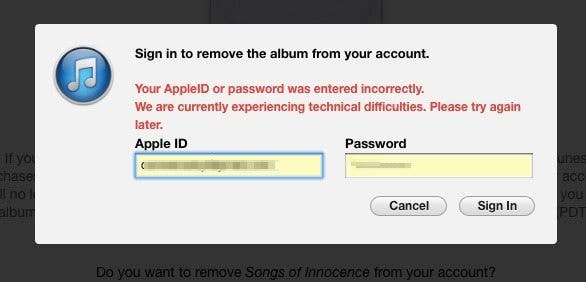
- A confirmation page will let you know that you’ve removed the U2 album from your library.
- You may still see the album in your iTunes library. The confirmation page suggests signing out of iTunes and back in. You can also select the songs, right click, and select Delete from Library.

How to Delete U2 Album from iPhone
- Open the Music app and locate the U2 Songs of Innocence album.
- Tap the circle with three dots near the top.
- Select either Remove… or Delete from Library.
- If you selected Remove…, tap Delete from Library.
- Confirm Delete Album.
Success! You have now deleted the awful U2 album that no one asked for from your iPhone and iTunes library. Now go delete Nickelback while you’re on a roll.

Conner Carey
Conner Carey's writing can be found at conpoet.com. She is currently writing a book, creating lots of content, and writing poetry via @conpoet on Instagram. She lives in an RV full-time with her mom, Jan and dog, Jodi as they slow-travel around the country.

 Rachel Needell

 Olena Kagui
 Amy Spitzfaden Both

 Kenya Smith
 Rhett Intriago
 Cullen Thomas

 Leanne Hays


 Ravi Both