Forgot Your Passcode? How to Restore a Disabled iPhone or iPad with iTunes, iCloud, or Recovery Mode


So you forgot your iPhone passcode; now what do you do? If you've entered the wrong password for your Lock Screen too many times, you already know your iPad or iPhone is disabled and are wondering how to restore your device. There are a few ways to reset the Apple password on your device and get into a locked iPhone or iPad, whether you have an older iPhone like an iPhone 6 or 7, all the way up to the newest iPhones. Let's get started learning how to reset a disabled iPhone or iPad with iTunes, iCloud or recovery mode.
Related: Forgot Your Restrictions Passcode? How to Reset It without Restoring Your iPhone or iPad
iPhone Is Disabled, Connect to iTunes
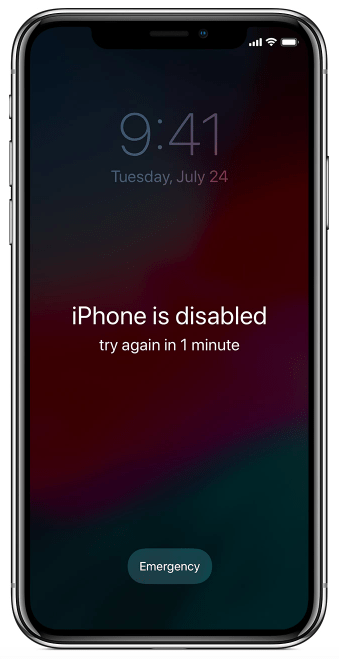
If six different, incorrect passcodes are entered into your device, you'll see the notice above. If another incorrect passcode is entered you'll be locked out for longer, and so on until the tenth attempt, when your iPhone or iPad will be disabled, and you'll see a message directing you to connect your device to iTunes. If you've set your device to erase on the tenth incorrect password, your iPhone or iPad will be wiped, and you'll need to restore from a backup to get it functioning again.
Does Your iPad or iPhone Have a Backup?
Hopefully, you've been regularly backing up your device with iTunes or iCloud, because if so, you should be able to recover your data.
But How to Reset My iPhone or iPad?
Once your device is disabled, there's no way to unlock it other than using iTunes, iCloud, or recovery mode to restore it. Which method should you use for your iPad or iPhone? Here are some guidelines on which option will work best for your device:
- If you’ve previously synced your iPhone using iTunes and often use iTunes to create backups for your iPhone, use the iTunes method.
- If you’re signed into iCloud and have Find My iPhone enabled, use the iCloud method.
- If you don’t use iCloud and can’t connect to iTunes, you'll need to use recovery mode.
Use iTunes to Erase & Restore Your iPhone or iPad
If you've previously synced your device with iTunes:
- Connect your iPhone or iPad to the computer you previously synced it with using a USB cable.
- If you're asked for a passcode and can't remember it, use another computer you've synced your device with or skip to recovery mode.
- iTunes will sync to your device; make a backup following this tip.
- In iTunes, click on the icon of your device, located near the top and toward the left side of the screen. This will open all the information about your device and what’s on it.
- The first tab is Summary. There, you will see the option to Restore iPhone; click on that.

- If you get an error message that Find My iPhone must be turned off, use the iCloud method (listed next) or recovery mode instead.
- Follow the on-screen instructions. This will completely erase your iPhone, so it’s important you know you have a recent backup either in iTunes or iCloud.
- Once your iPhone has been restored, it will start up like a new iPhone. Follow the setup process. When it’s time to restore your device, choose Restore from iTunes Backup and select the most recent backup available.
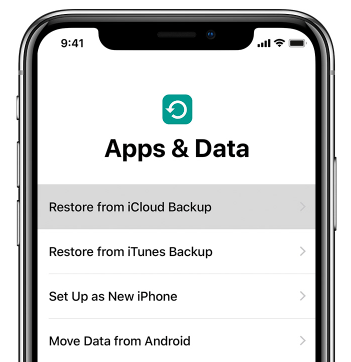
If this doesn't work for you (and you don’t meet the iCloud method requirements,) you'll need to use recovery mode.
Erase & Reset iPhone with iCloud
- On your computer, open a browser and visit icloud.com/find.
- Log in with your Apple ID and password.

- Select All Devices at the top.
- Click on the device (iPhone, iPad, or iPod Touch) of yours that is currently disabled.

- Your device needs to be connected to Wi-Fi and a power source for this process to work.
- Click Erase iPhone (or whichever device is disabled) and confirm.

- Enter your Apple ID password to restore all your apps and other purchases.
- Once your device has been wiped, it will power up as any new iPhone would.
- Go through the setup process as prompted. When it’s time to restore from a backup, choose Restore from iCloud Backup and select your most recent backup.

- This may take up to an hour; leave your device charging and connected to Wi-Fi so the process can complete. Music, photos, and apps on your device may take even longer to restore.

Use Recovery Mode to Reset Your Disabled iPhone or iPad
There are a few different reasons why you may need to resort to recovery mode to restore your device: If you haven't synced your device to iTunes or backed up to iCloud, if iTunes doesn't recognize your device or says your iPhone or iPad is in recovery mode, or if your screen is frozen on the Apple logo with no progress bar. To use recovery mode, you'll need a computer with the latest version of iTunes downloaded on it, then:
- Close iTunes on your computer, then connect your device to your computer with a USB cable.
- If it doesn't automatically open, launch iTunes.
- Now it's time to force restart your iPhone:
- For iPhone 6s or earlier, iPad, or iPod touch: Hold down the Top (or Side) and Home buttons simultaneously. When you see the Apple logo on your screen, do not let go of the buttons. Keep holding both until your the Connect to iTunes screen appears.
- For iPhone 7 or 7 Plus: Hold down the Side and Volume Down buttons at the same time. When you see the Apple logo on your screen, do not let go of the buttons. Keep holding both until the Connect to iTunes screen appears.
- For iPhone 8, 8 Plus, or X: Quickly press and release the Volume Up button, followed by the Volume Down button. Next press and hold the Side Button until you see the Connect to iTunes screen.
- Once your iPhone or iPad enters recovery mode, iTunes will ask if you want to Restore or Update your device. Select Update, and iTunes will attempt to restore your device without erasing your data.
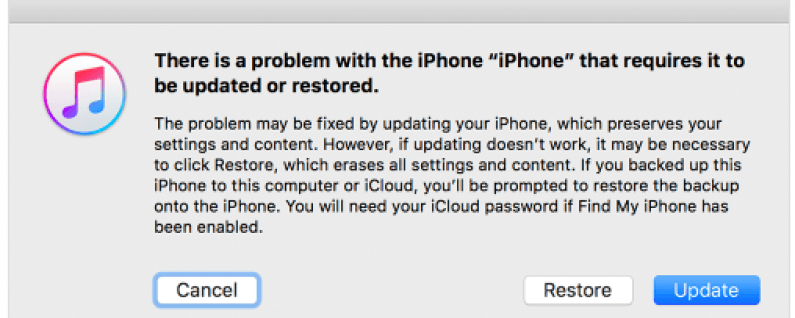
- Give this process time, but if after fifteen minutes your device isn't restored, retry the steps above but select Restore this time.
- Once your iPhone has been restored, it will start up as any new iPhone would. Follow the setup process. When it’s time to restore a backup from iTunes or iCloud, select the most recent backup available.

Leanne Hays
Leanne Hays has over a dozen years of experience writing for online publications. As a Feature Writer for iPhone Life, she has authored hundreds of how-to, Apple news, and gear review articles, as well as a comprehensive Photos App guide. Leanne holds degrees in education and science and loves troubleshooting and repair. This combination makes her a perfect fit as manager of our Ask an Expert service, which helps iPhone Life Insiders with Apple hardware and software issues.
In off-work hours, Leanne is a mother of two, homesteader, audiobook fanatic, musician, and learning enthusiast.
 Leanne Hays
 Olena Kagui

 Amy Spitzfaden Both

 Rhett Intriago
 Devala Rees

 Susan Misuraca


 Rachel Needell
