How to Use the Black Point Tool to Edit iPhone Photos & Why You May Want To
Use the Black Point tool to create stunning contrast in photos without ruining other effects.


Did you capture a memorable photo but you'd like to adjust depth and darkness to give it a richer, more polished feel? This simple tip is for you. We'll show you how to use Black Point on iPhone to edit photos for beautiful results.
Related: How to Transfer Photos from iPhone to Computer (Mac or PC)
Why You'll Love This Tip
- Make iPhone photos look more professional.
- Lighten dark areas to show more detail without lightening other areas too much.
- Deepen dark areas to make lighter areas stand out.
How to Edit iPhone Pictures with the Black Point Tool
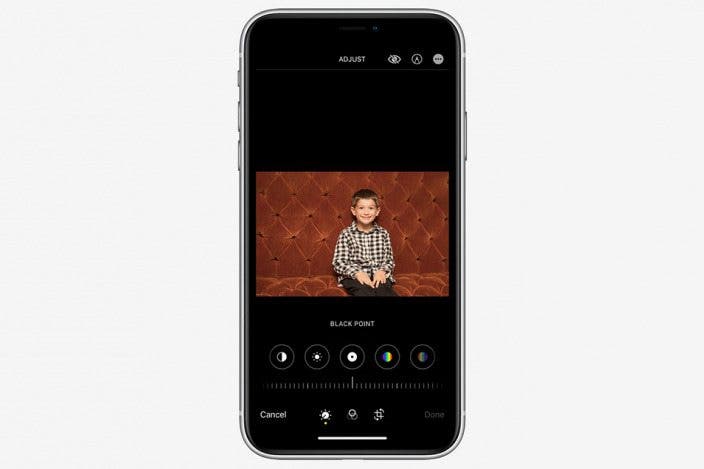
Since the iPhone Black Point tool fine-tunes the brightness of the darkest parts of your image, it has a big impact on your final picture. Brightening the black point can give an image a soft, romantic feel while darkening it adds drama and contrast. Here's how to edit iPhone photos with the Black Point tool.
- Open the Photos app.

- Select the image you want to edit.
- Tap Edit in the upper-right corner.

- Tap the Dial icon in the menu at the bottom of your screen.

- Swipe from right to left to toggle through the editing tools.

- Select the Black Point tool.

- Slide the scale left and right to adjust the black point in your photo.

- Increasing black point (sliding the scale left) will add depth to the darker parts of your photo.

- Decreasing black point (sliding the scale right) will soften the depth and contrast of the photo, giving the picture more of a faded look.

- Tap Done in the lower-right corner to save your changes.

Even if you never use other iPhone photo editing tools, just using the Black Point iPhone tool can really take your photos to the next level. Play around with this tool in various photos to see what feels right for each one! Next, learn how to blur a picture or part of a picture on your iPhone.

Emma Chase
Emma Chase is a freelance writer for iPhone Life. She has her Bachelors degree in Communication from the University of Northern Iowa. Emma has worked in many sectors in her professional career, including the higher education, finance, and nonprofit. Emma lives in small-town Iowa with her husband and two children. When she’s not geeking out over the newest Apple product or wrangling her kids, Emma enjoys a good book, crocheting, and trying new foods.

 Rachel Needell

 Susan Misuraca
 Leanne Hays
 Olena Kagui

 Rhett Intriago





 Cullen Thomas