How to Download All Songs on Apple Music to iPhone
On Apple Music downloading all songs in your library isn't as easy as we'd like it to be, but you have a few options we'll show you here.


To download Apple Music tracks to your iPhone for offline listening, just tap the cloud icon next to a song and it will download. However, if you've recently wiped your iPhone or gotten a new one, and you want to download all your music, we'll show you an excellent trick for how downloading all your songs on Apple Music at once.
How to Download Songs on Apple Music to iPhone
Can you listen to Apple Music offline? Sure! You just need to do an Apple Music download to your iPhone or iPad. Use this technique if you don't have a computer or if you only want to send a few playlists in iTunes or Apple Music to your device. If you just want to see your what's been played, check out how to view your Apple Music history. For more Apple Music tips like this, be sure to sign up for our free Tip of the Day newsletter.
- Open the Music app on your iPhone or iPad.
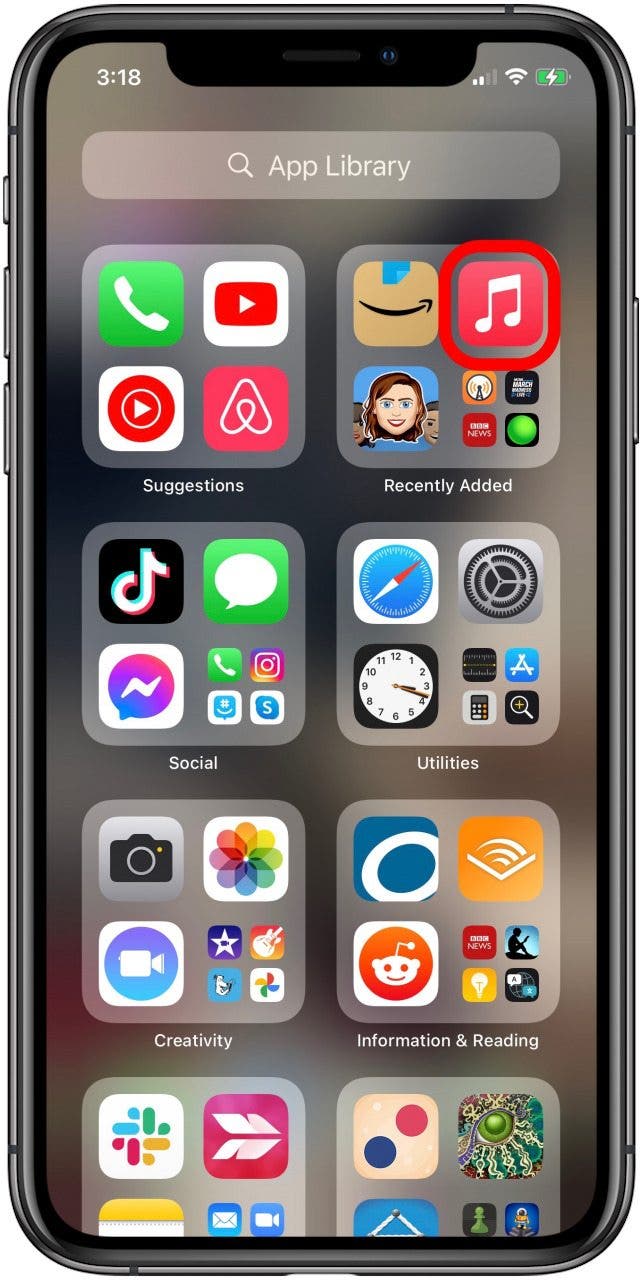
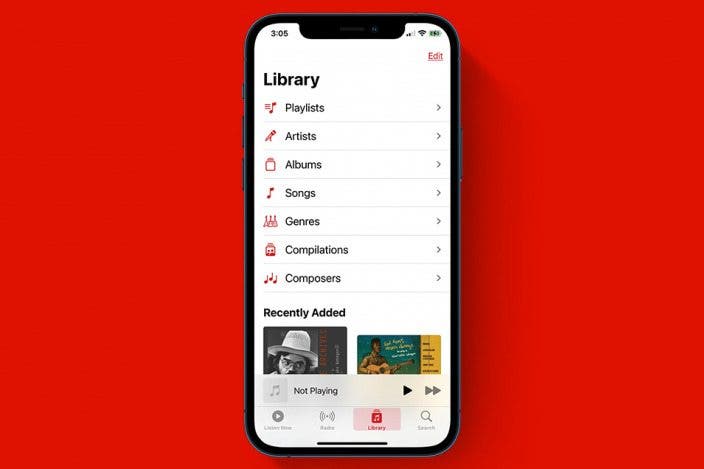
- Tap the Library tab, then tap Playlists, Albums, or Songs.
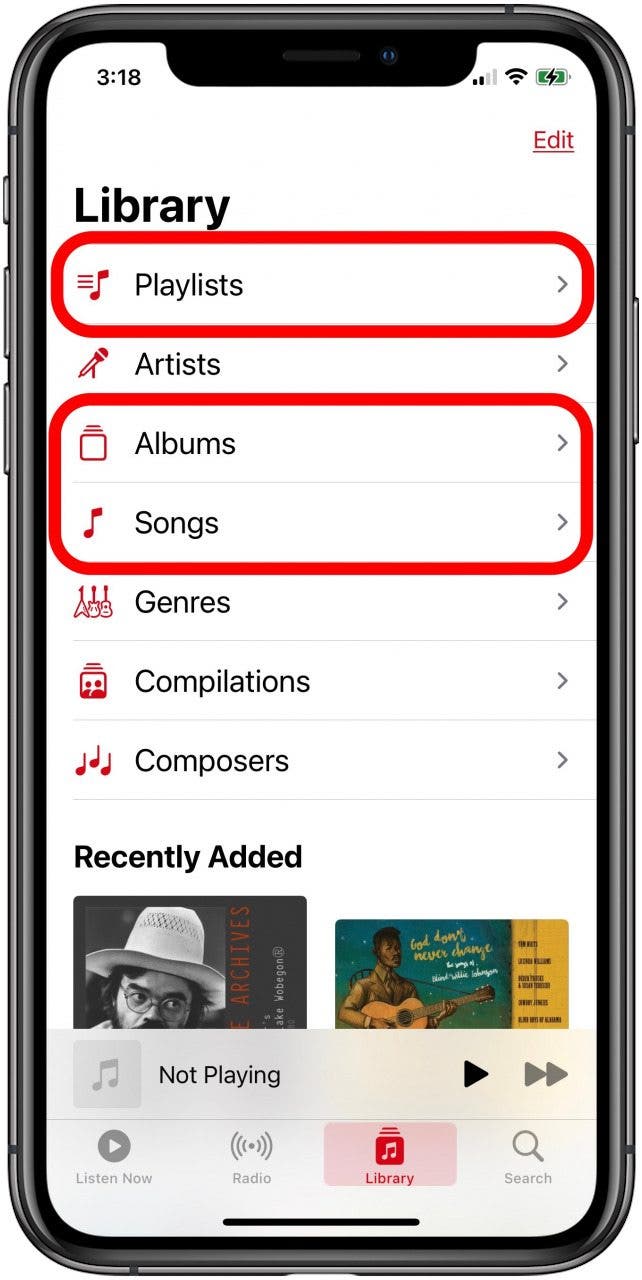
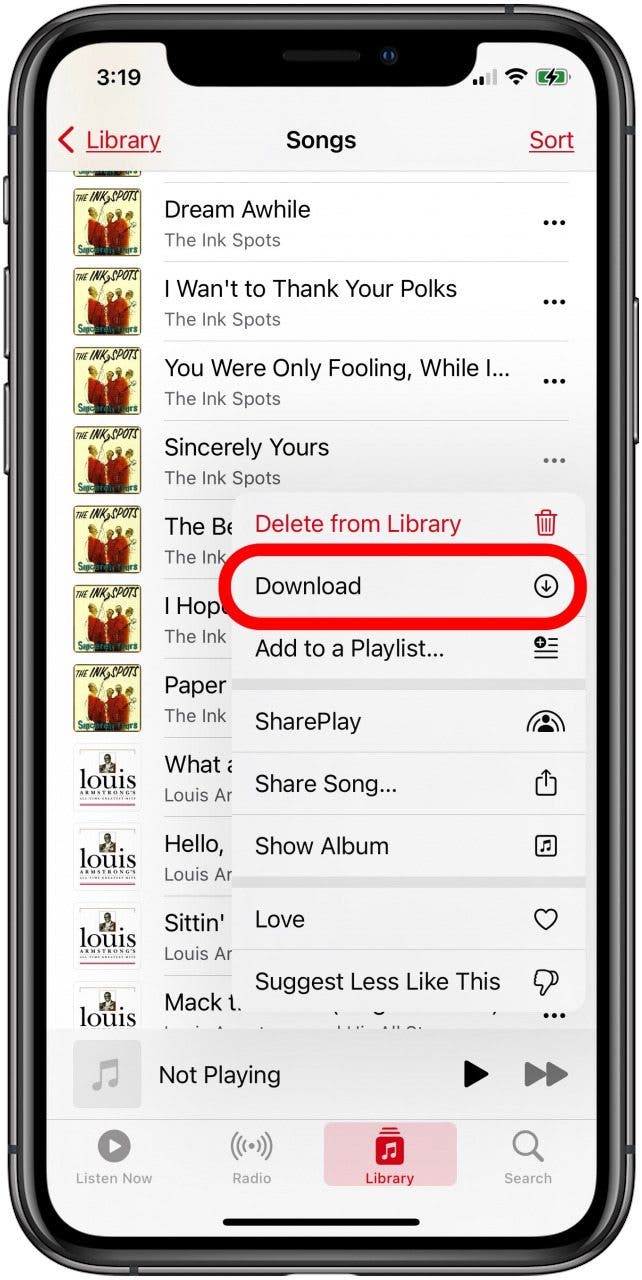
- If you select songs, you’ll need to scroll through your list and tap the More icon (three dots) next to every song.
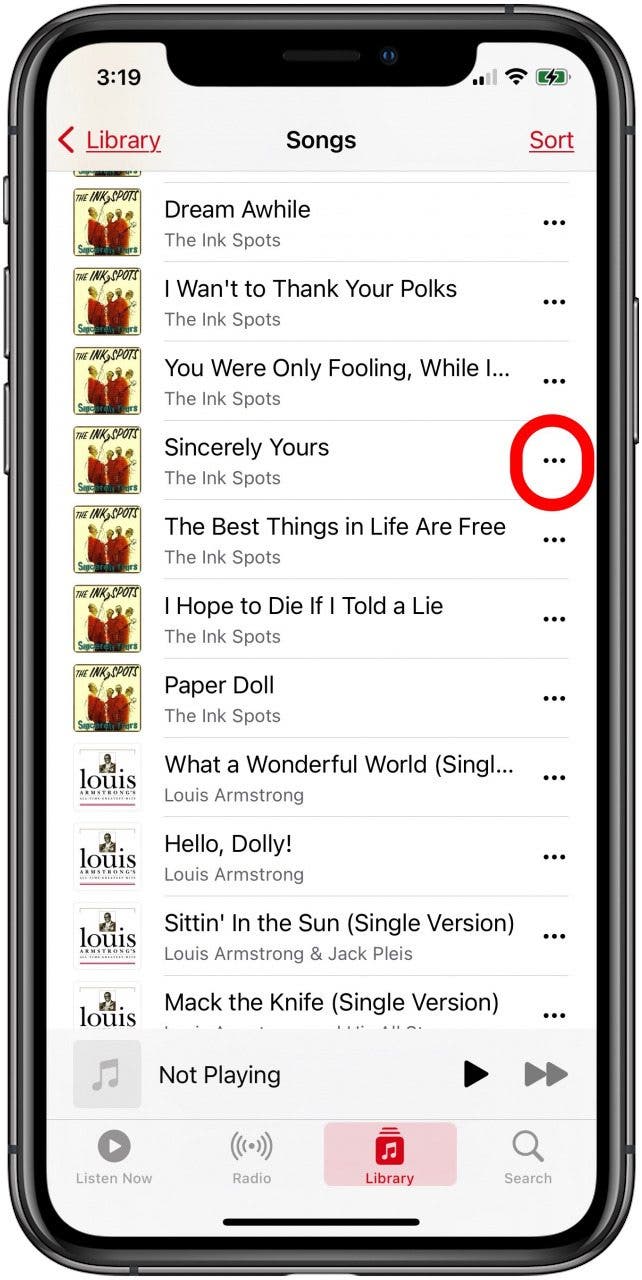
- You'll need to then tap Download next to each song.
- To download Albums or Playlists: long press the album title or playlist title until a menu appears.
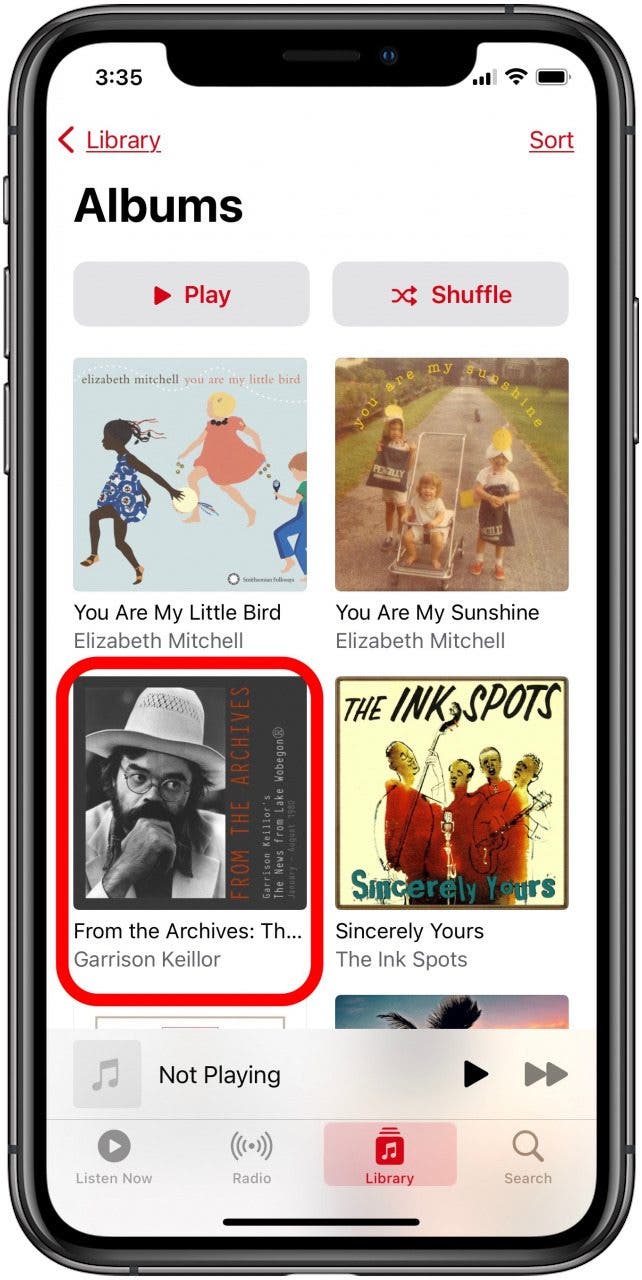
- Then tap Download in the menu.

If you have a large library, it will take some time to download every album and playlist. So make sure you're using Wi-Fi to download all that music, and I recommend charging your iPhone during the process too. You may even want to do this overnight.
This is not a fast method. It can be frustrating and time consuming to go through your whole library and download each item one at a time, but if you don’t have access to a computer and you really want to download all of your Apple Music or iTunes songs for offline listening, this method will work (with patience).
How to Download All Your Songs Using Music on a Mac or iTunes on a Windows PC
Have you been wondering, "How do I download all of my Apple Music songs at once?" Use this trick if you want to download your entire Apple Music library without tapping the download button over and over again. However, this method requires Mac with MacOS Catalina or later or a PC with iTunes.
- Open the Music app on your Mac or iTunes on your Windows Computer. You don't need to download all your music to this computer, but you can if you want. For this example, I'll use the Music app.

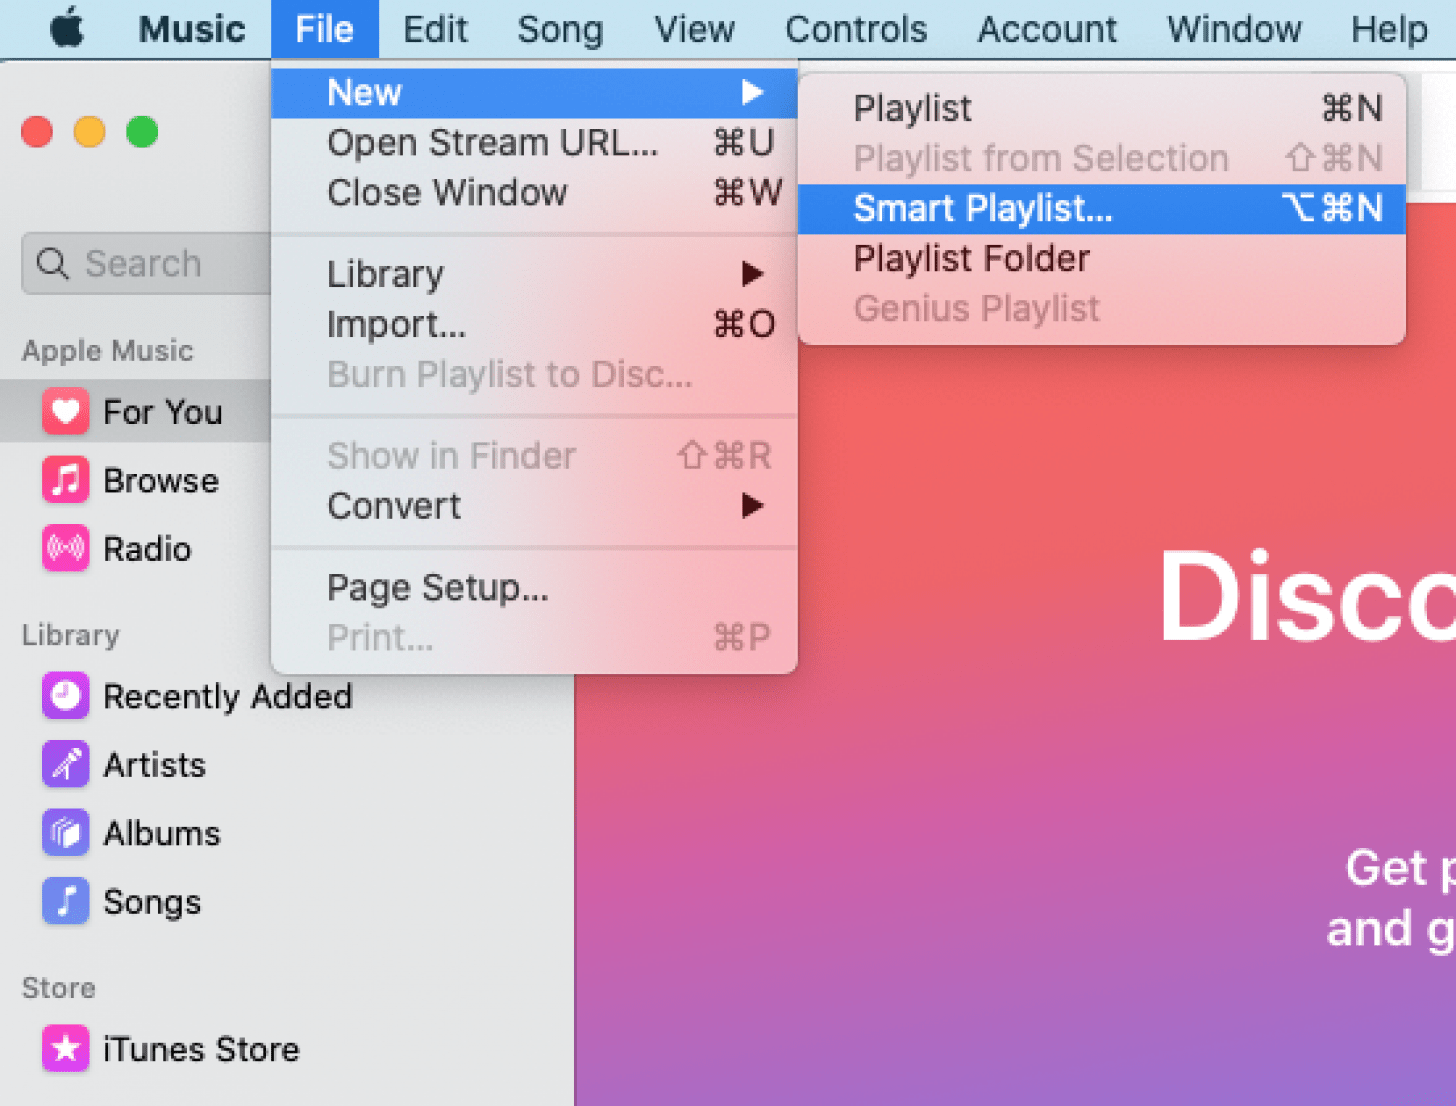
- At the very top, select File, choose New, and click Smart Playlist.
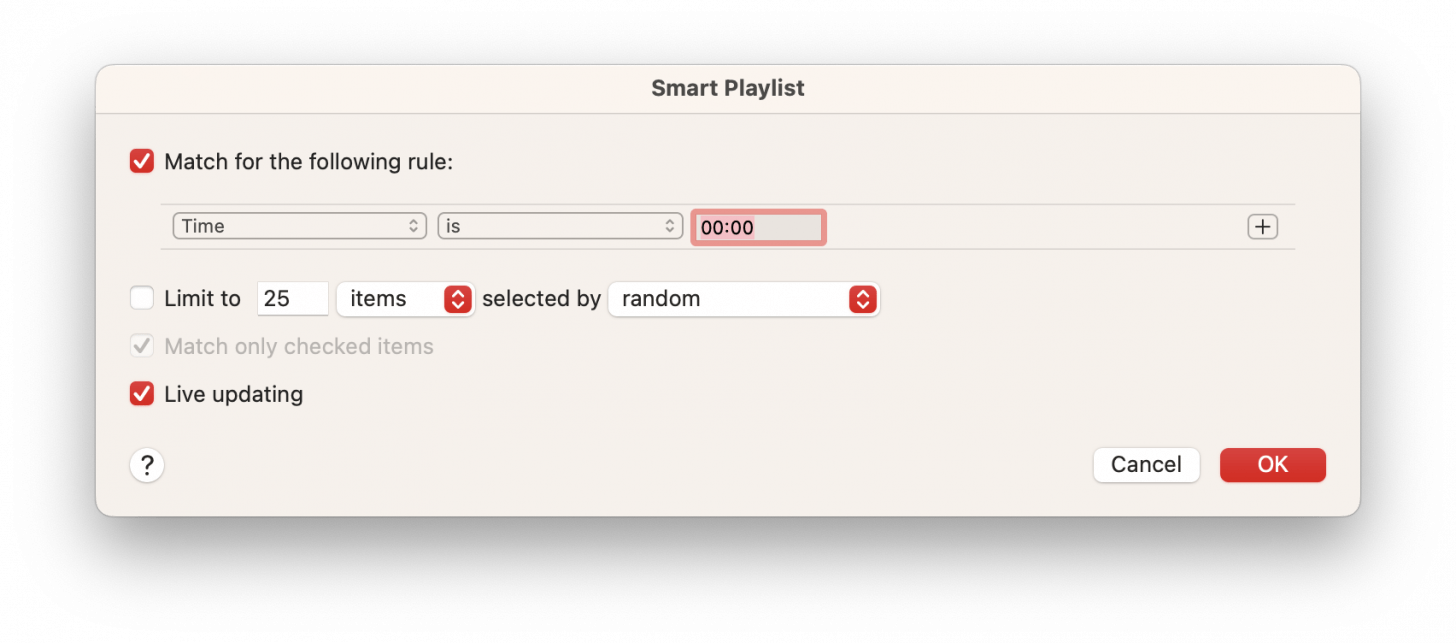
- A box will pop up where you can set rules for how the Smart Playlist decides which songs to add.
- Leave Match checked. The playlist will add songs that match the following rule.
- Select Time from the second drop-down box and is greater than in the second. The playlist will add songs based on their length (time) being longer than the value you set next.
- Leave 00:00 in the time formatted box; that way, all your songs will be included since they are all longer than zero seconds. Make sure Limit to is unchecked.
- Check Live updating so that new songs added to your Apple Music Library are downloaded too.
- Click Okay.
- Give the playlist a name; I named mine All my Music!
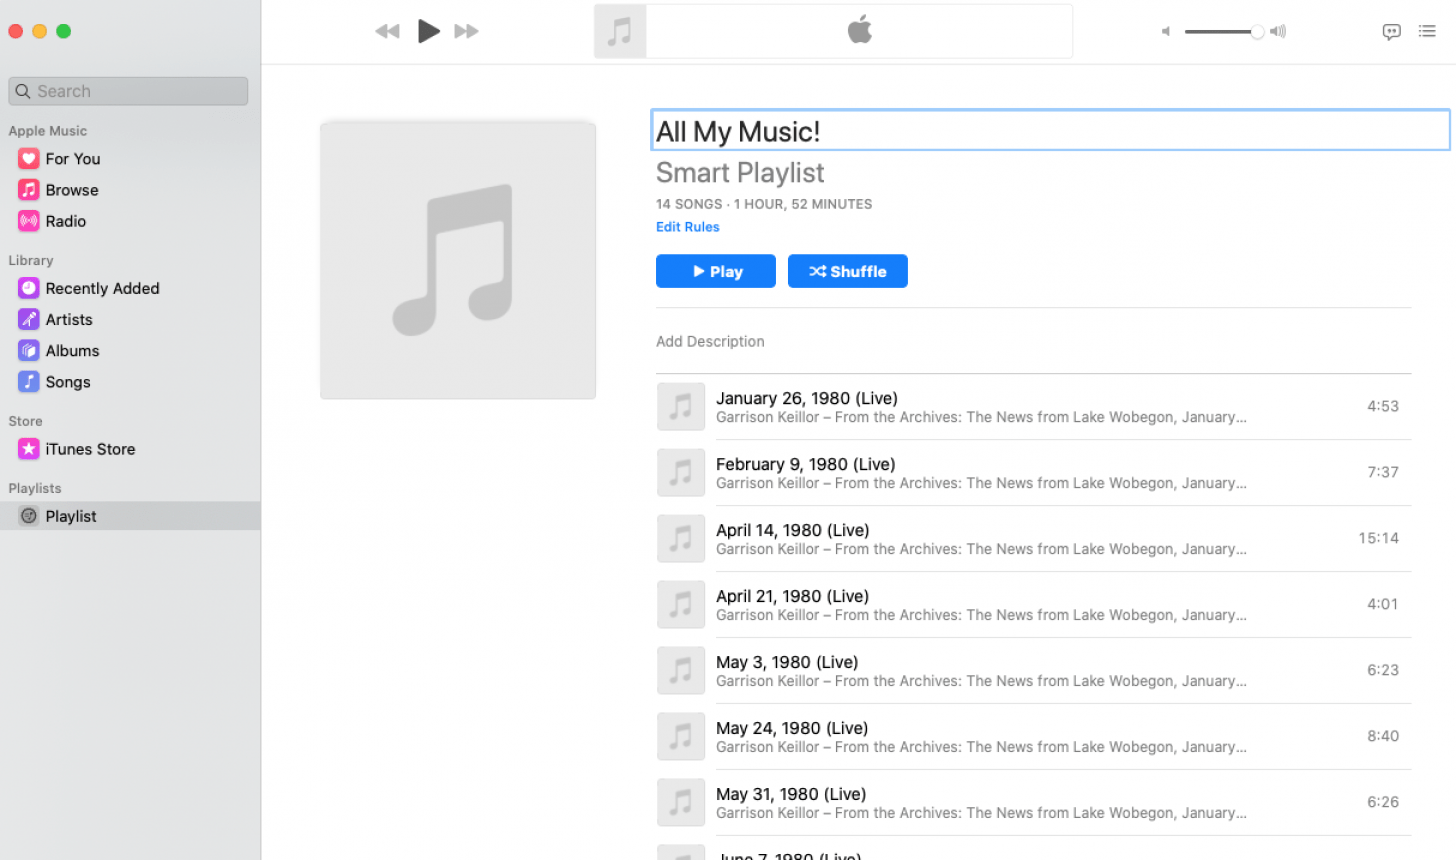
How it works: Because it's a Smart Playlist, your Apple Music playlist will automatically include every song you add in Apple Music and every song you purchase in iTunes that meet its criteria. And, because it's a playlist, you can tap the download icon at the top to download the whole thing. It doesn't matter how much music you have on the computer you use to create this playlist. This playlist will always include all the music available for download.
Pro Tip: It is common for Apple Music to open automatically on your Mac. You can turn this off if you don't find it helpful. Now we need to move this playlist to your iPhone. There are two ways to do that: with an Apple Music subscription, or with a USB Cable.
-
If you have an Apple Music subscription: In Music on your Mac click the Music menu and select Settings > General, and there check Sync Library. If you don't see that option, then you probably don't have an active Apple Music subscription. You can also check on your iPhone in Settings > Music to make sure Sync Library is turned on there as well as on your Mac. Now, your playlist will automatically appear on your iPhone.
-
If you do not have an Apple Music Subscription: Use the steps in the section below titled How to Download All Your iTunes Music to Your iPhone with a USB Cable to send your playlist to your iPhone.
-
Either way, once the playlist is on your iPhone, open the Music app on your iPhone.
-
Tap the Library tab, then tap Playlists.

-
Choose the playlist you just created on your computer.
-
Tap the download icon that’s next to the album art at the top of your playlist. All of your music will begin to download!
Depending on the size of your collection, this could take a while. I recommend keeping your iPhone plugged in while all of your music downloads.
How To Download All iTunes Music to Your iPhone Using a USB Cable
Use this method if you've got your music library on your computer, or if you've done the steps above but don't have an Apple Music subscription.
You will need a computer with iTunes or a Mac with MacOS Catalina or later.
- Plug your iPhone into your computer with the USB cable.
- Open Music on your Mac or iTunes on your Windows computer.
- Optional: If you already have some music on your iPhone, then right-click on the icon for your iPhone in the location bar on the left and select Transfer Purchases. This will copy any music on your iPhone over to your computer. Wait for it to finish.

- Now, in Finder on your Mac, click on your iPhone in the location bar. On a Windows computer, click on the tiny Phone icon at the upper left of the iTunes interface.
- You should see an interface much like what is pictured below. It will be a little different on a Windows computer, but all the same functions should be present. Click on the Music tab.

- On the Music tab, check Sync Music.
- If you've already downloaded your music library to your computer then you can sync the music from your computer directly to the iPhone over the cable. If you followed the steps above to create a single smart playlist with all your music then all you need to do is send the playlist you made to your iPhone. Either way, I recommend choosing Selected artists, albums, genres, and playlists.
- In the list of available music, select the Playlists tab. You can check the boxes next to whatever playlists you'd like to put on your iPhone, but in particular, you want to send that smart playlist you made.

- Click Apply. This will send all the files you selected on your Mac to your iPhone, replacing any other music or iTunes media you already had on the iPhone. In my case, the only file I sent to my iPhone was the smart playlist.
- Once the sync finishes, you can eject your iPhone from your Mac or Windows machine like you would any other USB device. You should find the playlists, artists, and songs you added in the Music app on your iPhone.
- (Optional) If you created a smart playlist following the steps in the section above, then you'll want to tap the download icon for that playlist to download your entire music library to your iPhone.

Make Sure All Future Music Is Automatically Downloaded to Apple Music
Now that you’ve gone through the trouble of downloading all of your music to your iPhone, you probably don’t need to do all of this again. Well, you can turn on a setting in Music that makes it so all songs that are added to your iCloud Music Library automatically download to your device for offline listening. Here’s how to turn that setting on.
- Open the Settings app on your iPhone.

- Tap Music.

- Under Downloads, toggle on Automatic Downloads.
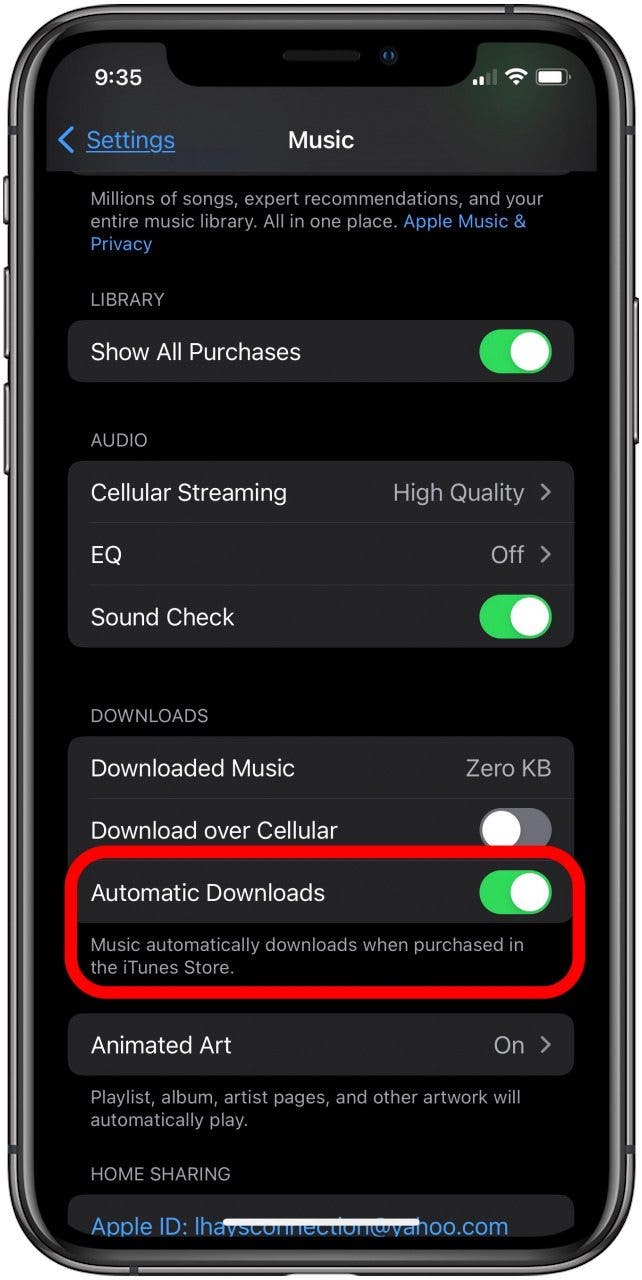
Now, all of your future music will automatically download to your iPhone. Worried about it taking up too much space on your device? Use this tip to Optimize Storage for Apple Music. And now that you have your music available at any time, you might even be interested in learning how to play music on FaceTime to share a listening experience with friends and family. Read next: How to play Apple Music on Alexa from your iPhone.

Conner Carey
Conner Carey's writing can be found at conpoet.com. She is currently writing a book, creating lots of content, and writing poetry via @conpoet on Instagram. She lives in an RV full-time with her mom, Jan and dog, Jodi as they slow-travel around the country.
 Olena Kagui
 Rhett Intriago
 Cullen Thomas
 Kenya Smith
 Rachel Needell

 Leanne Hays



 Amy Spitzfaden Both
