DIY Wireless Charging Furniture: Make an iPhone Charging Station on a Budget


Ever since I got my iPhone X last year, I’ve been intrigued by the possibility of creating a wireless charging station for it. Sure, there’s a burgeoning supply of furniture with Qi chargers already built in, but they’re more expensive than I’m willing to spring for. Beyond that, I enjoy repurposing all sorts of items around the house, from pallets, to fabric, to old box springs, and thought this project would be a great way to reuse a less-than-gorgeous piece of furniture while improving my less-than-stellar carpentry skills. My goal was to combine the old and worn with cutting-edge technology to create a piece of furniture no one would suspect had the ability to wirelessly charge your iPhone.
Related: Nomad Base Station: Wireless Charging Dock for iPhones & Apple Watch
Plan Your Project
You have a few things to decide before getting started on this upcycling project:
- Where in your home would you like to keep your wireless charging station?
- What are the ideal dimensions of this piece?
- Do you want the furniture to be for multi-purpose use, like a kitchen hutch that has a shelf just for charging your iPhone? Or are you looking for something simpler, like an end table or nightstand? I decided to make a nightstand for my sister that would double as a charging station for her iPhone X, iPad, Bluetooth headset, and any other gadgets she’d like to charge overnight.
Collect Resources & Determine Your Budget
I didn’t want to spend too much when it came to the piece of furniture I’d be upcycling; after all, how much should a used nightstand really cost? Ditto when it came to the wireless charger; I wanted something that worked well, but that wasn’t sleek or flashy, since it would be concealed anyway. In the end, here’s what I spent:
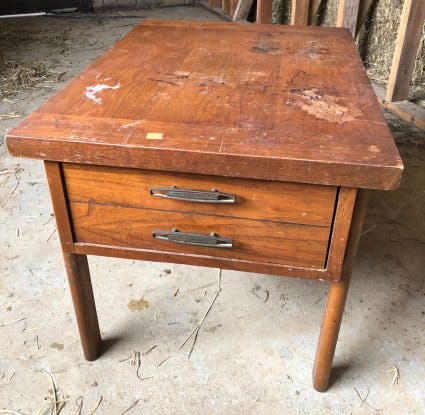
• $15 on a sturdy but scarred nightstand from the local Habitat for Humanity ReStore
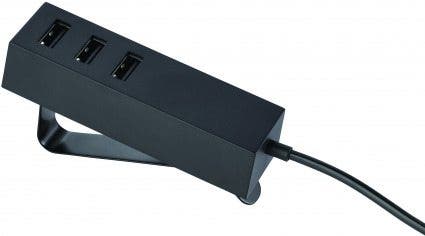
• $12.99 for a Lorby three-way USB splitter and charger from Ikea
• $13.99 for a 7.5-watt wireless charger from Yootech. (I recommend that whichever wireless charger you purchase should be round, as this will make it easier to install.)
Tools: Power Drill, Bits, Chisel Set & Sander
If you have access to a full workshop—either your own, a friend’s, or a community maker space —you might not have to budget much at all for tools. If you don’t have these kinds of connections, you’ll spend a bit more. In my case, I had a few basics already, including a power drill, sander, dust mask, and hearing protection. Beyond that, I was fairly lacking in the wood shop department.
I ended up purchasing more sanding sheets for my power sander, a drill bit set, four chisels with an included sharpening block, and a small canister of stain along with a new brush. All of this rang up to less than $40, and I considered this money well spent since I was adding to my collection of tools and skills.
Hand or Power Tools?

While I used hand tools in order to keep the wireless charger beneath the surface of my nightstand, another option is to use a hole saw attachment like this one from Masterforce ($8.49).
I was dedicated to creating a piece of furniture that wasn’t readily identifiable as a charging station, so I used chisels to carve out the inset for the wireless charger by hand, leaving the thinnest possible surface of wood so the iPhone could charge when placed on the table over the Qi charger.
If you’d rather not work with hand tools and don’t mind if the wireless charger is visible, you can take a much quicker and easier route than I did! Get the dimensions of the charger you’ve chosen and purchase a hole saw attachment with a slightly larger diameter than your charger. This will enable you to cut a circular hole that your charger can fit into, and you can trim and use the disk of wood you sawed out to create a shelf under your charger, bringing it level with the surface it’s set into.
Getting Started
Your next step is to decide where in your piece of furniture you’d like to locate the charger, then trace the shape on the underside of the surface. Conveniently enough for me, my nightstand drawer only extended two-thirds the length of the top, leaving plenty of room at the back to position the charger and run the cord through the back of the drawer.
I used my drill with a 5/16” bit to drill a hole large enough for the charging cable to fit through (measure the cable that attaches to your wireless charger or splitter to determine which bit you should use).
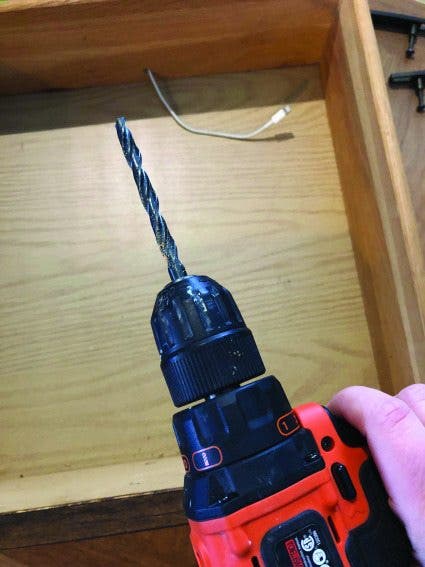
Now began the long task of excavating the shape of the wireless charging unit. I started by using my drill to make a series of holes about half an inch into the wood, being careful not to go all the way through. I chiseled away the excess wood, then drilled again, repeating the process until I had the shape I wanted.
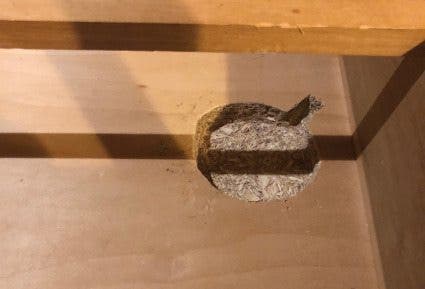
After many not-quite-thin-enough tests, my iPhone finally started charging through the tabletop, but only without its case. I considered this a partial victory and continued to scrape away wood practically atom by atom, until, at last, the phone charged even with the case on. Obsession for the win!
Finishing & Painting
I decided to sand and stain the top of the nightstand, and to chalk-paint the body. Chalk paint is a quick and easy solution when upcycling furniture; you don’t need to sand or prime before applying paint, and it’s easy to wipe off if you’d like to add a distressed finish. As an added bonus, I had several partial cans so my sister got to choose a color she liked and I didn’t need to purchase new paint.

New hardware and paint can transform the appearance of a worn piece of furniture. I removed the hardware and turned the nightstand upside down before chalk painting. Once the piece was dry, I flipped it back over, then sanded and stained the top. I like to use this upside-down approach when refinishing or painting furniture because you don’t miss any hard-to-see spots, and you’re able to work on the most visible part of the piece last, so it won’t get scuffed up.

After testing, my sister is excited to move the wireless charging nightstand to her apartment. The piece will keep her electronics and accessories organized in one place and will solve the problem of her cats walking across devices or chewing wires during charging. The one downside we’ve both noticed is that it’s difficult to know where to place an iPhone to begin charging; I didn’t make any marks on the top to indicate the charging area, because I wanted it to look like a normal nightstand. In hindsight, I should have stained a lighter or darker color in one area to indicate the charging area.
I’d love to know if this article has inspired you to create your own piece of wireless charging furniture; send me an email at Leanne@iphonelife.com and include some pictures so I can see what you’ve come up with! I’m also happy to accept carpentry advice from anyone who has more efficient methods than I’ve come up with.
Top image credit: CkyBe / Shutterstock.com

Leanne Hays
Leanne Hays has over a dozen years of experience writing for online publications. As a Feature Writer for iPhone Life, she has authored hundreds of how-to, Apple news, and gear review articles, as well as a comprehensive Photos App guide. Leanne holds degrees in education and science and loves troubleshooting and repair. This combination makes her a perfect fit as manager of our Ask an Expert service, which helps iPhone Life Insiders with Apple hardware and software issues.
In off-work hours, Leanne is a mother of two, homesteader, audiobook fanatic, musician, and learning enthusiast.
Related topics
Related Articles

 Rachel Needell
MacBook Screen Lines FIXED: Pink, Blue, or Black Line on Monitor
 Olena Kagui

 Rhett Intriago

Is Apple Watch with Cellular Worth It? We Have the Answer
 Amy Spitzfaden Both


Tesla Trip Planner Tips: How to Access Tesla Maps on iPhone


 Brian Peters