How to Add Your Own Music to Apple Music with iTunes on PC
Want to download mp3 to iPhone from your PC? We'll show you how.


The Apple Music subscription service provides a huge library of music to stream, but of course, it doesn't have every song that exists. So what if you want to add one of those missing songs to your personal Apple Music library? We'll show you how to do so using iTunes on your PC.
Related: How to Remove Music from iPhone, iTunes & iCloud
Adding your own songs to iTunes is quite simple and, if your iPhone Music app and iTunes are on their default settings, added tracks will probably be synced between them without any extra steps. Just follow the steps below to learn how to add songs and albums to iTunes. We'll follow this up with how to configure settings and how to fix tracks not syncing, in case you have any issues. For more tips and quick guides on using your iPhone and Apple apps, be sure to sign up for our free Tip of the Day newsletter.
How to Add mp3 to Apple Music on iPhone
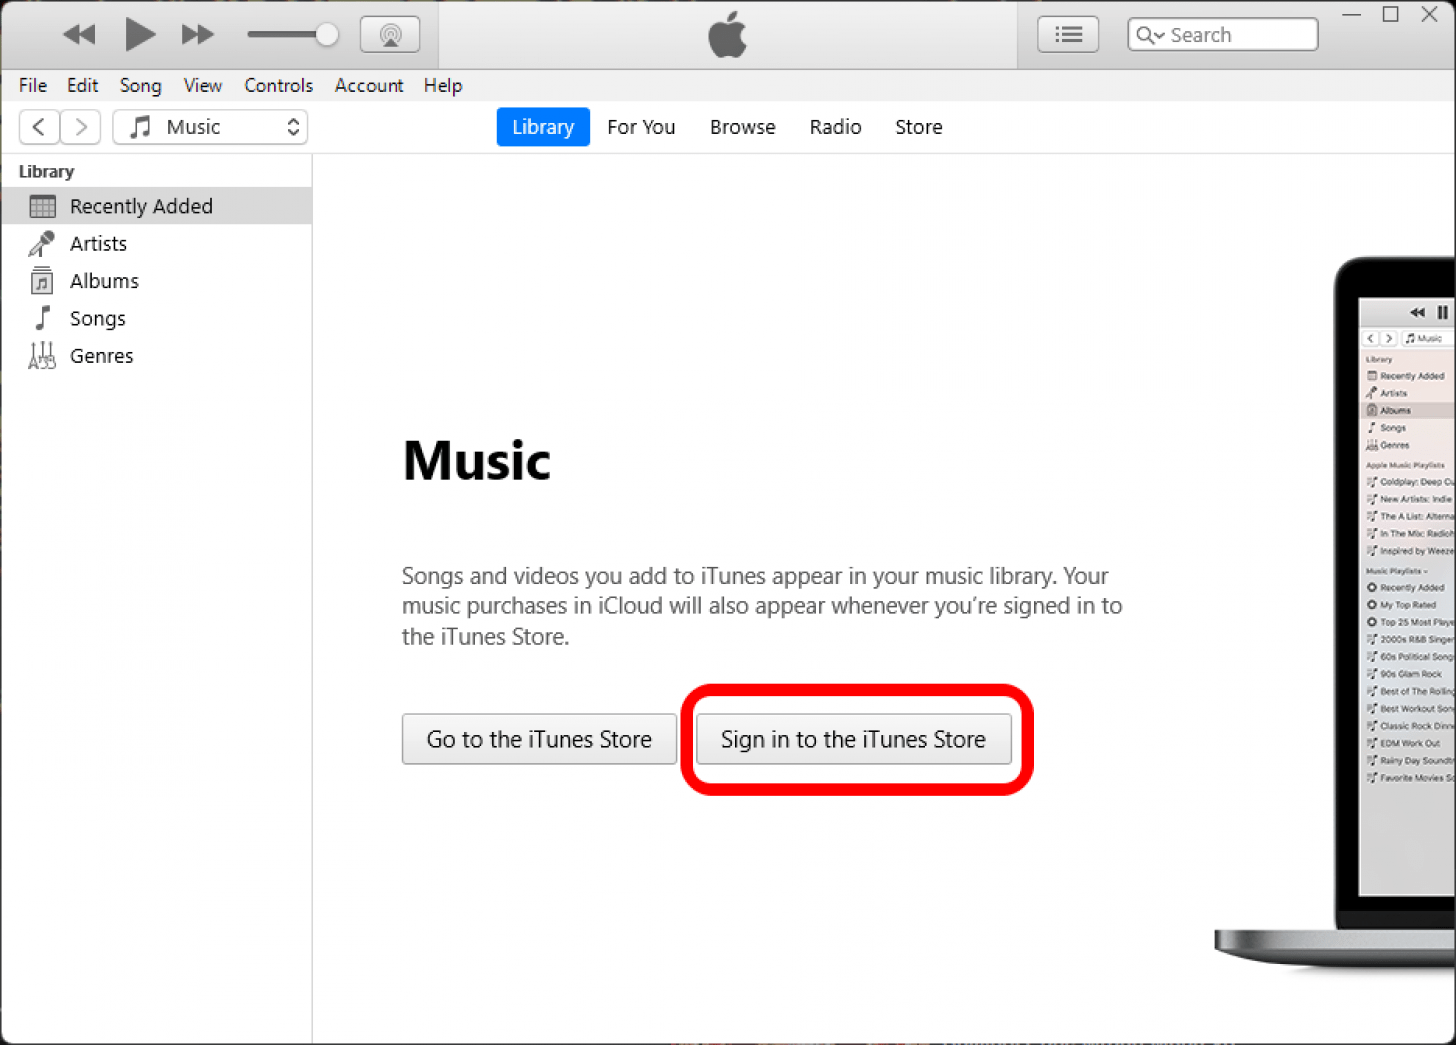
- Open iTunes and sign in.
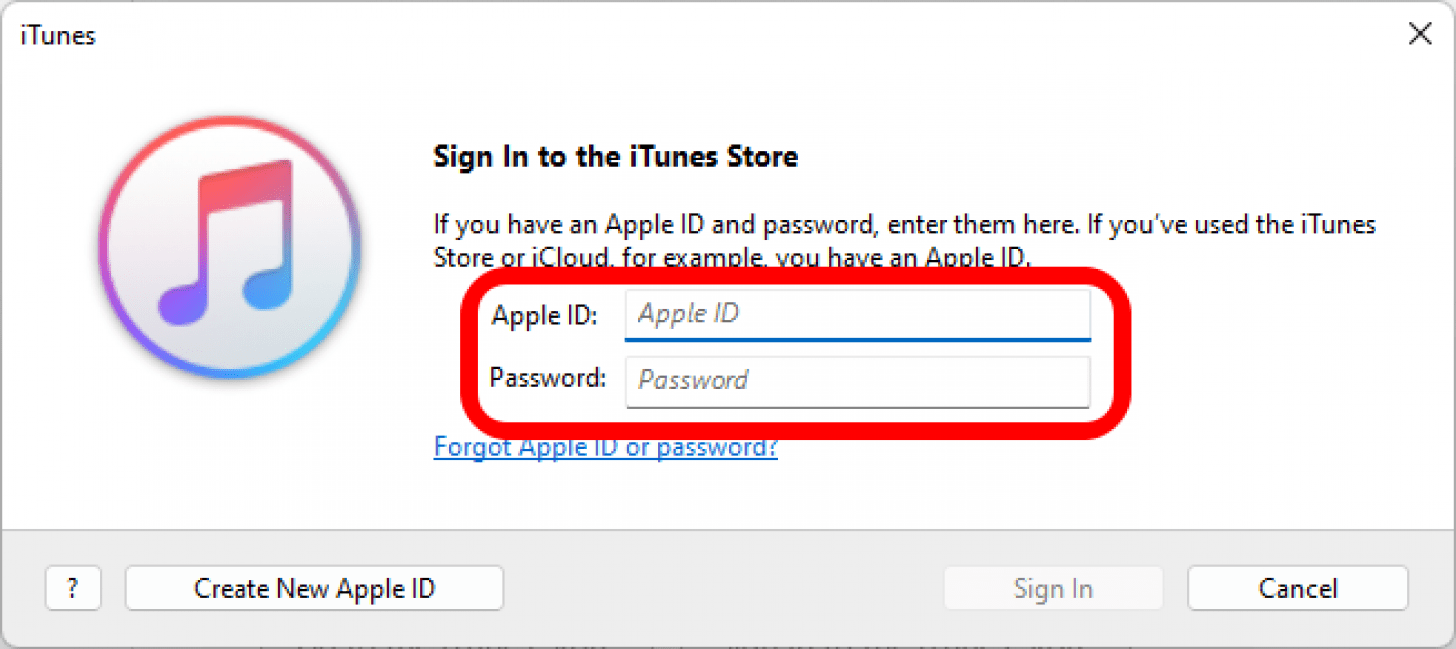
- Use the same login credentials as you use for iCloud on your iPhone.
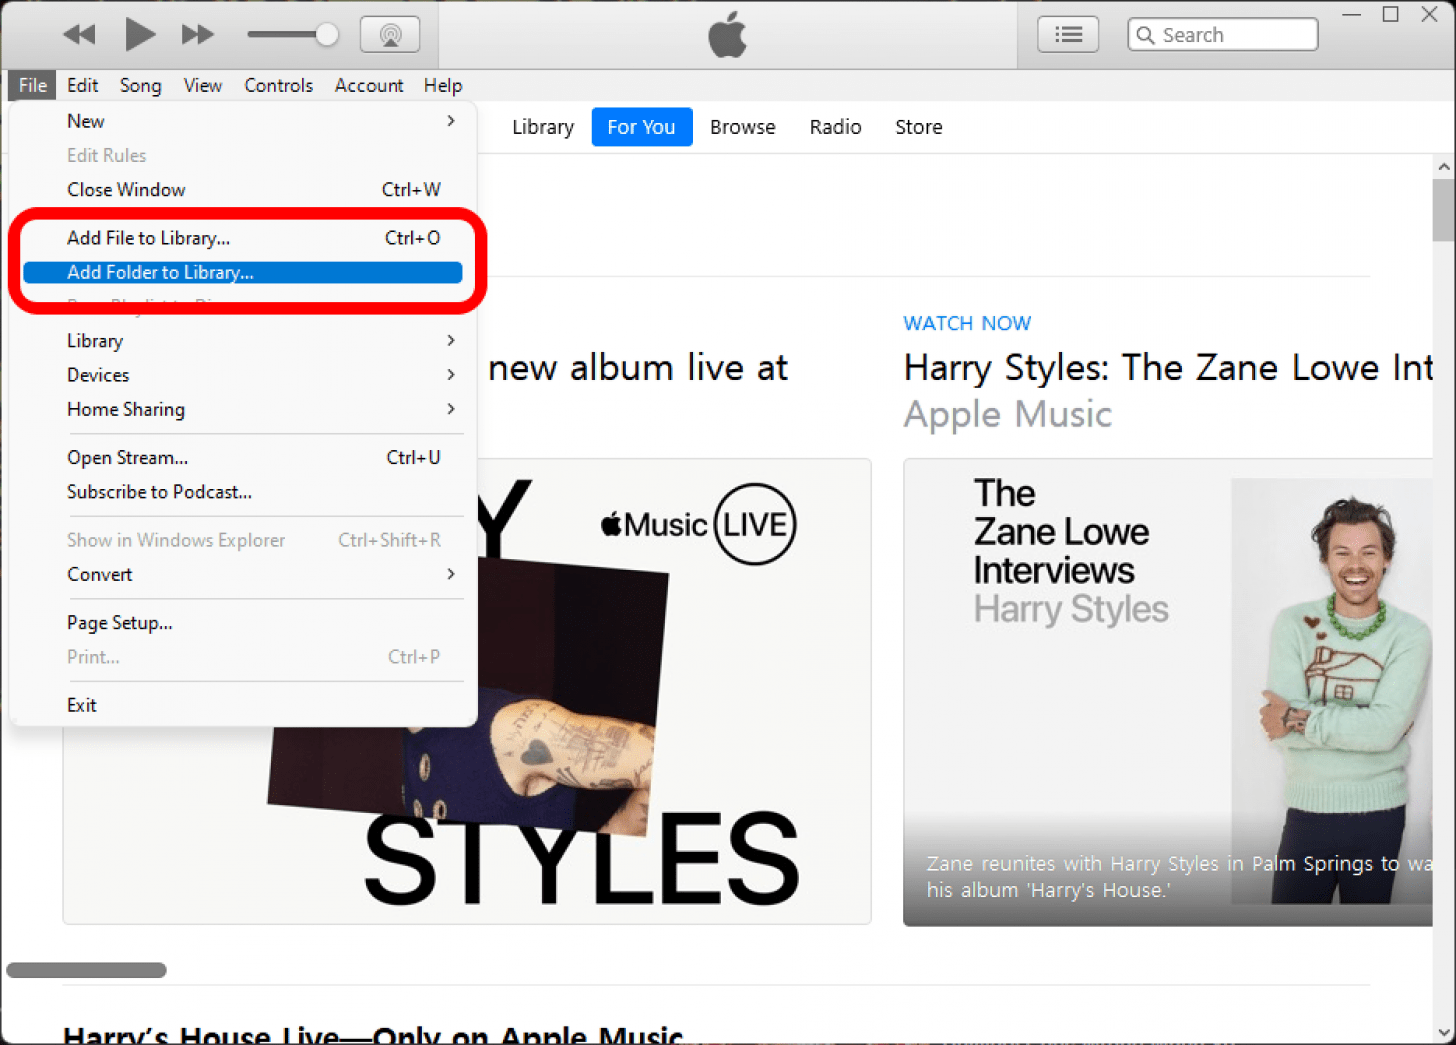
- Open the File menu.

- Select either Add File to Library or Add Folder to Library and then with the file picker select the files or folders to add.
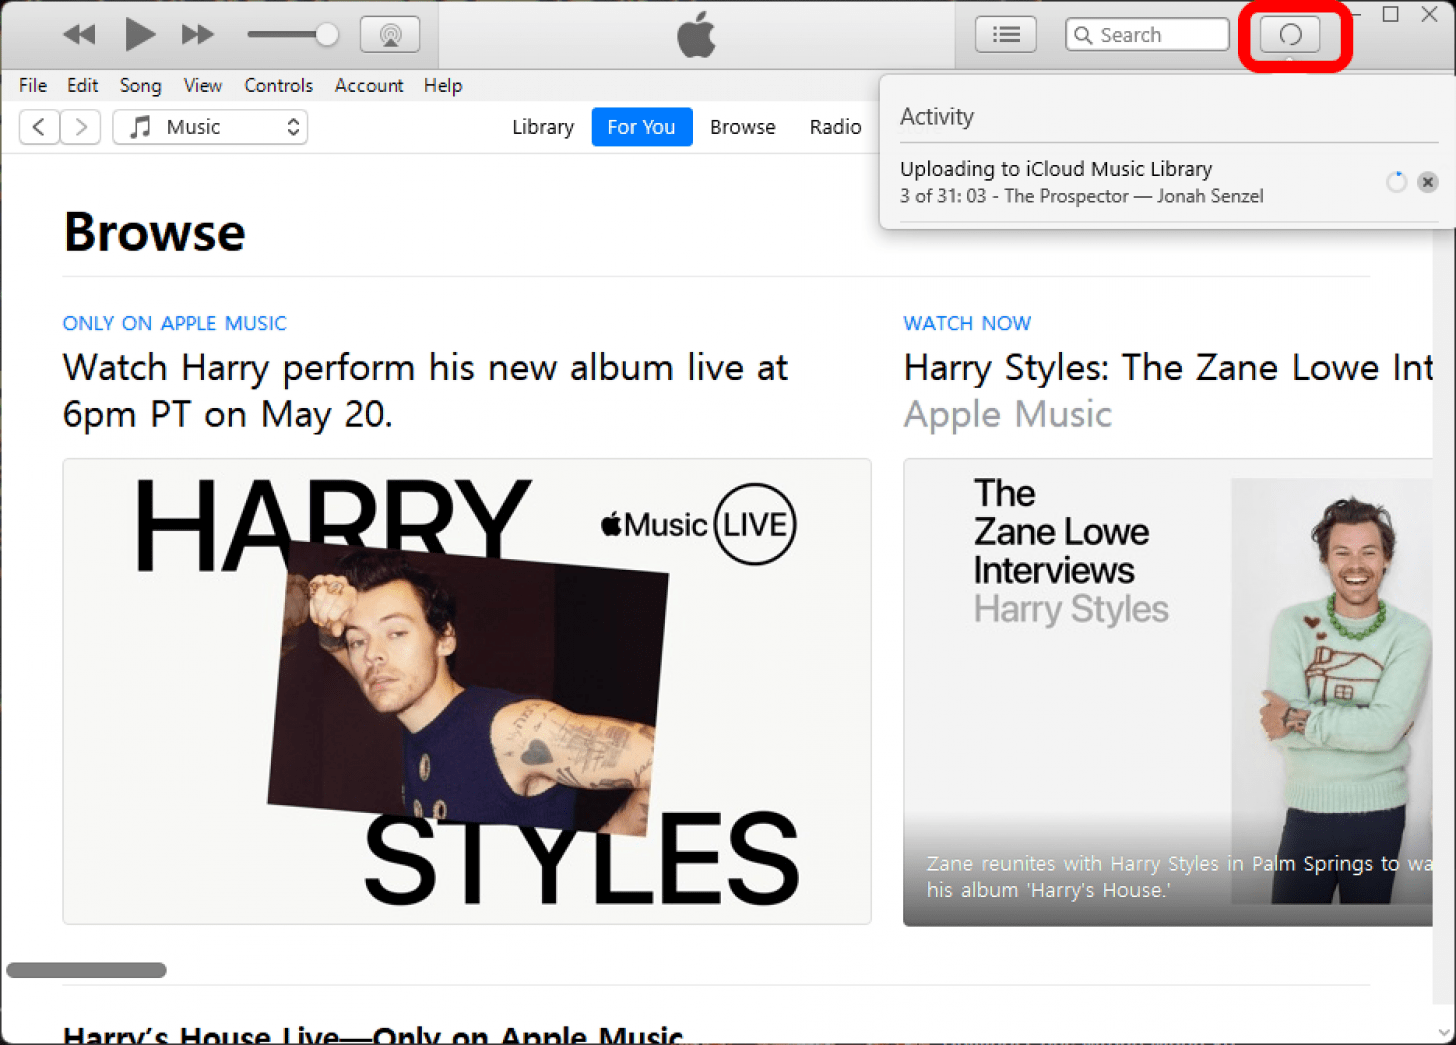
- You should see a button in the upper-right corner of the iTunes window showing a progress bar or circle. You can click this button to open a small window to see your upload's progress.
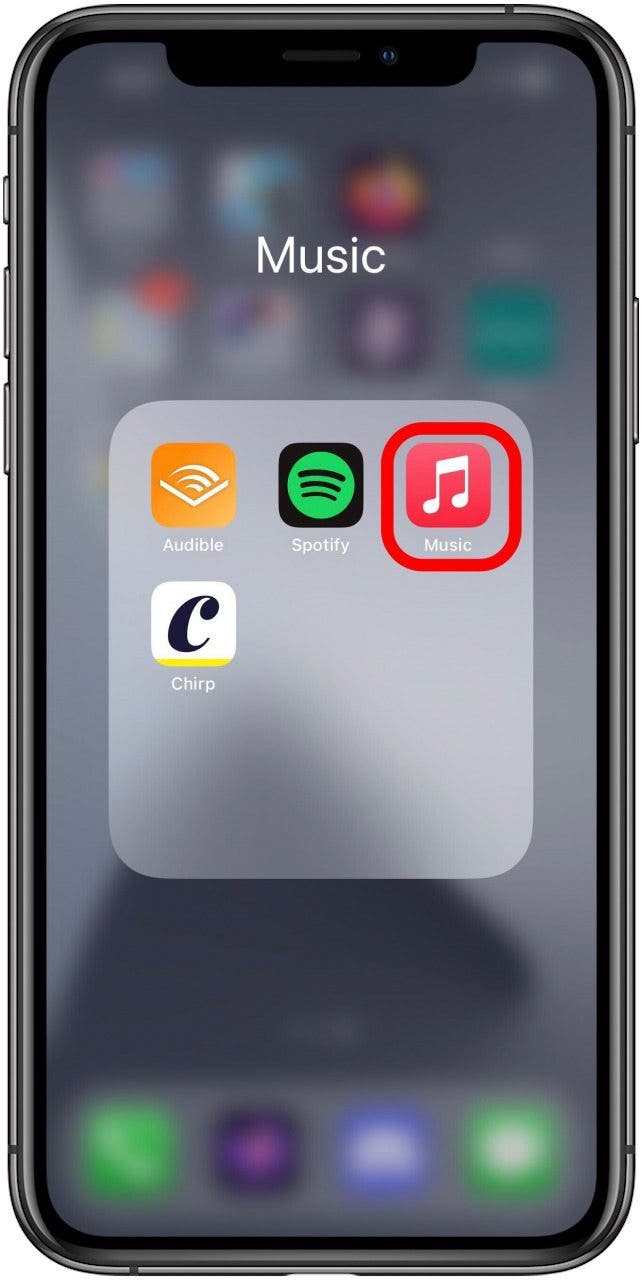
- When all files have been added, check your iPhone to see if the added songs are appearing in your Music library. Open Music.
- Tap the Library tab.
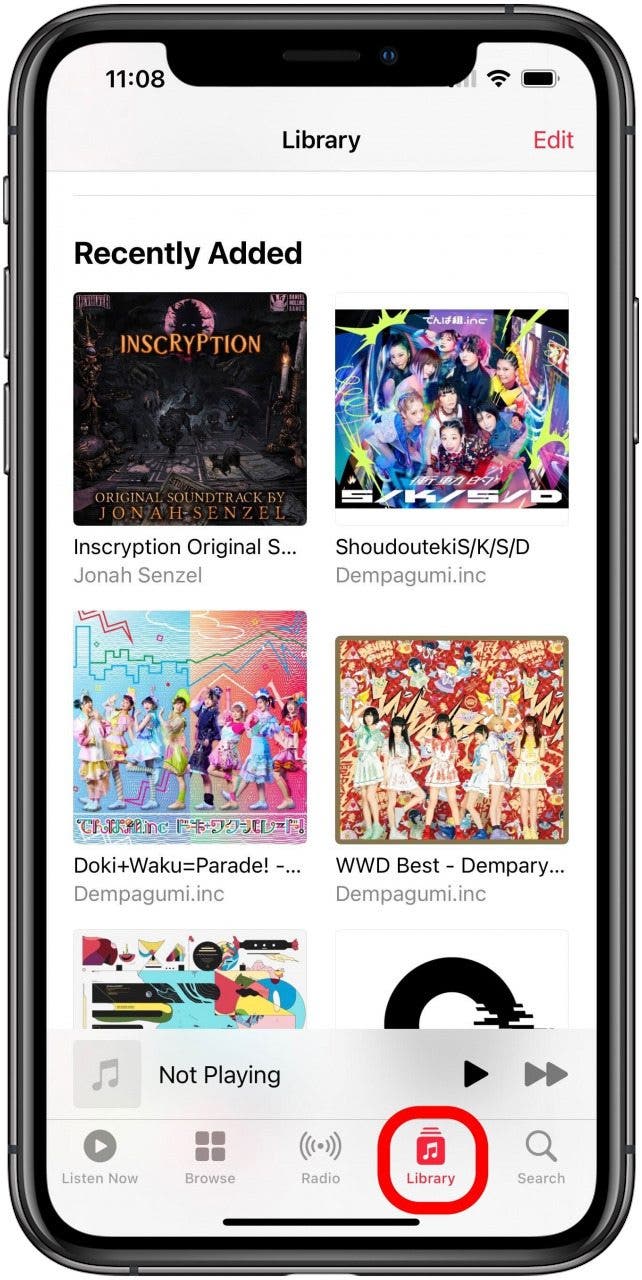
Look for the newly added album at the top of the Recently Added section. If the album appears, open it and check for cloud error icons marking any of the tracks. If there aren't any errors, the album is ready to go, and you can now listen to it on your iPhone. If you do see any error icons, never fear: we'll cover what to do about those down below.
Check & Configure Library Syncing Settings
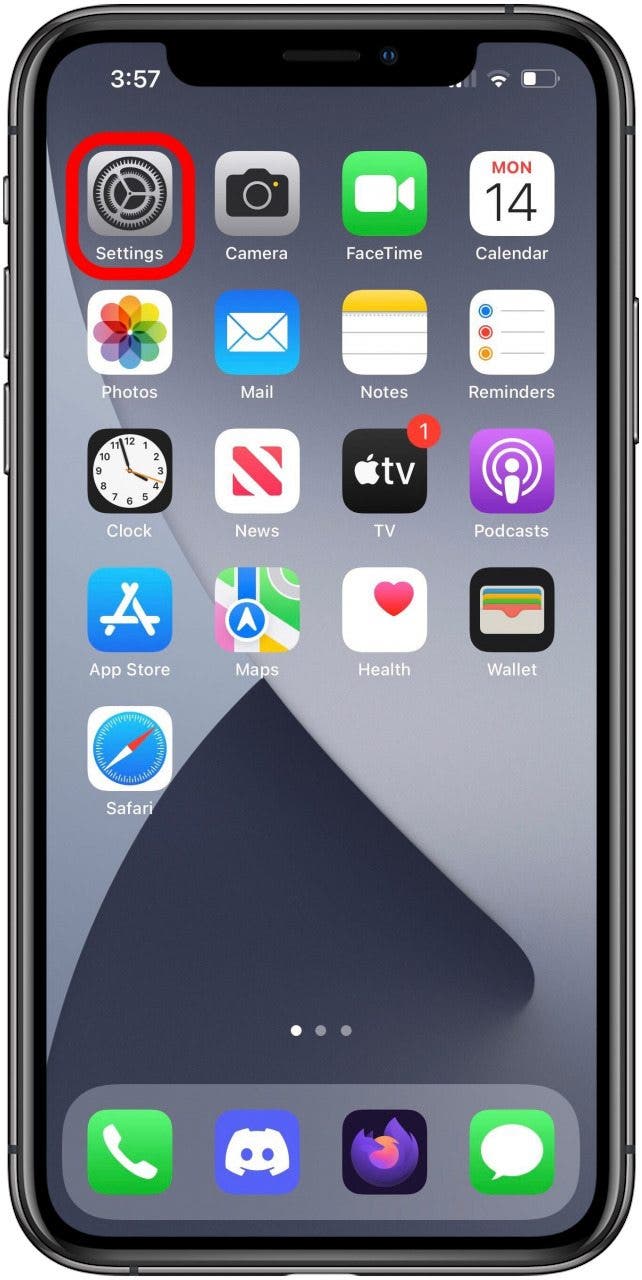
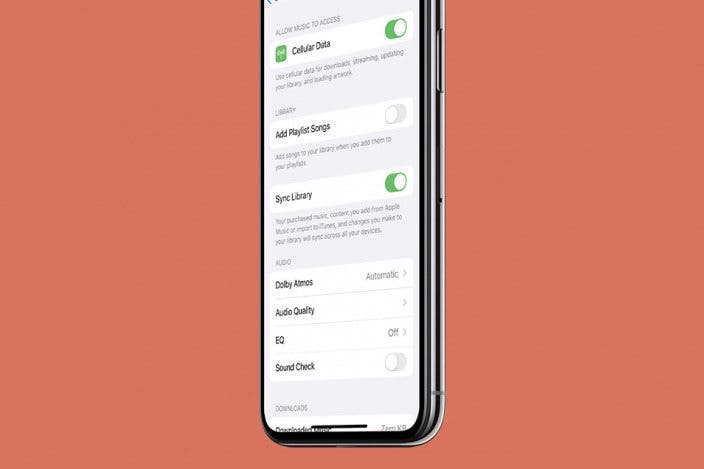
- Open Settings.
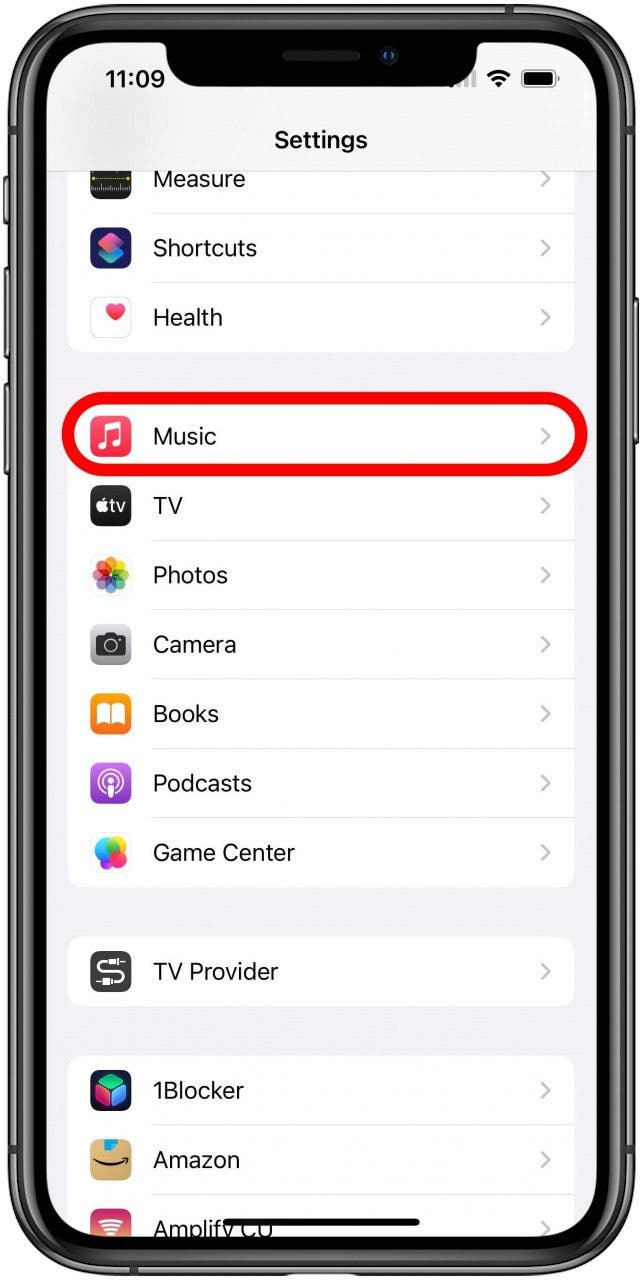
- Scroll down and find the option for Music and tap it.
- Make sure the Sync Library toggle is enabled (green) and if it isn't, tap it.

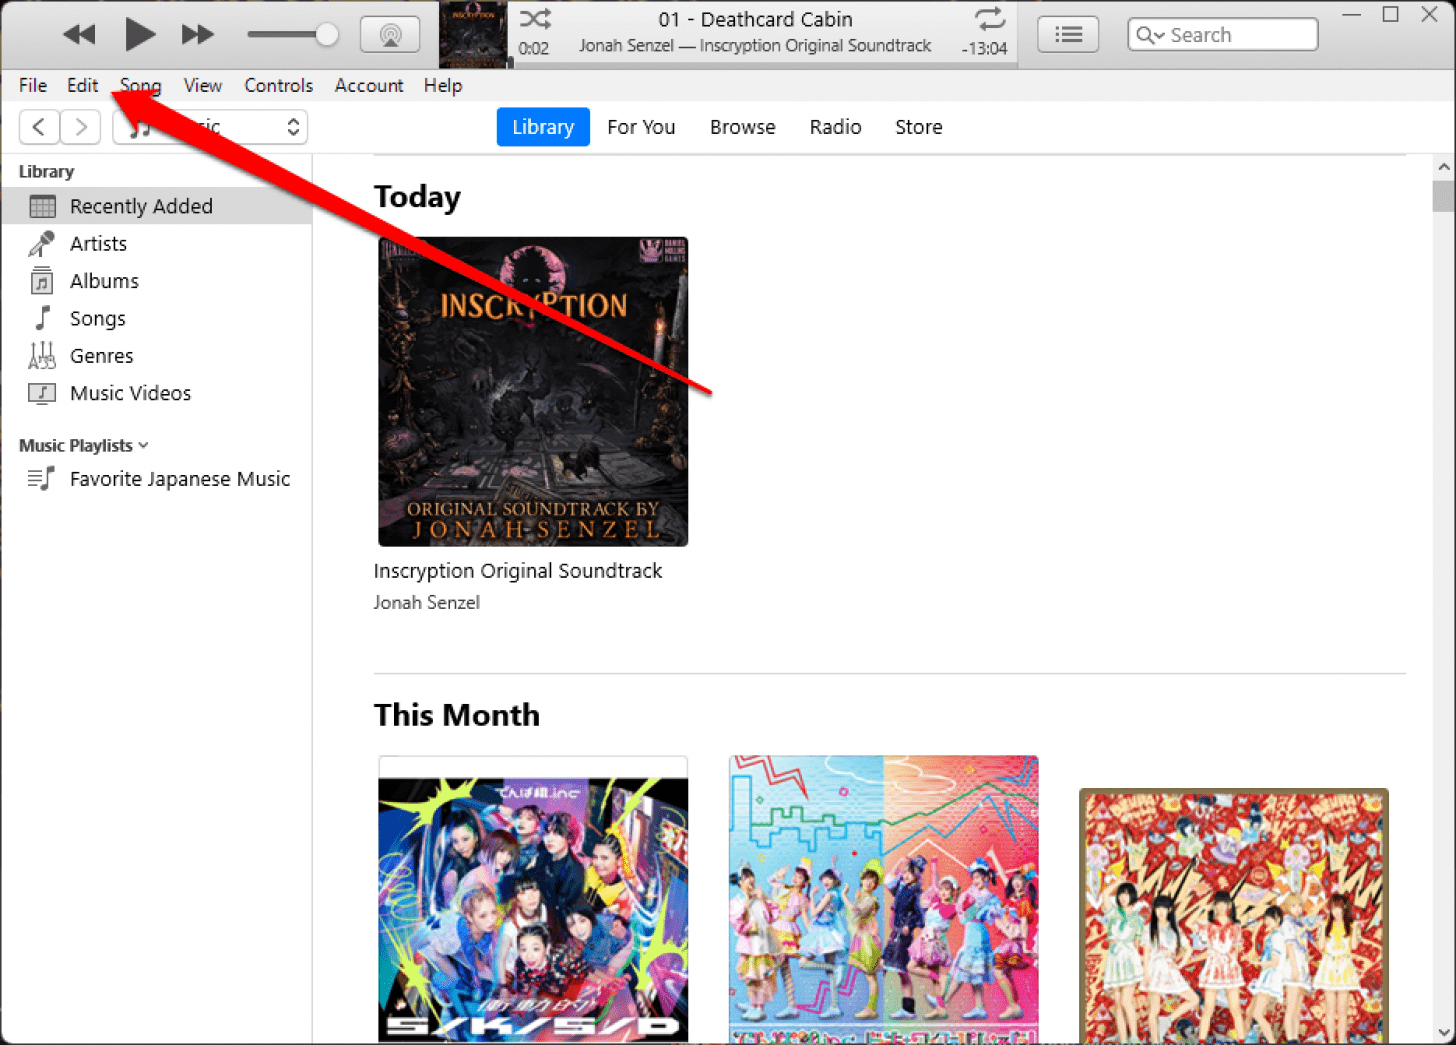
- On your PC, in iTunes, click the Edit menu.
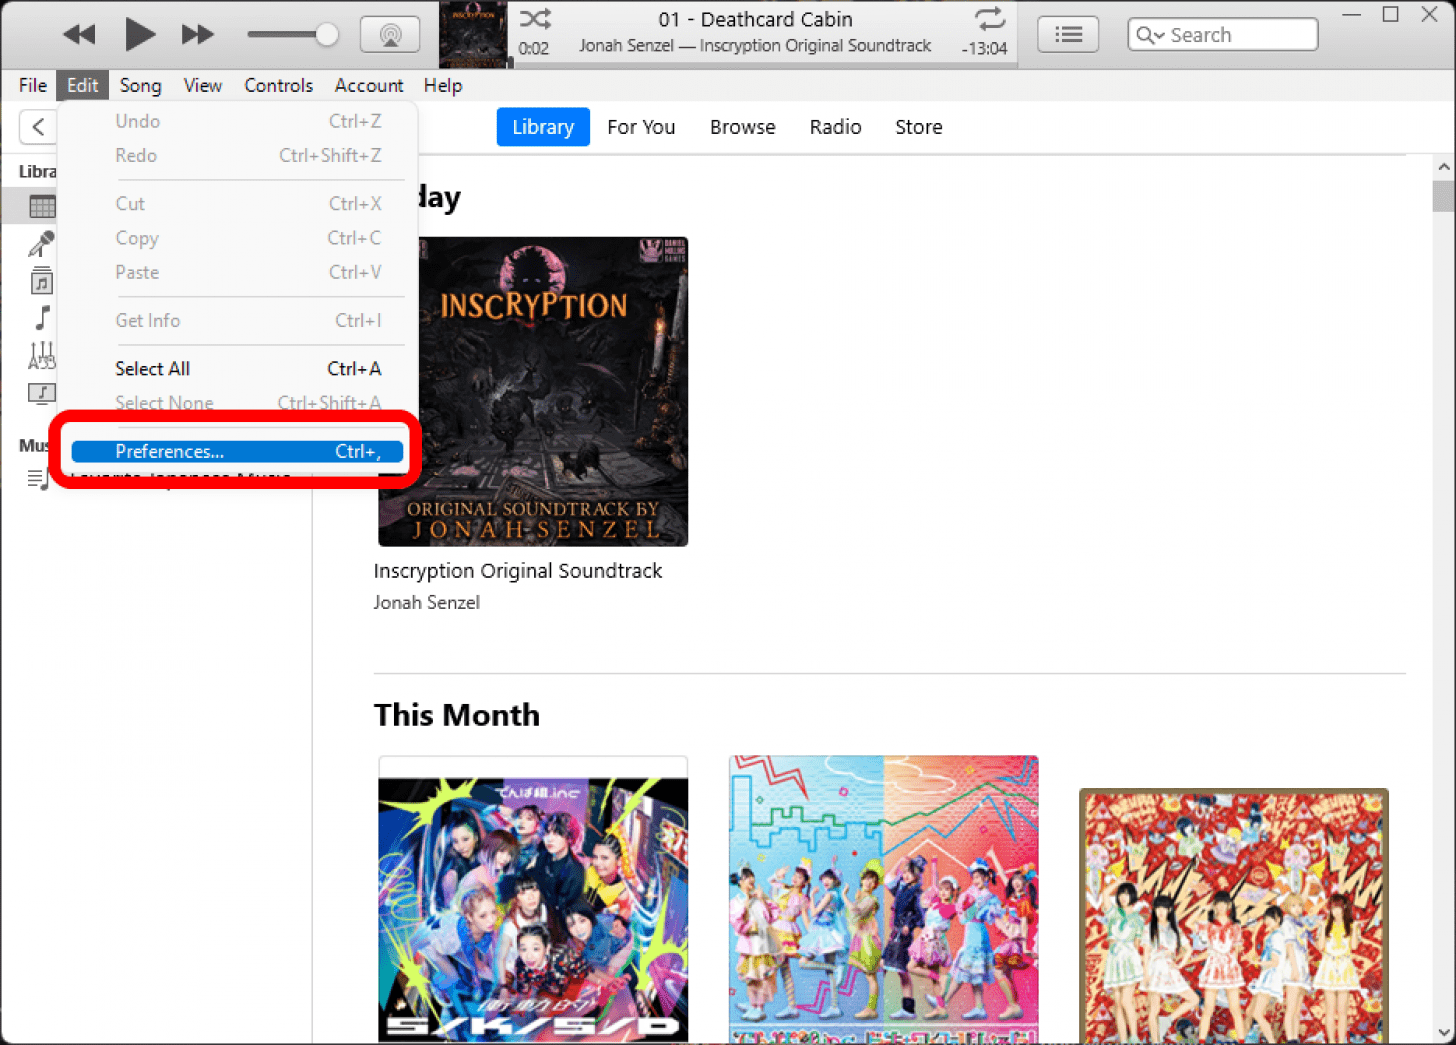
- Select Preferences.
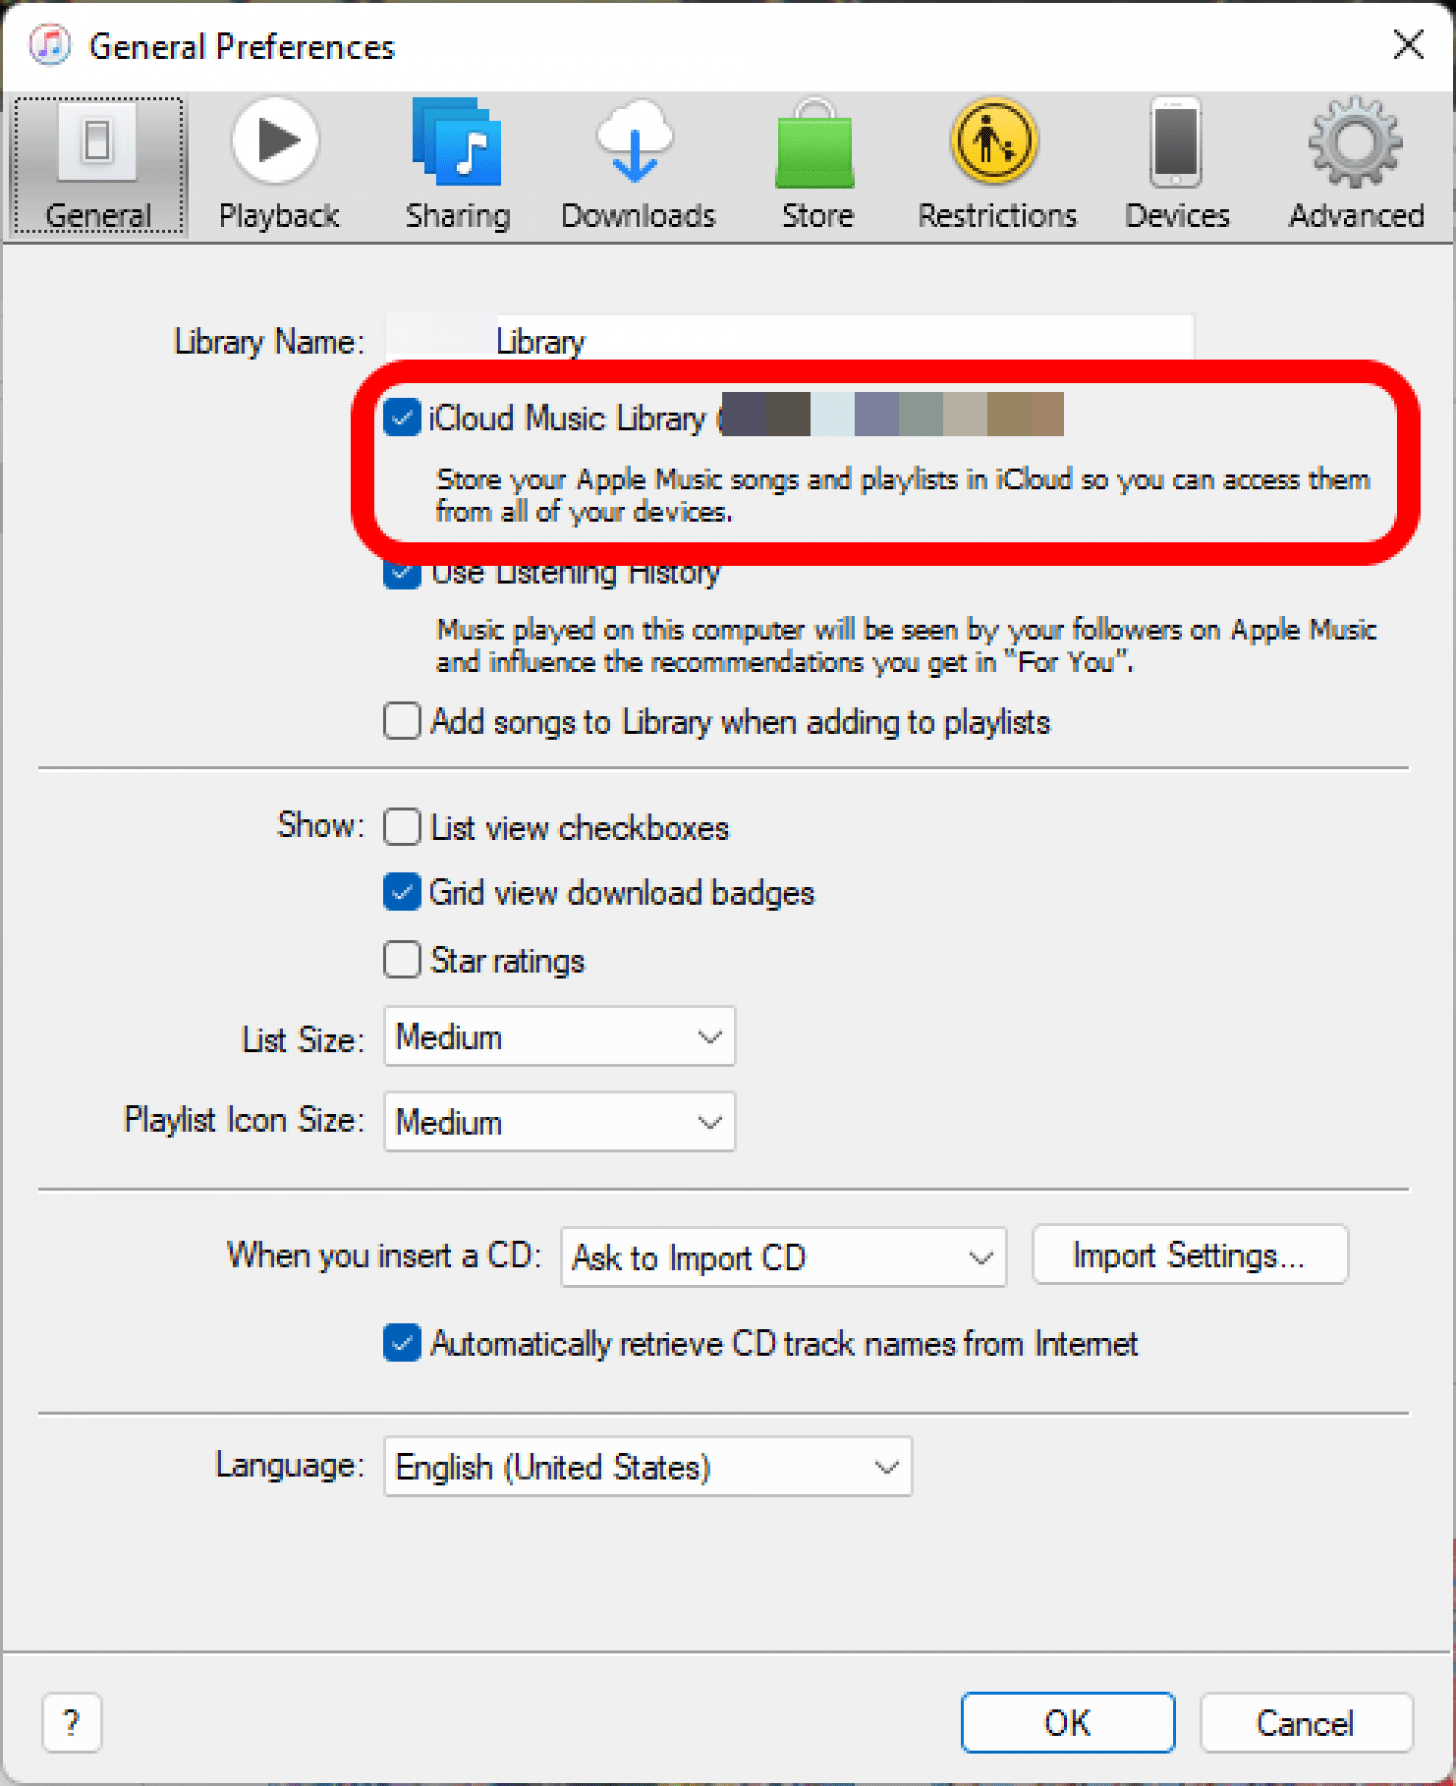
- In the General Preferences, make sure that the check box for iCloud Music Library is marked, if it isn't, click it.
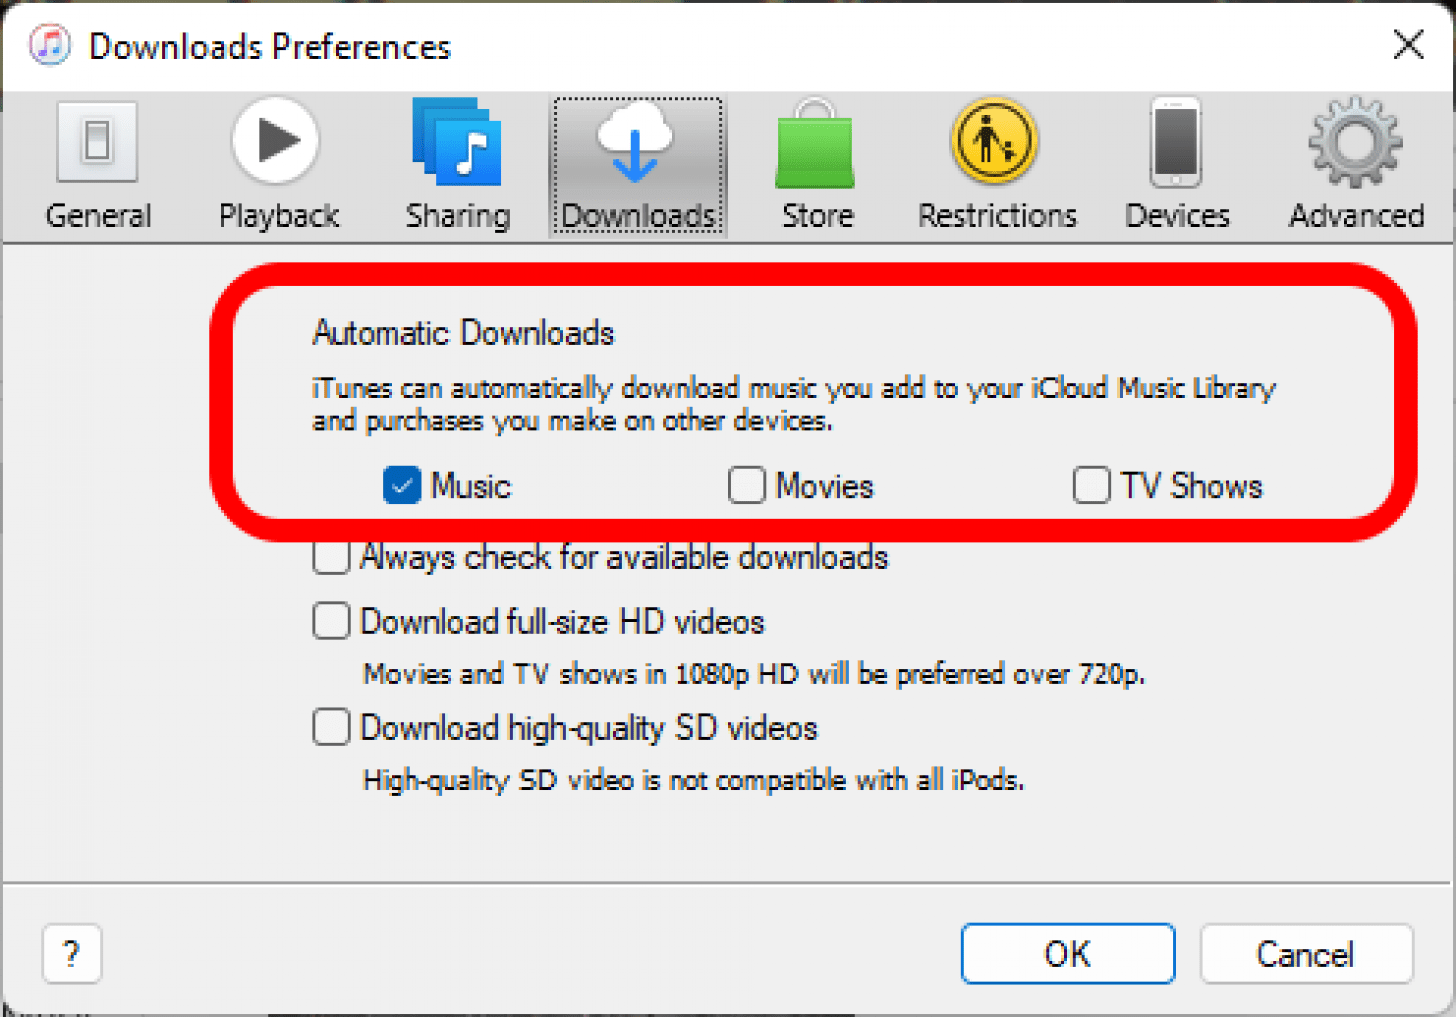
- In the Downloads section of Preferences, look under Automatic Downloads and make sure the Music option is ticked. If it isn't, click it.
Albums added to iTunes should be syncing to your iPhone Music app if these settings are all enabled.
Fixing Individual Tracks That Aren’t Syncing
If you've experienced any errors with uploading or syncing individual tracks, follow these steps:
- Tap the album in the Music app to open it.

- Check for any cloud error icons on the tracks. If one appears, tap it.
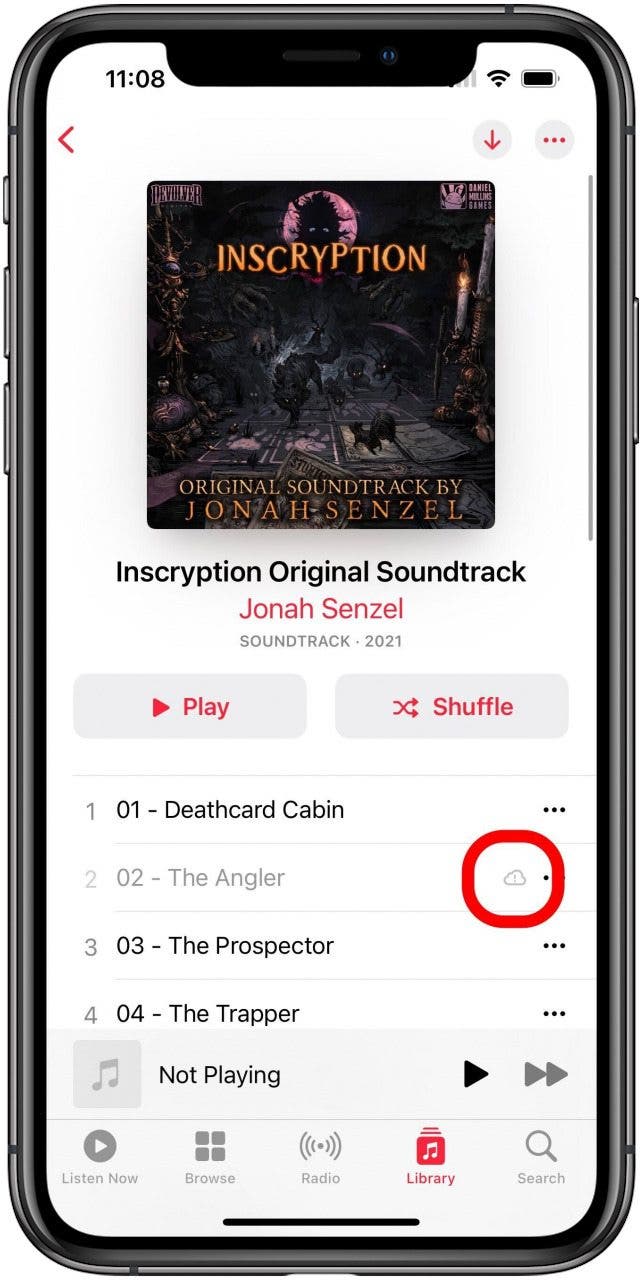
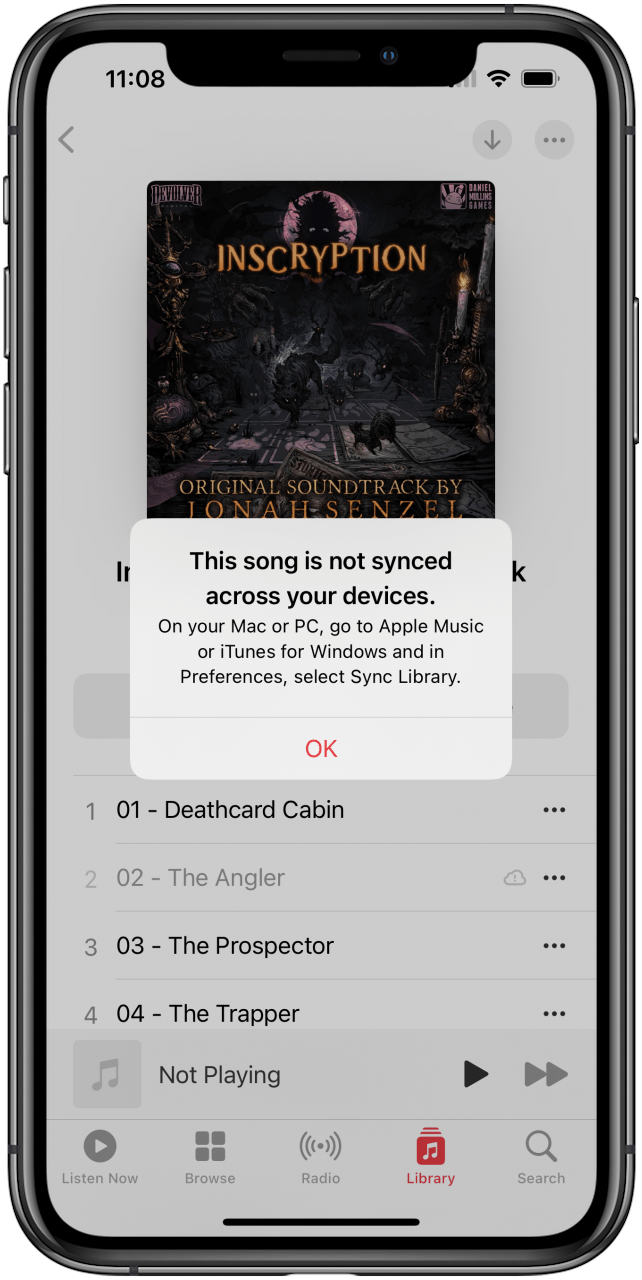
- You'll see a popup informing you this song is not synced across your devices. As long as the previously mentioned settings in both iOS and iTunes are properly set, this error is easily fixed in iTunes.
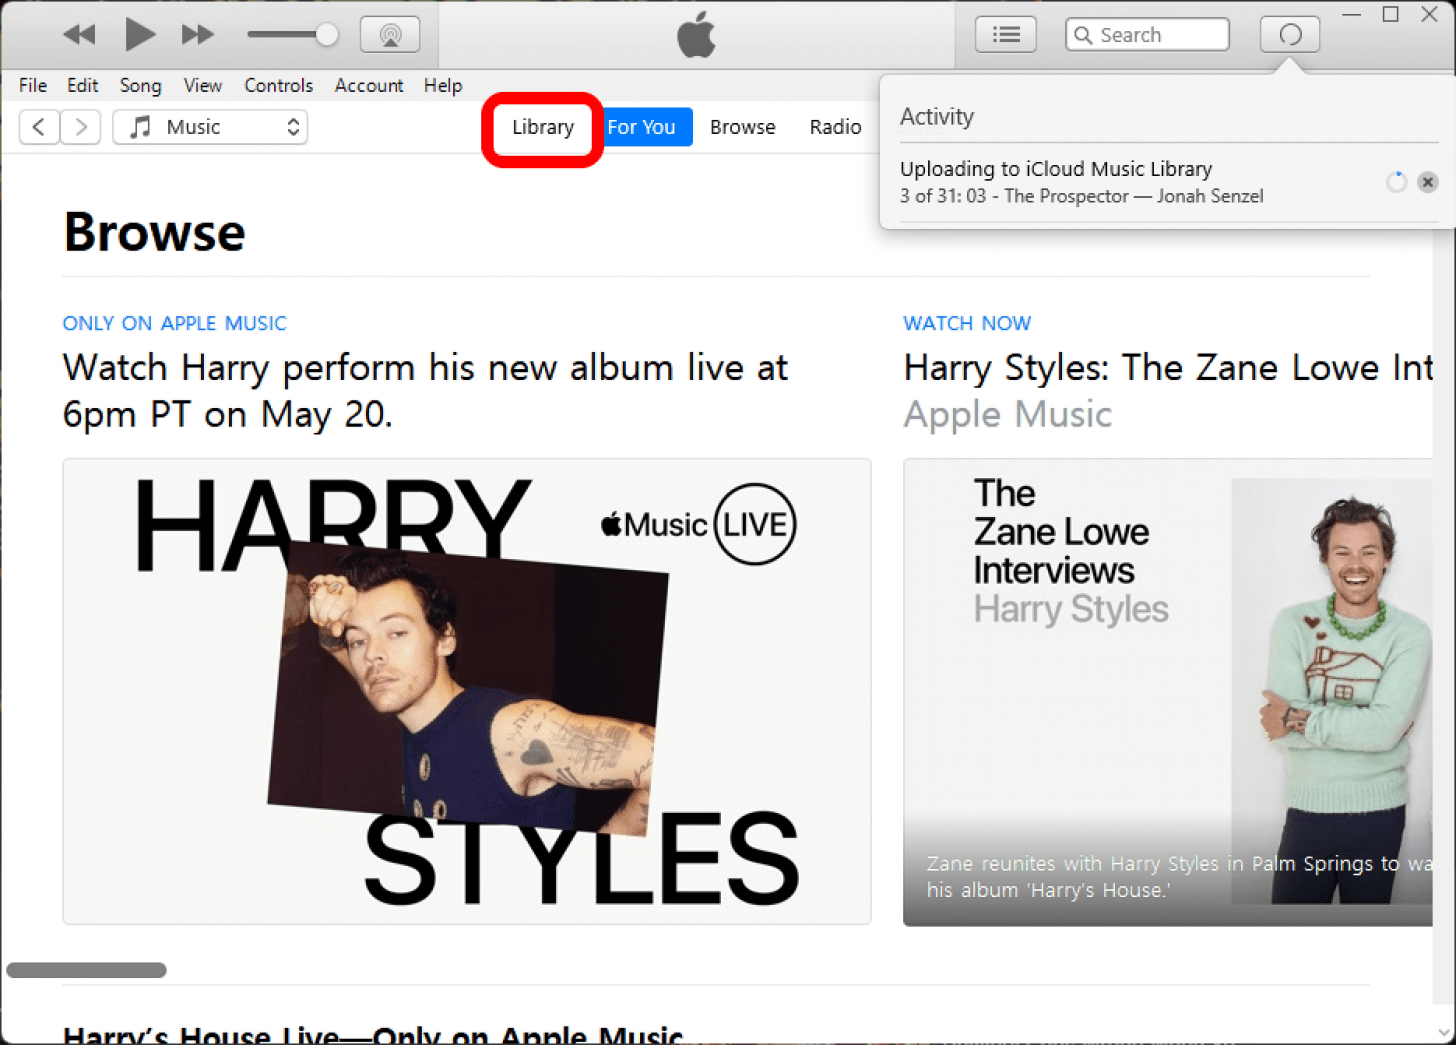
- Go back to iTunes on your PC. To find the album in iTunes, first click the Library tab.
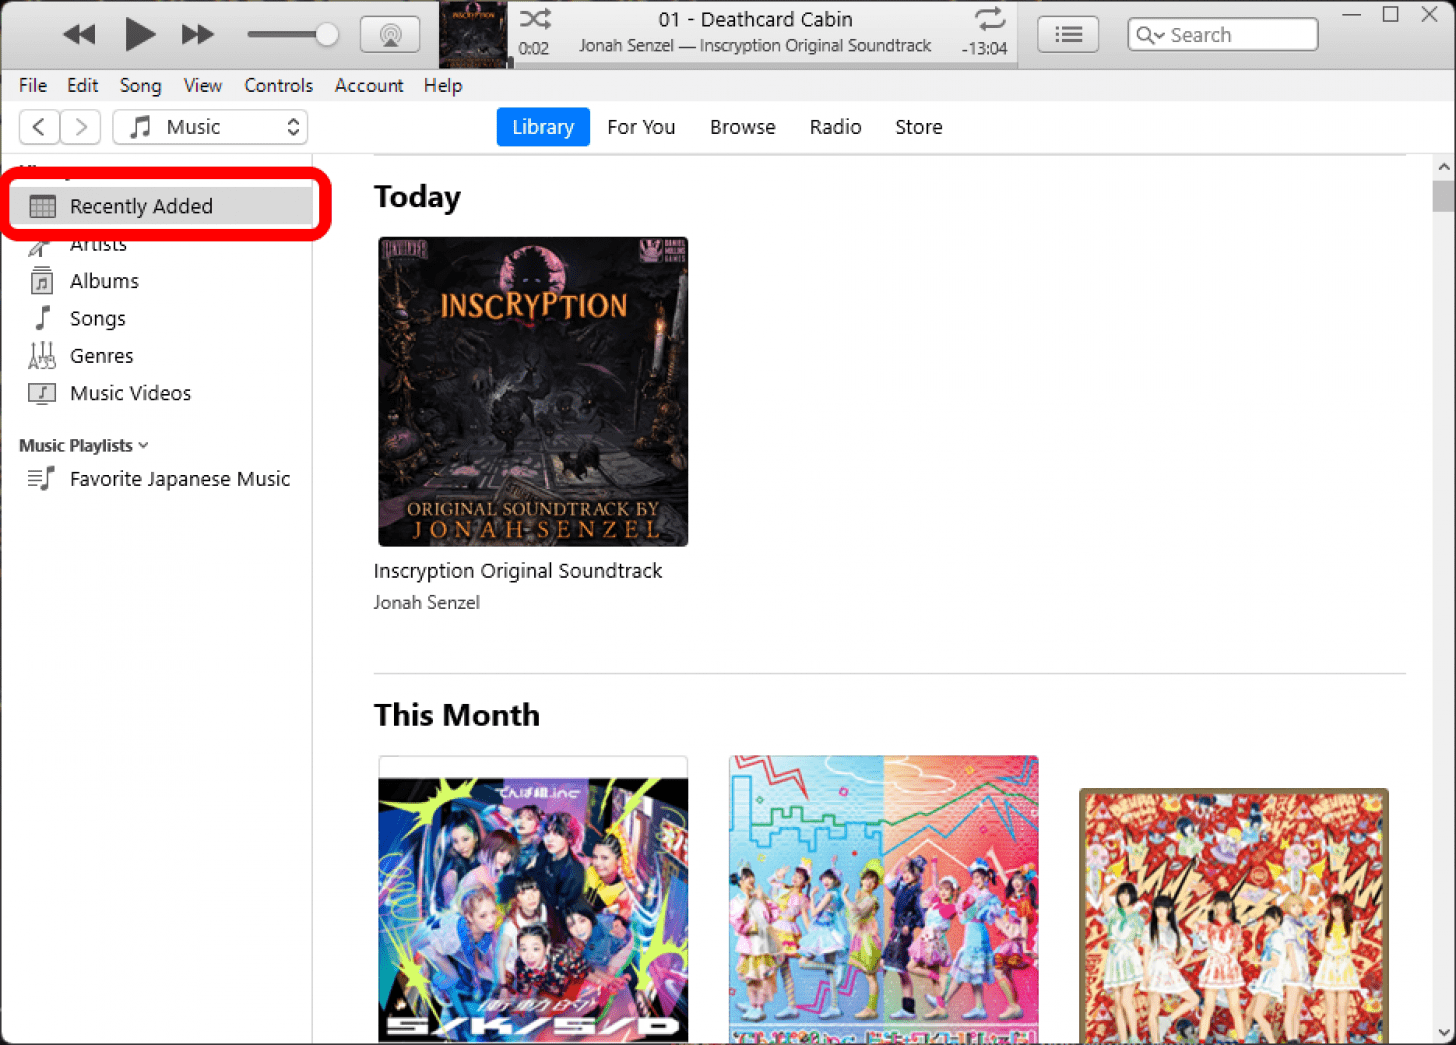
- Click Recently Added.
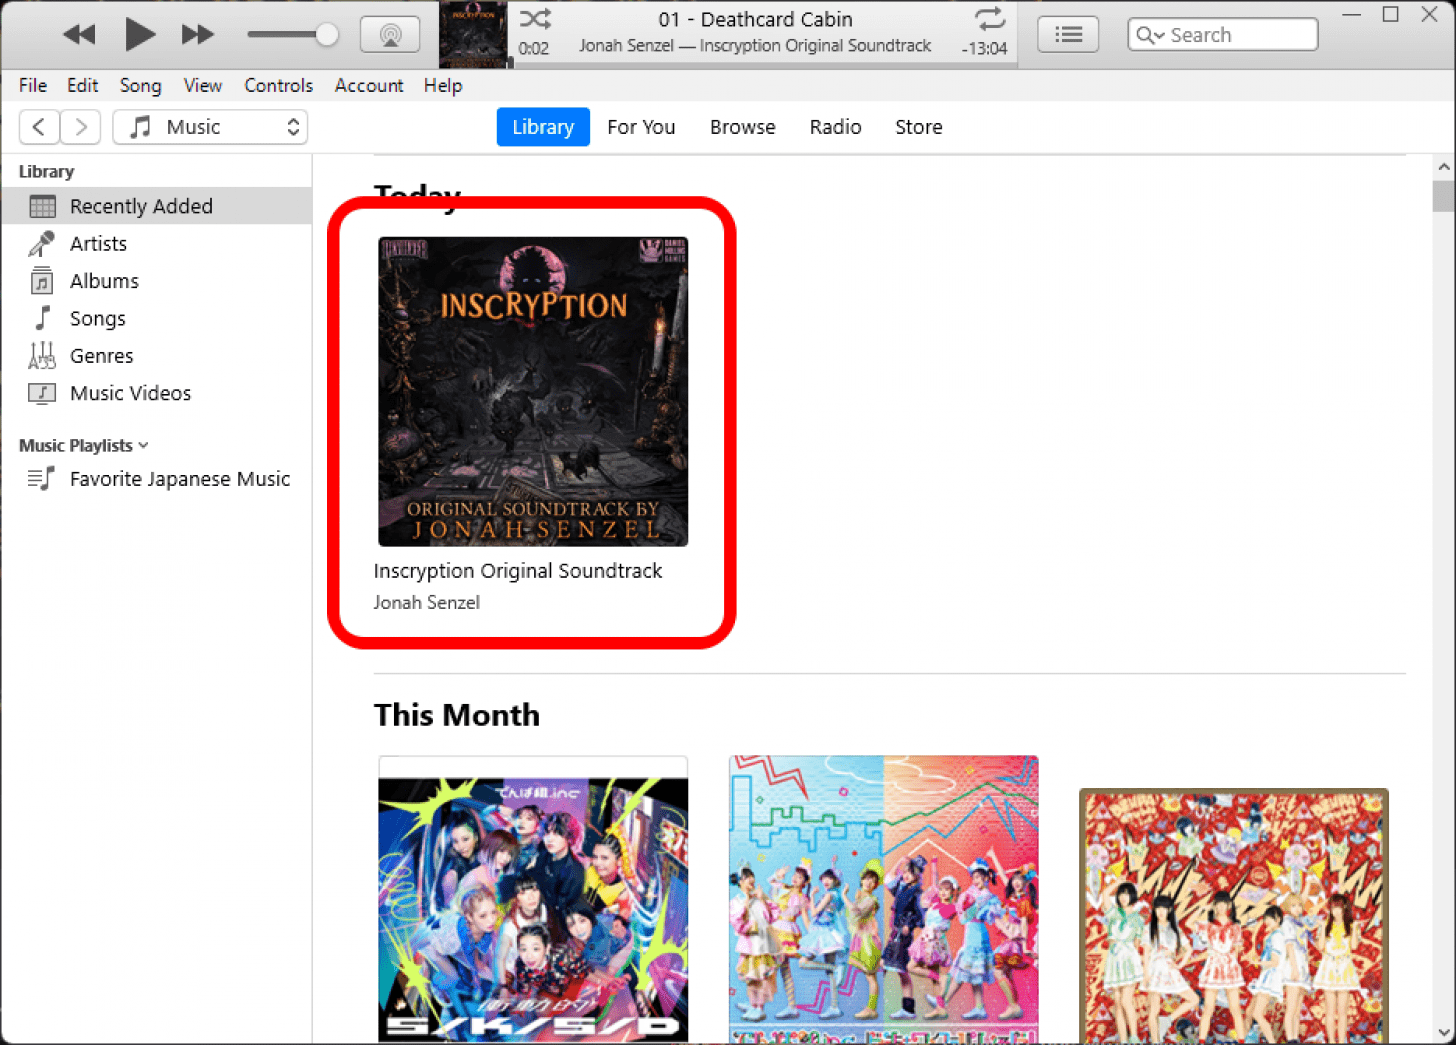
- Click the album to open it.
- You should see cloud error icons next to the same tracks here.
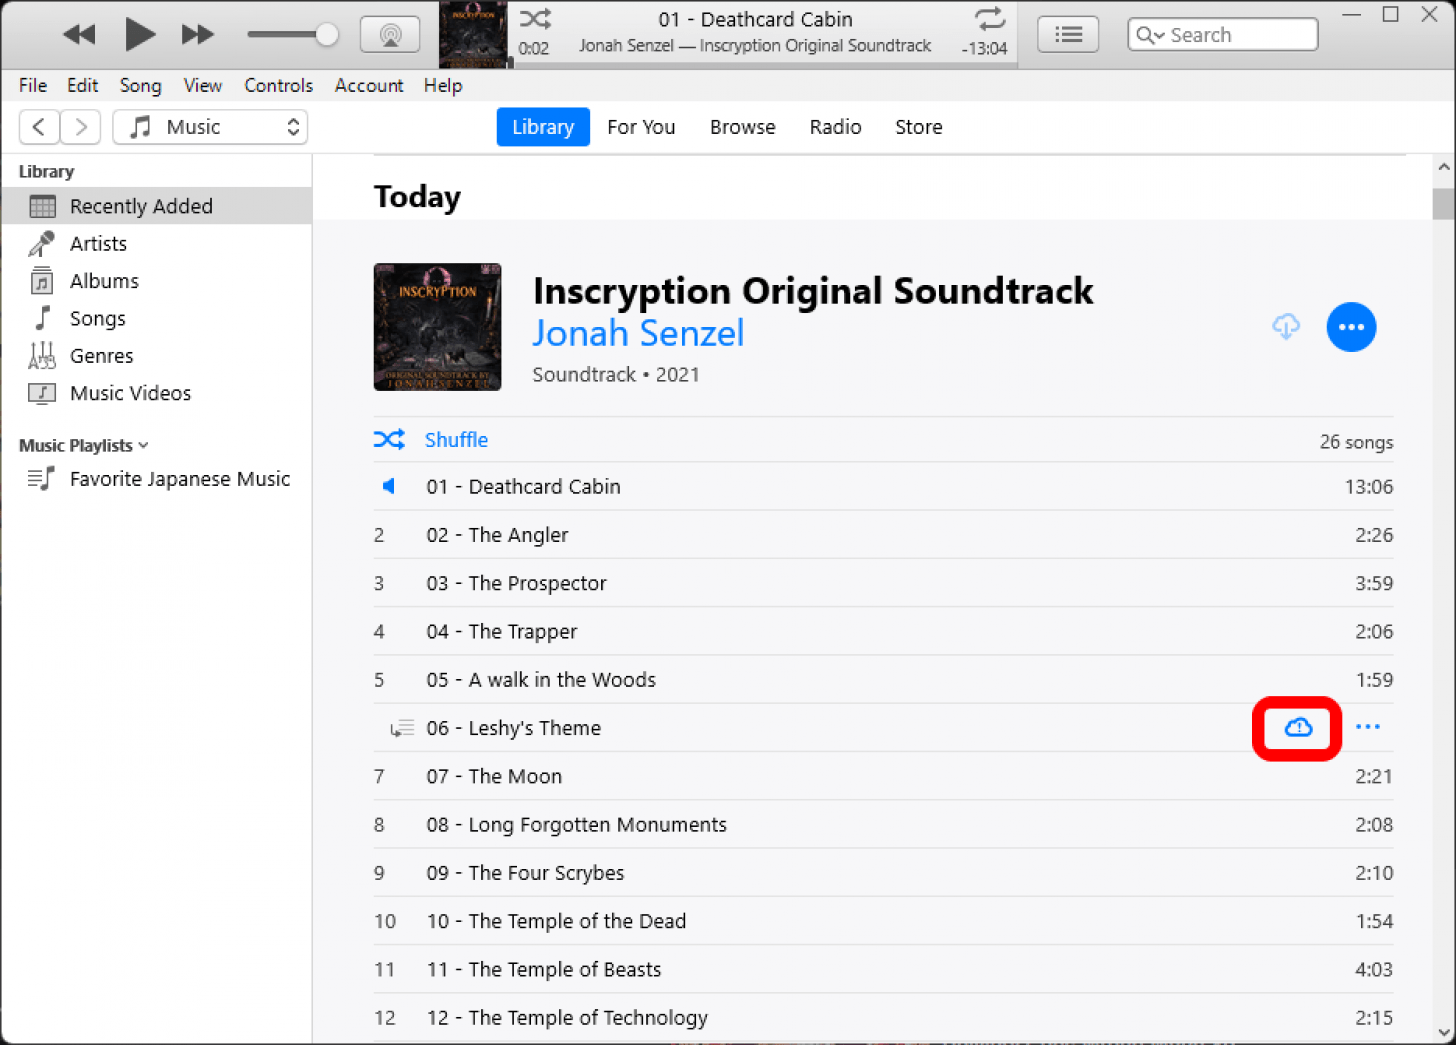
- Right-click the track and select Add to iCloud Music Library.
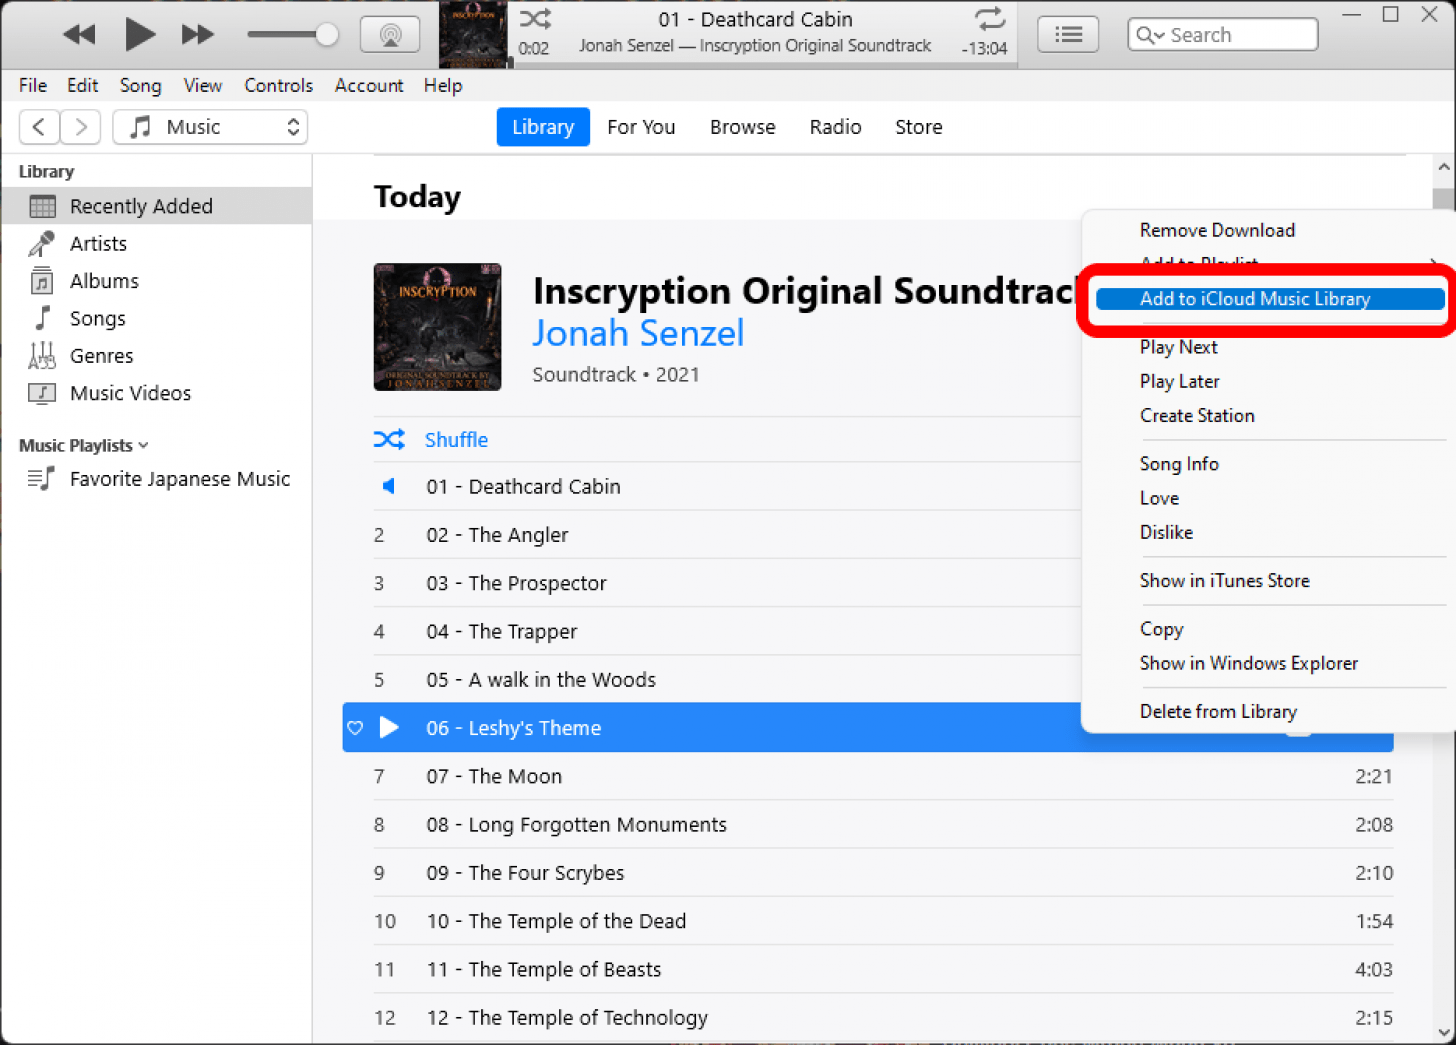
After a short wait for the upload and download your album should be fully synced with your iPhone's Music library, and you can enjoy listening to it wherever you go.


 Devala Rees
 Olena Kagui
 Rhett Intriago
 Rachel Needell


 Hal Goldstein
 Leanne Hays

 Amy Spitzfaden Both
 Susan Misuraca
