How to Customize Your MacBook Touchpad Settings
Learn how to customize your Mac trackpad gestures to fit your personal style.


Your Mac trackpad or touchpad should be the most intuitive part of your laptop, but this isn't always the case. Fortunately, you'll find extensive options to customize Mac trackpad gestures in your touchpad settings. Let's take a look how to customize these settings and what the different options mean.
How to Customize Your Touchpad Settings
First, let's take a look at how to access your touchpad settings.
- Open Settings.
- Click on Touchpad.
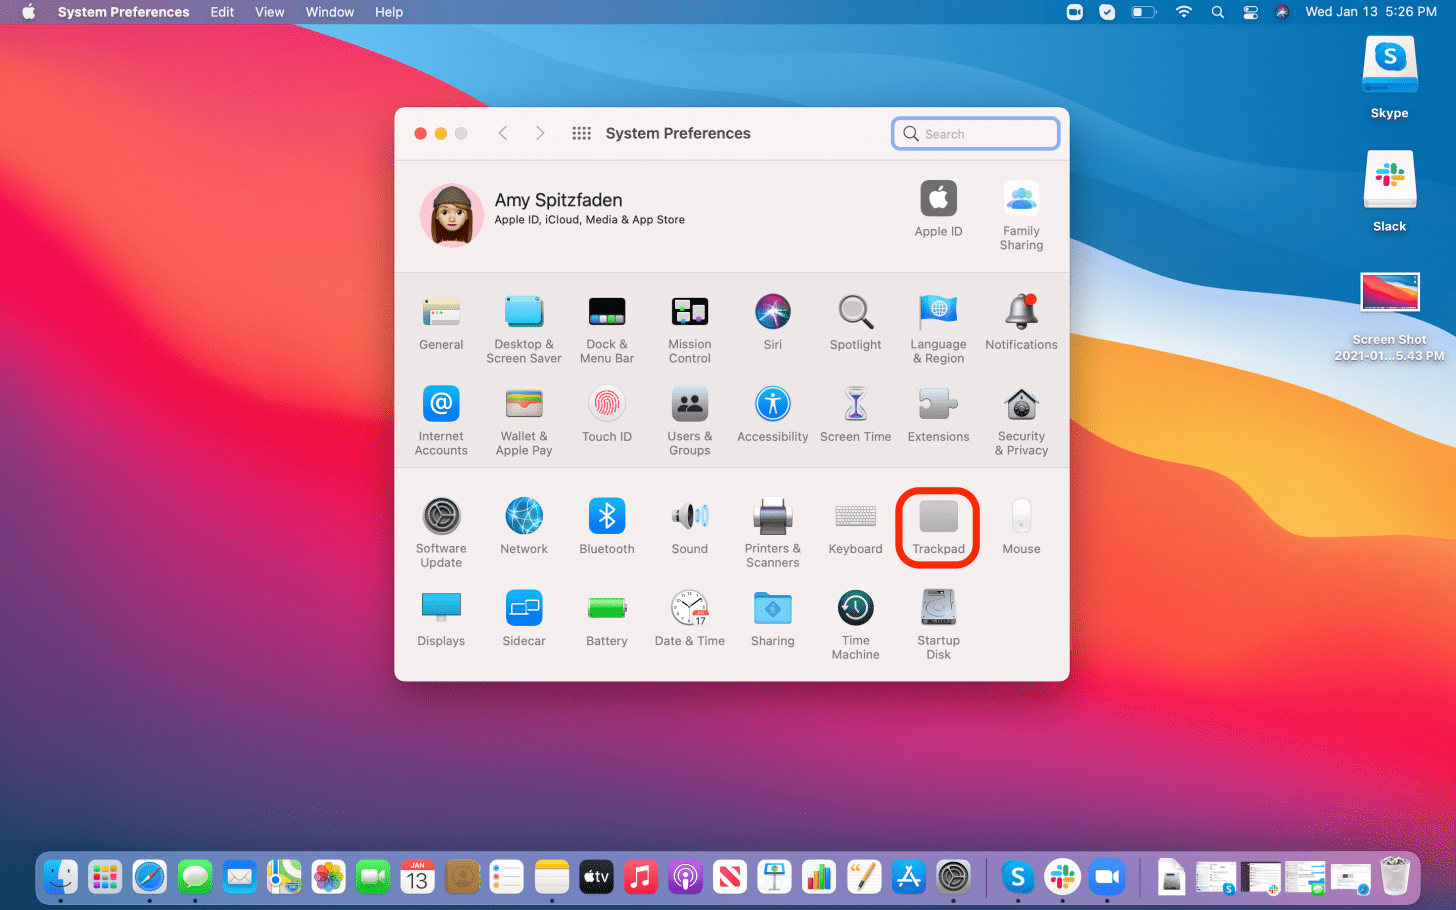
And there you go! You've accessed your touchpad settings and can now customize your MacBook gestures. So what are your options?
Force Click vs. Tap
These are two words that will appear frequently in this article, so let's define them now:
Force Click means to press down on your touchpad with some degree of force until it clicks like a mouse would.
Tap means you just touch your touchpad lightly, enough so your touchpad recognizes your gesture, but not so much that it full-on clicks.
Point & Click
This tab will allow you to customize how you click. There are more options here than you think, so let's break down each one.
- Look up & data detectors: If you choose to have this setting on, it means you can click on a word and get whatever info is available on it, from a dictionary definition to a web search. You can either choose to engage this by Force Click or Tap with three fingers.
- Secondary click is the good old-fashioned right click, but you have some options here. Select Click or tap with two fingers, Click in bottom of right corner, or Click in bottom of left corner for this one.
- Tap to Click is a feature that enables your computer to register a click when you tap the touchpad. This is a simple on/off option with Tap with one finger being the only gesture available.
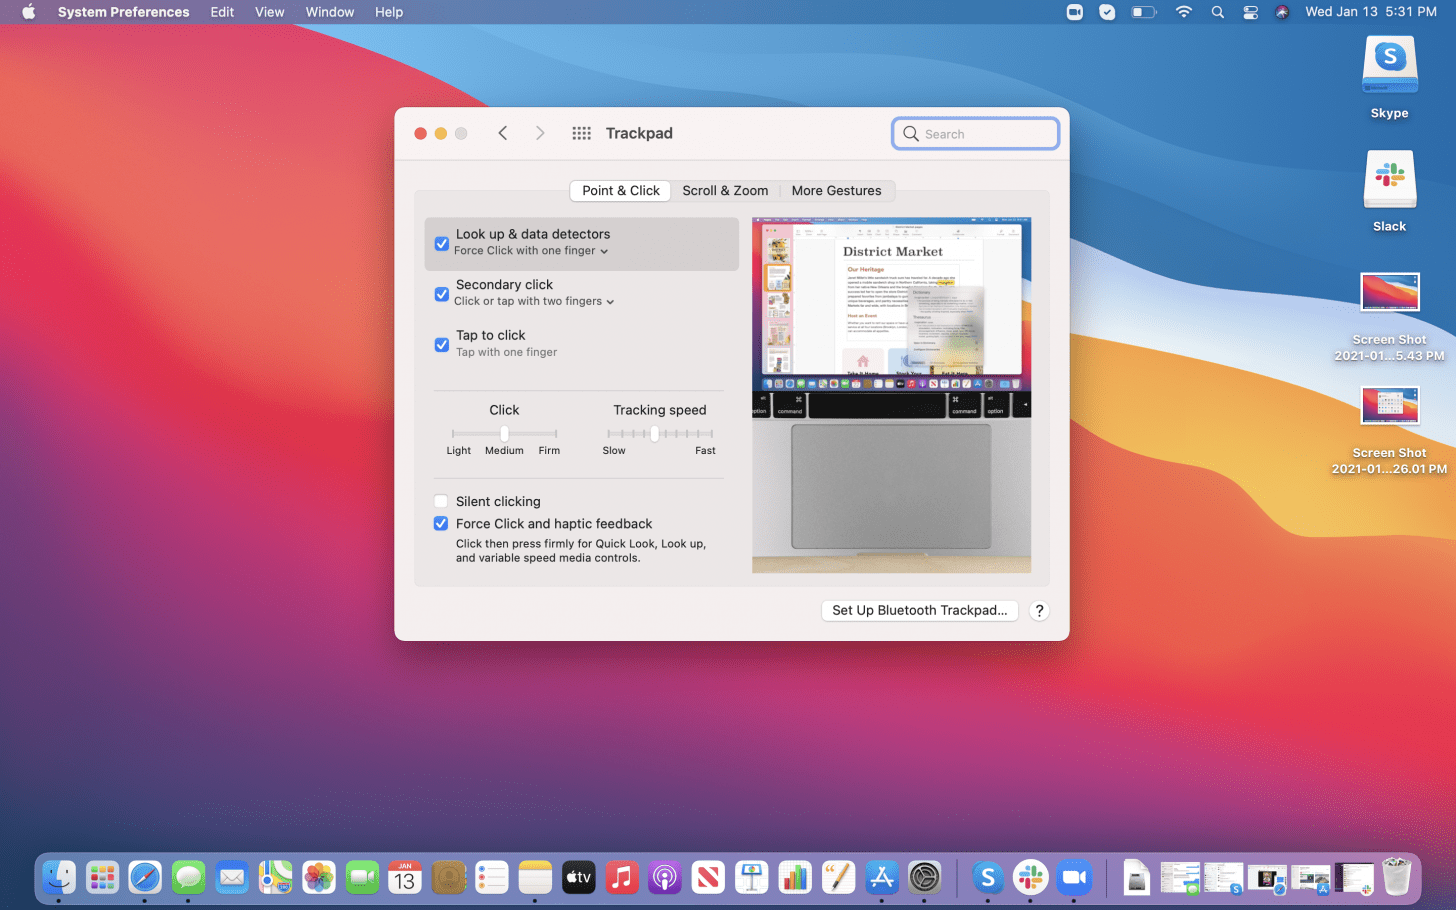
Below these options you'll find sliders letting you set the firmness of your click and mouse speed on your screen. Finally, you can turn on or off Silent clicking which will remove any click sounds from your sound effects. If you deselect Force Click and haptic feedback, your Force Click option will turn off, and anything you had set to that will be automatically deselected. For more tips on how to customize your Mac settings, check out our free Tip of the Day!
Related: Should You Buy a 2020 Mac? Apple’s New M1 Processor Is a Gamble
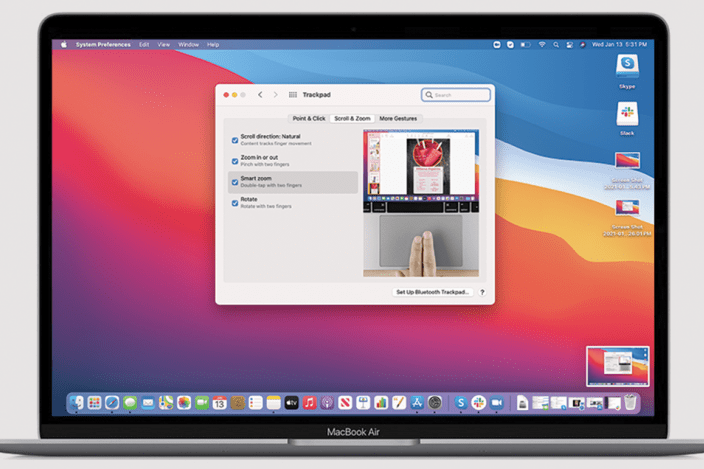
Scroll & Zoom
This menu is made entirely of on/off options that all automatically default to on, so let's take a look at what each section means.
- Scroll direction: Natural means the content you are viewing will track your finger movement on the trackpad and move the page accordingly. If you turn this off, your computer will default to the scroll bars on a page, and you may end up with reverse scrolling, or other confusing scroll patterns.
- Zoom in or out allows you to zoom by making a pinching motion on the trackpad. Bringing your fingers together will zoom out, pulling them apart will zoom in. Turning this off will leave you only with manual options for zoom, which can be helpful if you find yourself accidentally zooming a lot and/or you don't want to zoom very much at all.
- Smart zoom means if you double tap with two fingers, your computer will make its best guess as to what you want to zoom in on and zoom accordingly. This can be helpful if you want to see a face clearer or have a specific part of a text you'd like to examine, but again can be frustrating if you don't want to zoom but accidentally engage this function.
- Rotate allows you to rotate a page or image by turning two fingers either clockwise or counterclockwise. However, not every page or image allows this, and I have had limited success getting this to work.

More Gestures
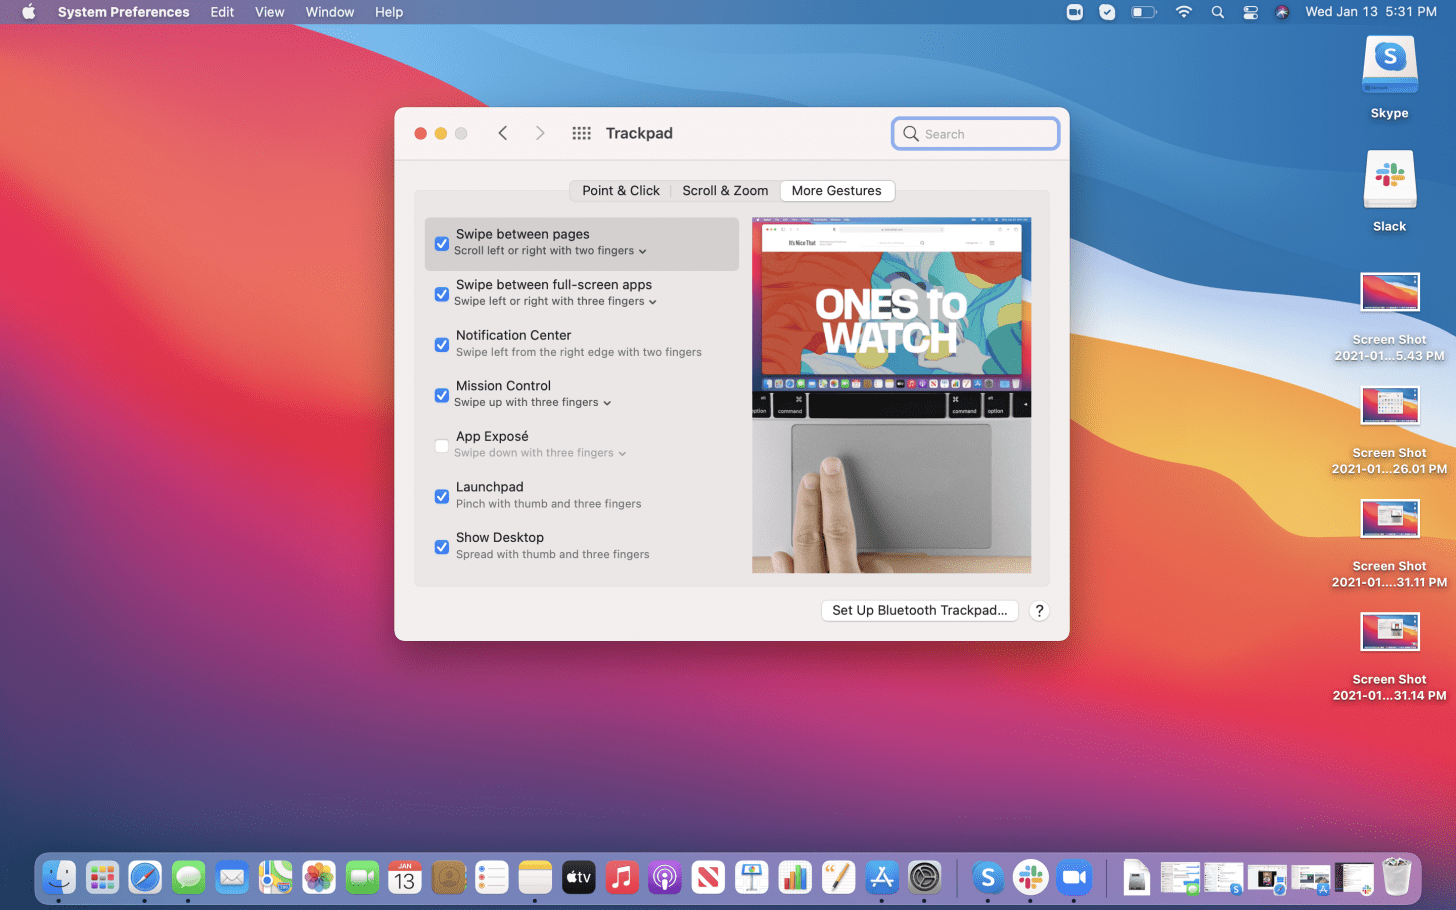
This is, you guessed it, all your other gesture options. This tab has both on/off options and gesture options for many of its entries, so we'll go over all of them.
- Swipe between pages allows you to use gestures to swipe between pages. The gesture options are Scroll left or right with two fingers, Swipe with three fingers, and Swipe with two or three fingers.
- Swipe between full-screen apps allows you to switch which open full-screen app is on your screen by swiping. Your gesture options are Swipe with three fingers, and Swipe with four fingers.
- Notification Center allows you to access your notification center with the instructions Swipe left from the right edge with two fingers. This one is a little confusing. It does not mean move your cursor over to the right side of your screen then swipe left with two fingers, but instead swipe your trackpad from the right edge to the left. There is no other gesture option for this, just the option to toggle it off.
- Mission Control brings all of your open pages, browsers, and apps onto your screen so you can easily choose which one to pull up onto the screen. The gesture options here are Swipe up with three fingers and Swipe up with four fingers.
- App Exposé is the only feature that comes automatically toggled off. That's because it's a little more involved. You'll have to set up an app Hot Corner for this to work, but if you go through the steps you'll be able to see all open pages and content of an app, similar to the display in Mission Control. The gesture options for this are Swipe down with three fingers and Swipe down with four fingers.
- Launchpad gestures allow you to access your launchpad by pinching your trackpad. The only gesture option here is Pinch with thumb and three fingers.
- Show Desktop allows you to see your desktop without any of your open apps or programs. The only gesture option here is Spread with thumb and three fingers.

Amy Spitzfaden Both
Amy Spitzfaden-Both is the Managing Editor for iPhone Life magazine and an award-winning novelist, with over 10 years of experience in the publishing industry. She specializes in Apple news and rumors, health and fitness tech, and parenting in the digital age. She graduated from MIU with a BA in Literature and Writing.
Amy lives in New Hampshire with her husband and daughter. When she’s not writing or glued to her iPhone, she enjoys hiking, traveling, and creating her own tea blends.
 Olena Kagui
 Amy Spitzfaden Both
 Rhett Intriago


 Rachel Needell
 August Garry

 Leanne Hays

 Belinda Sanmiguel
 Susan Misuraca