Easily Use Your iPhone to Scan Documents


Want to scan a document on the iPhone? The Files app can be used as a document scanner where you can scan and save documents as PDF files to your iPhone and iCloud. Using the Files app to scan a document on the iPhone helps keep you organized by scanning, saving, and marking up documents from one location. Here’s how to scan a document on the iPhone using the Files app.
Why You'll Love This Tip:
- Scan documents and save them directly to your iPhone.
- Save scanned documents as a PDF in the Files app.
How to Scan a Document on iPhone with the Files App
System Requirements
This tip works on iPhones running iOS 16 or newer. Find out how to update to the latest version of iOS.
While you can scan documents on your iPhone with the Notes app, scanning with the Files app saves the scan as a PDF which you can attach to emails or text messages. For more iPhone productivity tips and tricks, check out our free Tip of the Day newsletter. Now, here's how to scan documents on iPhone using the Files app:
- Open the Files app.
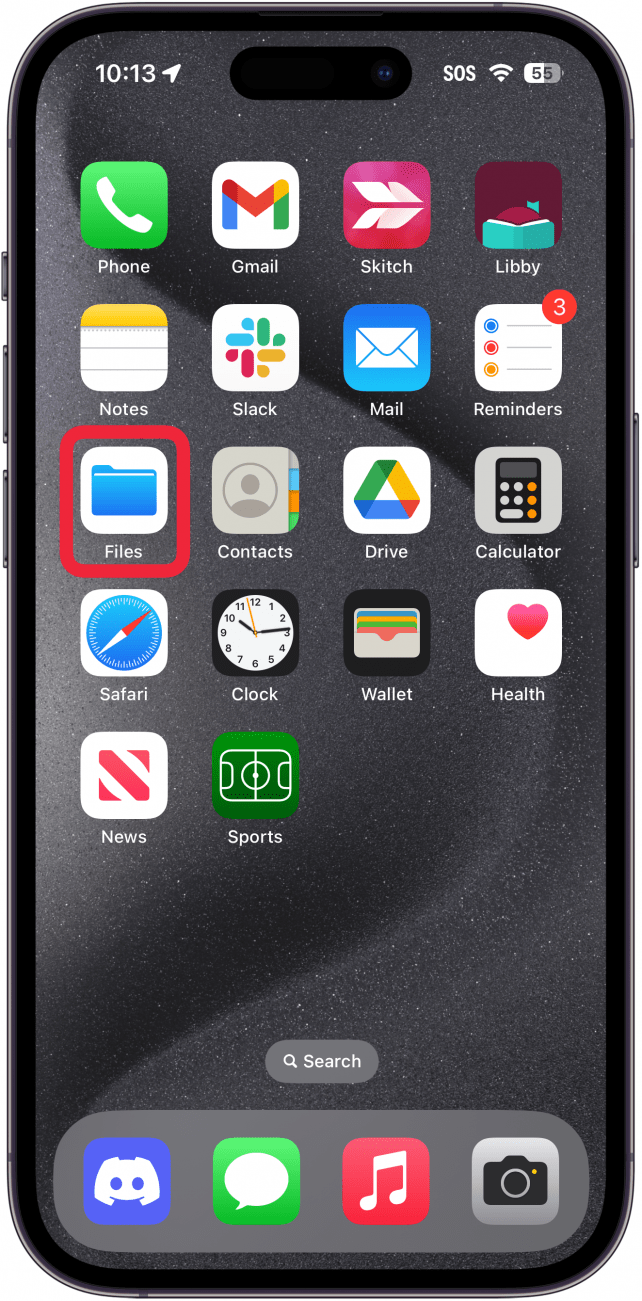
- Tap the three dot menu button in the top right corner.
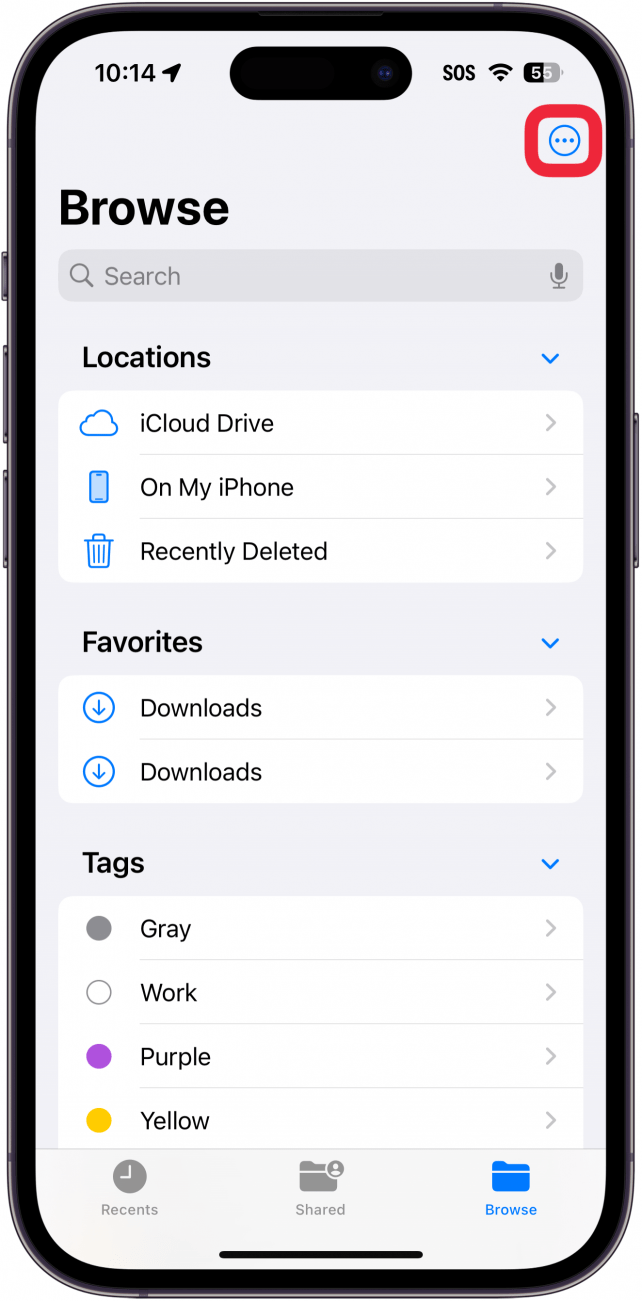
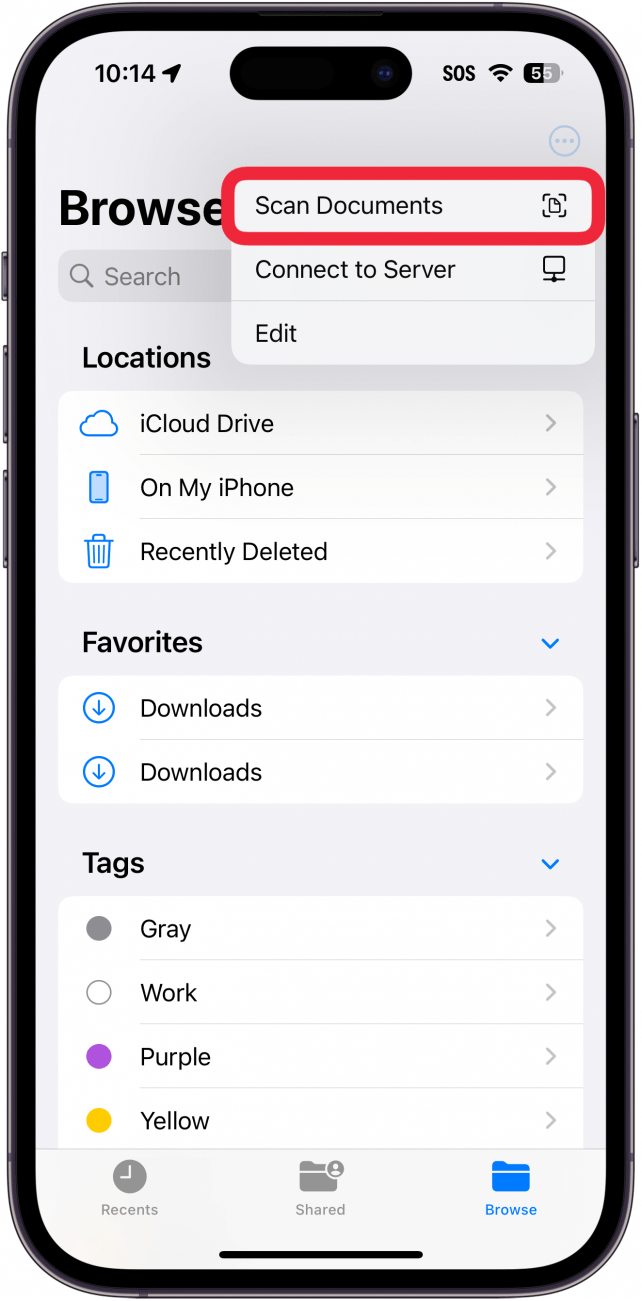
- Select Scan Documents.
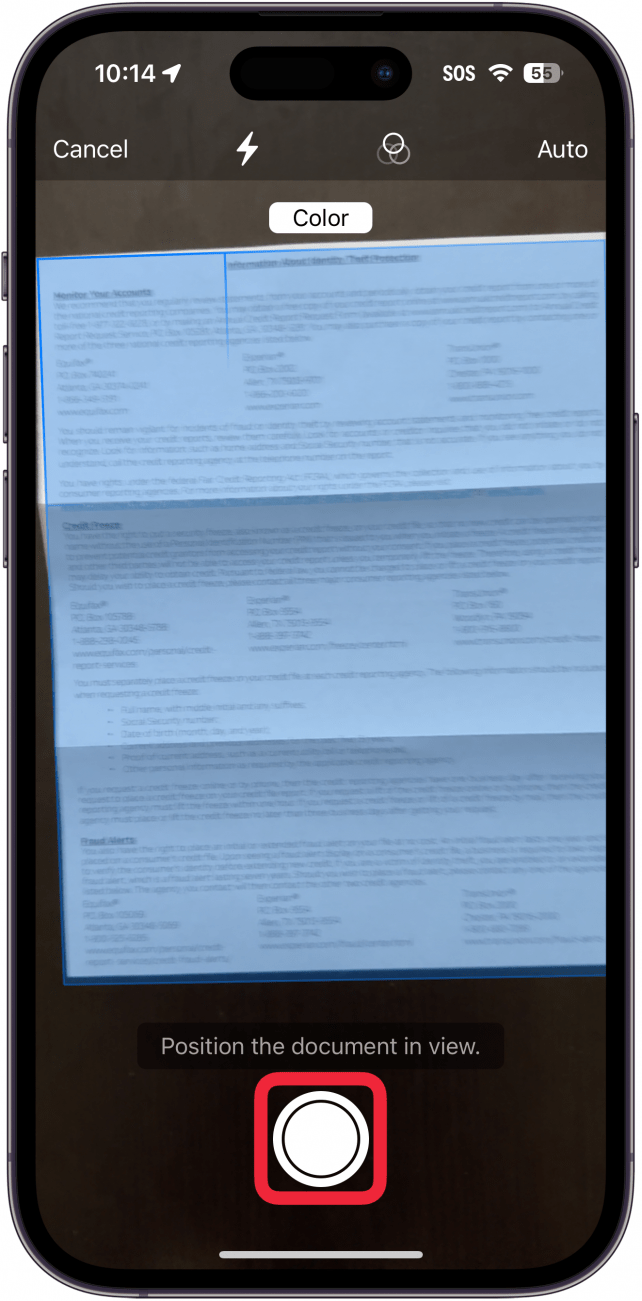
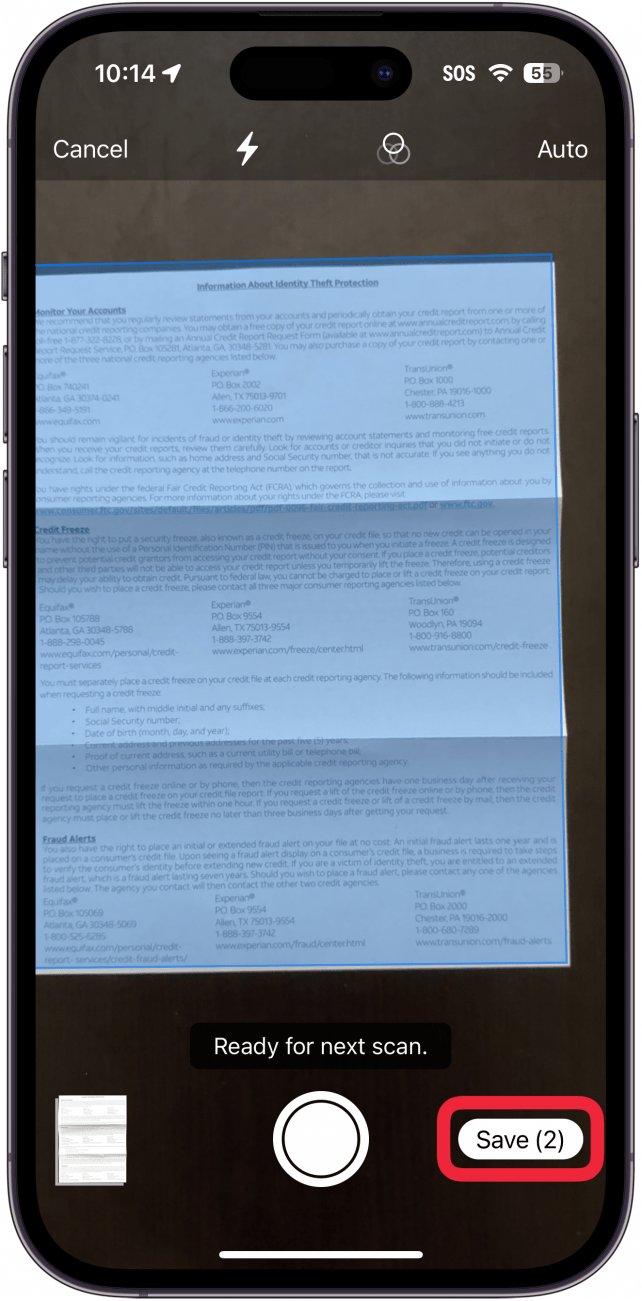
- Once the app detects a document, it will automatically snap a photo, but you can also tap the shutter button.
- Once you've scanned all your documents, tap Save.
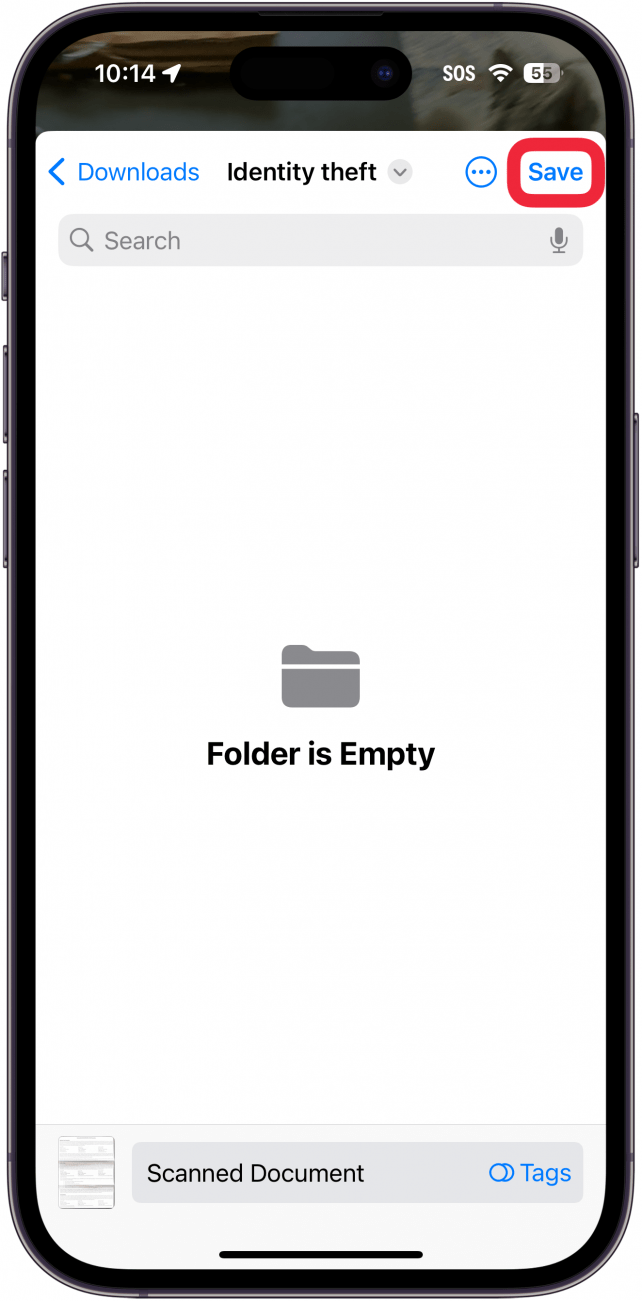
- You may need to choose the folder where you want to save your scanned document. If so, choose the folder, and tap Save in the top right corner.
- Tap to see your scanned document.
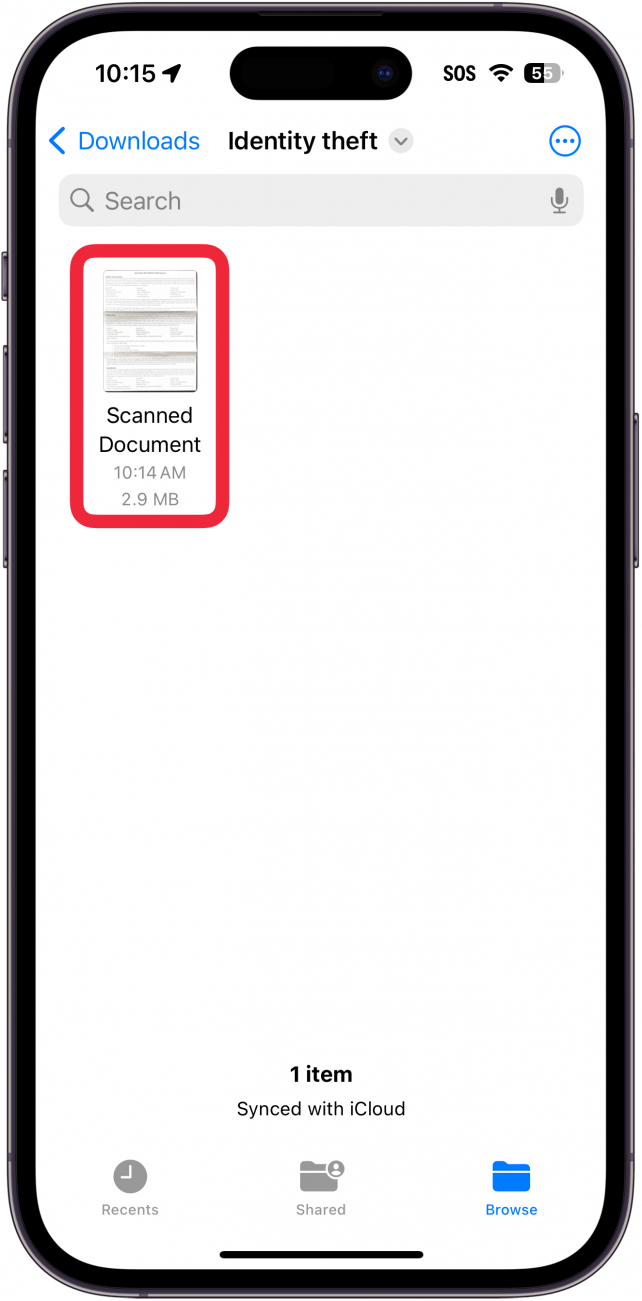
That's how to use your iPhone to scan a document. Now, you can navigate to that location to view your document. Whenever you save to Files on your iPhone, you can also view your document from your iPad or Mac as well. You can also scan photos with your iPhone using the Notes App or other photo-scanning apps.
Every day, we send useful tips with screenshots and step-by-step instructions to over 600,000 subscribers for free. You'll be surprised what your Apple devices can really do.

Tamlin Day
Tamlin Day is a feature web writer for iPhone Life and a regular contributor to iPhone Life magazine. A prolific writer of tips, reviews, and in-depth guides, Tamlin has written hundreds of articles for iPhone Life. From iPhone settings to recommendations for the best iPhone-compatible gear to the latest Apple news, Tamlin's expertise covers a broad spectrum.
Before joining iPhone Life, Tamlin received his BFA in Media & Communications as well as a BA in Graphic Design from Maharishi International University (MIU), where he edited MIU's literary journal, Meta-fore. With a passion for teaching, Tamlin has instructed young adults, college students, and adult learners on topics ranging from spoken word poetry to taking the perfect group selfie. Tamlin's first computer, a Radioshack Color Computer III, was given to him by his father. At 13, Tamlin built his first PC from spare parts. He is proud to put his passion for teaching and tech into practice as a writer and educator at iPhone Life.
 Rachel Needell
 Rhett Intriago

 Olena Kagui
 Ashleigh Page




 Leanne Hays
