How to Screen Record on Mac
Here's how to screen record on a Mac or MacBook, with and without audio, and how to stop screen recording.


Need a free Mac screen recorder with audio? Here's how to screen capture on Mac (and MacBook) with audio or without. We'll go over how to use the screen recorder Mac feature with QuickTime and the Screenshot toolbar.
Related: How to Take a Screenshot on iPhone 13 & Earlier Models
How to Screen Record on Mac (2022 Update)
How do you screen record on a Mac? How do you stop screen recording? There are two ways to screen record on your Mac. You can use a Mac keyboard shortcut, or do QuickTime screen recording. Not all apps will allow you to screen record. For more great Mac tutorials, like how to transfer photos from an iPhone to a Mac, check out our free Tip of the Day.
Screen Capture on Mac with the Screenshot Toolbar
Macs updated to macOS Mojave and later can access the Screenshot toolbar. This method will not record internal or external audio. To use the Screenshot toolbar to screen record on a Mac:
- Press the Shift, Command, and 5 keys at the same time.

- Screen recording controls will appear. From left to right, they are Capture Entire Screen, Capture Selected Window, Capture Selected Portion, Record Entire Screen, and Record Selected Portion.
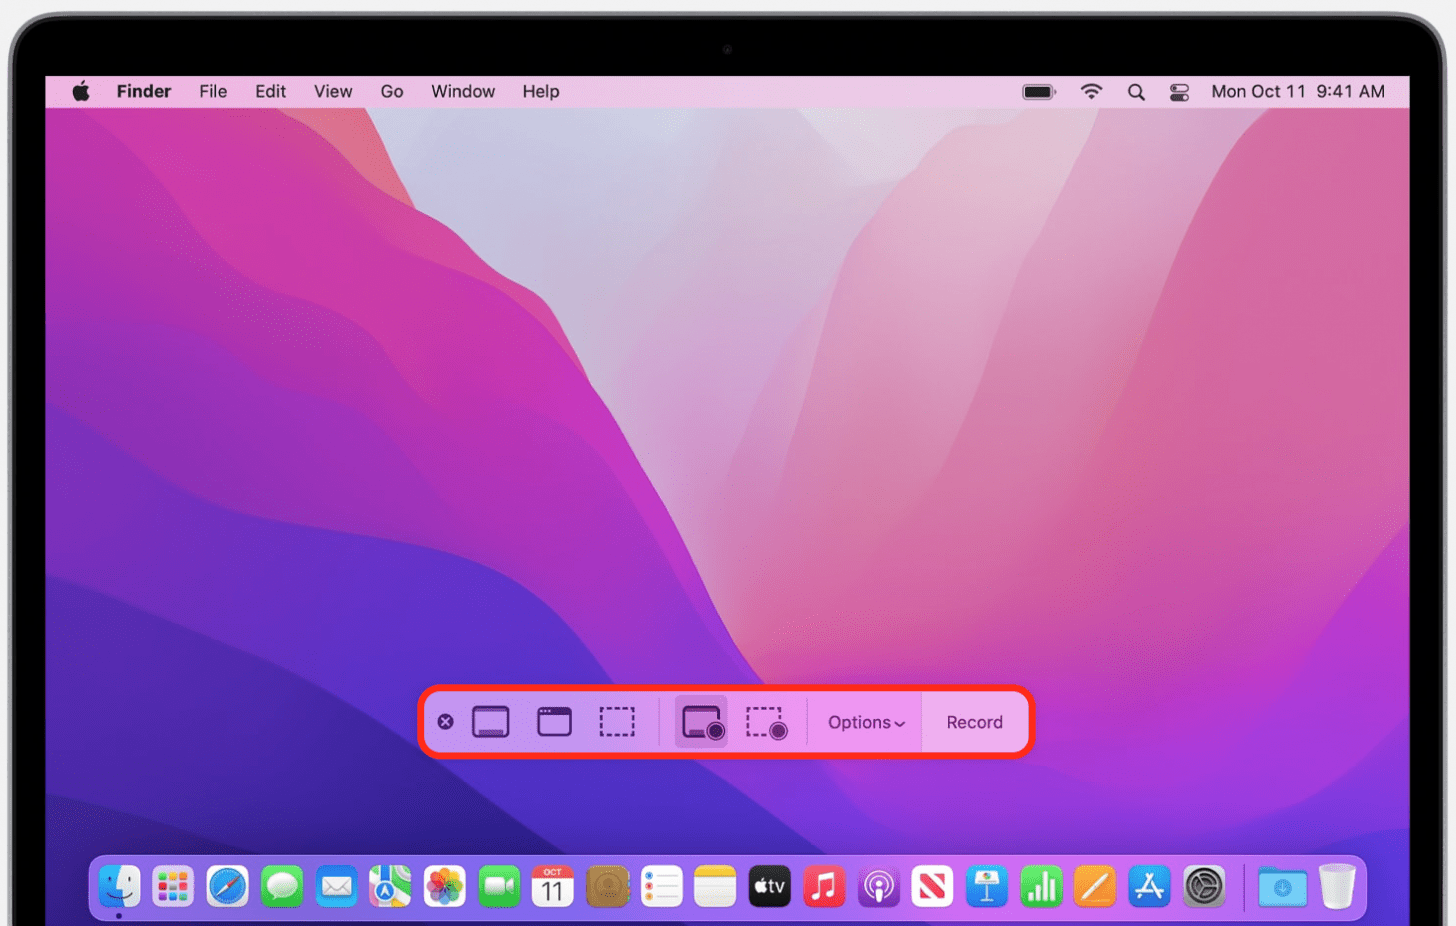
- Click the caret next to Options to choose where the screen recording will be saved, whether or not to set a timer, and more.
- Click the Record Entire Screen or Record Selected Portion icon, then click Record to begin screen recording.
- Click the Stop Recording icon (a square within a circle) or use Command, Control, Esc when finished.
QuickTime Screen Recording with Audio
If you've been wondering how to record the screen on your Mac with audio, you can do that using QuickTime. Here's how.
- Open the QuickTime Player app on your Mac.

- In the menu bar, click File, then New Screen Recording.
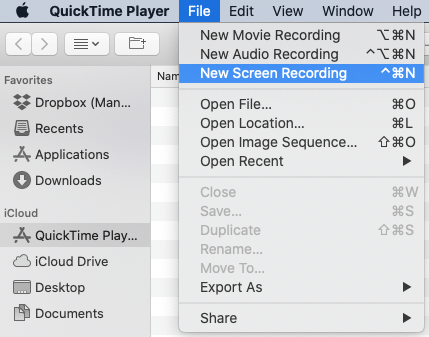
- Screen recording controls will appear. From left to right, they are Capture Entire Screen, Capture Selected Window, Capture Selected Portion, Record Entire Screen, and Record Selected Portion.

- Click the caret next to Options to choose where the screen recording will be saved, whether or not to set a timer, and more.
- If you want to record audio, be sure to click Options, then choose a microphone. If you use your Mac's internal microphone, it will pick up internal and external audio.
- Move the volume slider to change the audio during recording. If you hear feedback, lower the volume or use a different microphone.
- Select Show Mouse Clicks in Recording to show a black circle around your mouse pointer.
- Click the Record Entire Screen, click the red Record button, then click anywhere on the screen to begin recording the entire screen.
- Click Record Selected Portion, click the red Record button, then drag the dotted line to choose an area to record only part of the screen.
- To stop recording, click the Stop button (white square in a gray circle) or use the Command, Control, Esc keyboard shortcut.
- QuickTime will automatically open the screen recording when you click the Stop button.
Now you can play, edit, or share your screen recording. You can also screen record with audio on an iPhone or iPad! If you're looking to record a video of yourself via Zoom, check out this tip that walks you through how!

Leanne Hays
Leanne Hays has over a dozen years of experience writing for online publications. As a Feature Writer for iPhone Life, she has authored hundreds of how-to, Apple news, and gear review articles, as well as a comprehensive Photos App guide. Leanne holds degrees in education and science and loves troubleshooting and repair. This combination makes her a perfect fit as manager of our Ask an Expert service, which helps iPhone Life Insiders with Apple hardware and software issues.
In off-work hours, Leanne is a mother of two, homesteader, audiobook fanatic, musician, and learning enthusiast.

 Rhett Intriago
 Olena Kagui
 Susan Misuraca
 Rachel Needell
 Leanne Hays