How to Use a USB Drive with an iPhone or iPad


Sometimes we run out of space on our Apple devices. External storage for iPads and iPhones can be tricky to use, so we are going to walk you through using a USB (also called a flash drive or thumb drive) with both an iPhone and an iPad. This will help you easily transfer things like photos to an external storage device or external hard drive. Moving certain items to external storage will free up space for you to keep taking photos and utilizing your device to its fullest potential. Let’s look at how to use a USB drive with an iPhone or iPad.
Related: Photo Management Guide: How to Organize, Share & Store Your iPhone Photos
What's in This Article
- How to Use a USB Drive with an iPhone
- Tips for Using a USB Drive with an iPad
- How to Use a USB Drive with an iPad: Lightning Cable Port
- How to Use a USB Drive with an iPad: USB-C Cable Port
How to Use a USB with an iPhone
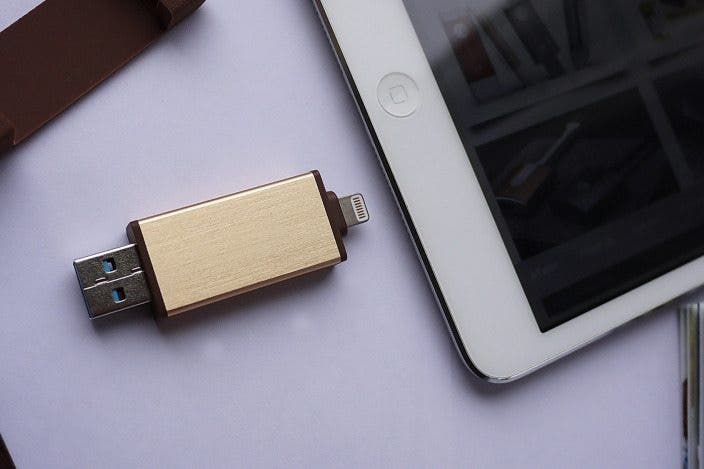
The easiest way to use a USB drive with an iPhone is to use a device designed for this purpose, such as a USB drive with a Lightning cable adapter attached. This device plugs directly into an iPhone with no extra devices. It's a small, portable, and efficient method to expand your storage space by moving items from your iPhone into external storage so that you can free up space on your iPhone.
Most USB drives for iPhones have their own apps. No two apps are identical so we can’t walk you through each individual process, but we can give you an idea of how this will typically work. Here's a step-by-step explanation for using a USB drive with your iPhone:
- First, download the app that accompanies your USB flash drive. When plugging the flash drive into your iPhone, it may prompt you to download the accompanying app on its own, but if it doesn’t, you can download it from the App Store by searching the device's name or following the instructions included in the device’s packaging.
- If you haven’t already, plug your flash drive into your iPhone.
- A message will appear on your iPhone screen. Make sure to tap Allow on that message.
- You will be directed to go to the app associated with your flash drive. On that screen, you will likely see information like how much storage is available on your phone and how much is available on the USB. You will also see transfer options. Each USB drive and app will look a little different.
- The instructions included with your USB flash drive will be the most useful. We suggest following those instructions about what to do next.
- The app will likely ask you if you’d like to delete photos or files you’ve just transported from your phone to the drive. If you are trying to clear up storage on your phone, you will want to delete the items you have just transferred. Otherwise, feel free to choose as you see fit!
Tips for Using a USB Drive with an iPad
Using a USB drive with an iPad is slightly more complicated. Newer iPads allow you to connect an adapter in order to use a USB drive. However, some USB drives require more power than an iPad can offer. Before purchasing a USB drive, ensure that it is compatible with an iPad.
Your iPad allows you to transfer photos from your USB drive to the iPad, but you won’t be able to add any other types of files. You can also transfer photos from your iPad to your desktop, or keep them on the USB flash drive in order to utilize external storage for your iPhone.
iPads have a couple of different ports, which means you will need to know which port your iPad has before deciding which method will work for you. The iPad Pro has a USB-C port. All other iPad generations have a Lightning port. Need to check which iPad you have? Check out our iPad identification article to help you narrow it down.
How to Use a USB Drive with an iPad: Lightning Cable Port
Option 1: You can follow the instructions used for the iPhone, and use a special USB made for a Lightning port
Option 2: You can purchase a cable that is Lightning to USB. This type of adapter plugs into your iPad on one end and a USB (flash drive) on the other end. When plugging in your USB flash drive for the first time, you will likely be prompted to follow the instructions to download an app and allow access similar to the steps for an iPhone.
How to Use a USB Drive with an iPad: USB-C Cable Port
You can use a USB-A to USB-C cable to connect your flash drive to your iPad. A USB-A is the technical name for a flash drive. A USB-C cable is the technical name of the port on many Mac computers and the iPad Pro.
- Connect the adapter to your iPad and plug in the USB-A to the other end of the adapter.
- Follow the prompts to move files from your iPad to your flash drive.
- Your flash drive will come with instructions. Each flash drive is slightly different. For a general guide to how to use your flash drive, follow the instructions to use a flash drive with your iPhone.
Now that you know how to use a USB flash drive with your device, you can remove photos and files from your iPhone or iPad in order to create more storage. This will help your device function more optimally, and will free up space for you to keep taking pictures!

Hannah Nichols
Hannah Nichols is a freelance marketing consultant and writer. She is obsessed with audiobooks and podcasts and always asks people for recommendations. Hannah loves going to the gym and taking really long walks with friends. She enjoys traveling with her partner and her eight-year-old son.
 Ashleigh Page

 Rhett Intriago
 Rachel Needell
 Susan Misuraca
 Amy Spitzfaden Both

 Devala Rees
 Hal Goldstein
 Olena Kagui
 Leanne Hays