How to Use AirPods as Hearing Aids & Take the Hearing Test


What to Know
- The AirPods Pro 2 models have a Hearing Aid feature.
- First, you take a five-minute hearing test on your iPhone.
- As long as you have mild to moderate hearing loss, your AirPods Pro 2 will adjust to help you hear better.
Users have been using AirPods as hearing aids for quite some time now, but the AirPods Pro 2 have built-in features to test your hearing and actually improve your ability to hear using the Hearing Aid feature. The five-minute process will help you figure out if you have any hearing loss and if your AirPods can make a difference for you.
Using AirPods as Hearing Aids 101
The AirPods Pro 2, nicknamed "Apple hearing aids," because of their ability to help users with mild to moderate hearing loss, will walk you through the process of doing a five-minute at-home hearing check. As long as you turn on the Hearing Aid feature, it will automatically adjust the AirPods to help you hear better.
1. Connect your AirPods to your iPhone.
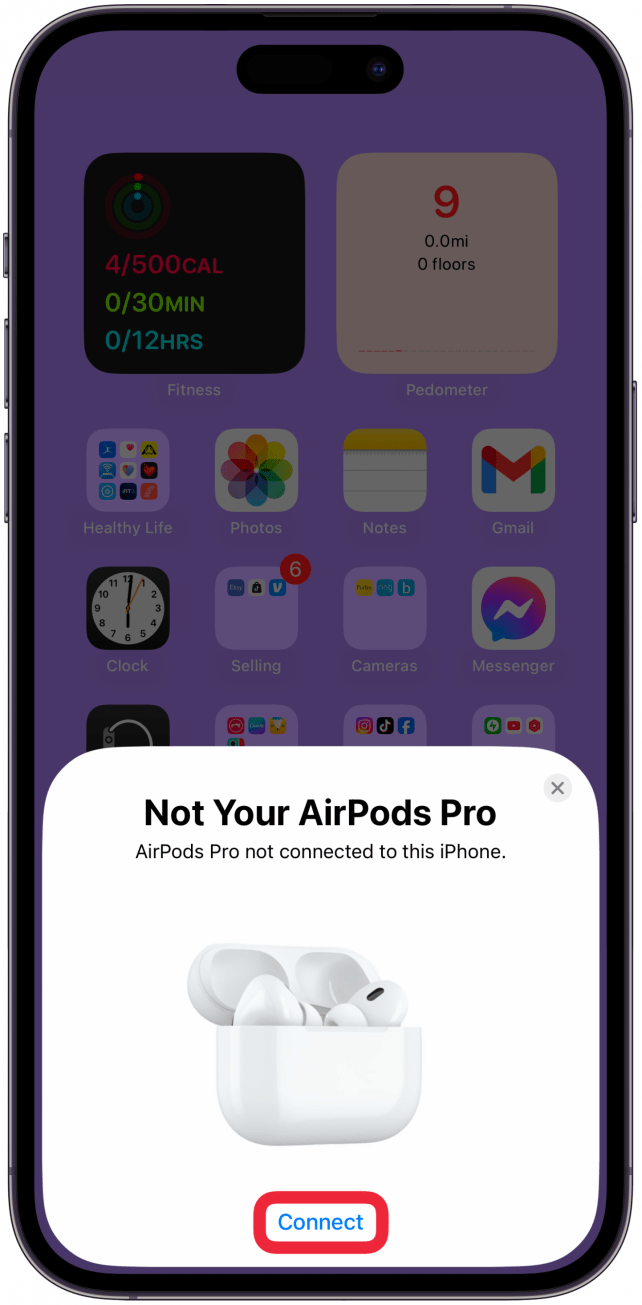
You have to be connected to the AirPods you wish to use as hearing aids, but the good news is, you don't need to own the AirPods to take the test and try out the Hearing Aid feature. All the steps in this article were taken using my husband's AirPods Pro 2 with my iPhone 16 Pro Max.
- If you haven’t done this already, connect the AirPods Pro 2 to your iPhone by holding the open case near your iPhone. On your iPhone, tap Connect.

- You will be instructed to press and hold the button on the back of your AirPods case.
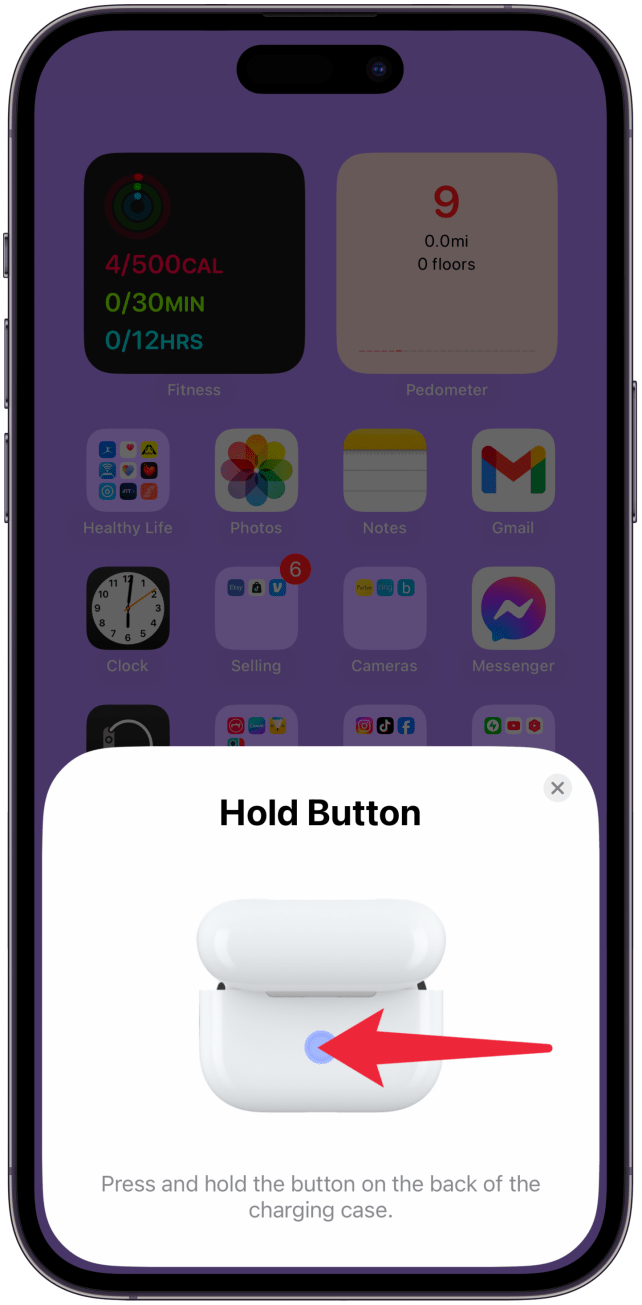
- It should only take a few seconds to connect to the AirPods. If you are using someone else’s AirPods to do this, you will see a notification explaining that the owner of the AirPods will be able to track their location. Tap OK.
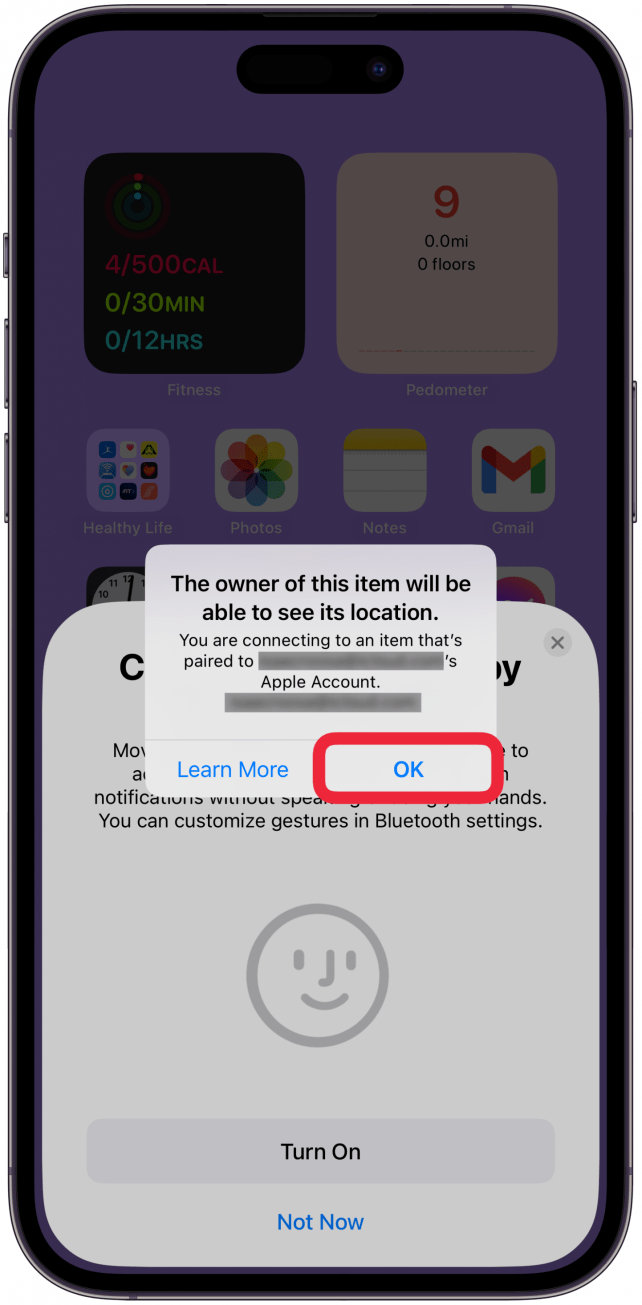
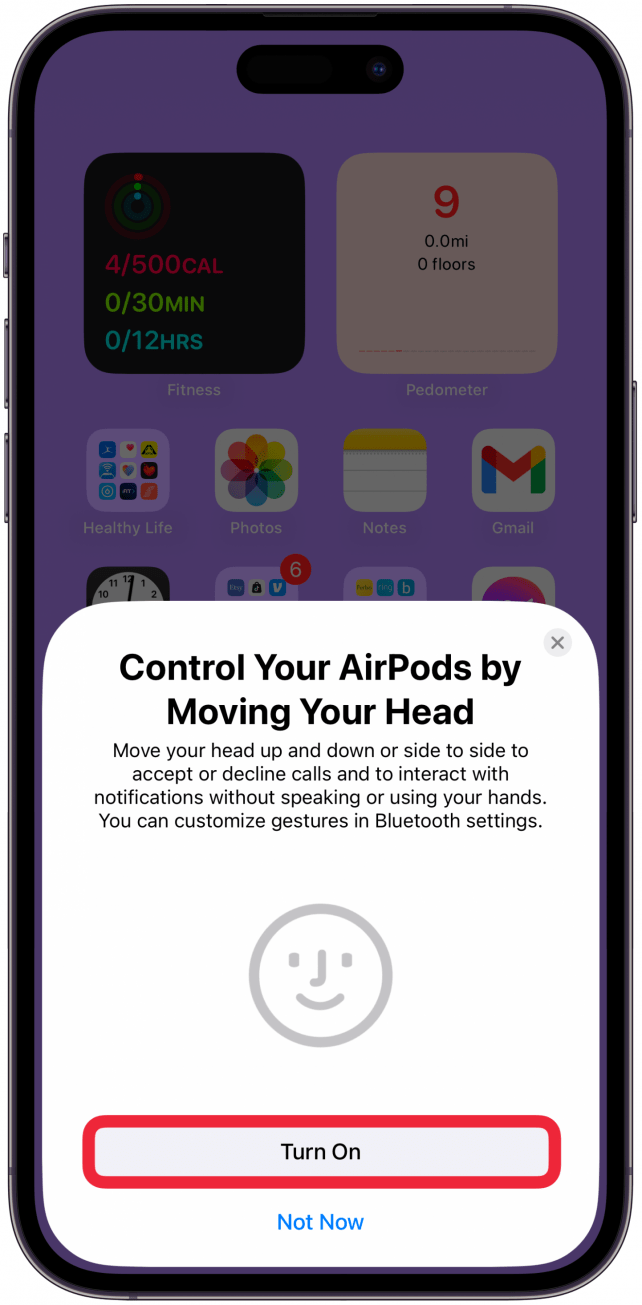
- When connecting new AirPods, the setup process will introduce you to some of the new features and let you turn them on if you wish. When it asks you if you want to control your AirPods by moving your head, select either Turn On or Not Now based on your preference.
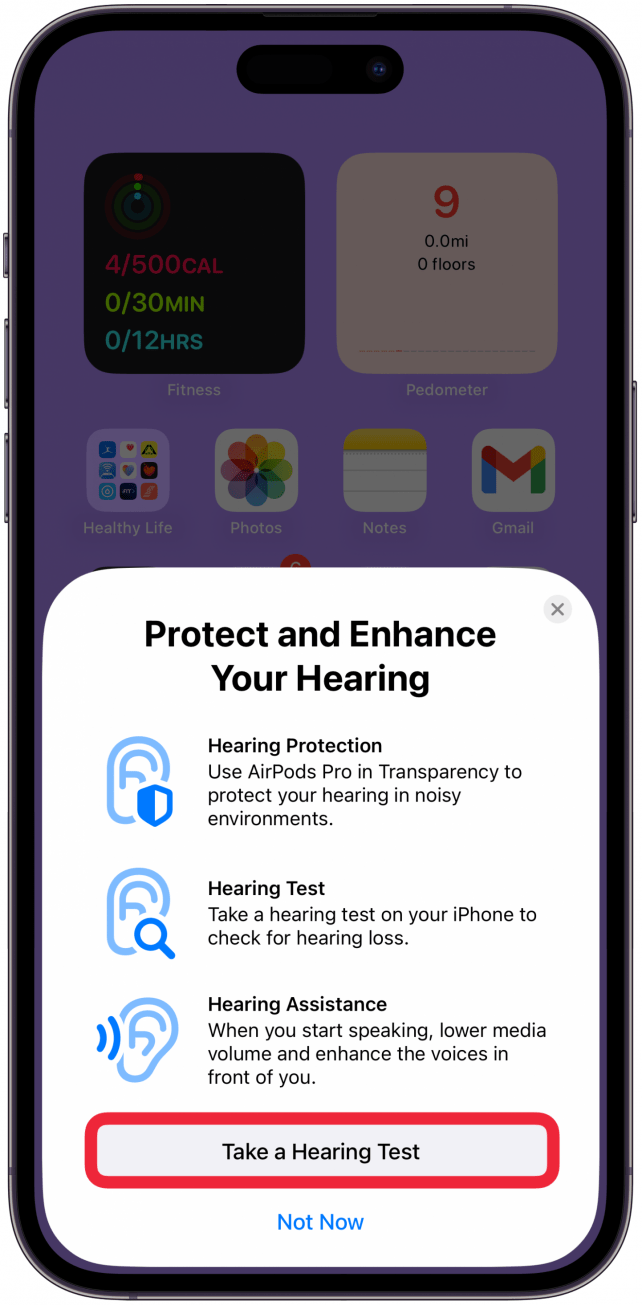
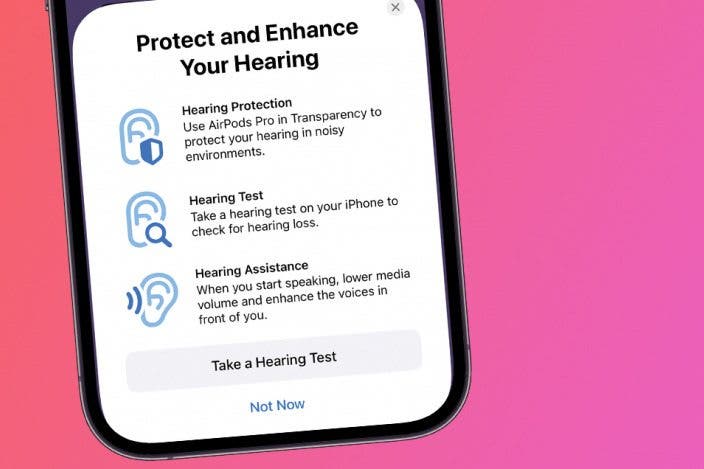
- Next, you'll be prompted to take the hearing test! Tap Take a Hearing Test and see the rest of the steps in the next section, or just follow the on-screen instructions.
Now that you’re connected to your own or someone else's AirPods Pro 2, it’s time to take the hearing test. Be sure to check out our free Tip of the Day for more great iPhone location services tutorials!
2. Take the on-device hearing test!
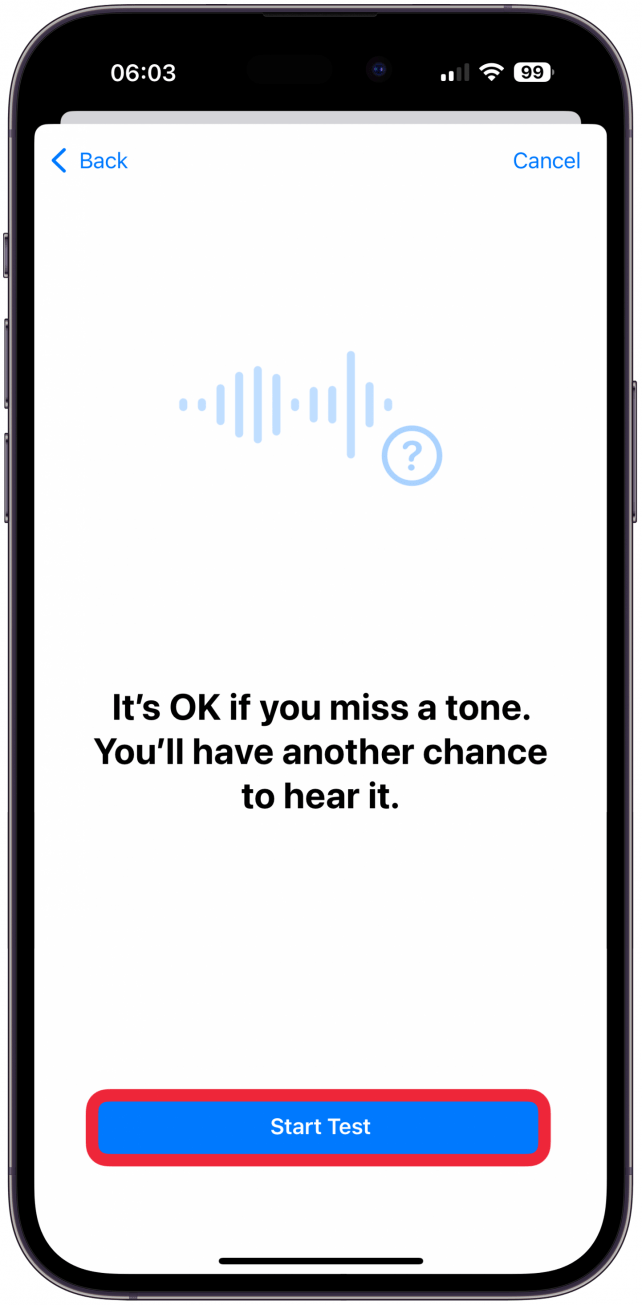
Your iPhone will walk you through the entire hearing test, including letting you know if the environment you are in is silent enough. Make sure to find a quiet spot without distractions so you can stay focused, then start the test. You may be prompted to take the test once you connect to your AirPods, but you can also access it manually.
- Go Settings.
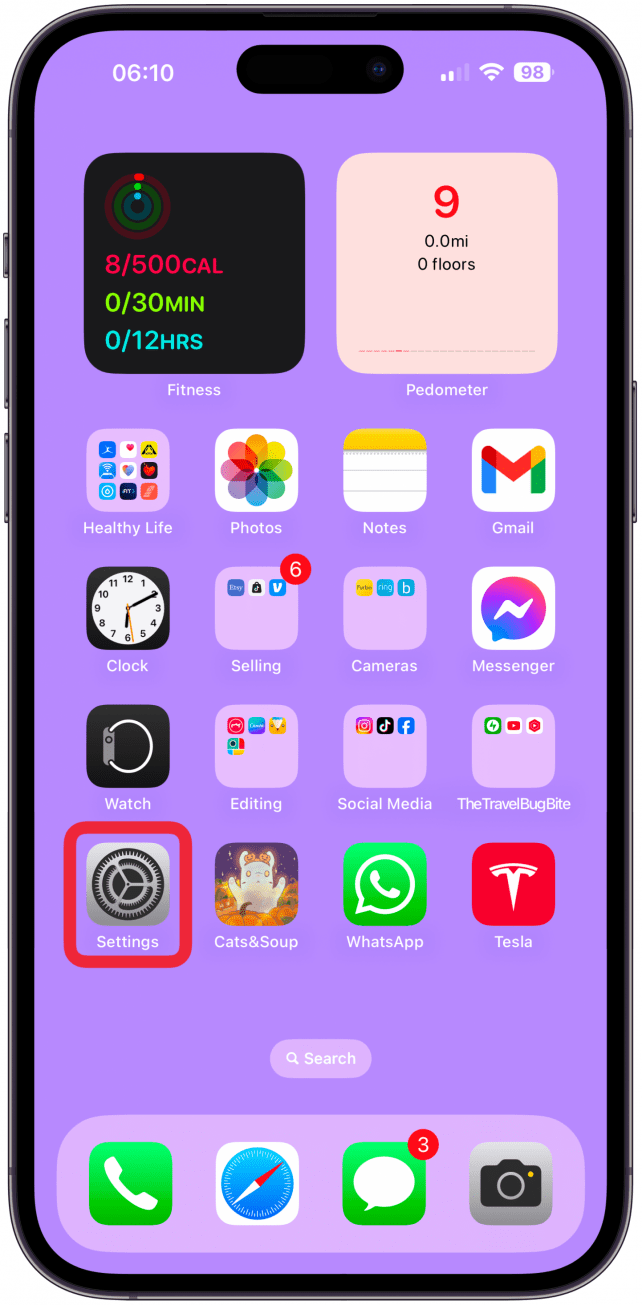
- Tap on the name of your AirPods; when connected to your iPhone, they will show up under your name at the top of your iPhone Settings.
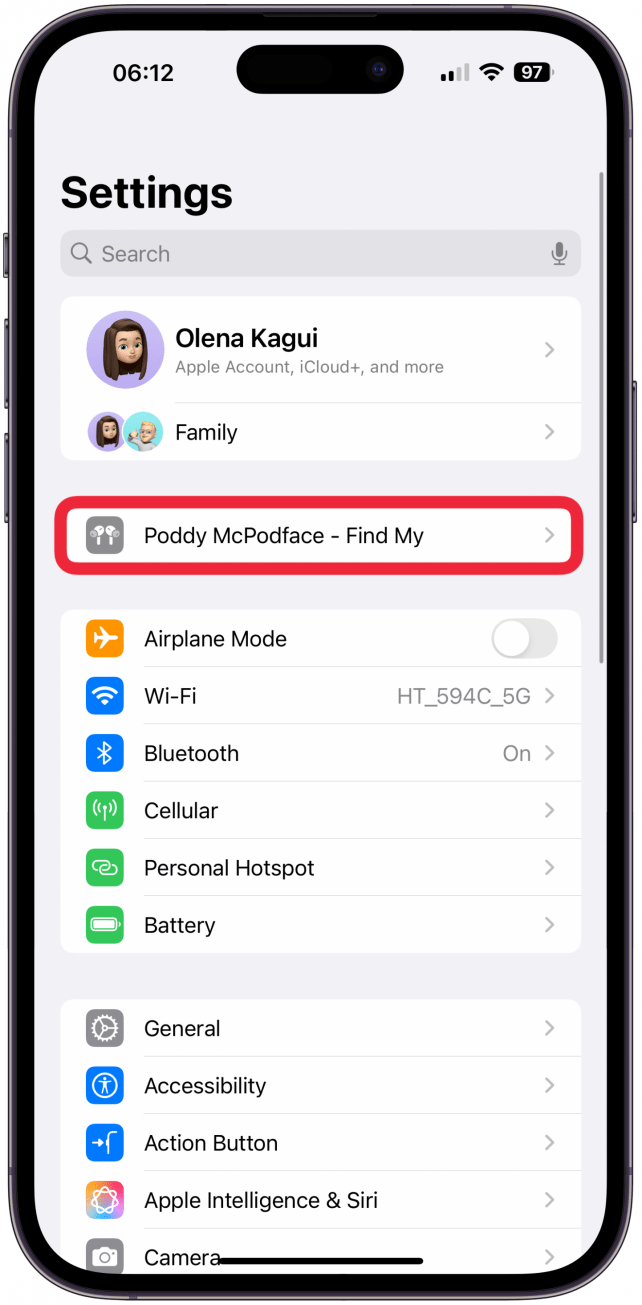
- Tap Take a Hearing Test.
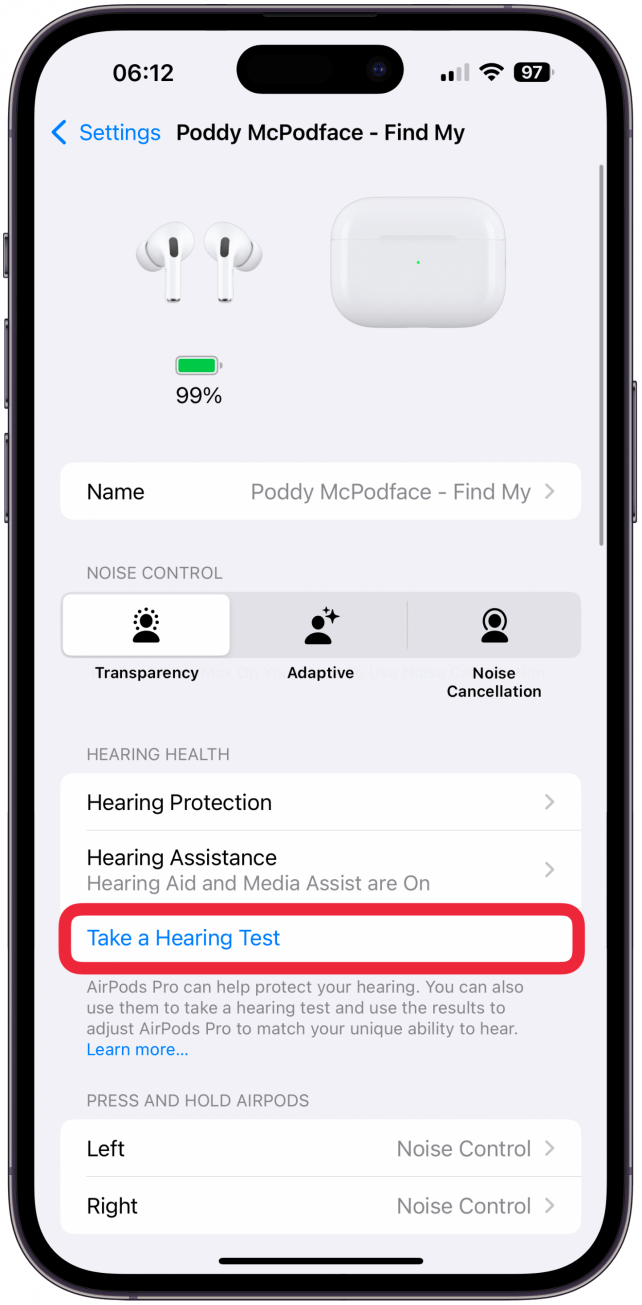
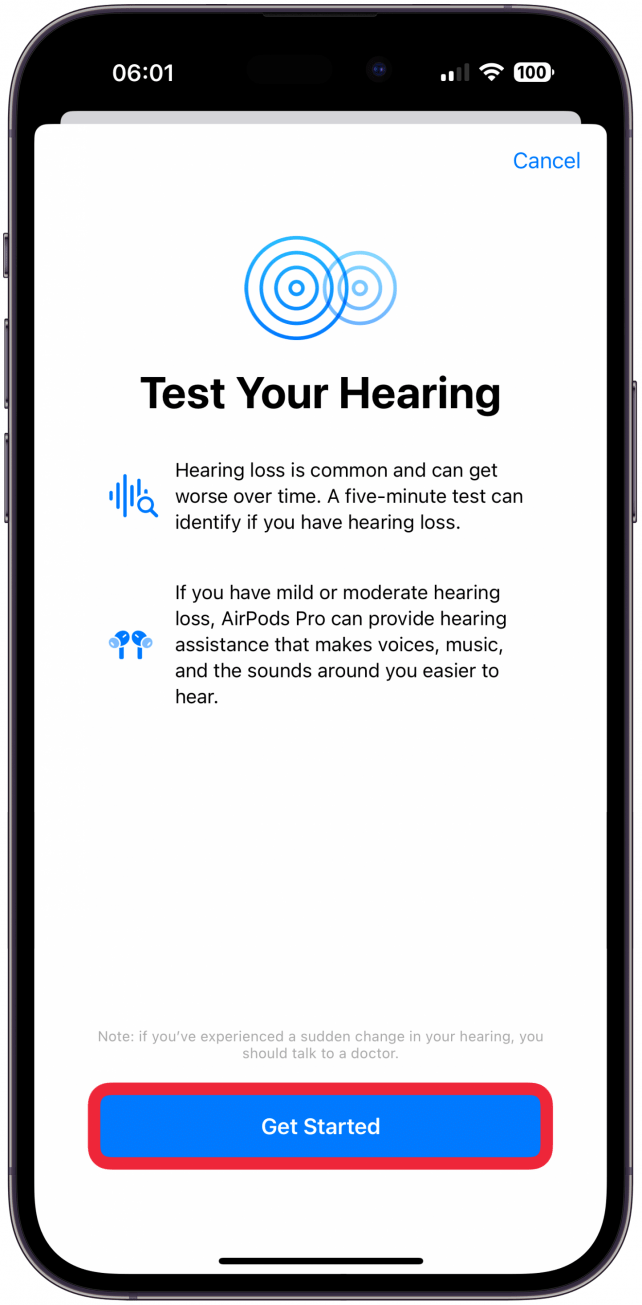
- You will see some information about this particular hearing test and what your AirPods can do for you. Once you are ready, tap Get Started.
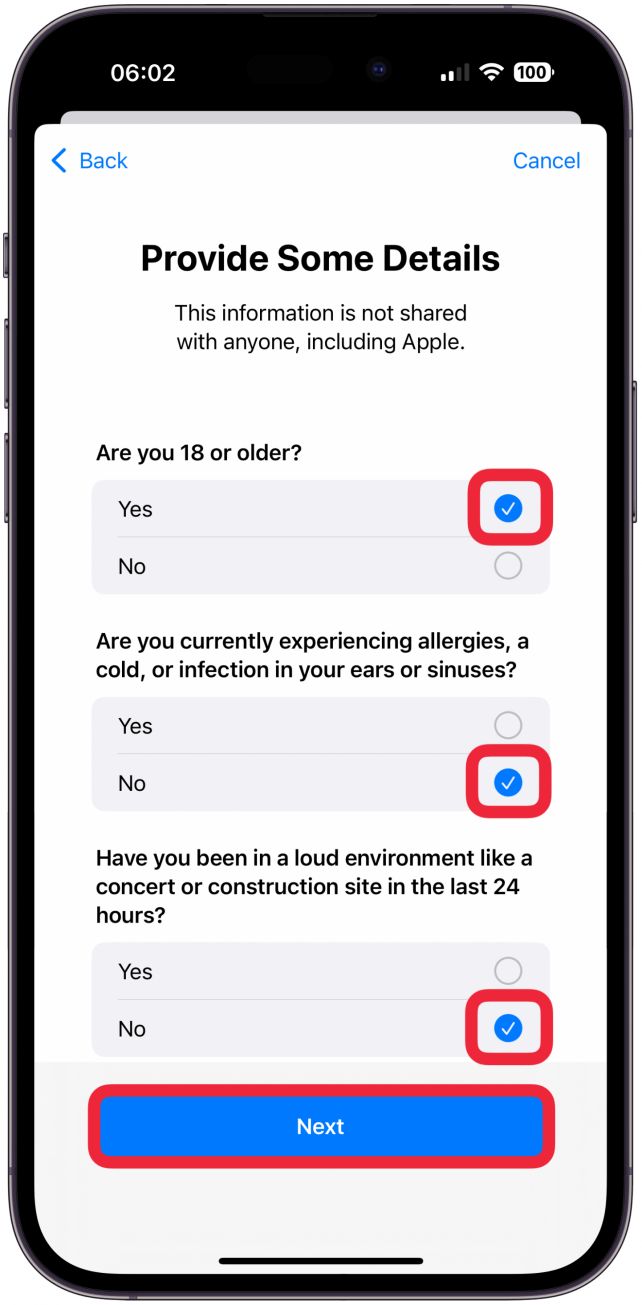
- Answer the three questions by tapping the correct answer. Make sure the answer is marked with a blue check mark. Once you are done, tap Next.
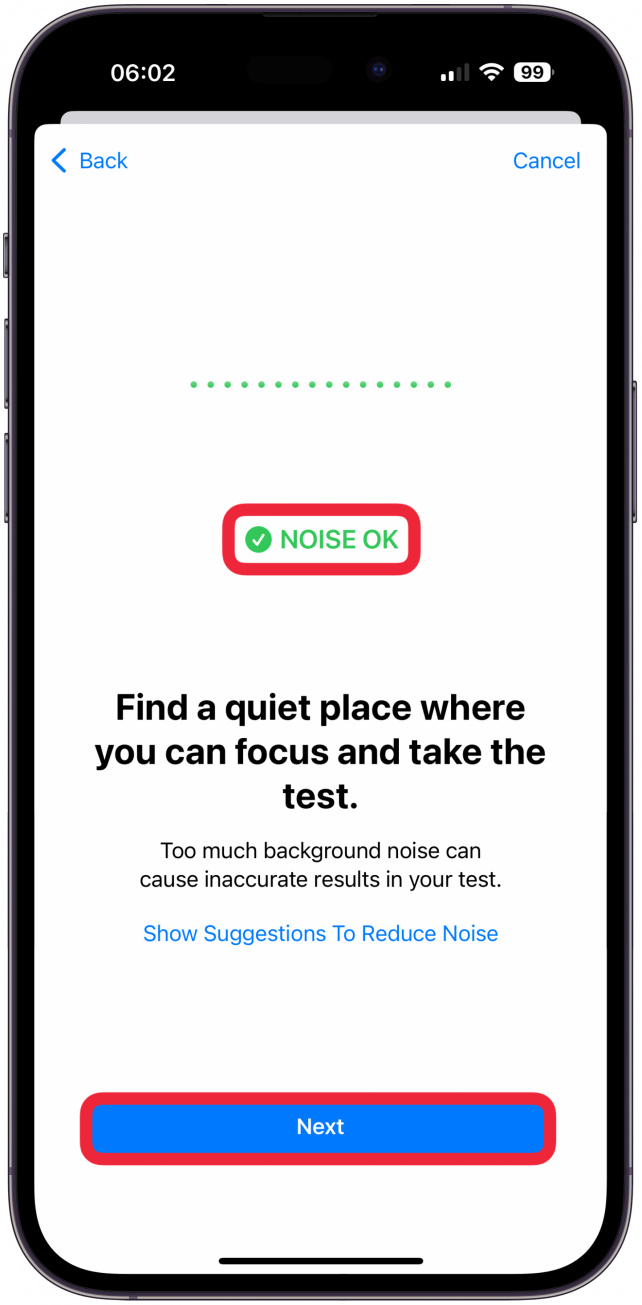
- Your device will tell you if you are in a quiet enough place. If you are not, try going somewhere else. Once you see NOISE OK, tap Next.
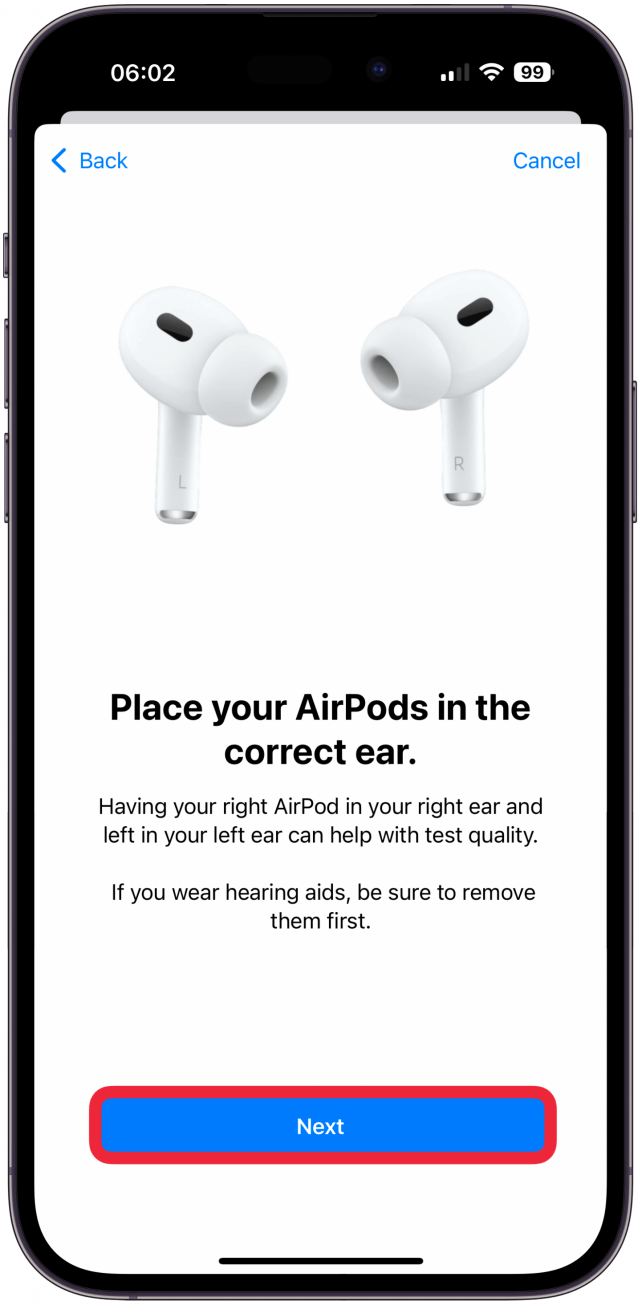
- Place your AirPods in your ears if you haven’t already. Tap Next.
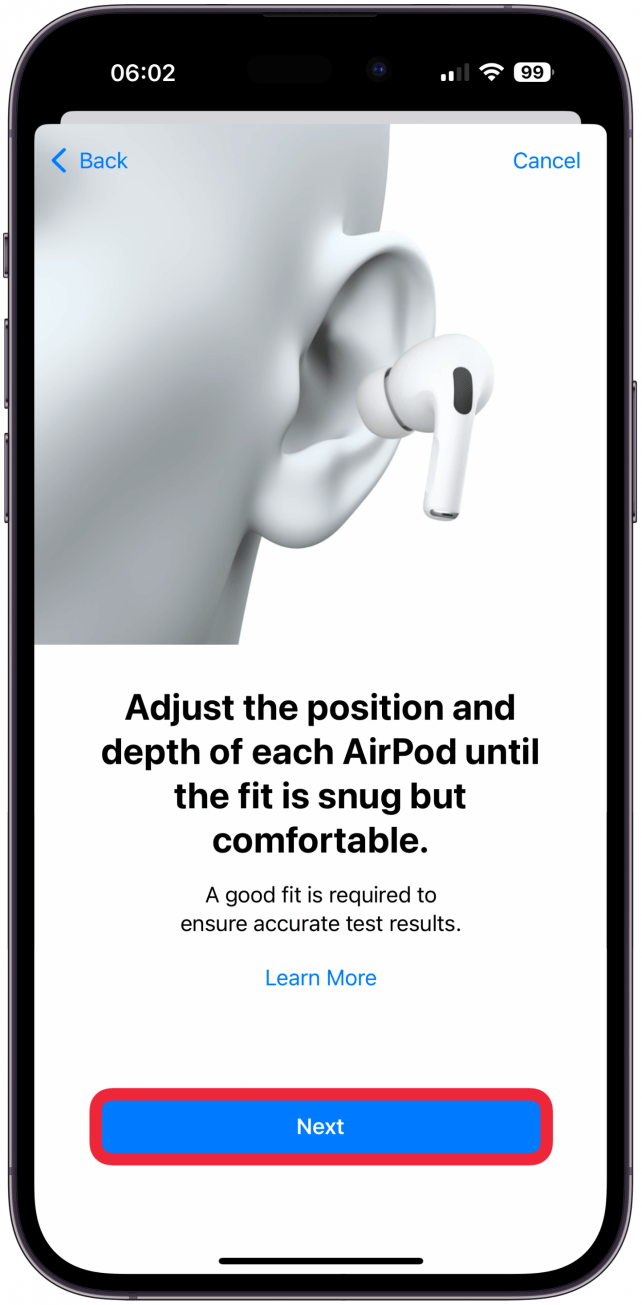
- Adjust the AirPods as instructed on your screen, you can tap Learn More if you need assistance. Once they are snug but comfortable, tap Next.
- Now, your AirPods will let you know if the fit is right. Tap Start the Check.
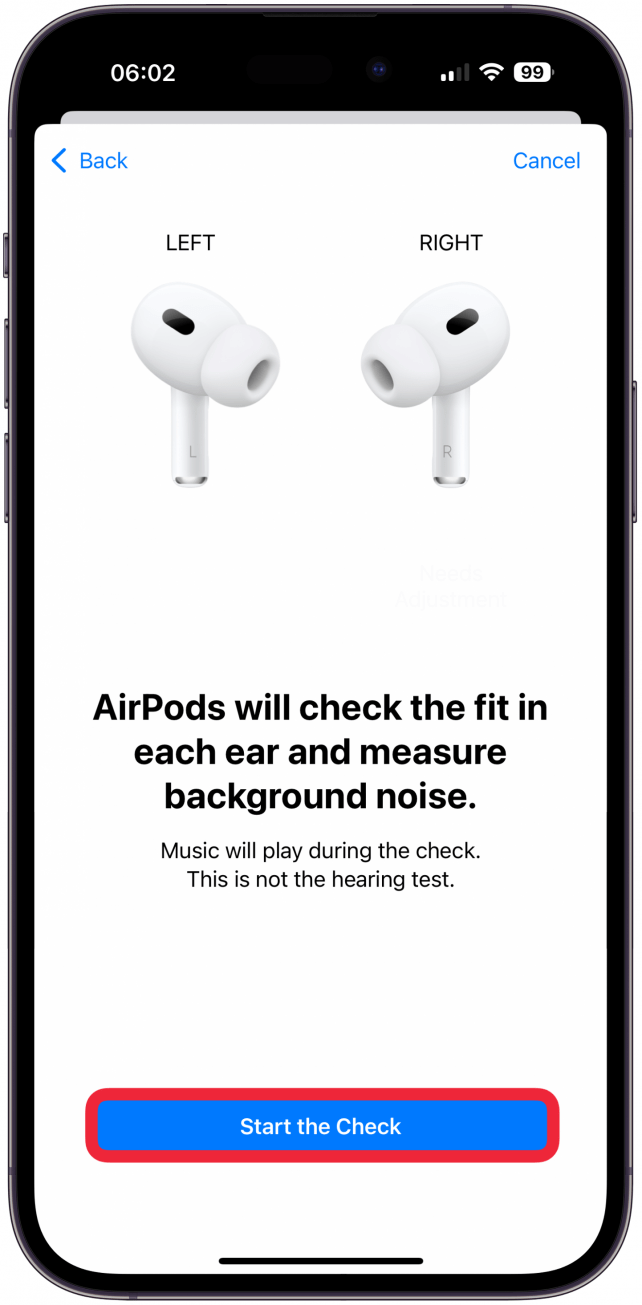
- It will take a few seconds to complete the check, if the fit is good, tap Next. If not, you may need to readjust your AirPods and maybe even try different tips.
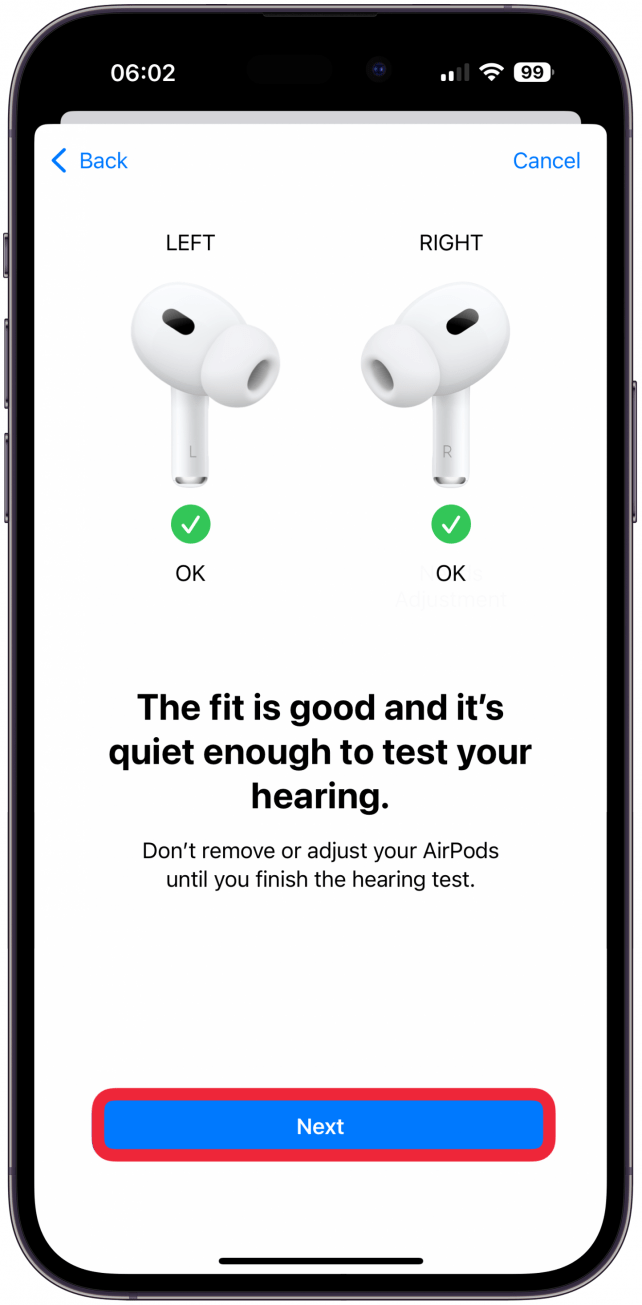
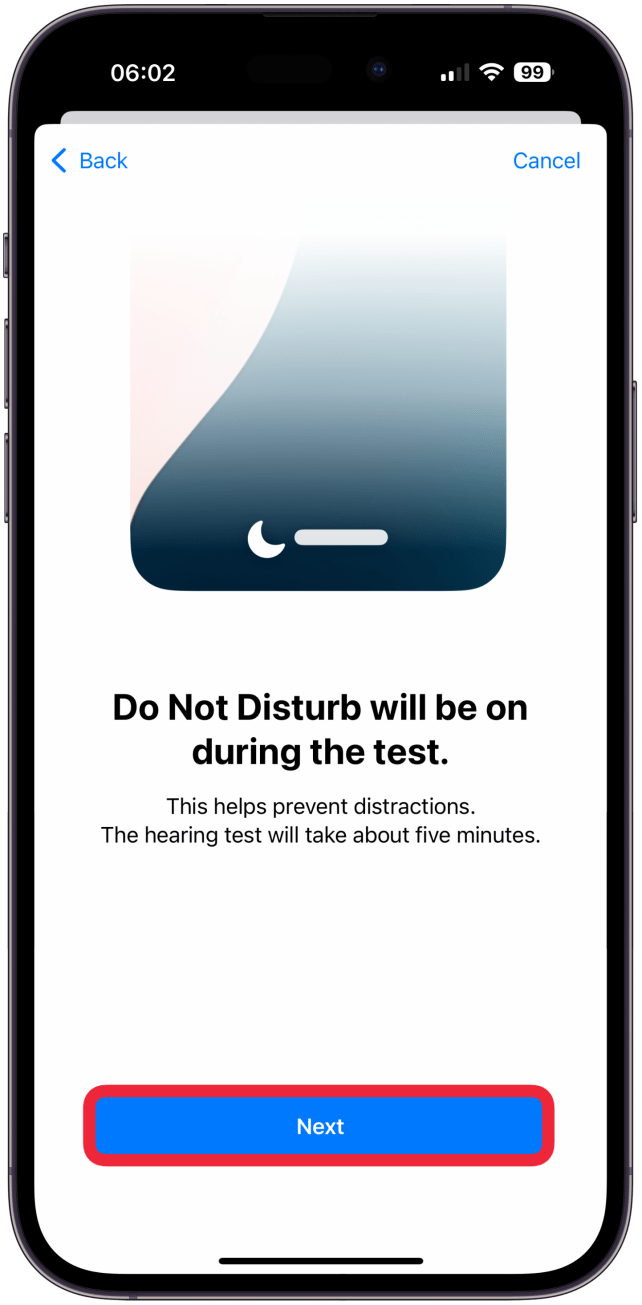
- Your iPhone will automatically turn on Do Not Disturb during the test. Tap Next to acknowledge this.
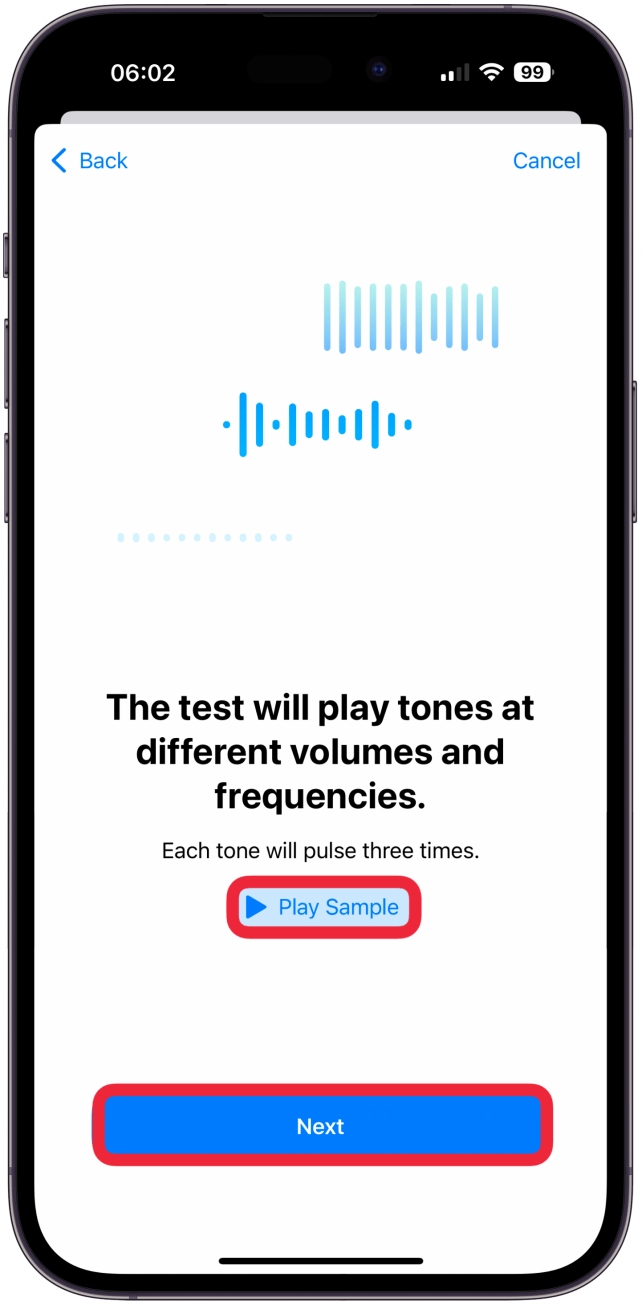
- Before you start the test, I recommend you tap Play Sample and hear the tones so you know what to expect. Each tone pulses three times; you are not expected to tap three times per played tone. Tap Next.
- You will be given instructions on tapping correctly, tap Next.
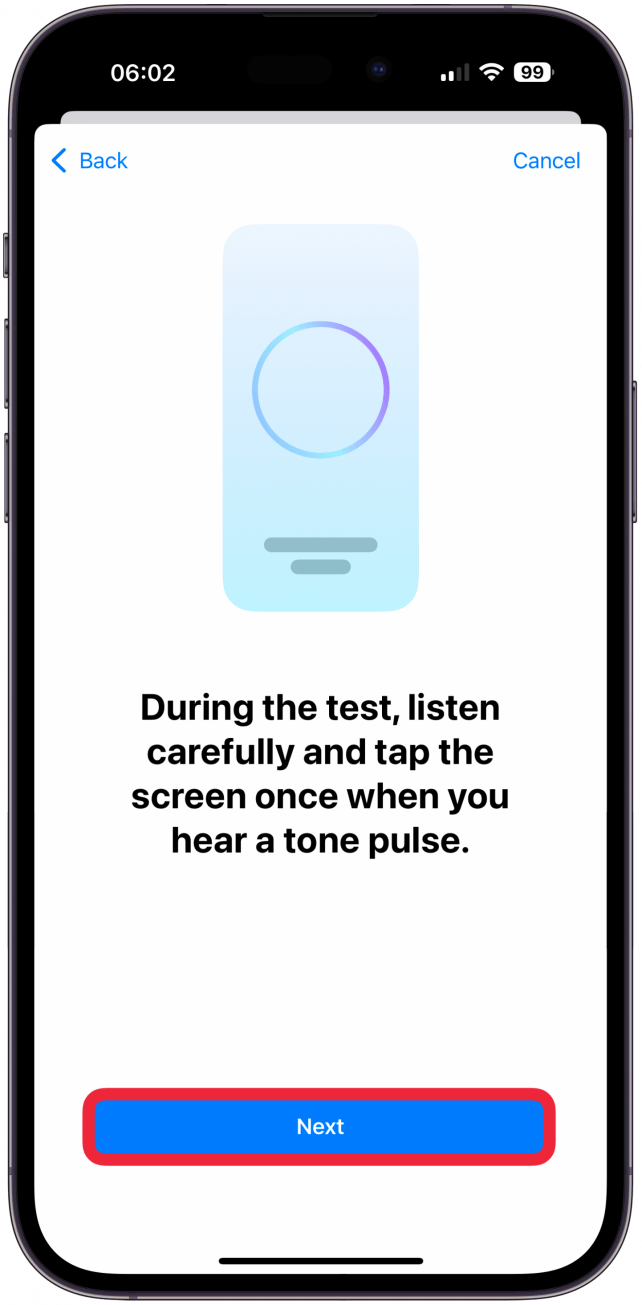
- Finally, tap Start Test. Your left ear will be tested first, and then your right.

- Once the test is complete, tap Show Results.
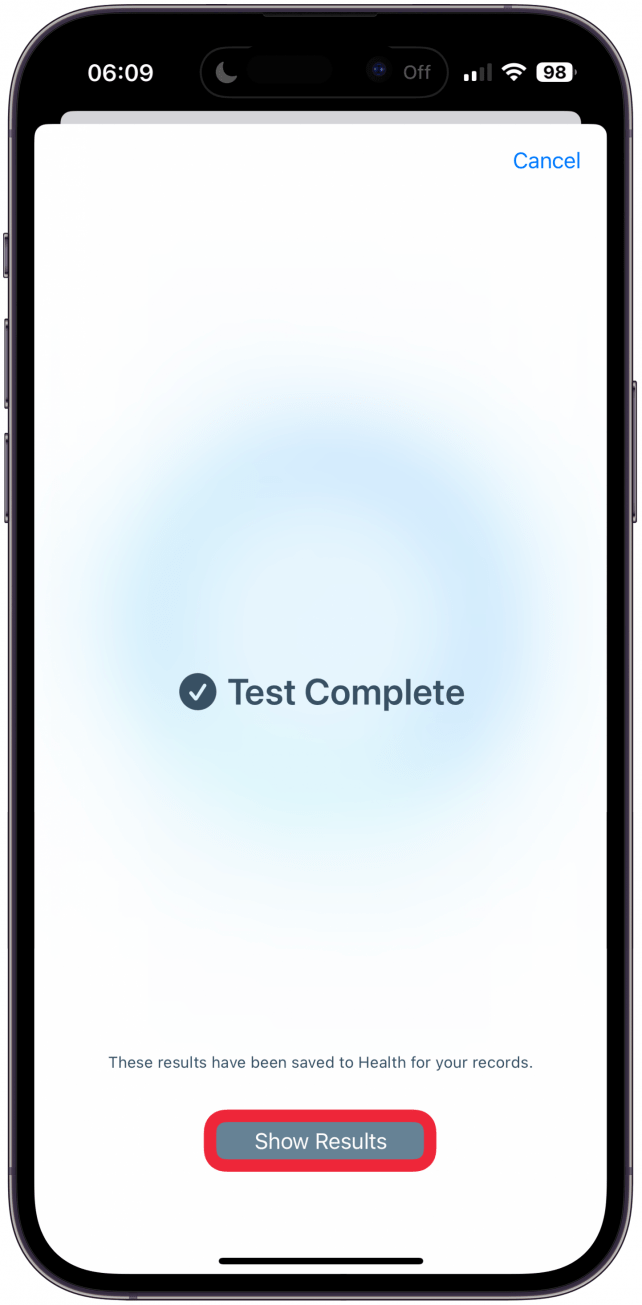
The results of the test will be saved in your Health app, so if you connect a different pair of AirPods that have the Hearing Aid feature, they can take the results of your last hearing test and apply them to the AirPods. According to Audibel, adults between 18 and 40 should only take a hearing test at least once every three years, unless you think you might be experiencing hearing loss.
3. Check your hearing test results.
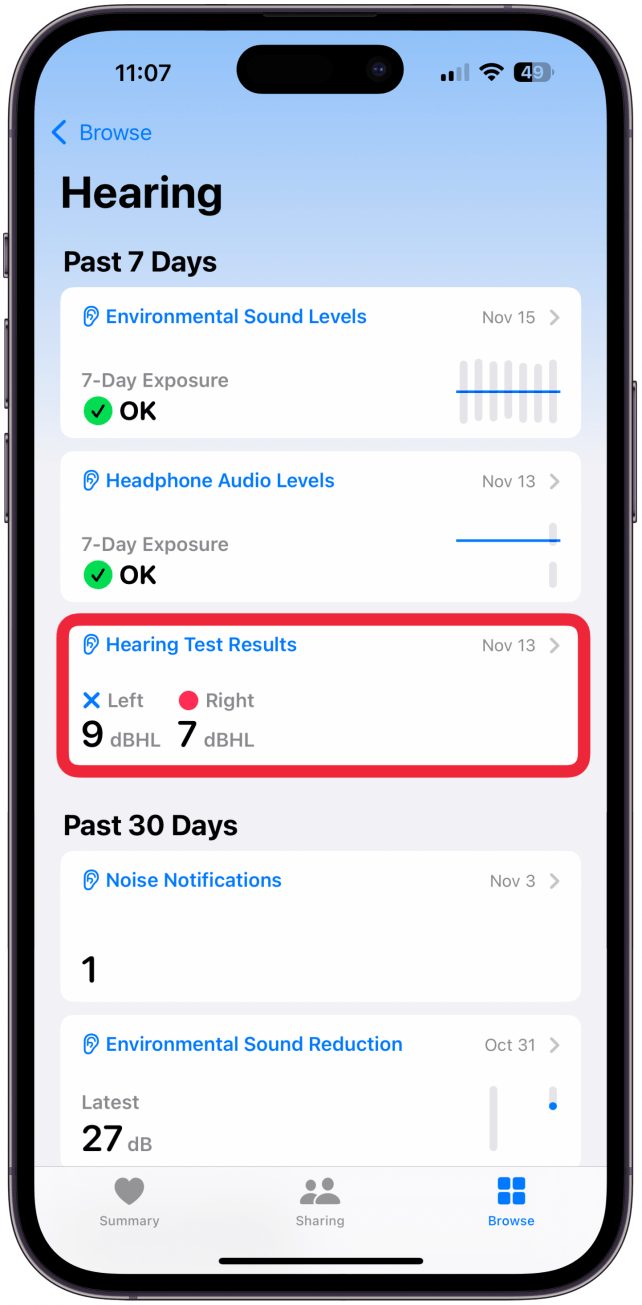
Your results from the hearing test are available right after you take it. But you can always access it at a later time as well. To access your AirPods hearing test results:
- Open the Health app.
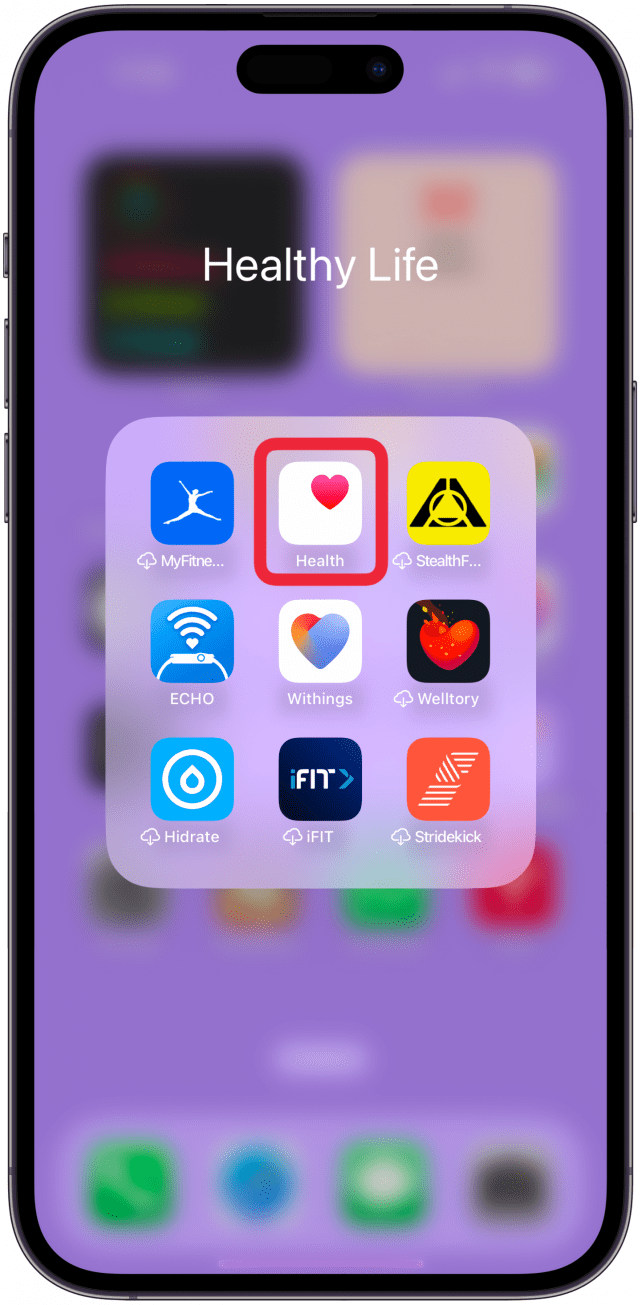
- Navigate to the Browse tab if you’re not already there and tap on Hearing.
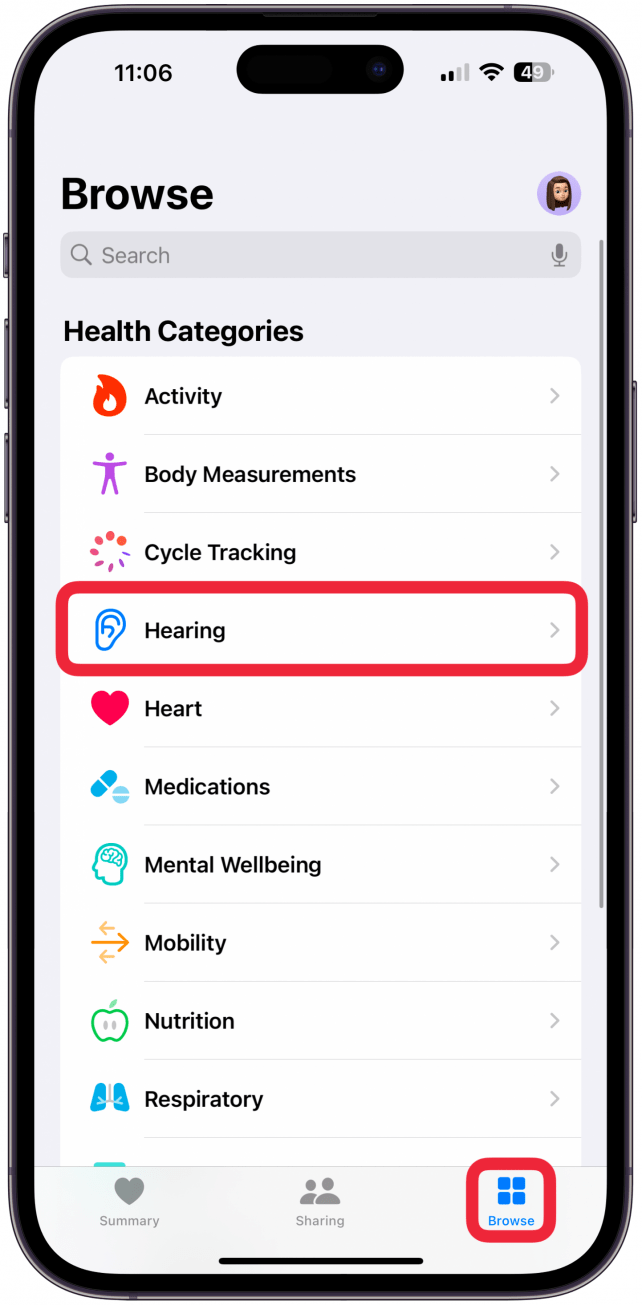
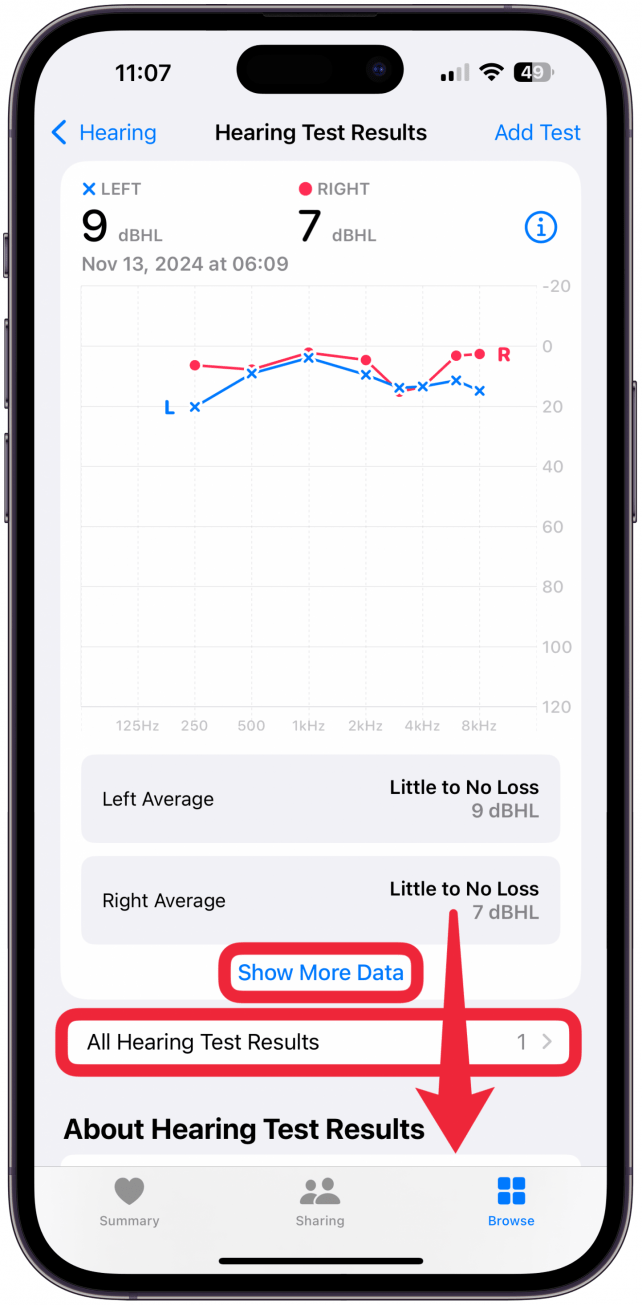
- You will see the results on the page. Tap on Hearing Test Results to get more information.

- Here, you can see more data, look at previous hearing test results if you have some, and you can scroll down to learn more about hearing loss in general.
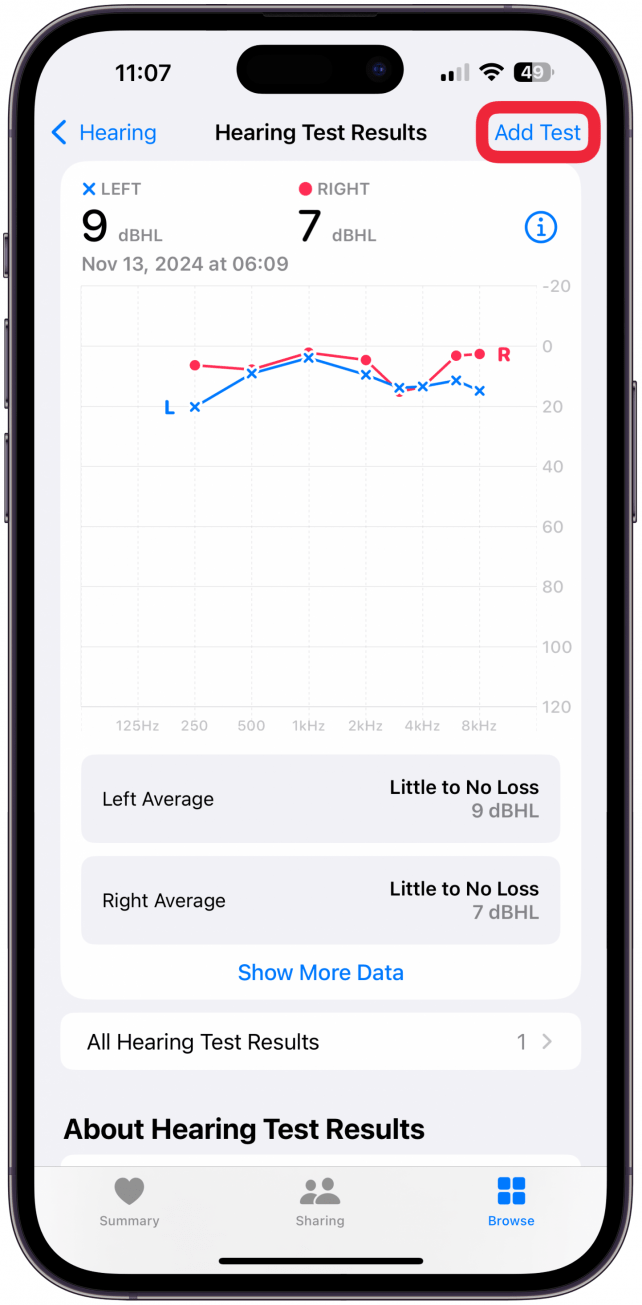
- If you wish to take another test, tap Add Test.
4. Adjust your AirPods settings for better hearing.
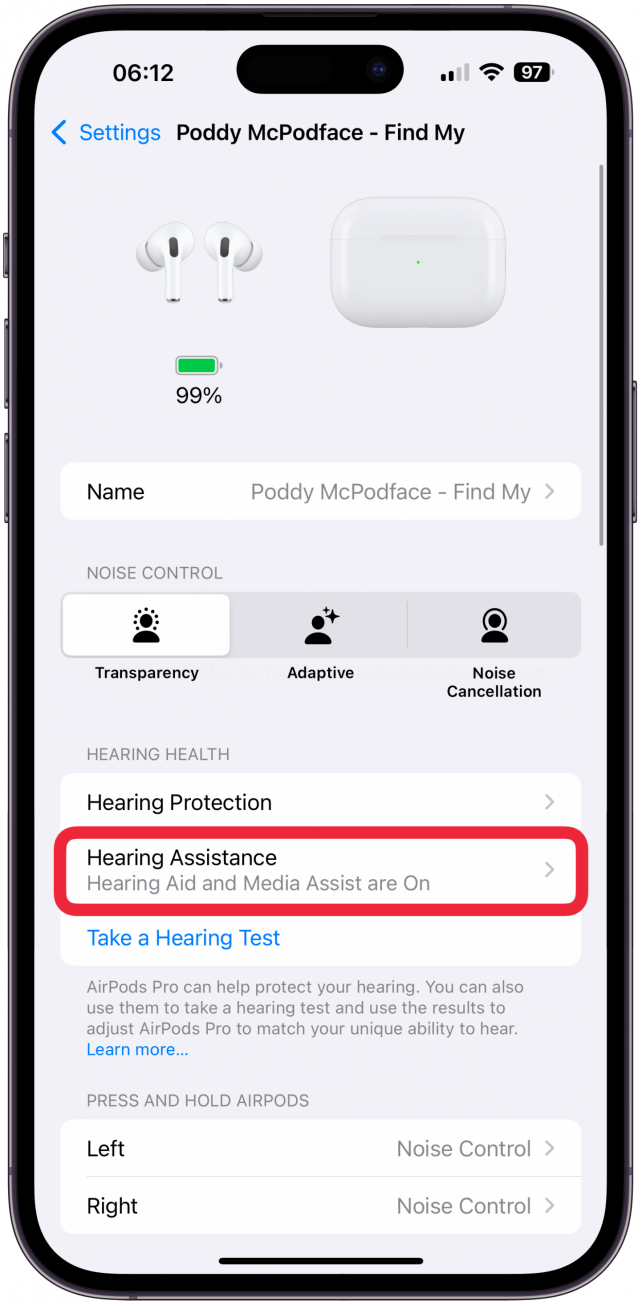
When you originally take the test, you will see if you need to make changes to your AirPods settings to hear better. If changes are recommended, they will show up as suggestions. But you can also manually alter your AirPods by tinkering with the settings:
- Open your connected AirPods in the Settings as you did to take the test initially. First, make sure that Hearing Assistance is on. Tap on it to see more details.

- Make sure Hearing Aid is toggled on, and tap Adjustments.
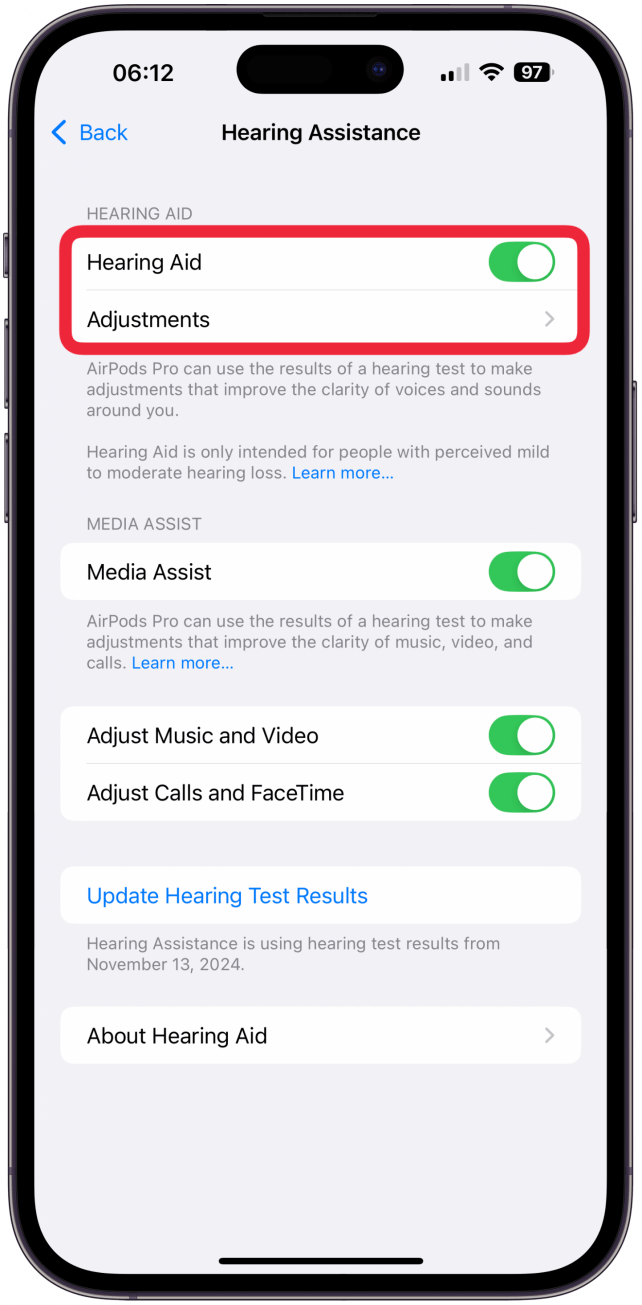
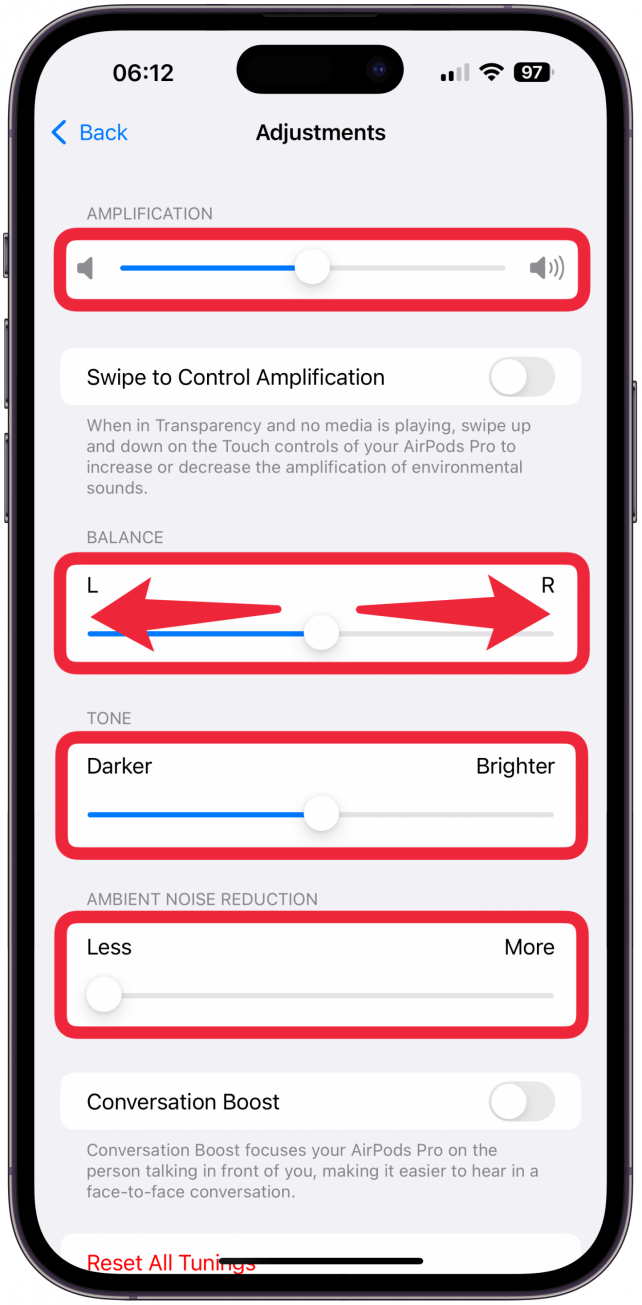
- Here, you can alter the amplification, balance, tone, and ambient noise reduction, and you can toggle on Conversation Boost to help you hear in-person conversations.
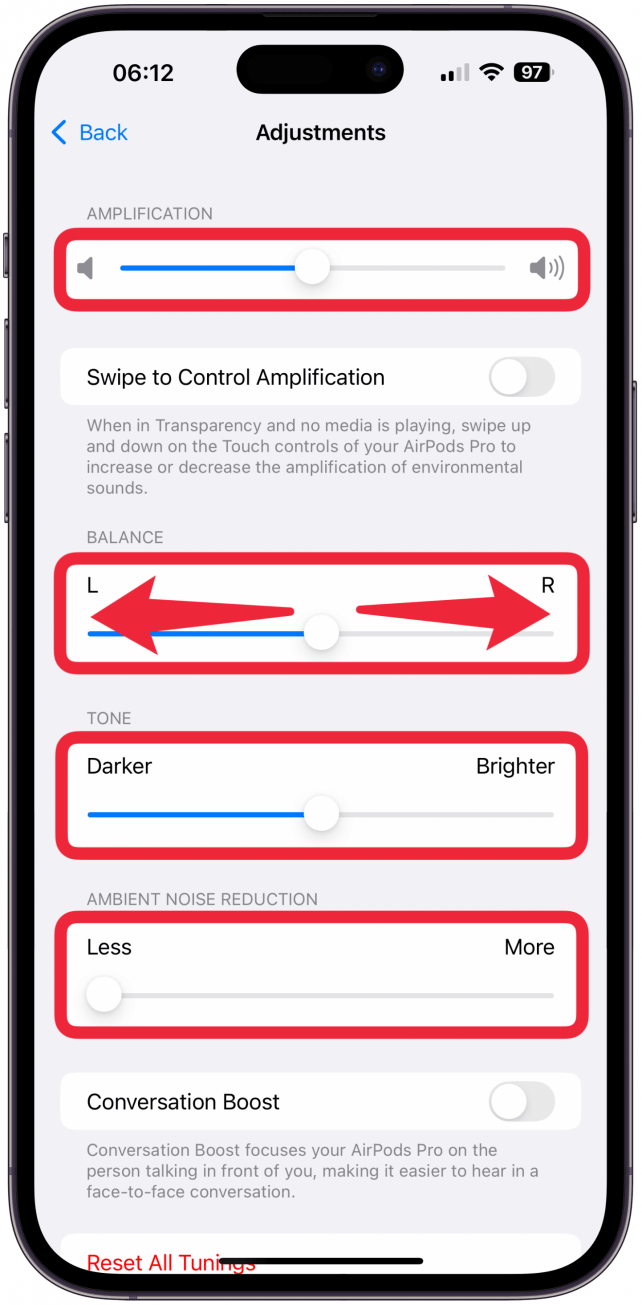
- You can also toggle on Swipe to Control Amplification so that you can swipe up and down on the Touch controls of your AirPods to control the level of amplification.
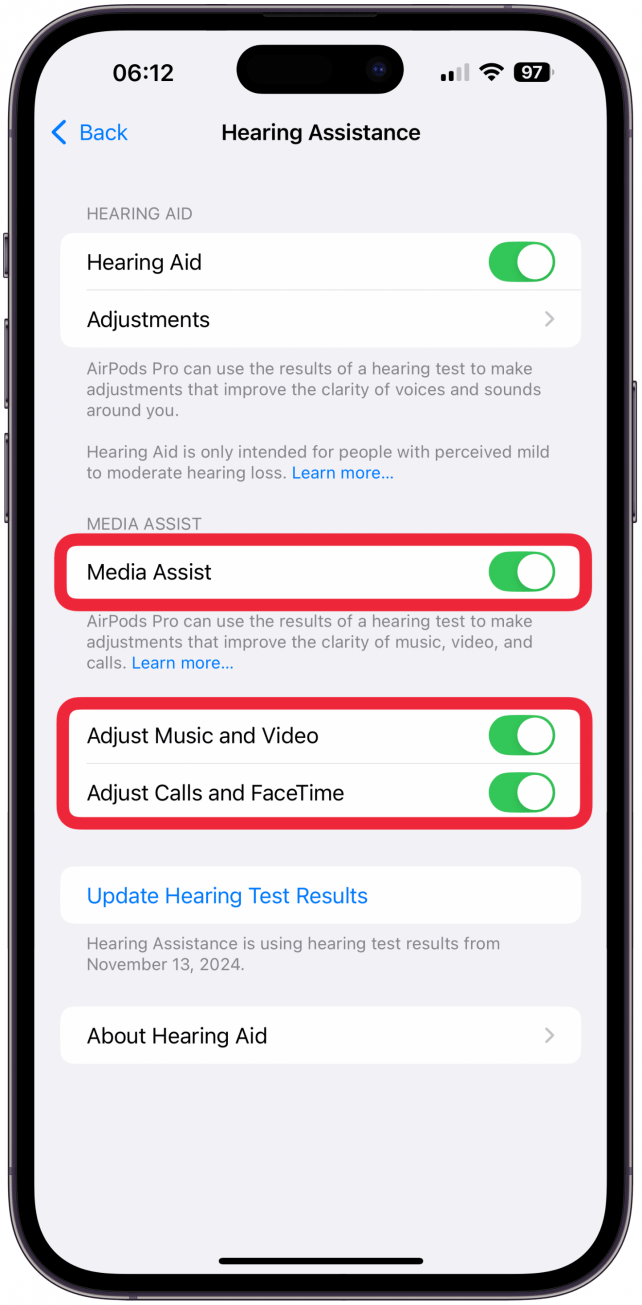
- Go back to your Hearing Assistance Settings and consider toggling on Media Assist, Adjust Music and Video, and Adjust Calls and FaceTime to let your AirPods automatically make decisions for good hearing health. This may help prevent future hearing loss, although it is best to speak to your doctor if you have any concerns.
Now you know how to use your AirPods as hearing aids! While this feature can only help those with mild to moderate hearing loss, it is a valuable feature and can help so many AirPods users. Plus, even the newest model of AirPods Pro is cheaper than any hearing aid on the market. Plus, AirPods don’t look like hearing aids, which has a huge appeal to some people with hearing loss. Next, find out how long AirPods last and how to improve their battery life.
FAQ
- What is the Apple hearing aid feature release date? The Apple hearing aids release date for the new AirPods Pro 2 feature was October 28, 2024.
- How to use my earbuds as hearing aids? Many earbuds have adjustable settings that let you tweak how you hear through your earbuds. Not every earbud or even AirPod has a specific hearing aid feature.
- What model are the new AirPods 2024? AirPods 4, AirPods Max, and AirPods Pro 2 are the AirPod models that were released in 2024.

Olena Kagui
Olena Kagui is a Feature Writer at iPhone Life. In the last 10 years, she has been published in dozens of publications internationally and won an excellence award. Since joining iPhone Life in 2020, she has written how-to articles as well as complex guides about Apple products, software, and apps. Olena grew up using Macs and exploring all the latest tech. Her Maui home is the epitome of an Apple ecosystem, full of compatible smart gear to boot. Olena’s favorite device is the Apple Watch Ultra because it can survive all her adventures and travels, and even her furbabies.
 Rhett Intriago
 Olena Kagui
 Susan Misuraca
 Leanne Hays
 Rachel Needell
 Amy Spitzfaden Both