What Is Apple Wallet?


What does Apple Wallet do? Apple Wallet (formerly Passbook) is, as it sounds, a virtual wallet app that keeps your credit and debit cards, rewards cards, boarding passes, movie tickets, and more all in one place. In this guide, we’ll go over how to add cards and passes to Apple Wallet and how to use them.
How to Add Cards to Apple Wallet
If haven't already done it, you’ll need to set up Apple Pay before you begin. Now we’ll go over how to add additional cards to Apple Wallet. Soon, you'll even be able to add your driver's license or state ID to your Apple Wallet! To learn more about how to pay for things and manage your finances on your iPhone, sign up for our Tip of the Day newsletter.
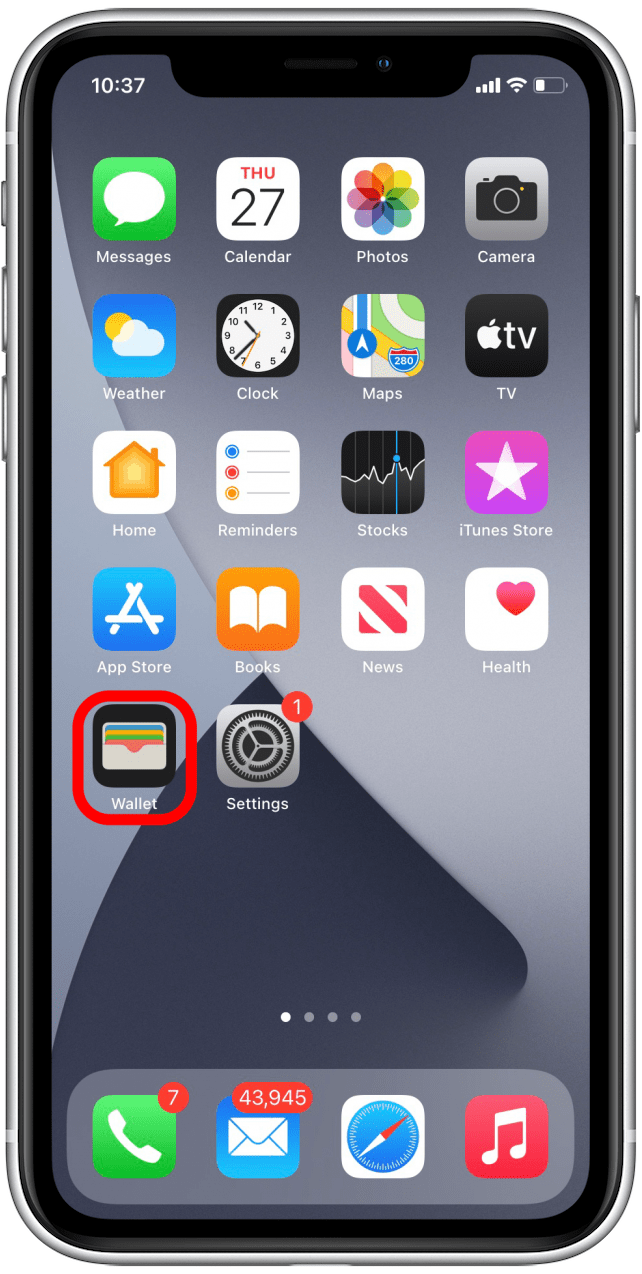
- Open the Wallet app.
- Tap the add icon.

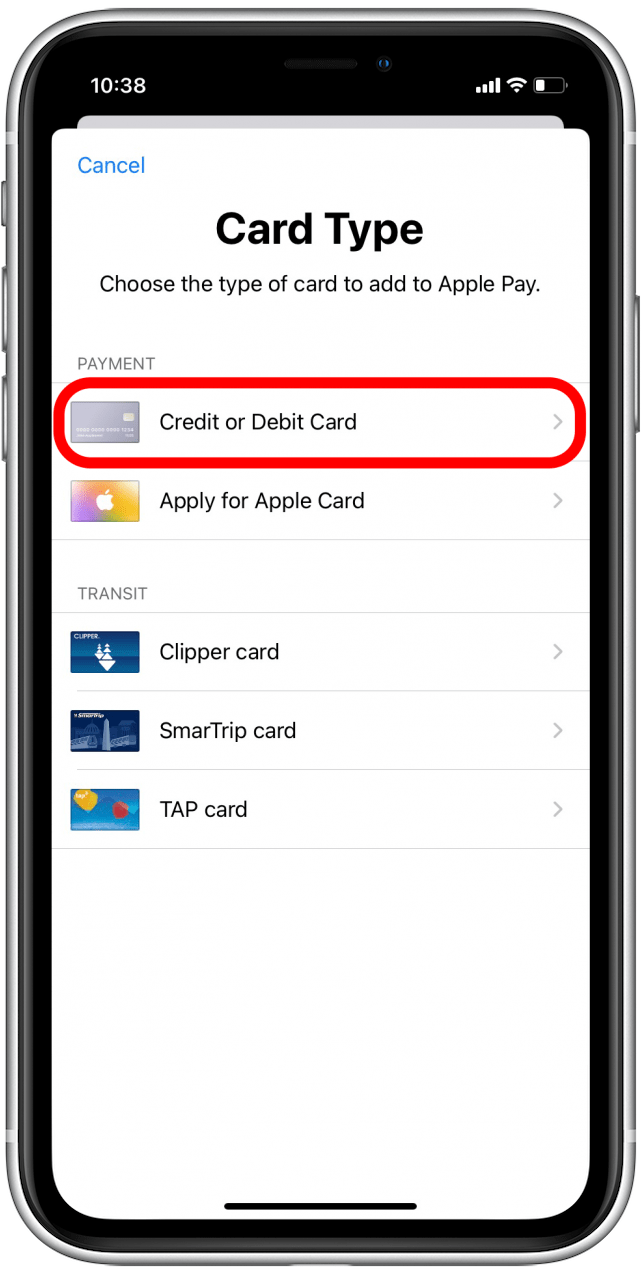
- Select the card type you’d like to add. I’ll be adding a credit card.
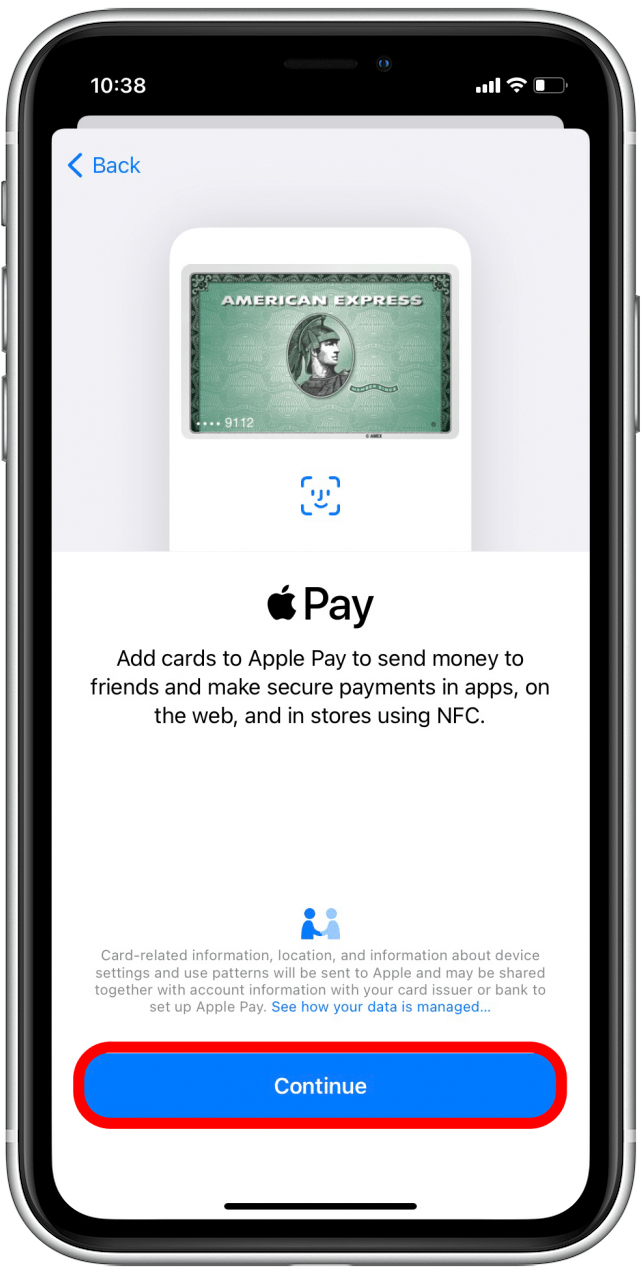
- Tap Continue.
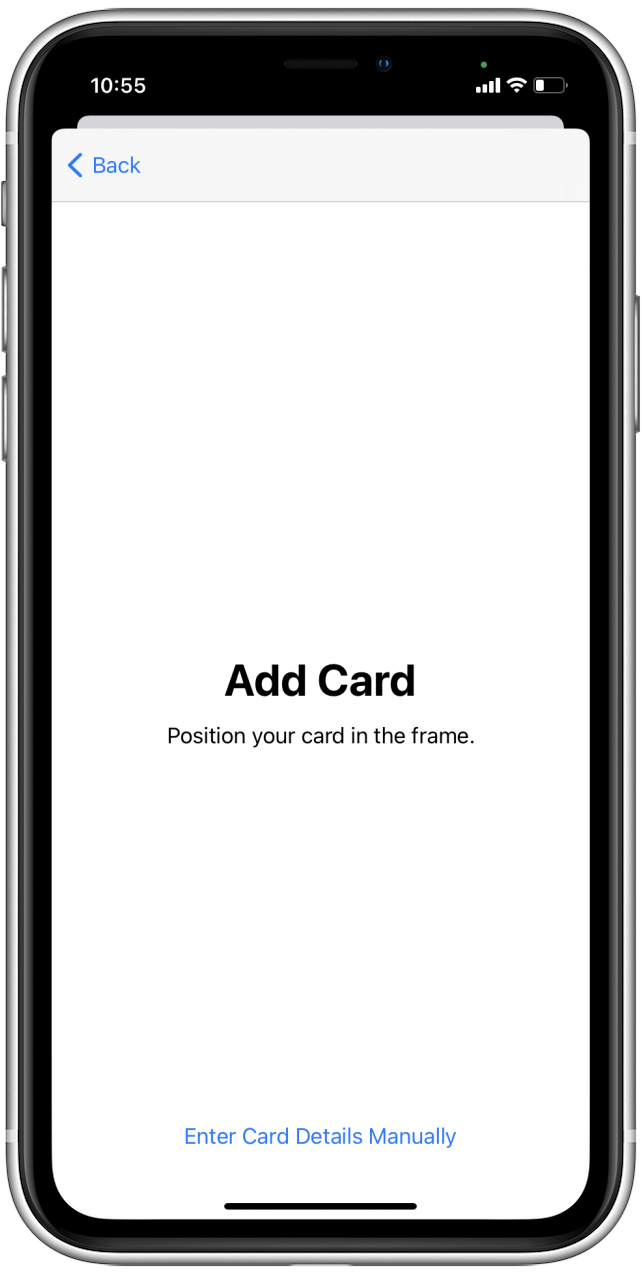
- Either position your card in the frame using your camera or tap Enter Card Details Manually.
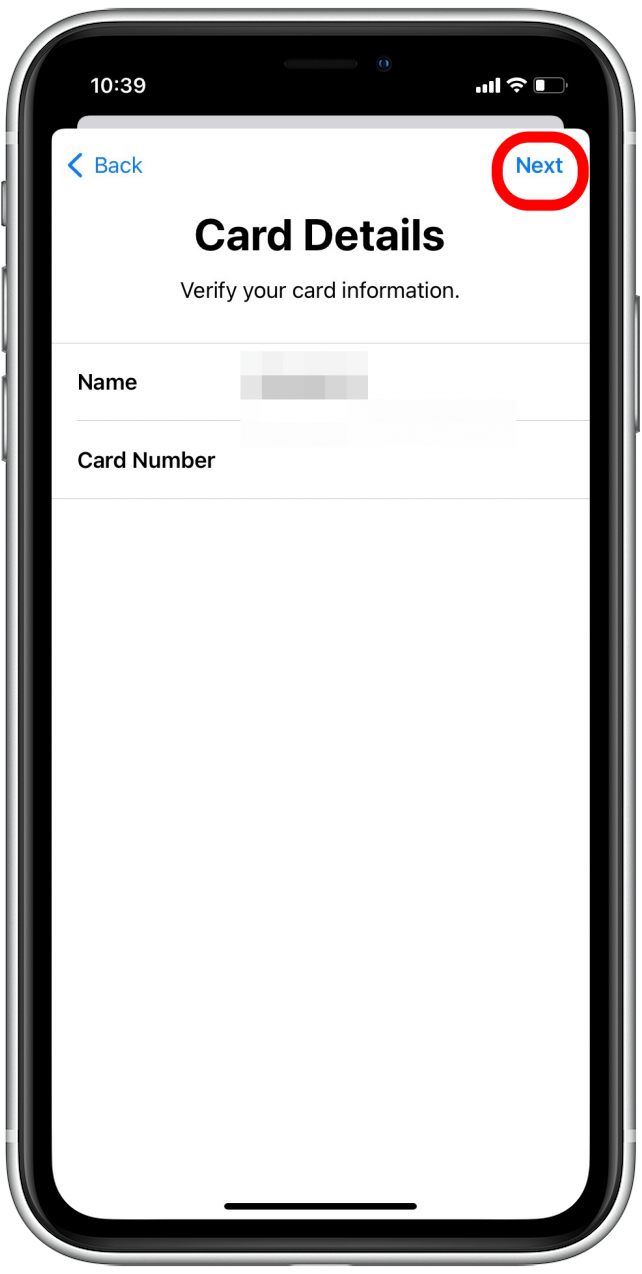
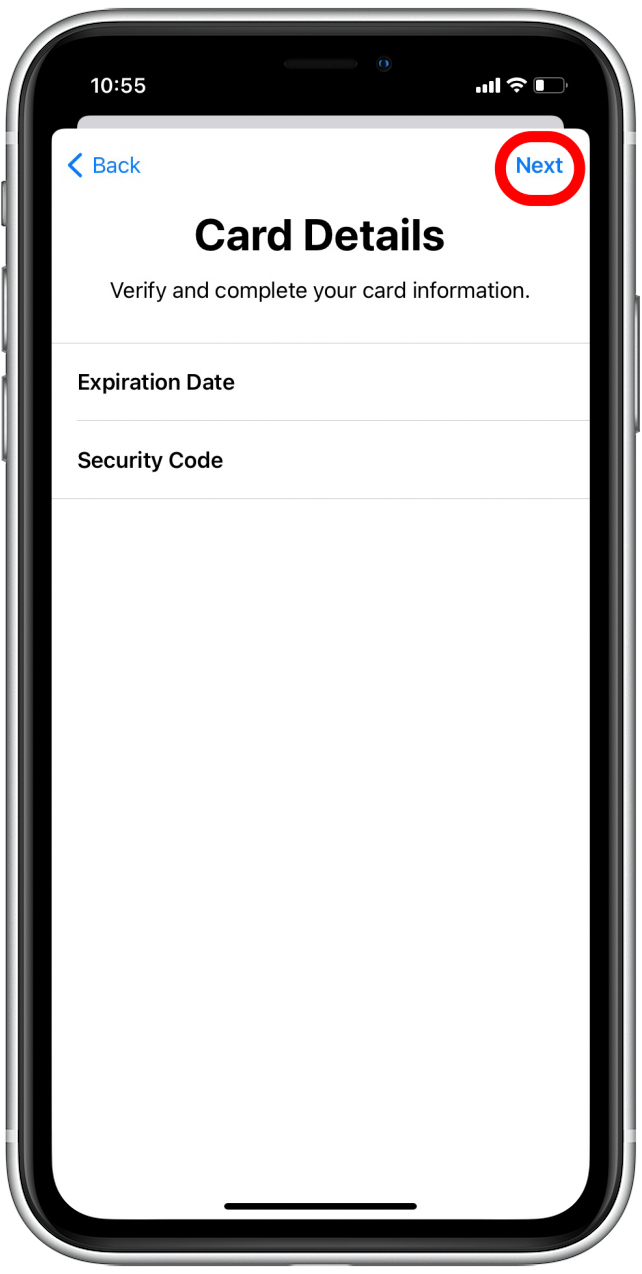
- Verify your card information and tap Next.
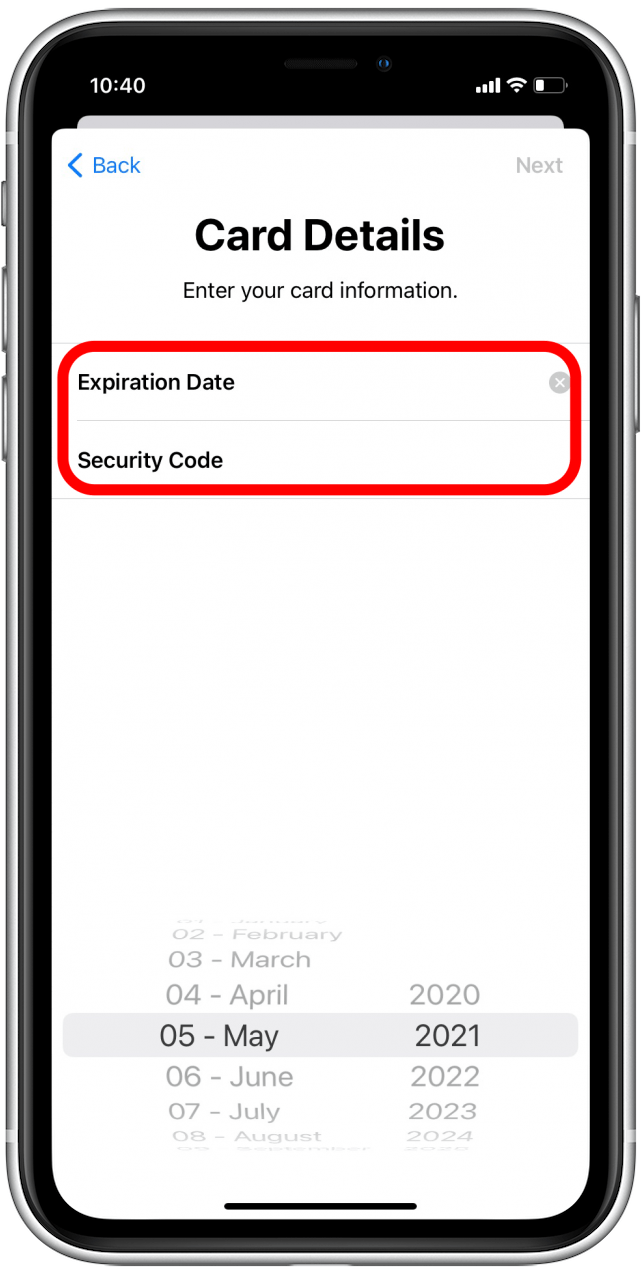
- Enter your card’s expiration date and security code.
- Tap Next.
- Wait for Apple Wallet to communicate with your card issuer.
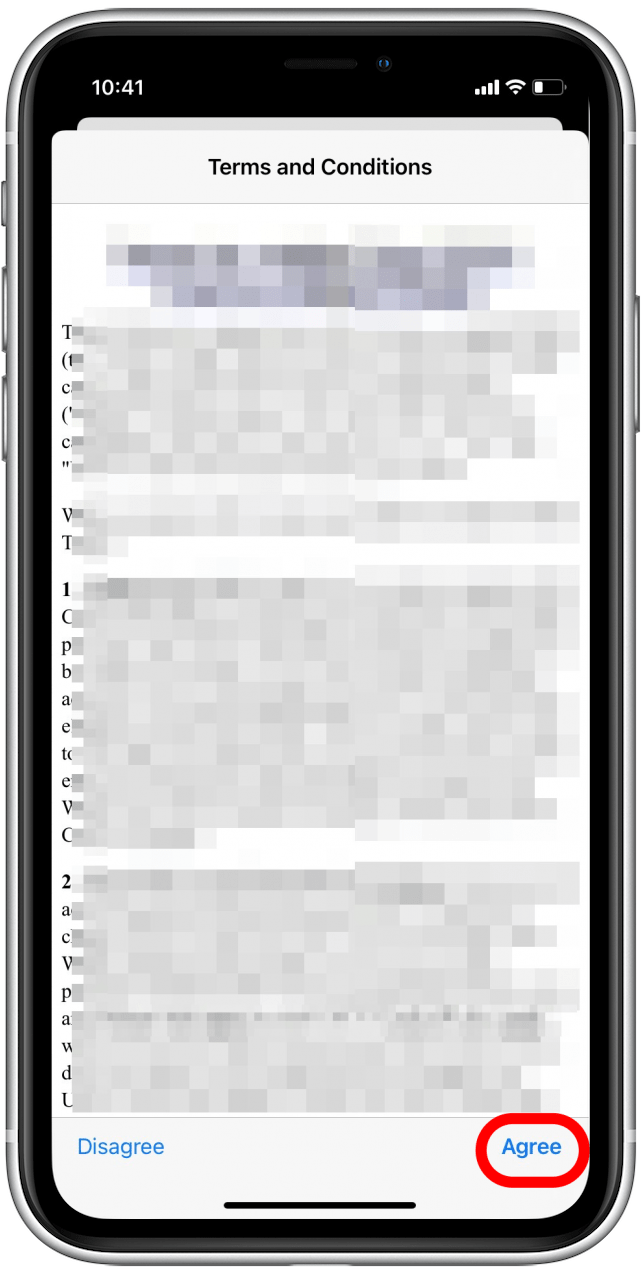
- You may see terms and conditions from your card issuer. Read through these before tapping Agree.
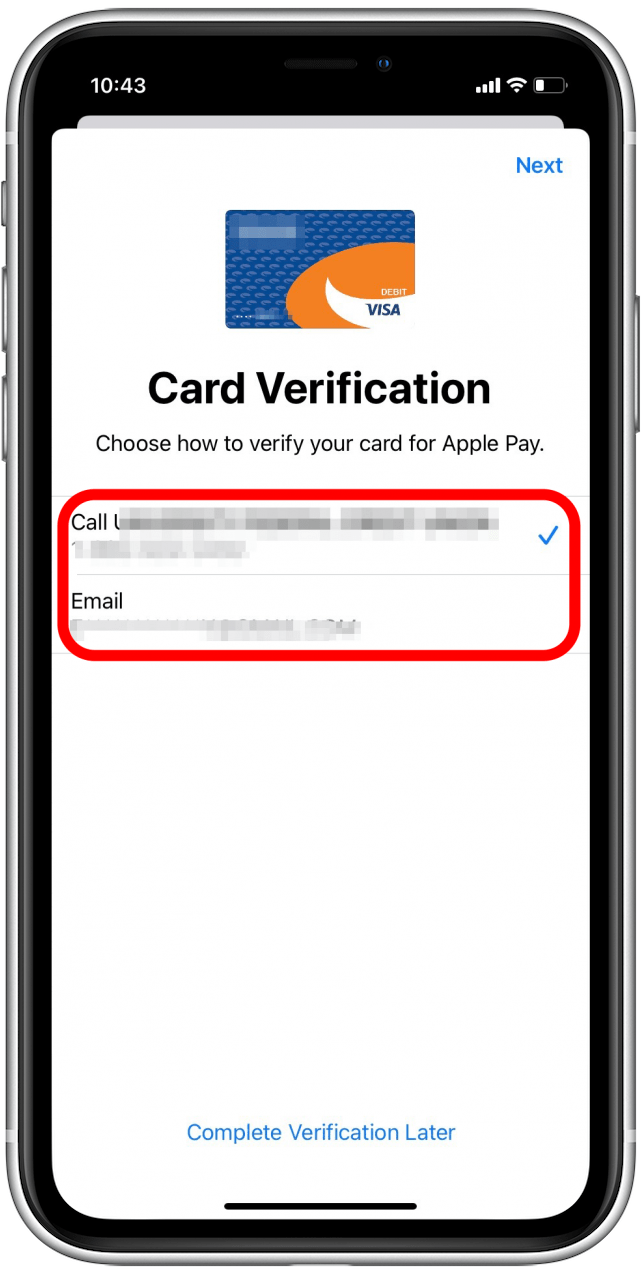
- Choose how to verify your card for Apple Pay: you may either call the card issuer or receive an email to verify.
- Tap Next.
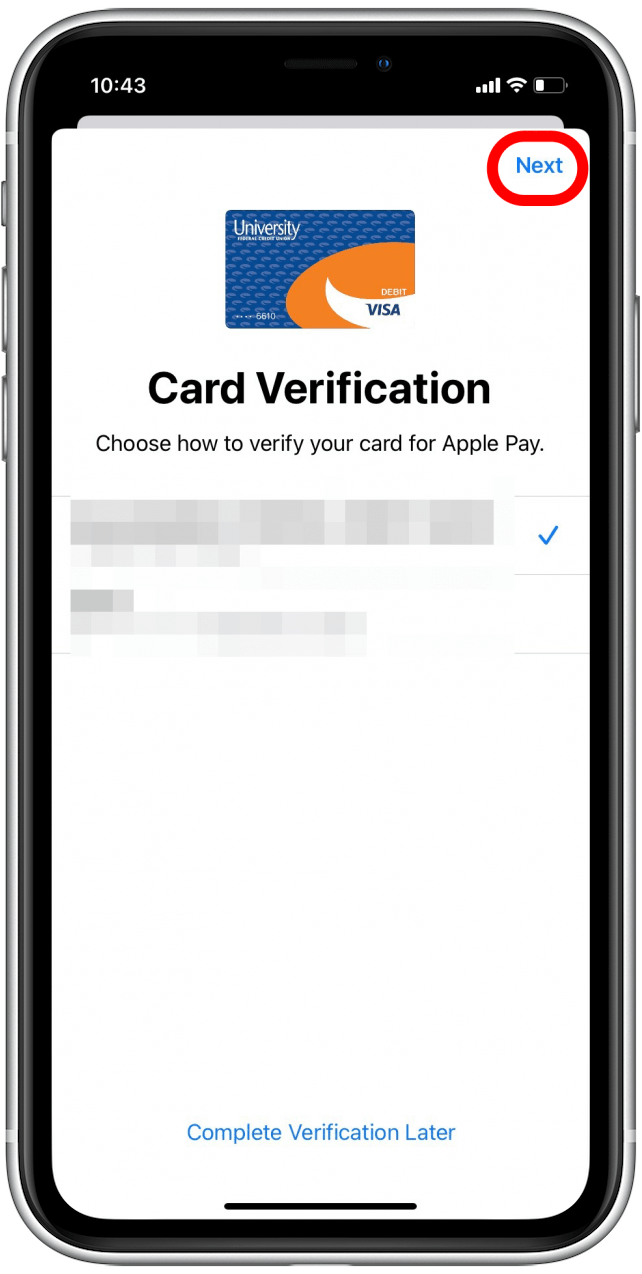
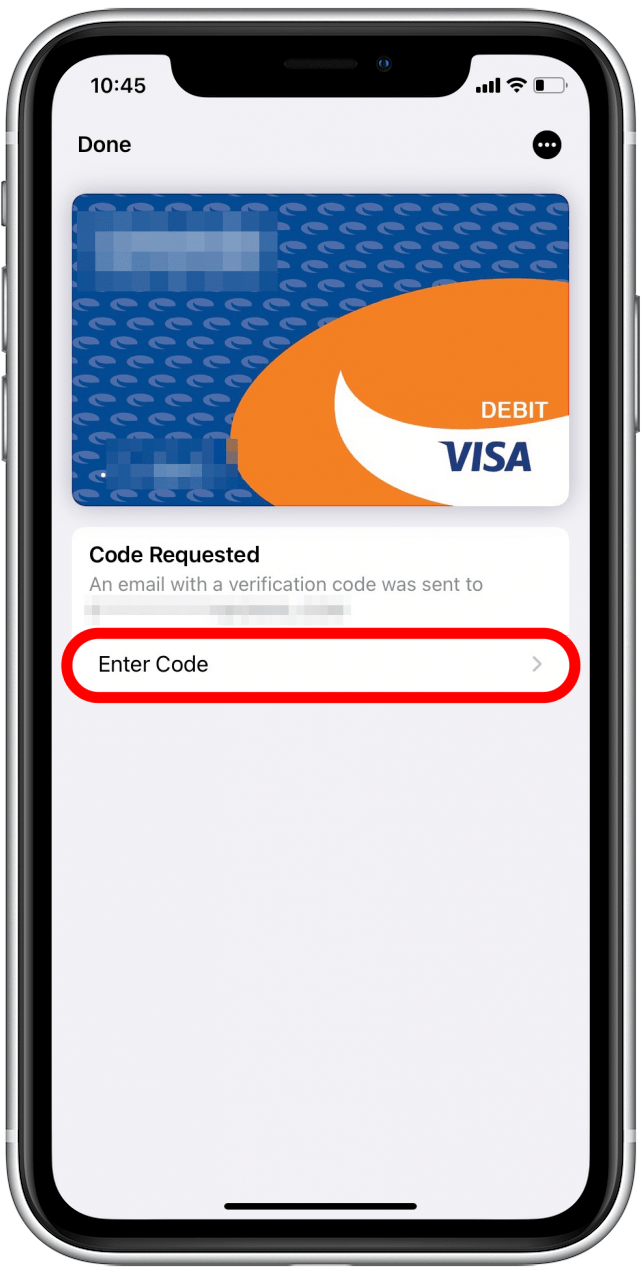
- If you opted to receive an email, check your email to retrieve your verification code.
- Tap Enter Code.
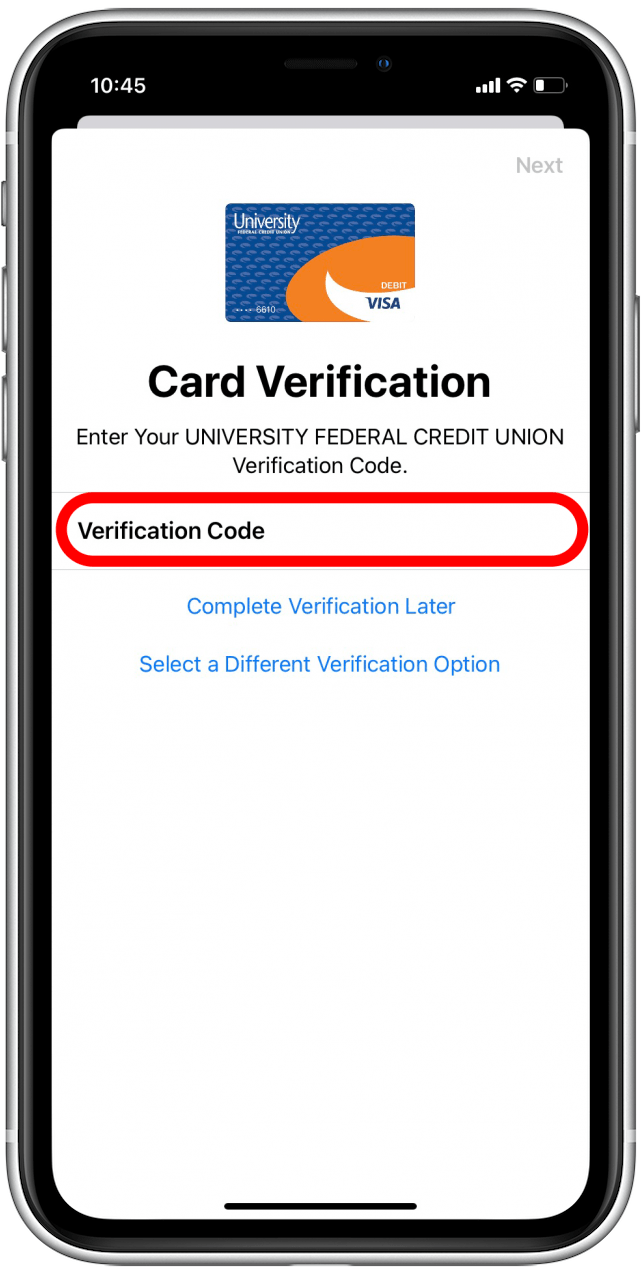
- Enter the verification code and tap Next.
- You can choose to use this new card as your default card or not.

- Tap Done.
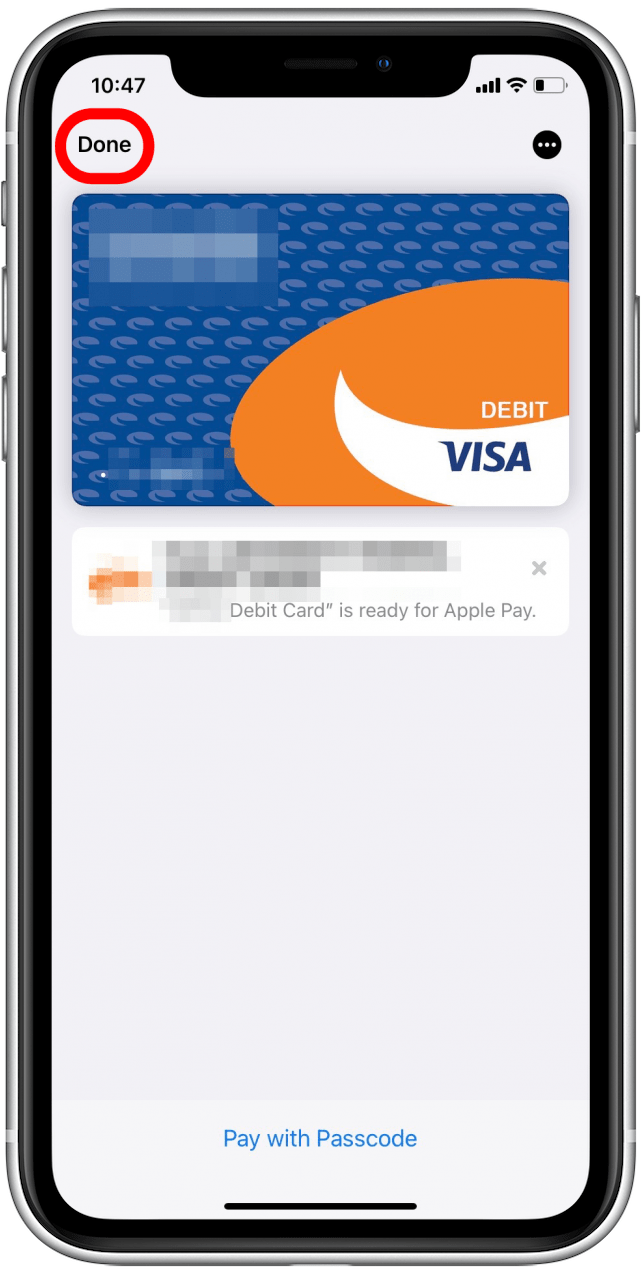
Now you’ll be returned to your Apple Wallet, with the newly added card available for use with Apple Pay. Check out our article on how to pay with Apple Pay in store if you're not familiar with the process.
Apple Wallet Passes: What Are They & How to Use Them
What are Apple Wallet passes? Apple Wallet passes are a digital collection of all your rewards cards, tickets, and other types of passes you might currently have in one place. You can use passes on your iPhone to get and redeem rewards, get into movies, check into flights, and more. But before you do any of that, you’ll have to add them to your Apple Wallet.
How to Add Passes to Apple Wallet
Each company might have a slightly different method you can use to add its pass to your Apple Wallet. Here, we’ll go over adding a Starbucks card to your Apple Wallet:
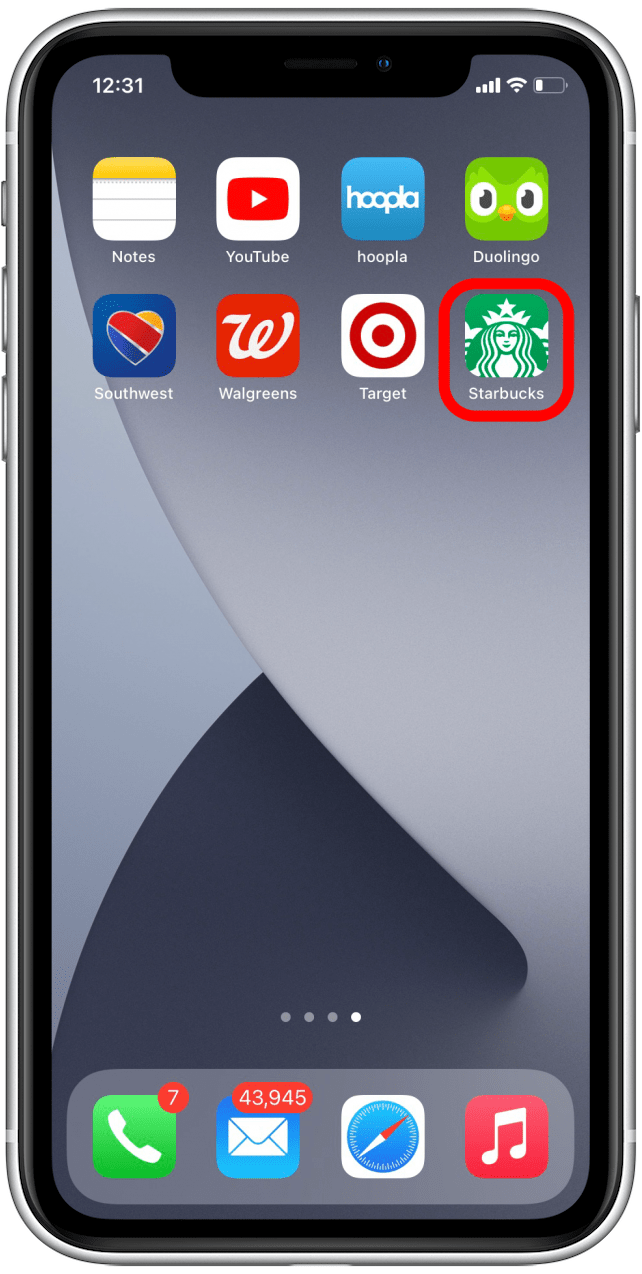
- Open the Starbucks app.
- Tap Pay in Store.

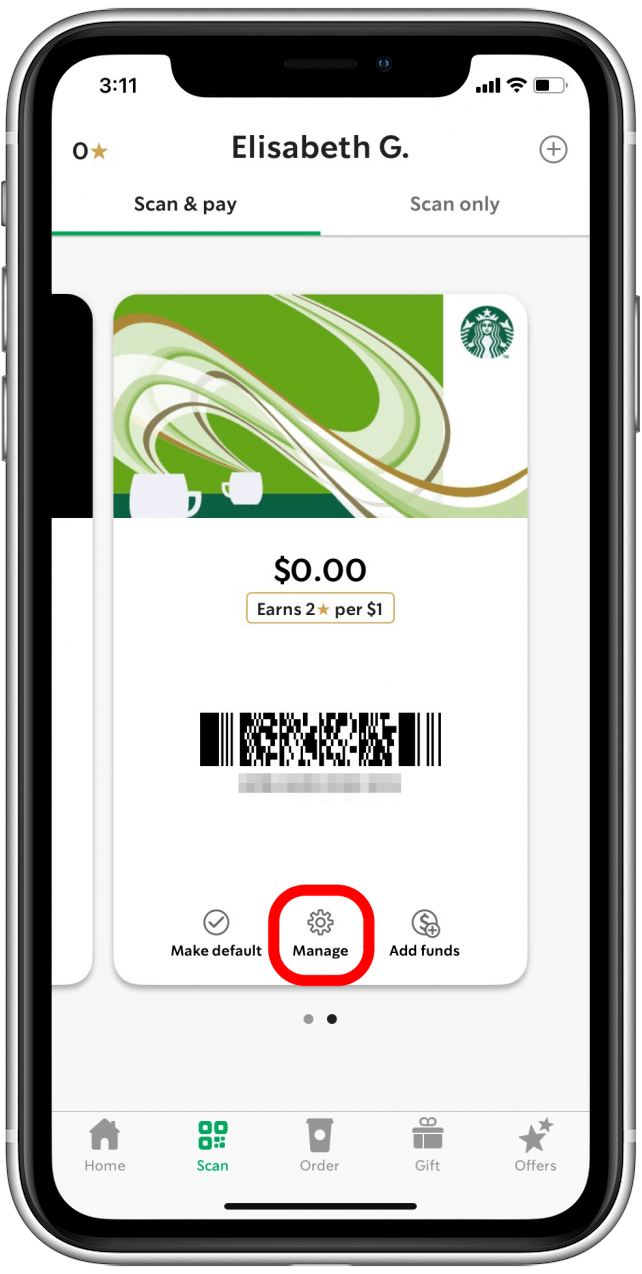
- Find your Starbucks card and tap Manage.
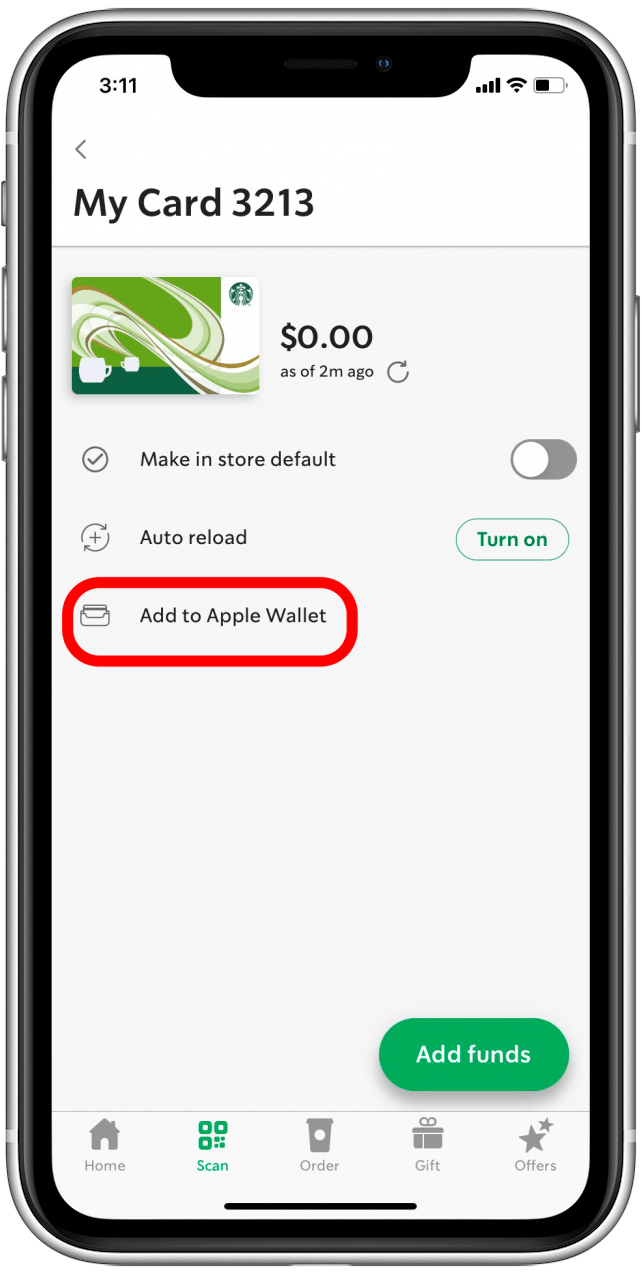
- Tap Add to Apple Wallet.
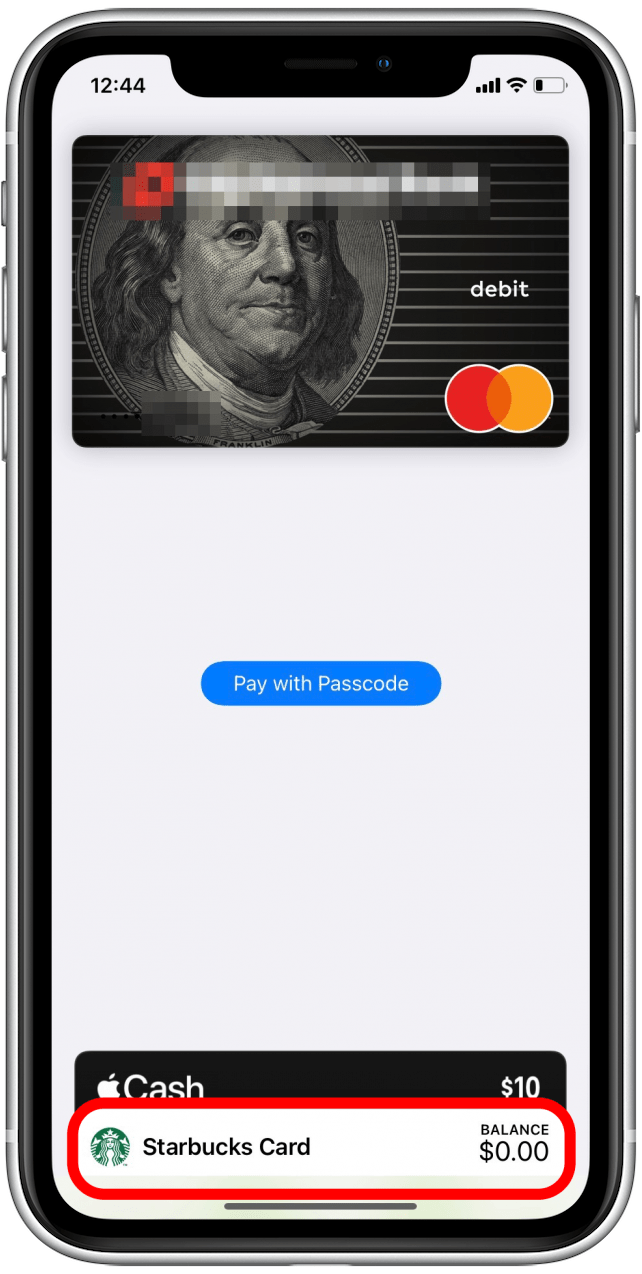
Now when you open your Apple Wallet, you should see your rewards card listed under Apple Cash and your debit and credit cards.
How to Use Passes in Apple Wallet
You’ll know if a store you’re visiting accepts Apple Pay if you see these logos on or near the register:

- When you’re ready to scan a pass or pay using your Apple Wallet, you can open your Apple Wallet by double-tapping the Home or Side button on your iPhone.
- Tap on the pass you’d like to use.
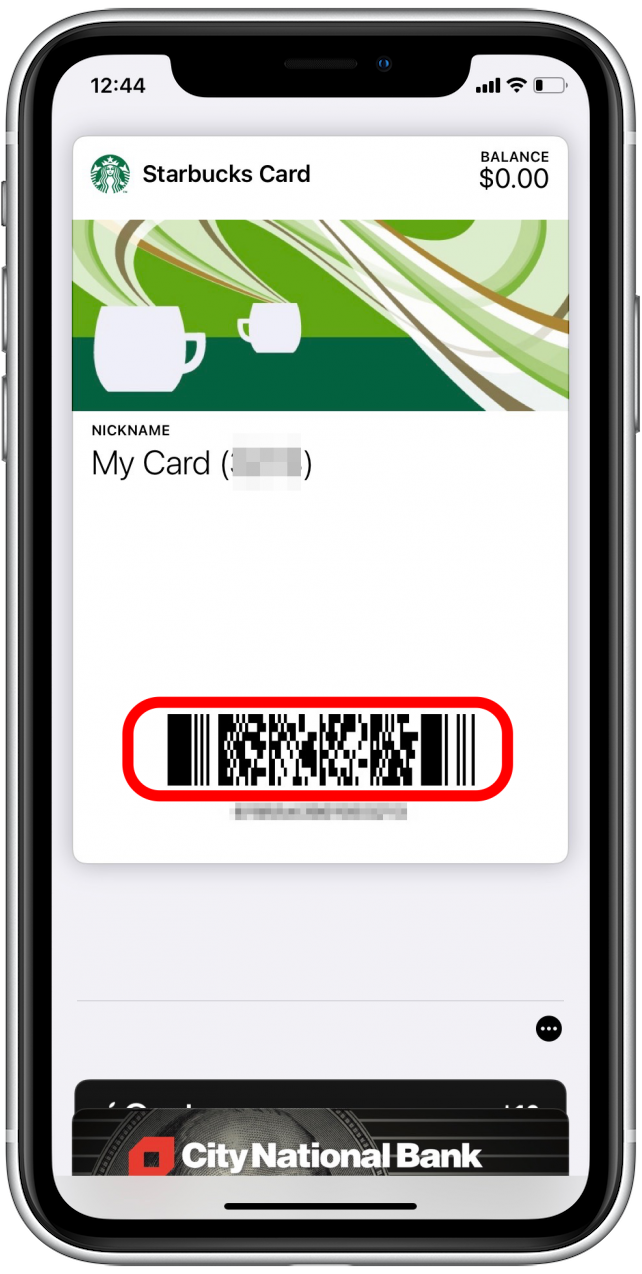
- Scan or tap your pass at the register.
Related: Apple Card: How to Apply for & Use the Apple Credit Card
How to Use Apple Cash
Apple Cash, like Venmo or PayPal, lets you send payments directly to friends and family much more easily than cutting a check. You can use your Apple Cash balance to pay in stores directly from your Apple Wallet, or use Apple Cash to send and receive money through the Messages app. We’ll go over how to set Apple Cash up, how to add money to your Apple Cash balance, and how to pay in a store using Apple Cash.
Set Up Apple Cash
Here’s how to set Apple Cash up:
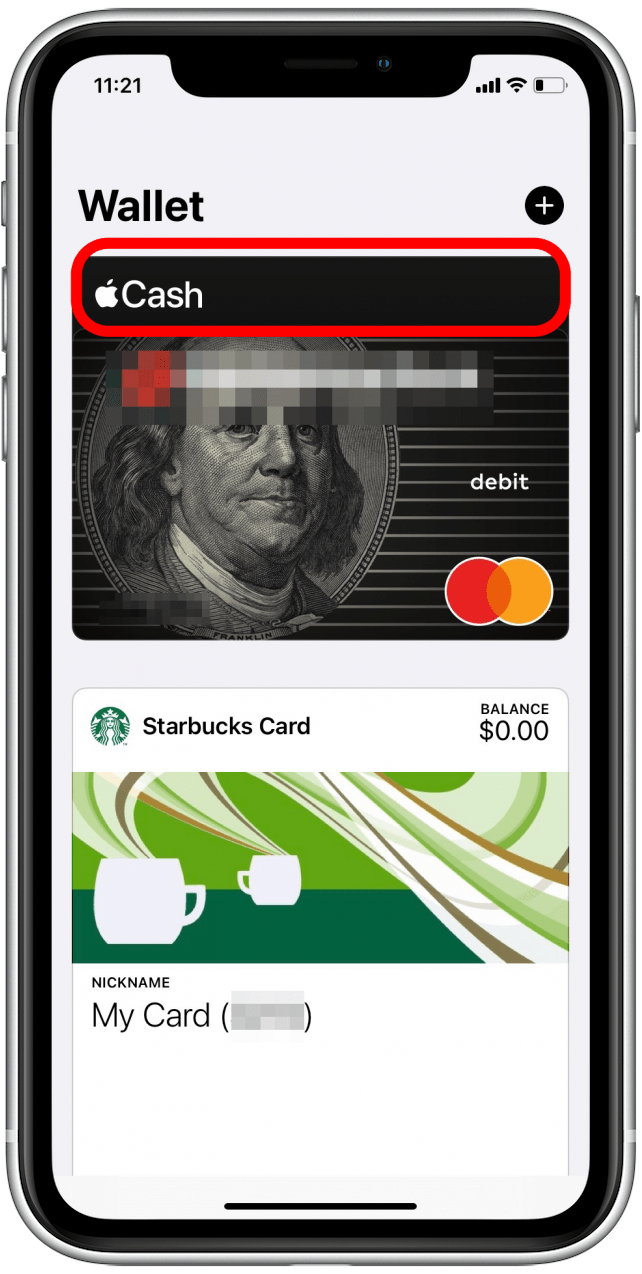
- Open your Apple Wallet.

- Tap Apple Cash.
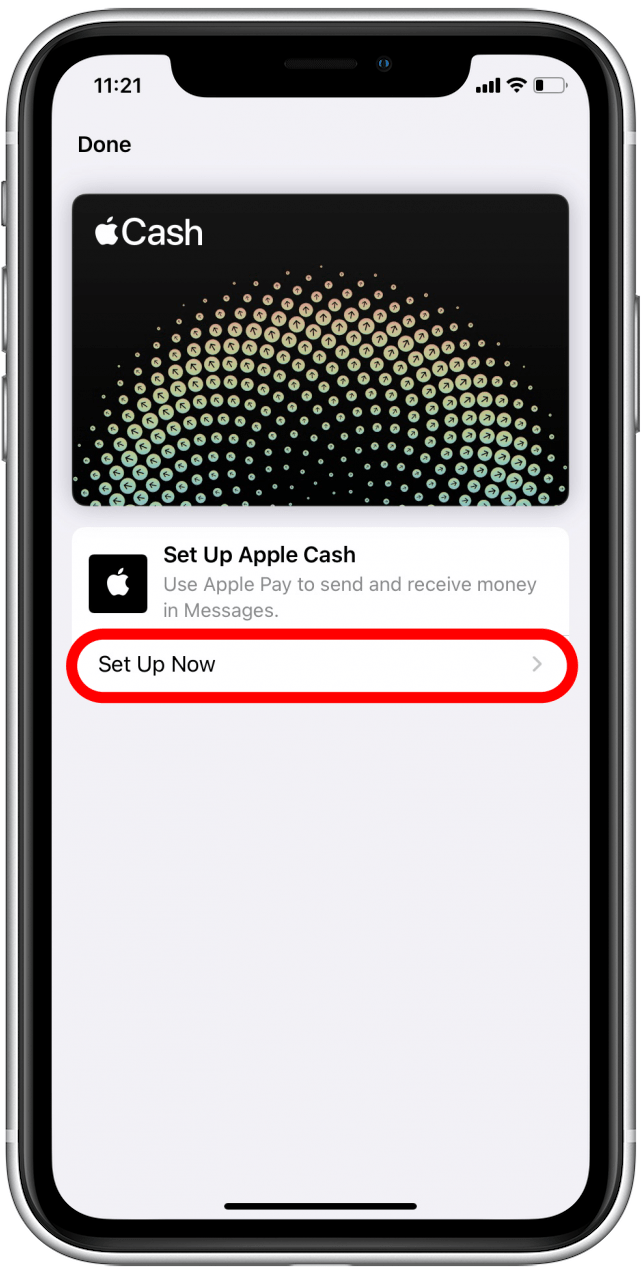
- Tap Set Up Now.
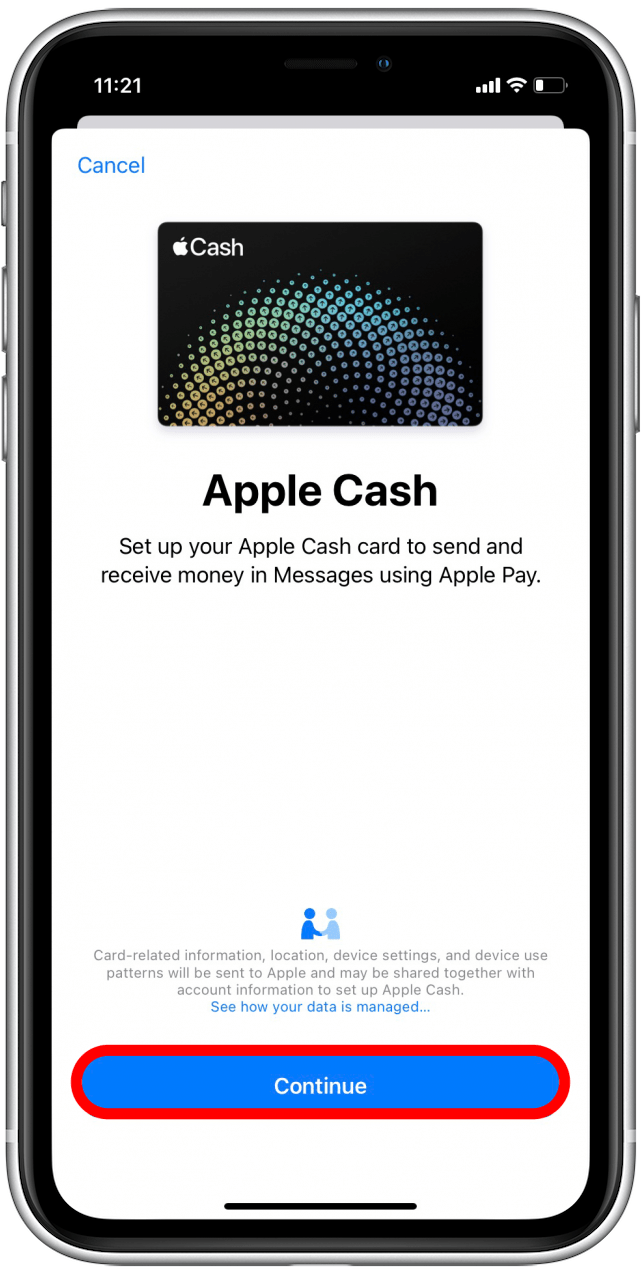
- Tap Continue.
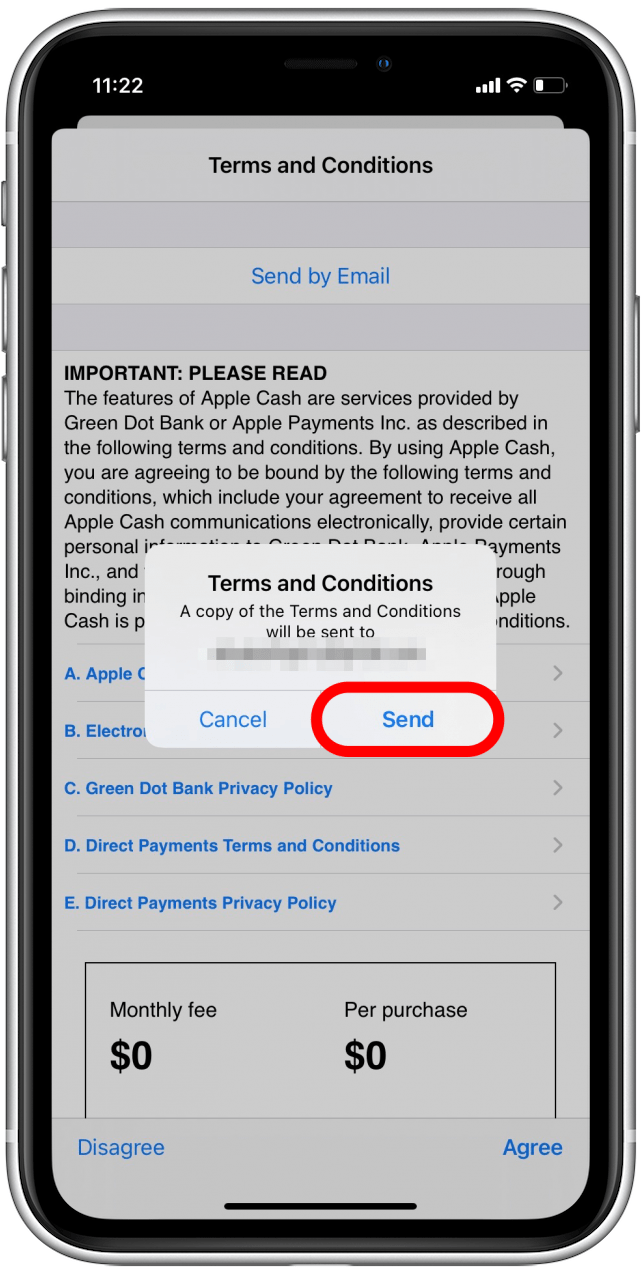
- Review the Terms and Conditions. Have a copy sent to your email, so you can reference it later.
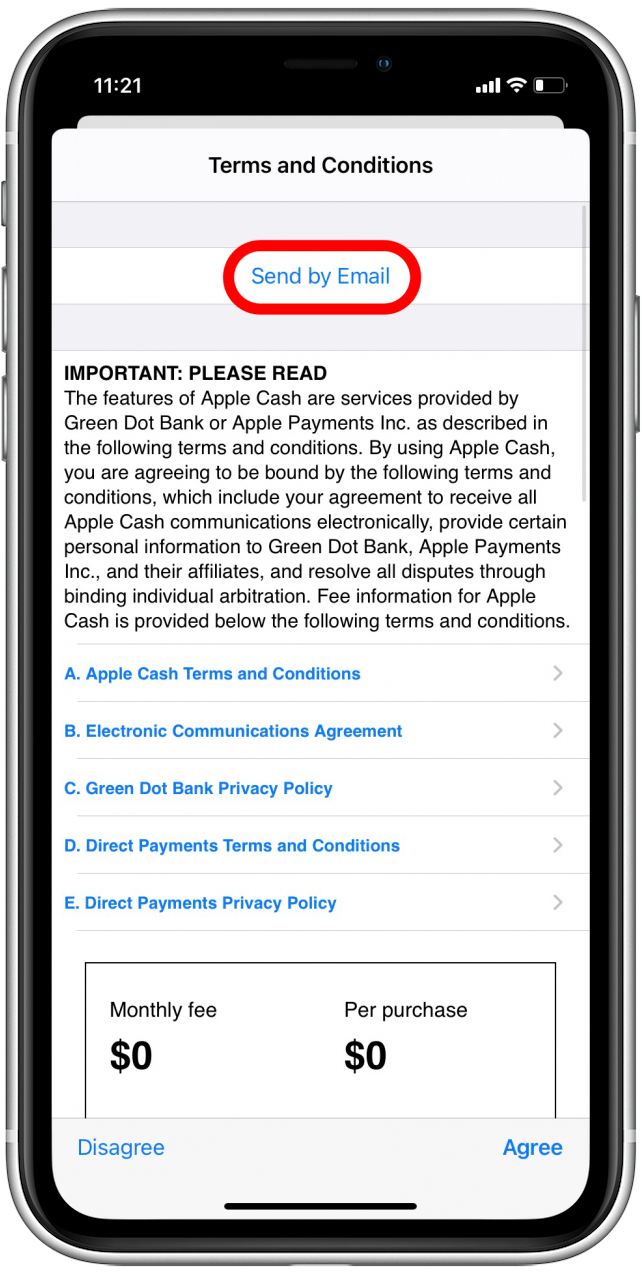
- Tap Send.
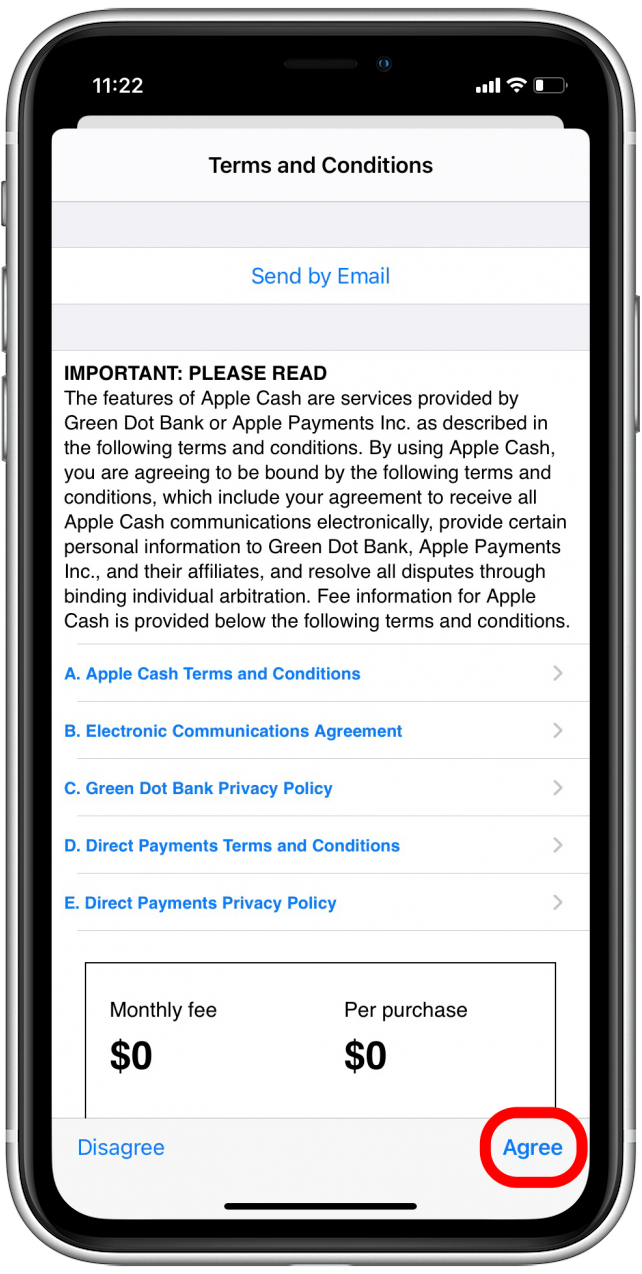
- Tap Agree.
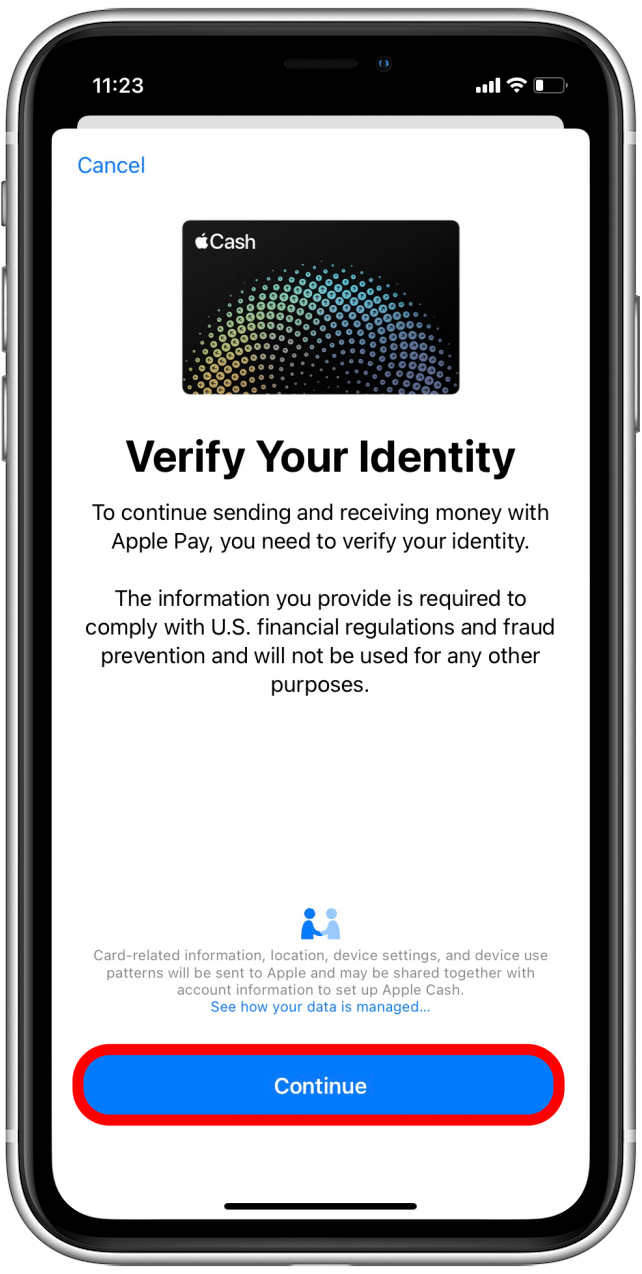
- Tap Continue to verify your identity.
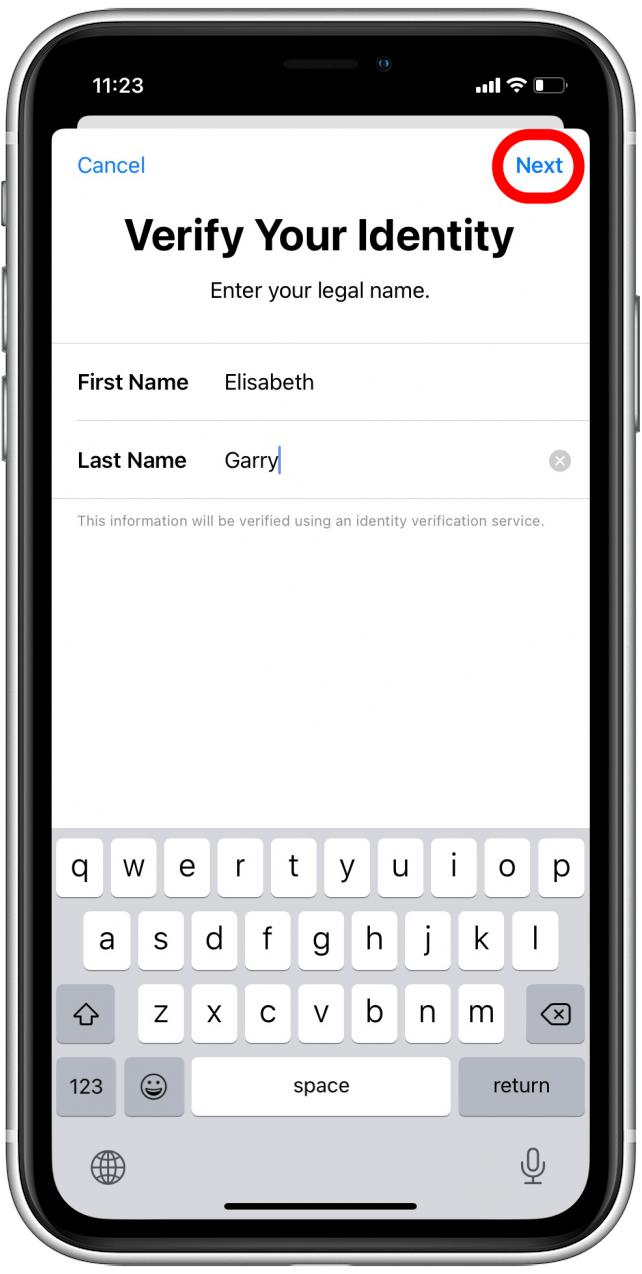
- Verify your name and tap Next.
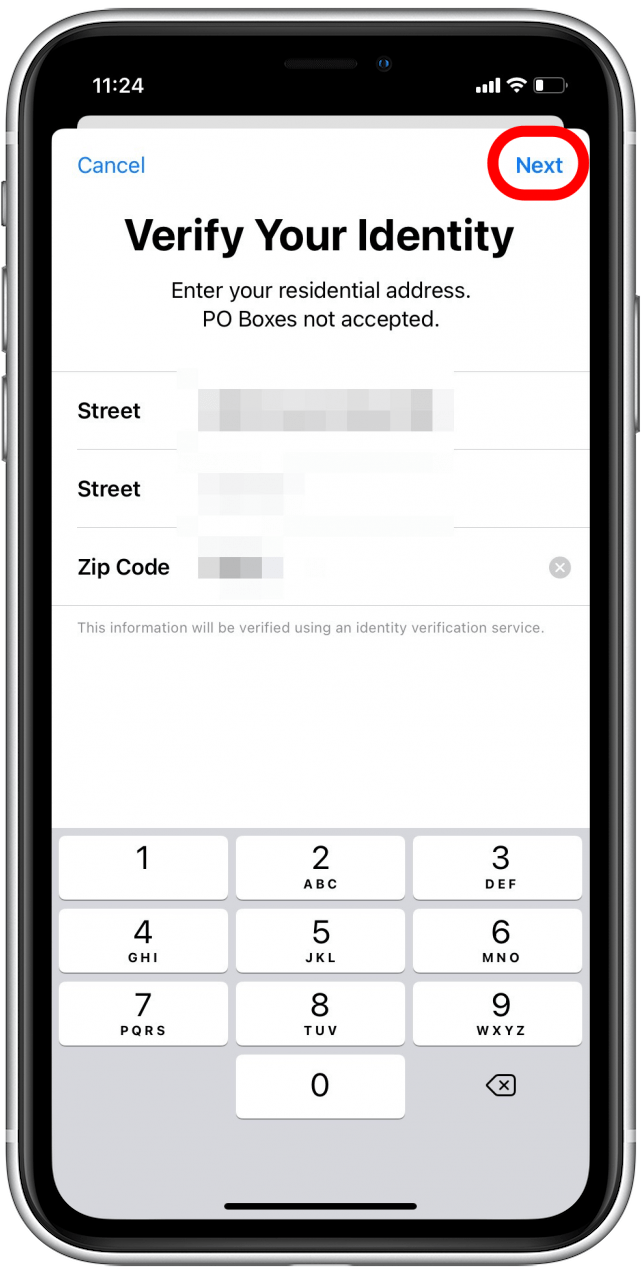
- Enter your address and tap Next.
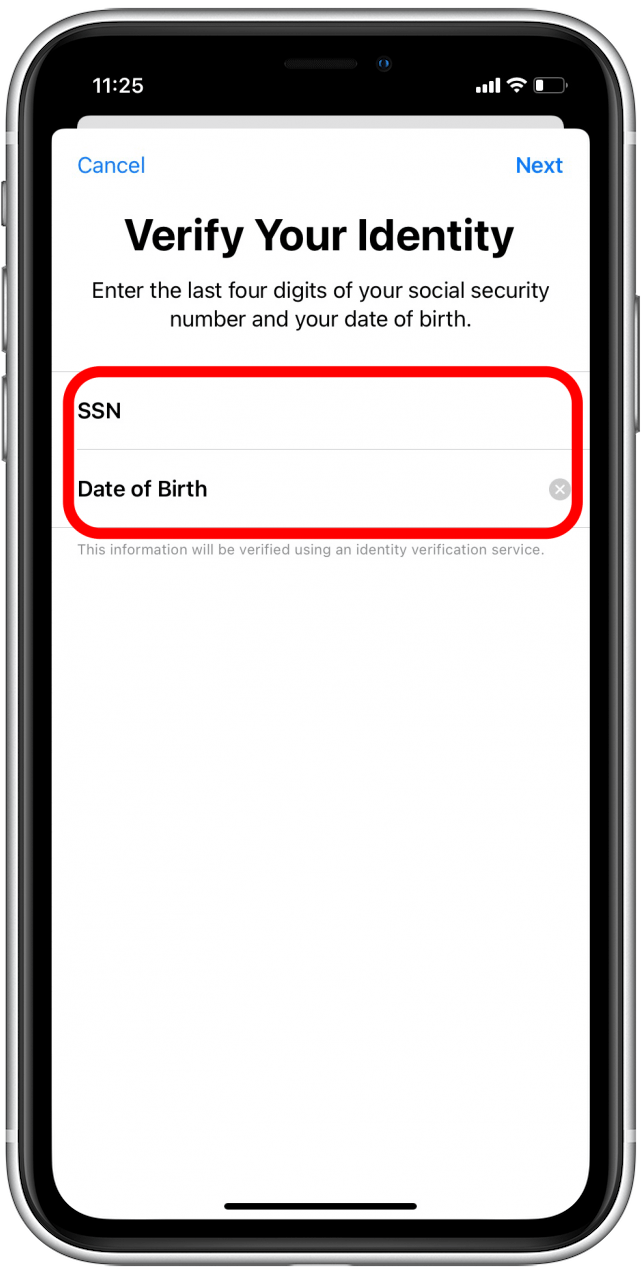
- Enter the last four digits of your social security number and your date of birth.
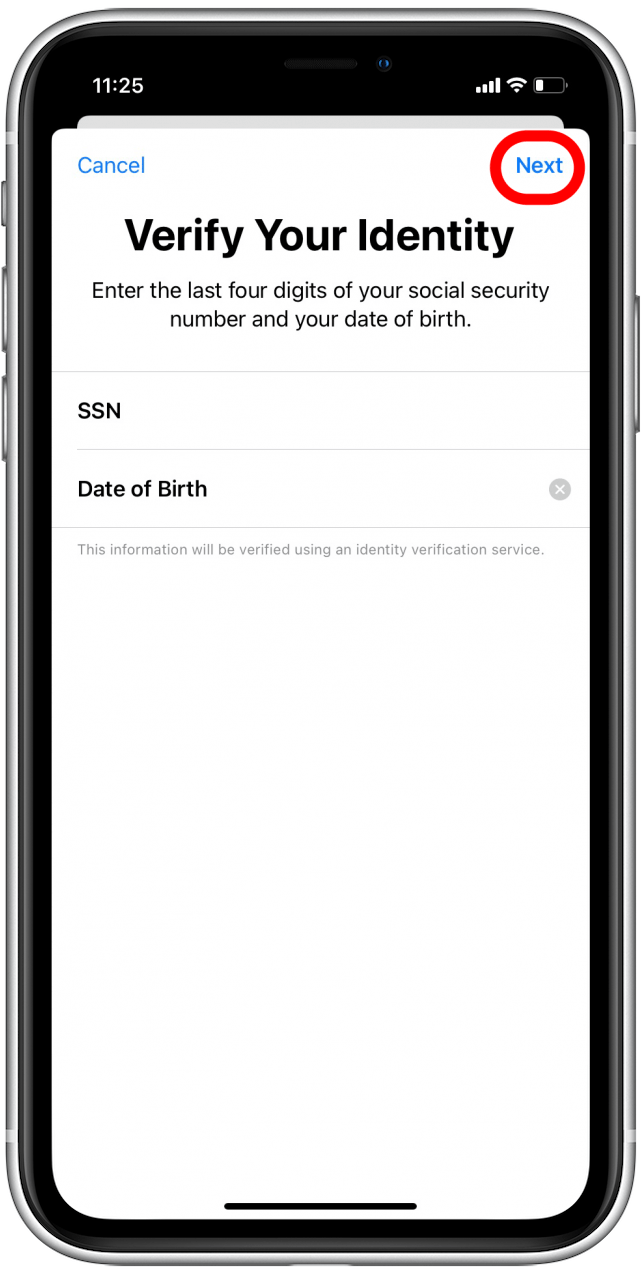
- Tap Next.
- Wait for Apple Cash to set up and then tap Done.

Add Money to Apple Cash in Apple Wallet
Money that you add to Apple Cash using Apple Wallet will be taken from your default card in your Apple Wallet. We’ve gone over how to set a default credit card in Apple Wallet.
- Open the Wallet app.

- Tap Apple Cash.

- Tap the more icon.
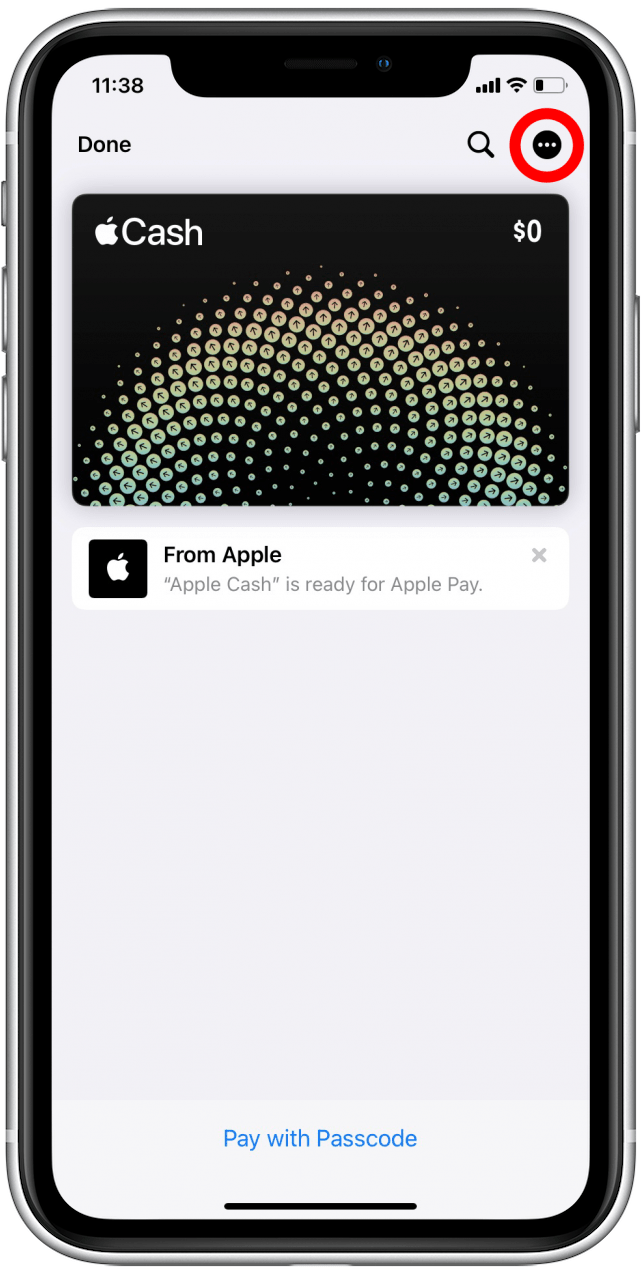
- Tap Add Money.
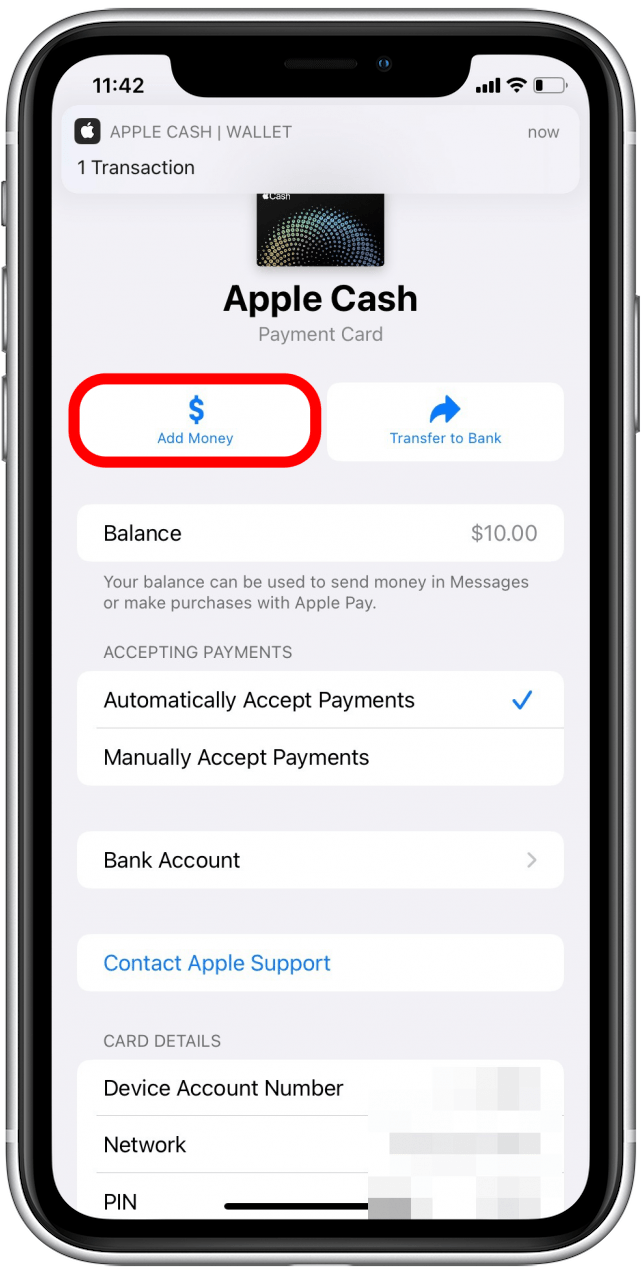
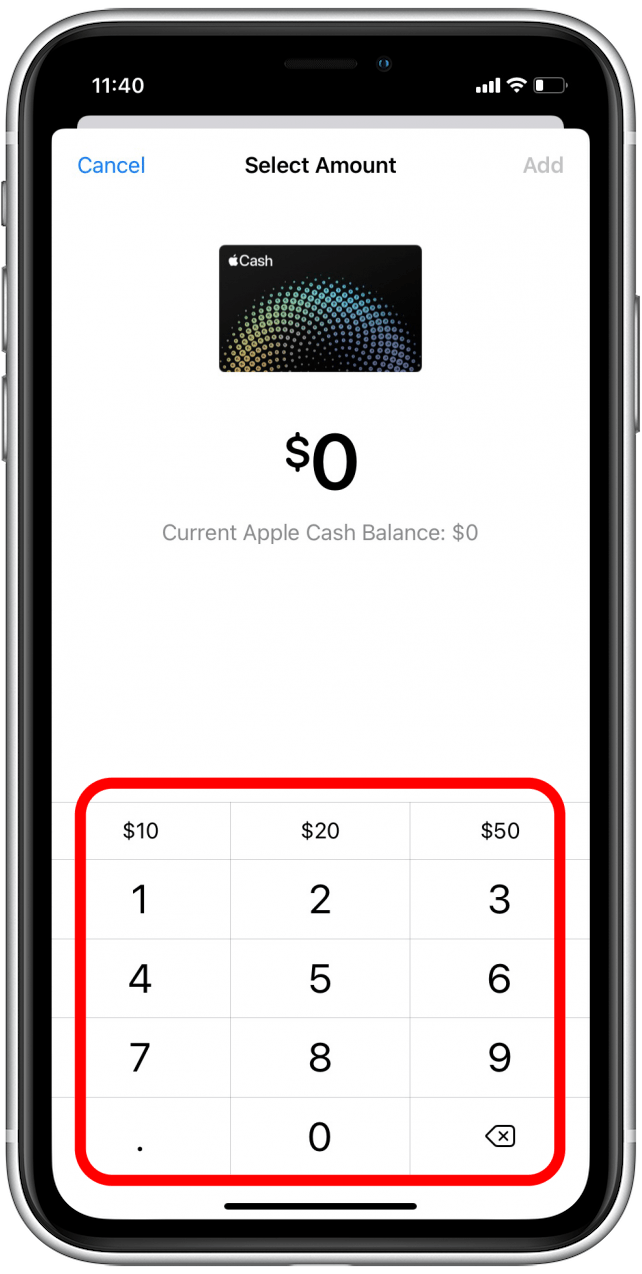
- Select the amount of money you’d like to add to Apple Cash.
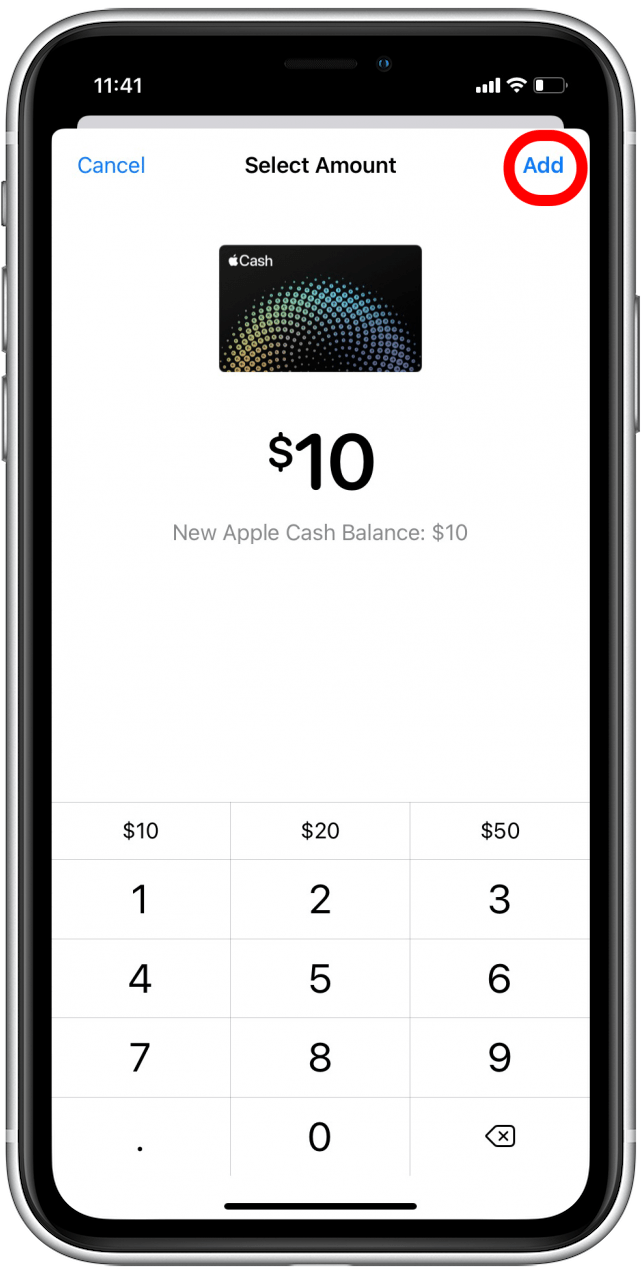
- Tap Add.
- Confirm by double-tapping the Side button or Home button.
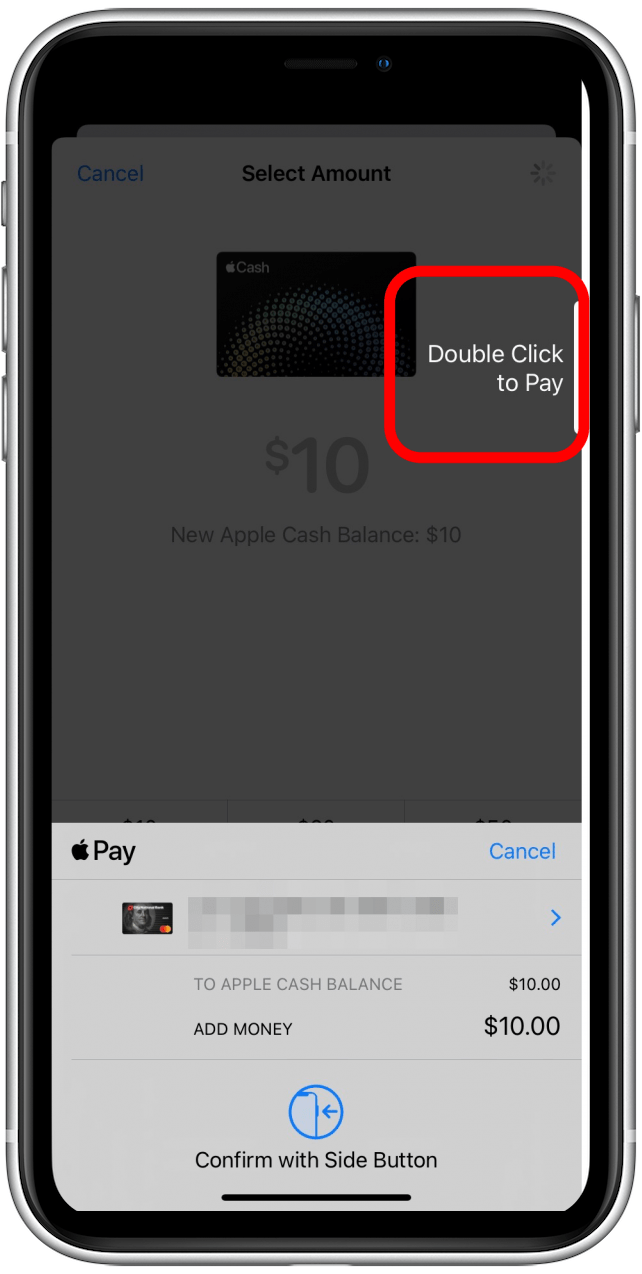
- Confirm with passcode, Face, or Touch ID.
The money is now available in Apple Cash, and you can send or receive payments via Apple Cash in the Messages app.
Pay with Apple Cash in Store
You can pay with Apple Cash at any brick-and-mortar store that accepts Apple Pay.
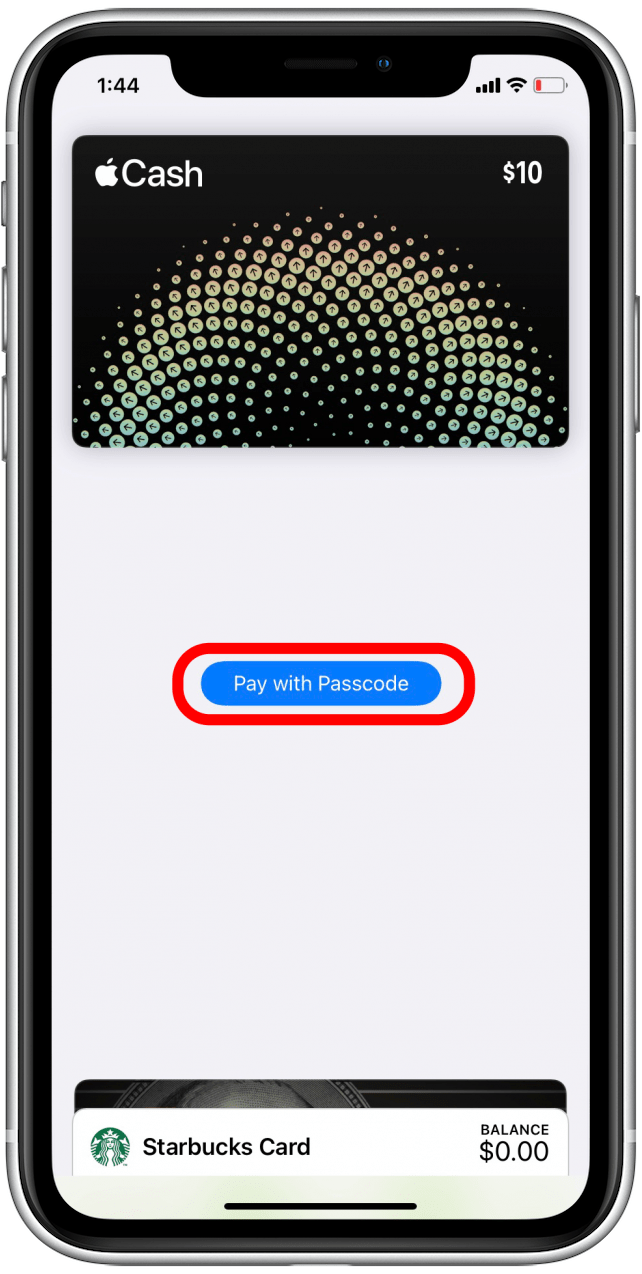
- When you’re ready to scan a pass or pay using your Apple Wallet, you can open Wallet by double-tapping the Home or Side button on your iPhone.
- Tap on Apple Cash.
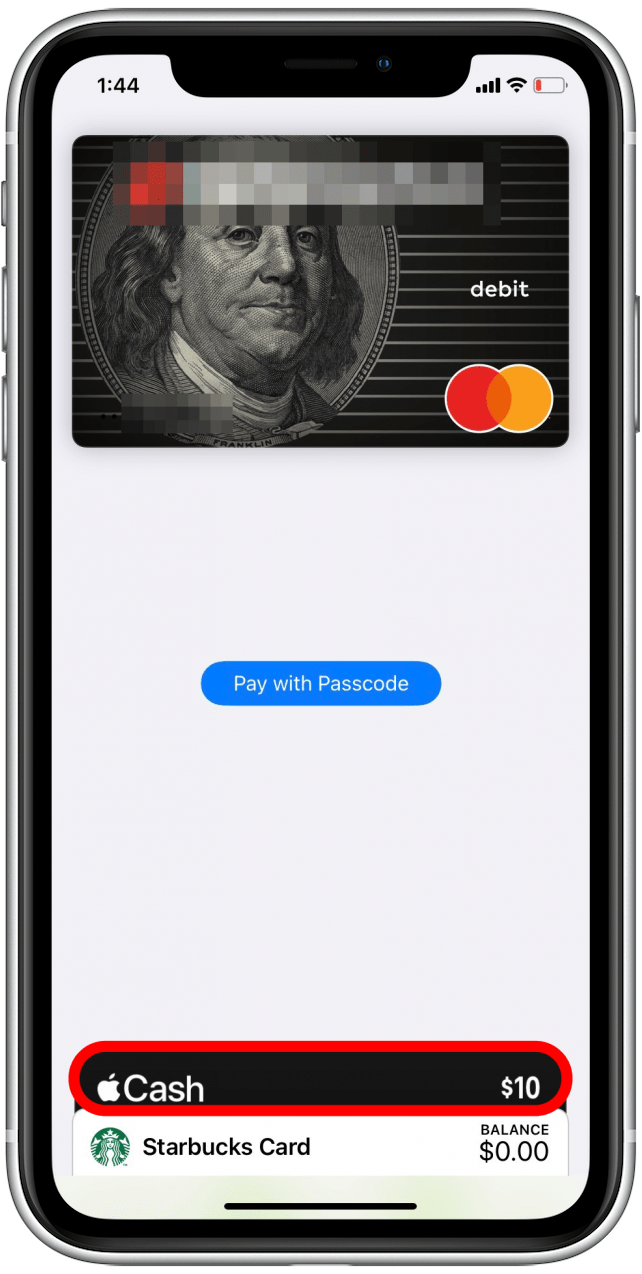
- Tap your pass at the register or tap Pay with Passcode.
Next, learn how to use the Apple Wallet tracker feature to track your shipments.

August Garry
August Garry is an Associate Editor for iPhone Life. Formerly of Gartner and Software Advice, they have six years of experience writing about technology for everyday users, specializing in iPhones, HomePods, and Apple TV. As a former college writing instructor, they are passionate about effective, accessible communication, which is perhaps why they love helping readers master the strongest communication tools they have available: their iPhones. They have a degree in Russian Literature and Language from Reed College.
When they’re not writing for iPhone Life, they’re reading about maritime disasters, writing fiction, rock climbing, or walking their adorable dog, Moosh.


 Rhett Intriago


 Sarah Kingsbury
 Olena Kagui
 Rachel Needell

 Amy Spitzfaden Both
 Brian Peters
 Leanne Hays