Neat & Tidy Notes: How to Draw with Lines & Grids in the Notes App
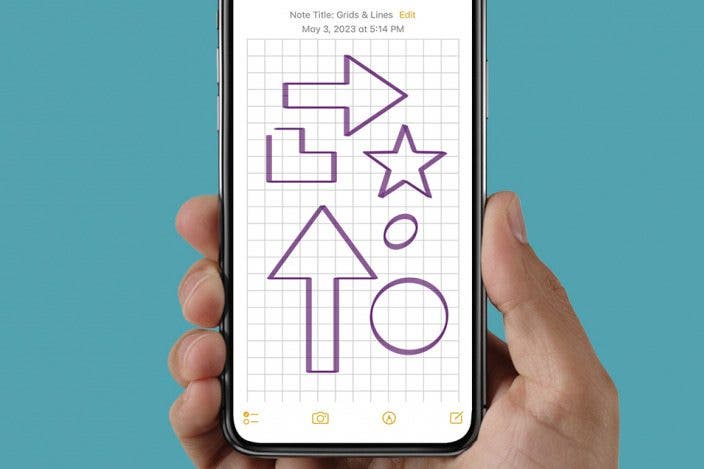
A really cool feature of the Notes app is that it allows you to place lines or grids on the note for you to draw on top of.


With 10-plus years of experience with Apple devices, Rachel specializes in all things iPad and is a Notes app expert. Find her writing in the Daily Tip newsletter and iPhone Life magazine.
Learn More

With 10-plus years of experience with Apple devices, Rachel specializes in all things iPad and is a Notes app expert. Find her writing in the Daily Tip newsletter and iPhone Life magazine.
Learn MoreJust when you thought the Notes app couldn't get any better, you learn that you can actually turn a note into graph paper, or create evenly spaced lines that help you maintain straight writing. This is a super handy tip, especially if you're drawing out a math problem or simply want to take handwritten notes on some lined paper. The Notes app can do it all! Let's get into how to add lines and grids to Notes.
Why You'll Love This Tip
- Take your note from a blank page to either lined or graph paper with this simple trick.
- Make drawing floorplans, graphing out math problems, drawing 3D objects, or writing in a straight line super easy on the Notes app.
How to Create Lines and Grids on a Note
You might have thought that all new notes in the Notes app come as completely blank pages, but you can actually enable a setting to place a graph or evenly spaced lines on the note. If you like tips about using your Apple devices, be sure to sign up for our free Tip of the Day!
- On your iPhone or iPad, open the Notes app.

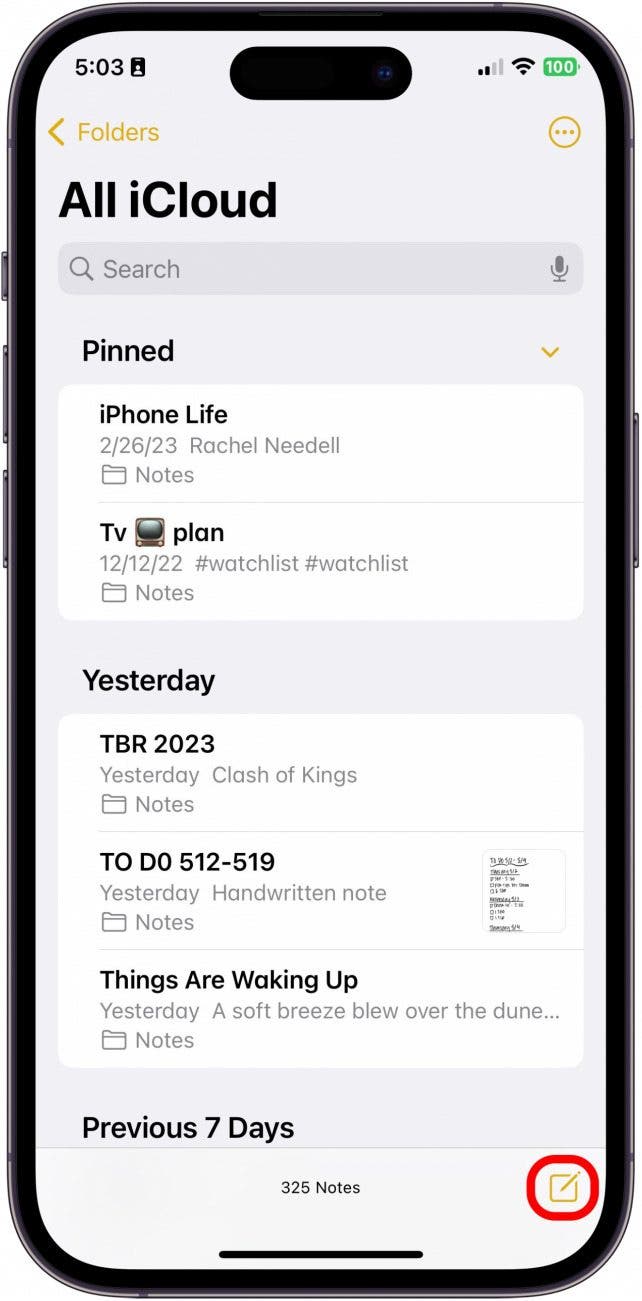
- Tap the Compose New Note button.
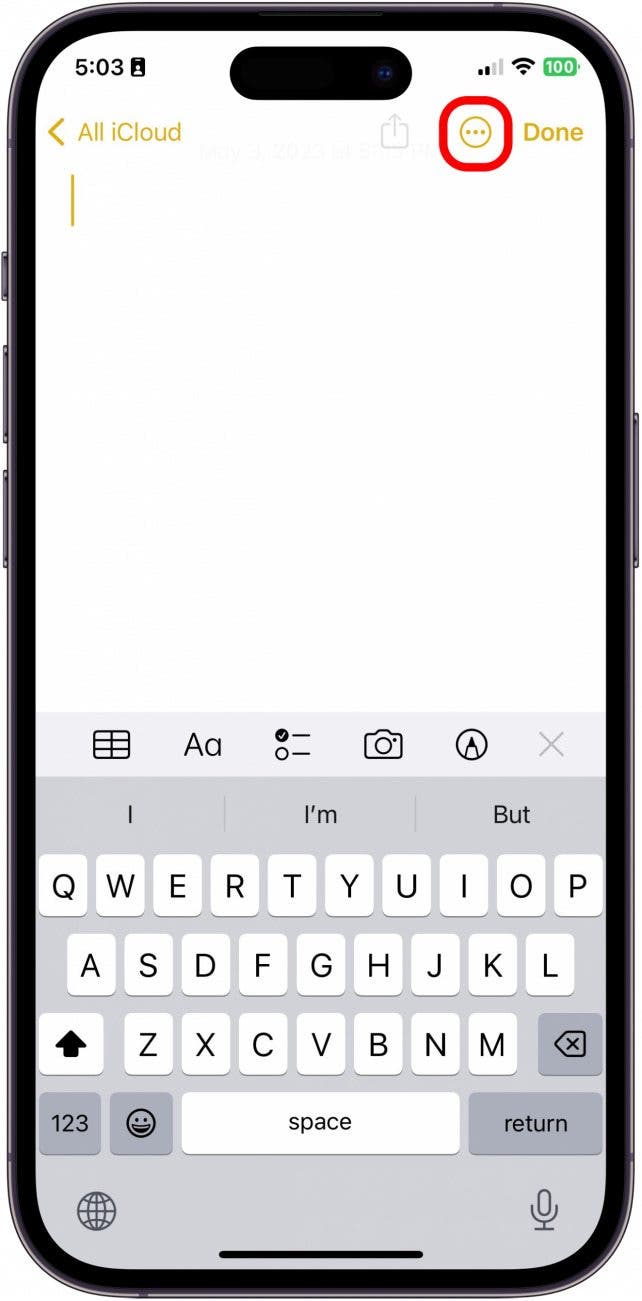
- Tap the more icon at the top right.
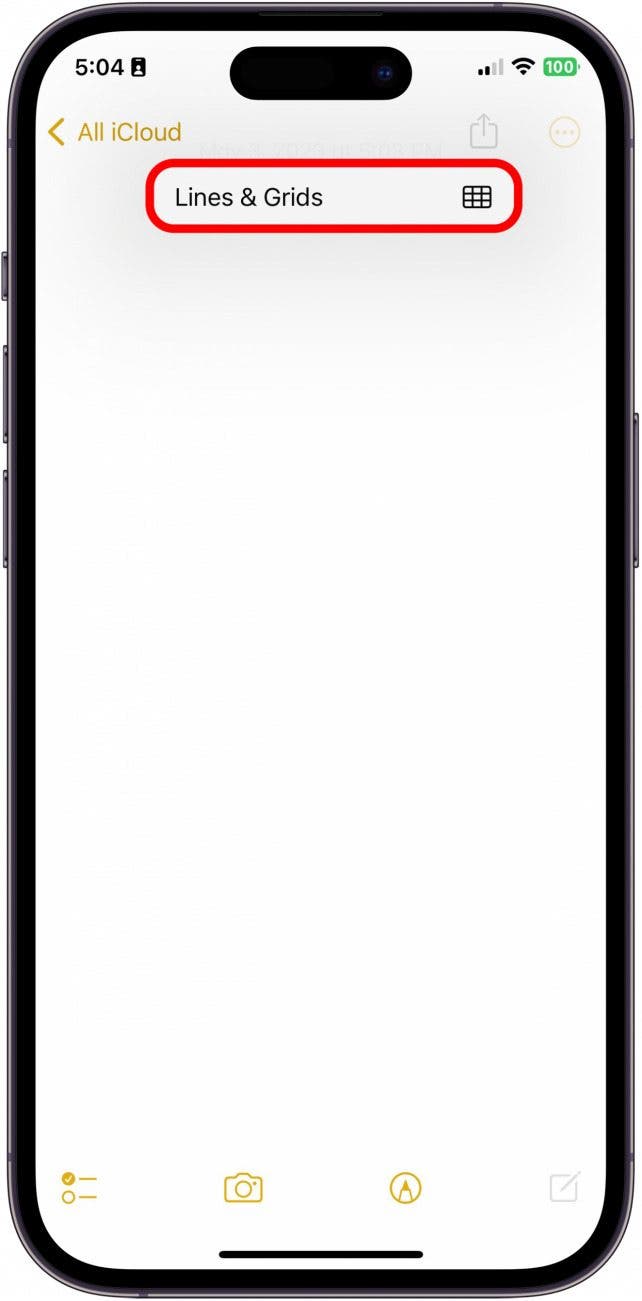
- Tap Lines & Grids.
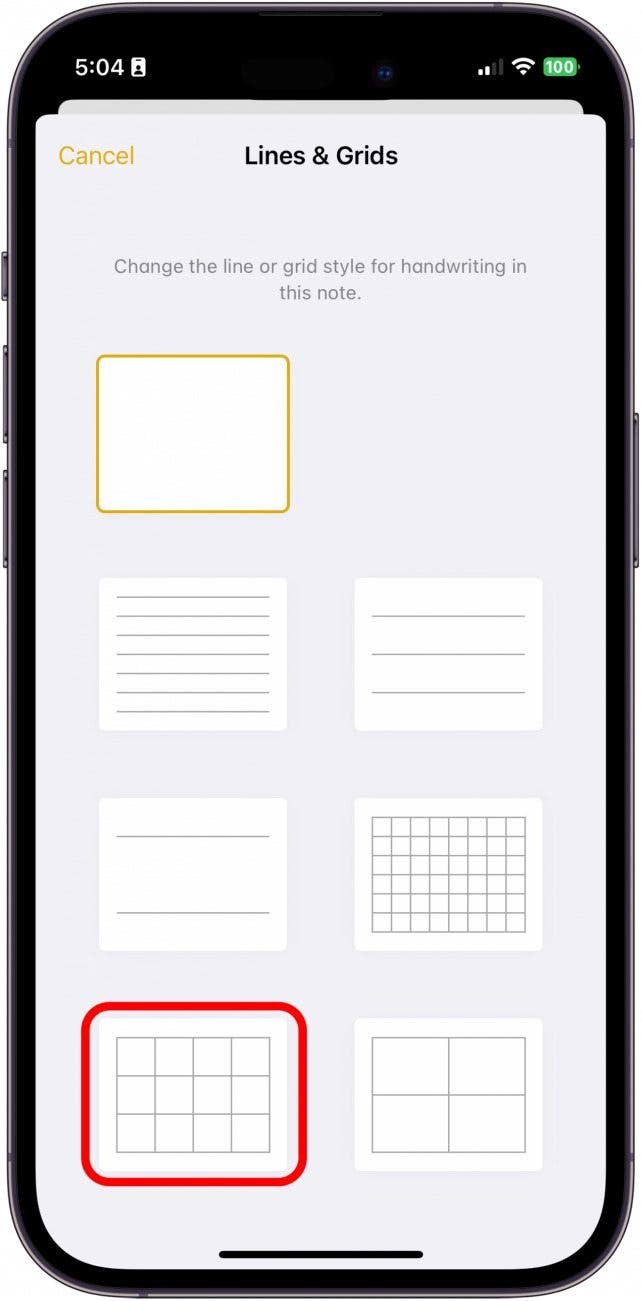
- From here, you can choose from a variety of line and grid options. Pick whichever one suits your needs.
- Next, tap the Markup button to begin to draw.
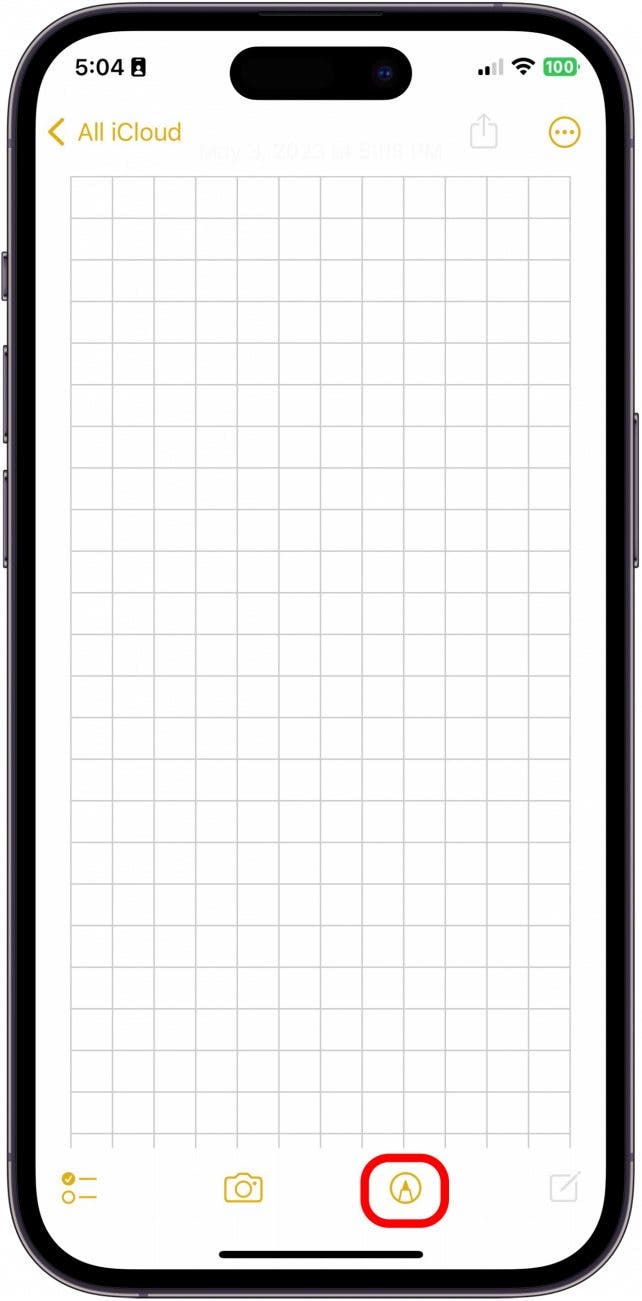
- When you're finished drawing, tap Done.

- You can tap anywhere above or below your drawings or handwriting to type within the note. Keep in mind that the grid or lines you've added will disappear where your typed text is.

And that's how easy it is to add grids and lines to your notes in the Apple Notes app. It is definitely important to remember that this is a drawing feature, not so much a typing feature. And while you can type on the same note with grids and lines, those grids and lines will stop wherever you have typed text.
Every day, we send useful tips with screenshots and step-by-step instructions to over 600,000 subscribers for free. You'll be surprised what your Apple devices can really do.


 Rhett Intriago
 Cullen Thomas

 Rachel Needell

 Olena Kagui
 Leanne Hays


 Susan Misuraca
 Amy Spitzfaden Both
