How to Create a Custom Map Guide in Apple Maps
Apple Maps Guides let you plan your next adventure!

Tamlin Day pairs a lifelong love of technology with a passion for teaching, bringing approachable Apple expertise to his work as a writer and educator at iPhone Life.
Learn More Tamlin Day pairs a lifelong love of technology with a passion for teaching, bringing approachable Apple expertise to his work as a writer and educator at iPhone Life.
Learn MoreWhether you’re planning a cross-country road trip or an eventful day with a loved one, creating your own personal Apple Maps Guide is a great way to ensure a good time. An Apple Maps Guide is a feature in the Maps app that allows you to create a list of places you'd like to go, sort of like having a personal handheld travel guide.
Why You'll Love This Tip
- Plan out a vacation and ensure you hit every landmark.
- Map out a route that takes you to more interesting places.
How to Create a Map on Apple Maps
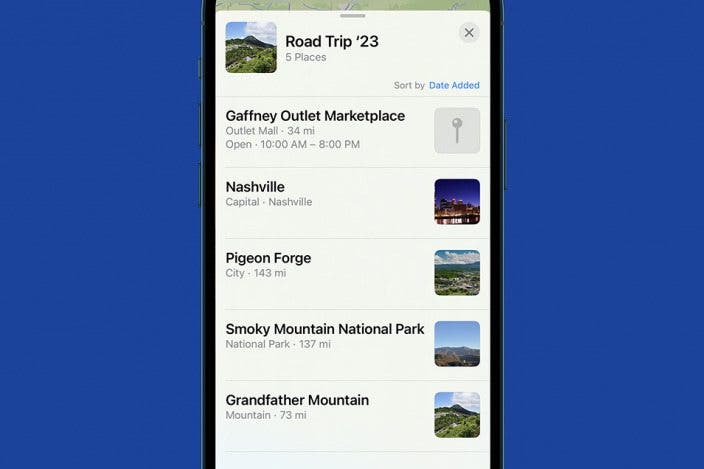
We've gone over how to save and share a location from Apple Maps, now learn how to save multiple locations in Apple Maps in your own personalized guide! You can also save other important locations like nearby stores or restaurants, the airport, and hotels. Then, when you start your journey, the GPS will lead you to all the locations you’ve set up for seamless traveling. Using guides also helps me to plan my walking routes, so I can spend less time traveling from place to place, and more time sightseeing landmarks. For more great iPhone tutorials, check out our free Tip of the Day. Now, let's go over how to create a map on Apple Maps:
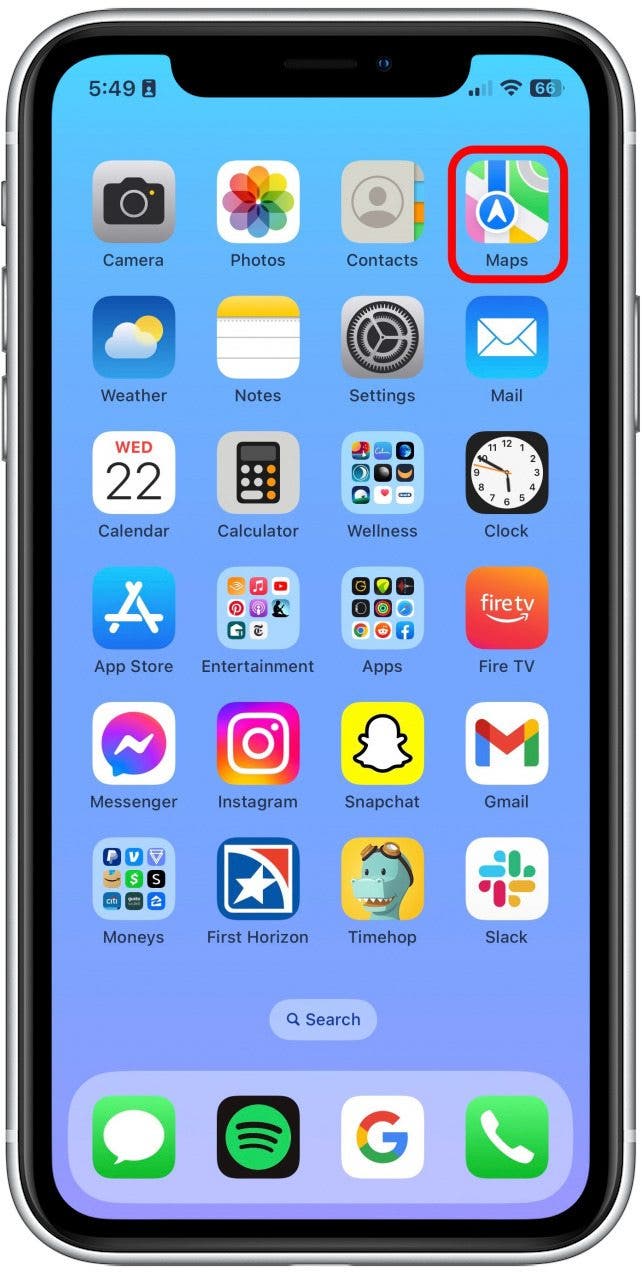
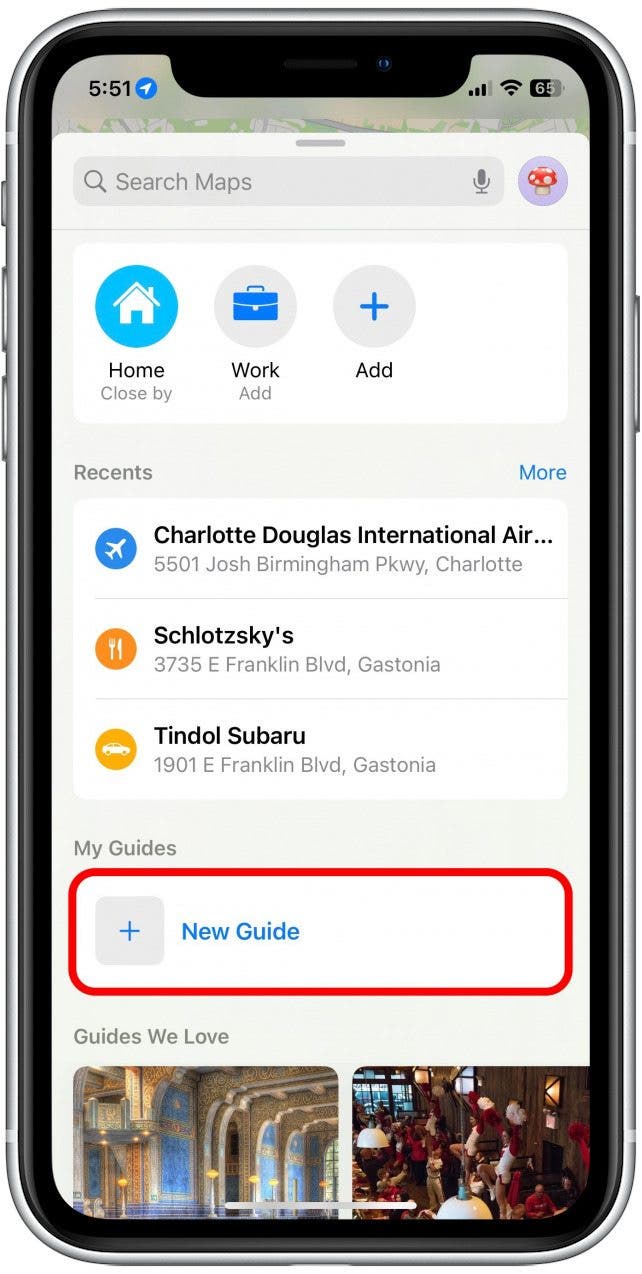
- Open the Maps app.
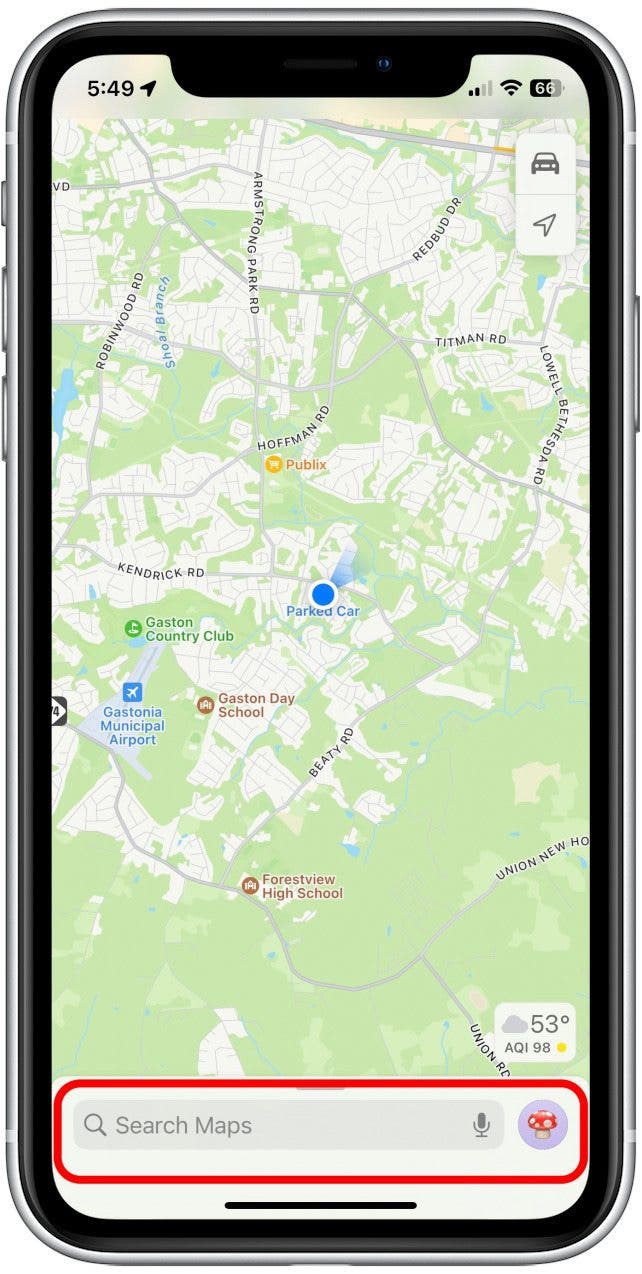
- Swipe up on the gray card that appears under the map view.
- If it’s your first guide, tap New Guide.
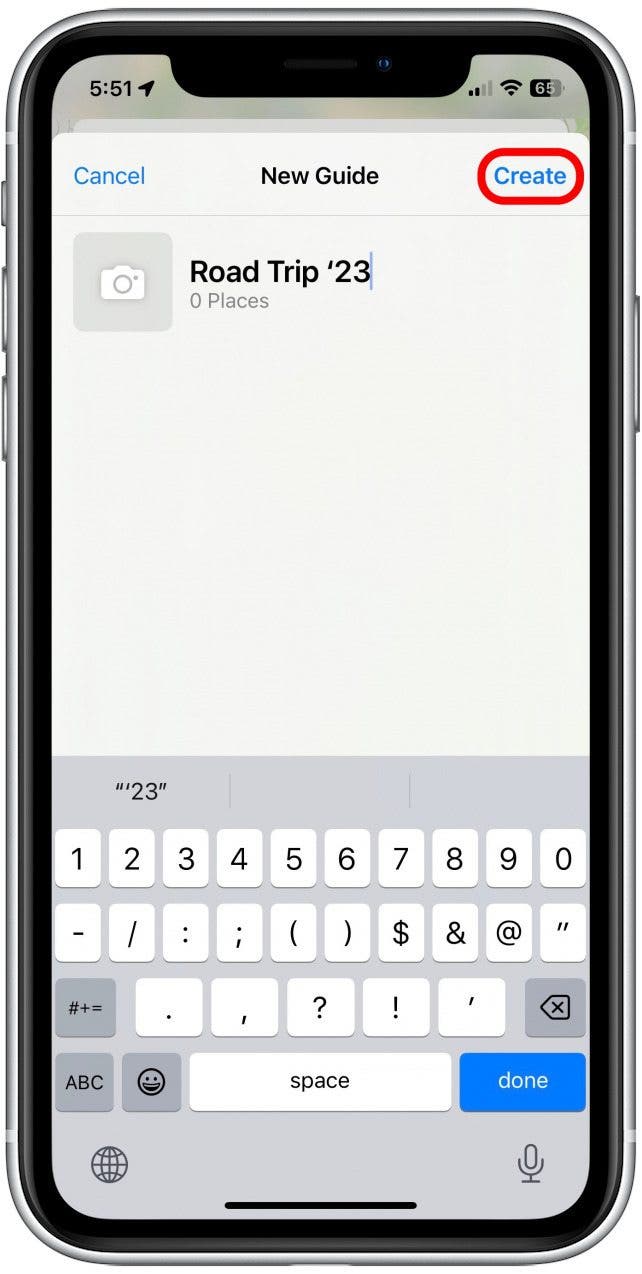
- Enter a title for your guide and tap Create.
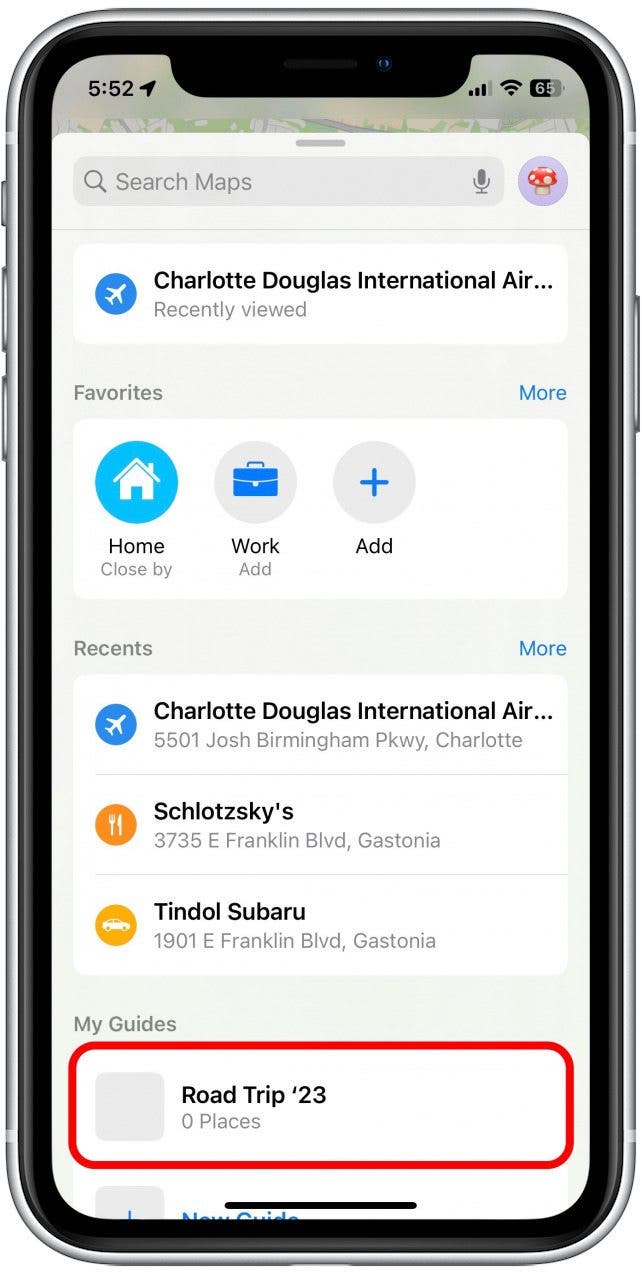
- It may take you out of the guide. If so, tap the guide you just created again.
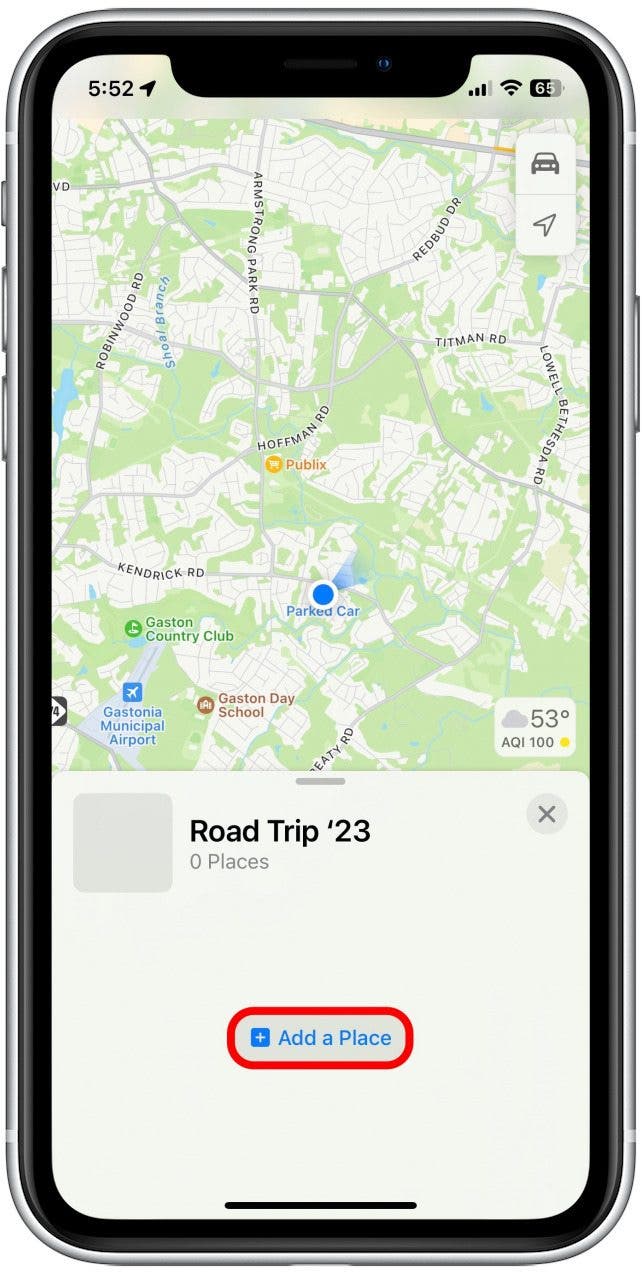
- To begin adding locations to your guide, tap Add a Place.
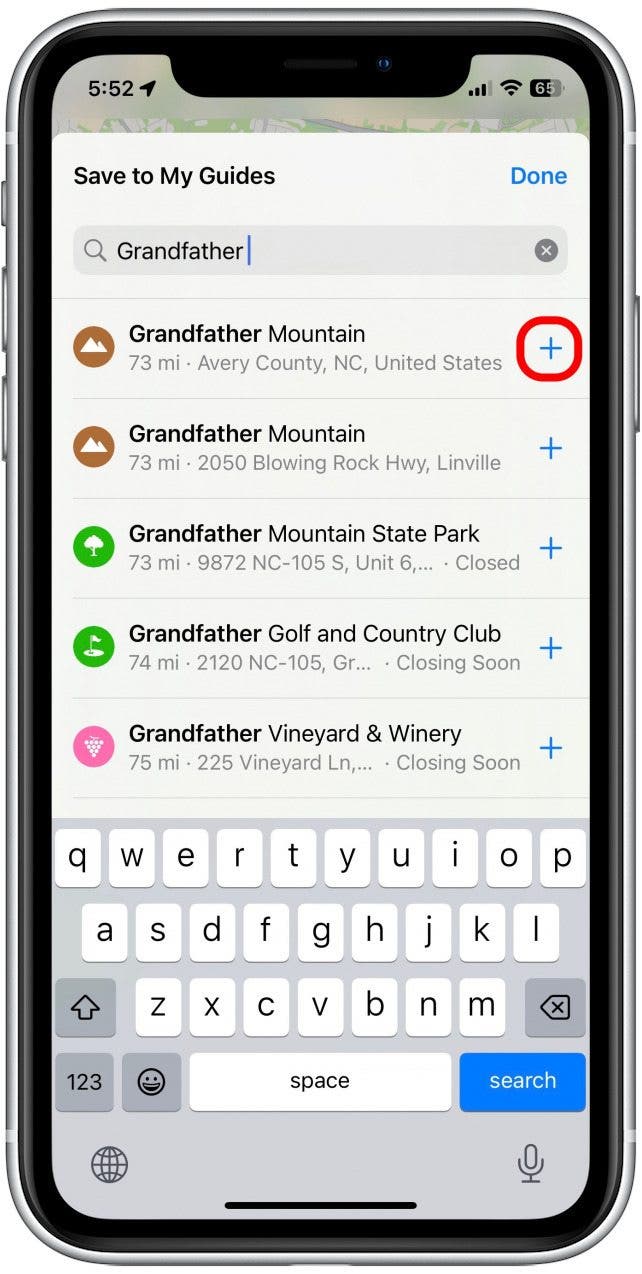
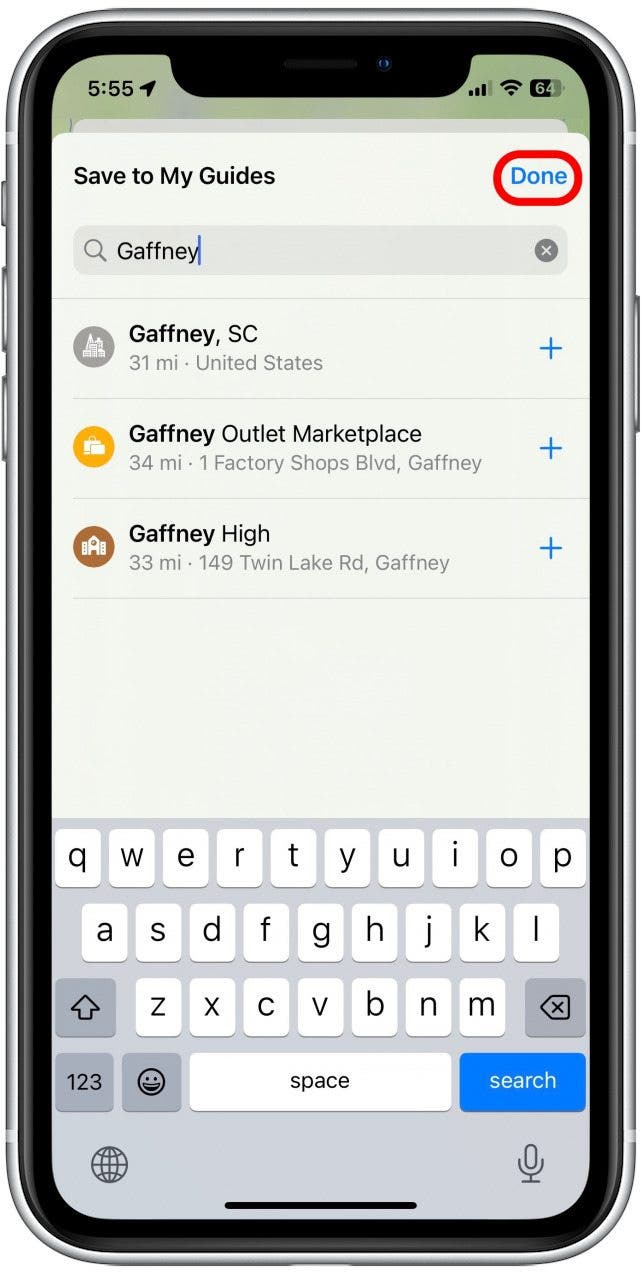
- Enter your desired location into the search bar. Tap the blue plus sign next to the location you want to save.
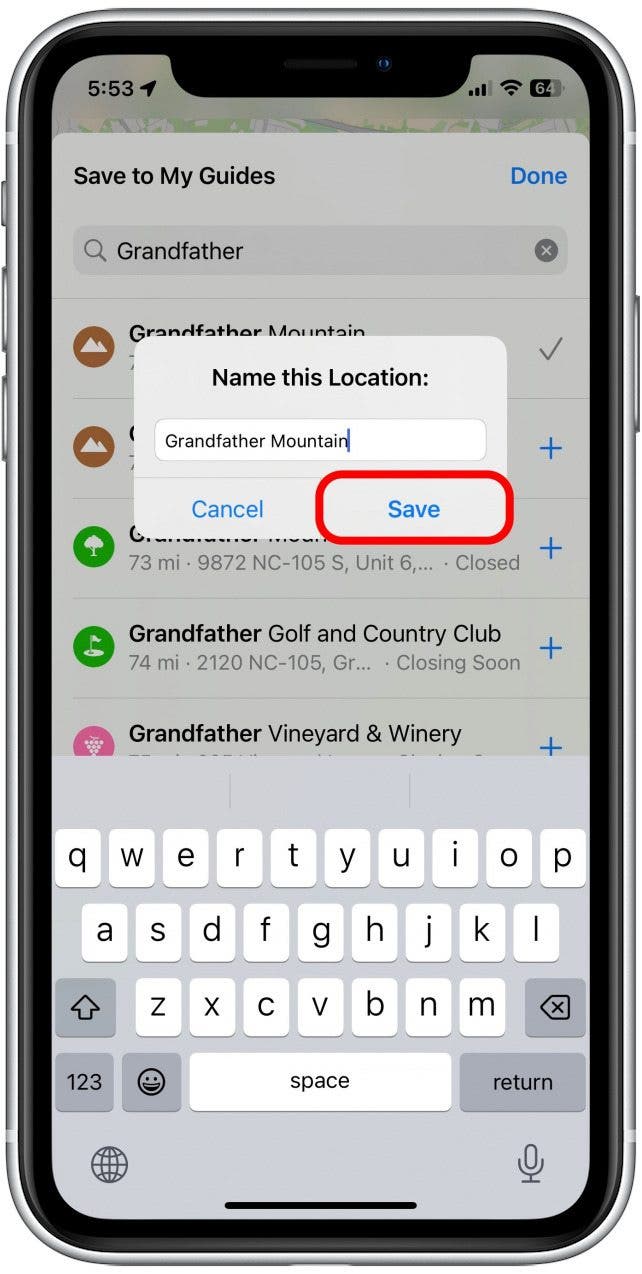
- It may ask you to name the location. Choose a name that you will be able to remember and identify. If you don't see this screen, you can simply go to the next step.
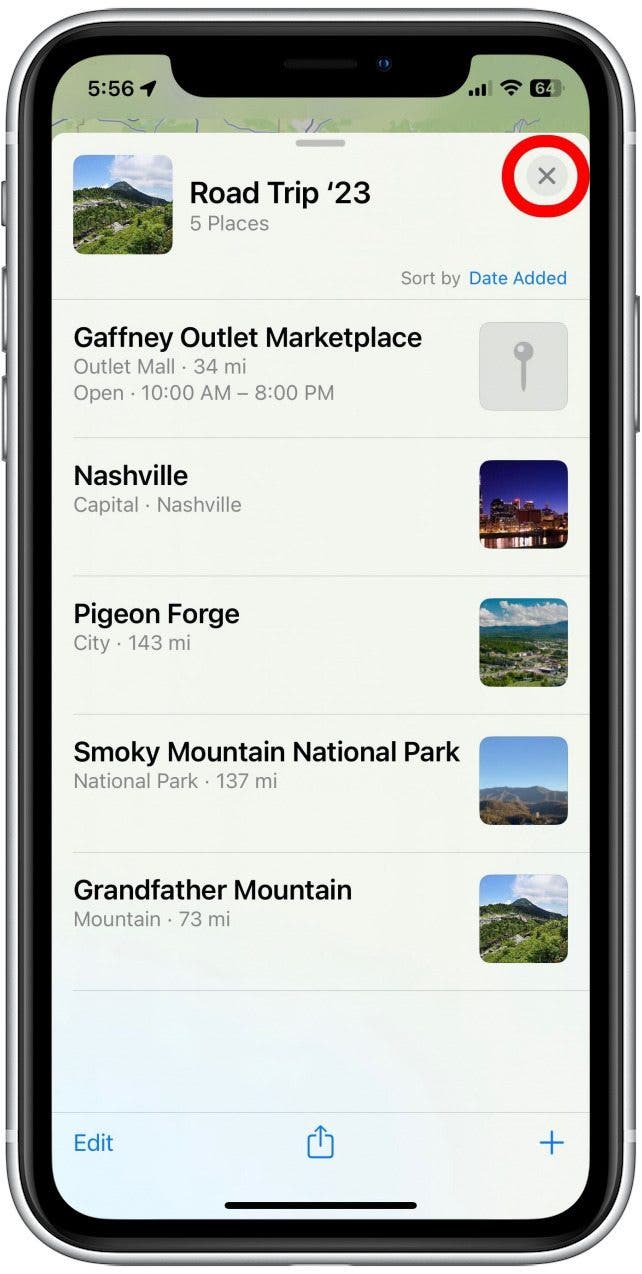
- Tap “X” to return to the map.
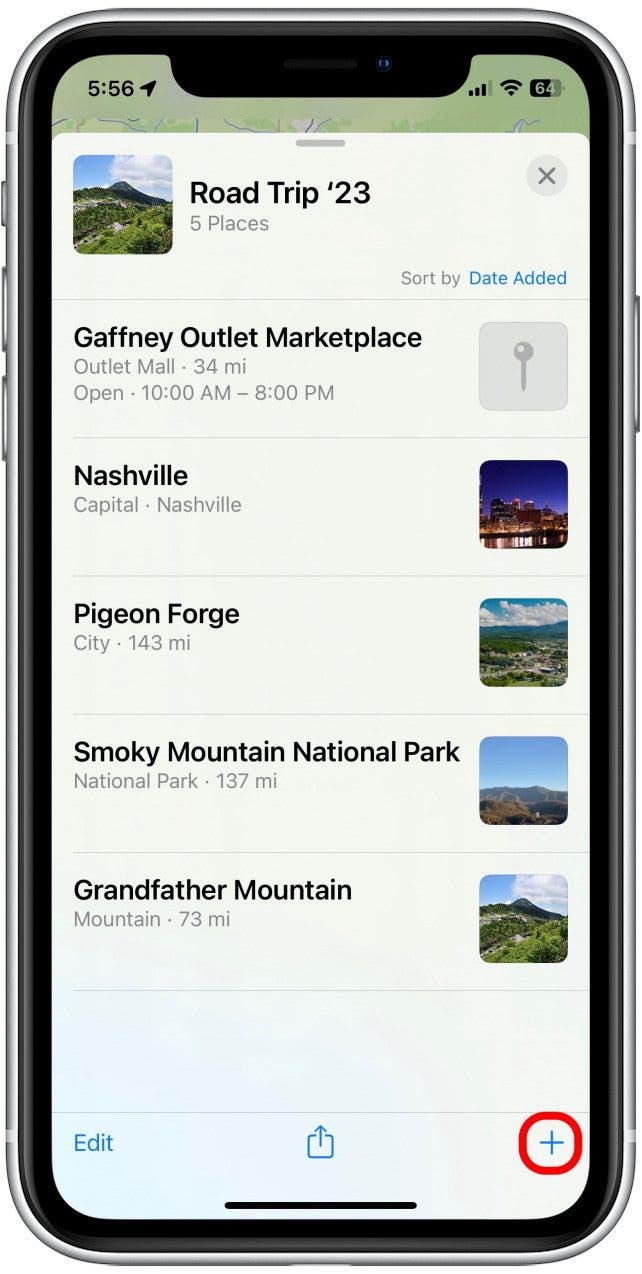
- To quickly add another location, tap the blue plus sign.
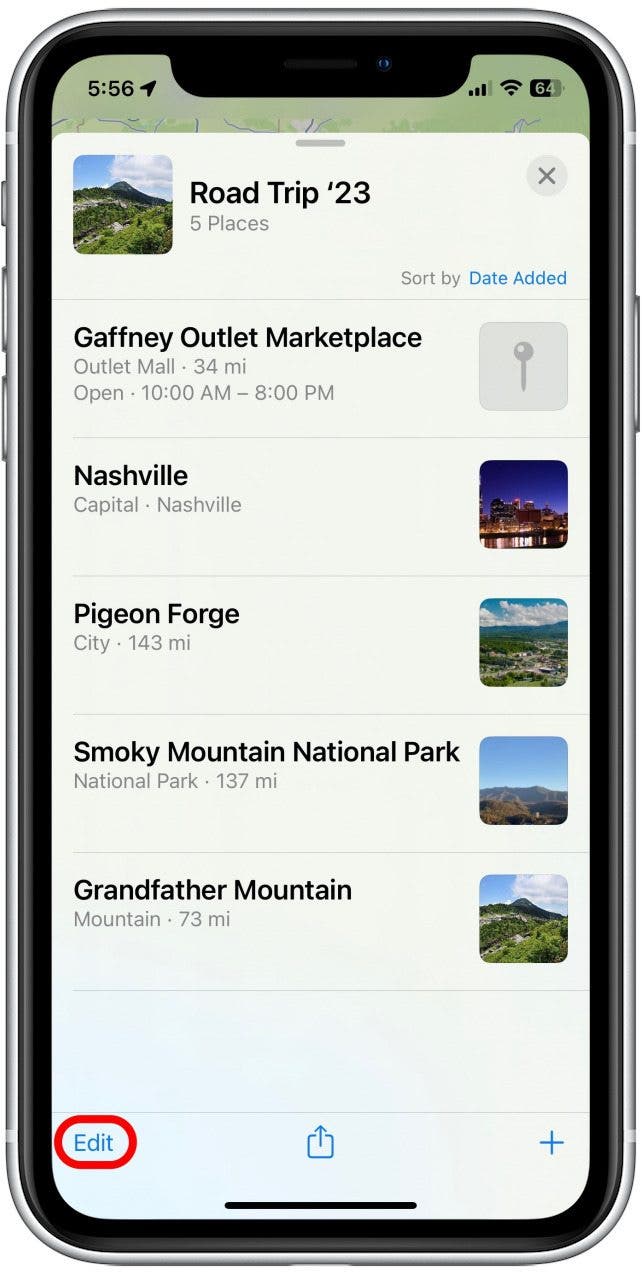
- To delete locations from your Guide, tap Edit. You can also swipe left on a specific location to share or delete that location.
- To share the guide with others, tap the Share button.
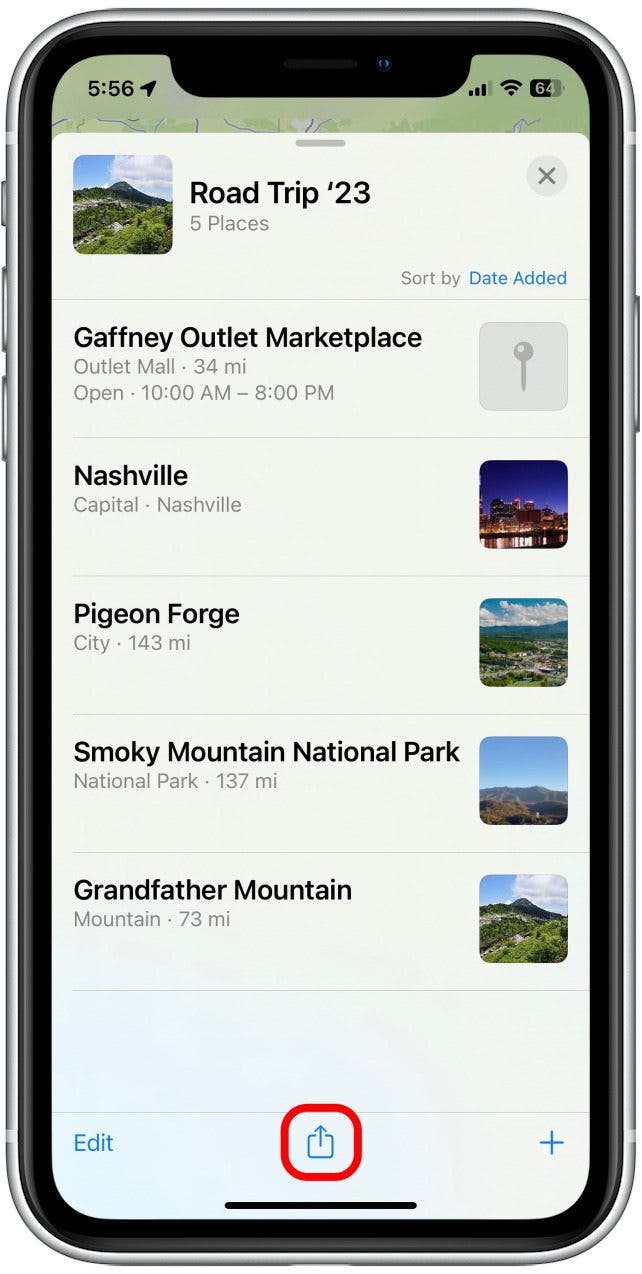
- Tap Done to return to your guide.
When I travel, I like to use my guides to organize my trip, so I can plan to visit landmarks, shops, and restaurants in a specific part of the city on one day, and a different part of the city the next. Occasionally, I’ll find a Guide where I’m interested in only one or two of the recommendations. In this case, I can tap the blue plus sign next to the destination and add it to one of my own Guides. Much like saving a favorite picture to a specific photo album, this shortcut allows you to only save locations you are highly interested in, which makes for easier reference down the line. You can also download a map of the area so that you can use your guides even without an internet connection.
Finally, if you're interested in learning a fun new way to explore in Maps, you can also learn how to view the interactive globe. And if you're planning a road trip, you can also learn how to change arrival and departure times in Apple Maps so you can find the best time to leave and avoid traffic.

Every day, we send useful tips with screenshots and step-by-step instructions to over 600,000 subscribers for free. You'll be surprised what your Apple devices can really do.

Tamlin Day
Tamlin Day is a feature web writer for iPhone Life and a regular contributor to iPhone Life magazine. A prolific writer of tips, reviews, and in-depth guides, Tamlin has written hundreds of articles for iPhone Life. From iPhone settings to recommendations for the best iPhone-compatible gear to the latest Apple news, Tamlin's expertise covers a broad spectrum.
Before joining iPhone Life, Tamlin received his BFA in Media & Communications as well as a BA in Graphic Design from Maharishi International University (MIU), where he edited MIU's literary journal, Meta-fore. With a passion for teaching, Tamlin has instructed young adults, college students, and adult learners on topics ranging from spoken word poetry to taking the perfect group selfie. Tamlin's first computer, a Radioshack Color Computer III, was given to him by his father. At 13, Tamlin built his first PC from spare parts. He is proud to put his passion for teaching and tech into practice as a writer and educator at iPhone Life.

 Olena Kagui

 Leanne Hays
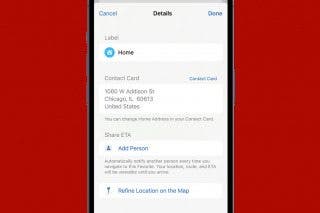
 Rhett Intriago
 Rachel Needell


 Amy Spitzfaden Both