How to FaceTime Screen Share on Mac
Share your screen in a Mac FaceTime call with friends, family, and co-workers.


Learning how to screen share on a Mac FaceTime call is useful in all kinds of situations, whether you want to walk someone through how to interpret a spreadsheet or just informally show a family member some fun digital art. Let's cover how to share your screen on a FaceTime call on your Mac.
Why You’ll Love This Tip
- Who needs Zoom? Share a single window or your entire screen while on a Mac FaceTime call.
- Share your screen to review documents, clarify tasks, or show off your amazing vacation photos.
How to Share Screen on FaceTime on Mac
To learn more about your Mac's hidden features, sign up for our free Tip of the Day newsletter. If you want to share your screen on a group FaceTime call, everyone on the call must have a Mac running macOS 12.1 or later, an iPhone running iOS 15.1 or later, or an iPad running iPadOS 15.1 or later. If anyone on the call does not have the required software versions, the Share Screen icon will simply not appear. But if all participants’ software is up to date, then you should be good to go! Now, here's how to screen share on a Mac FaceTime call:
- Open the FaceTime app.

- Click New FaceTime to start a call.

- Enter at least one contact name, email, or phone number, and click FaceTime.

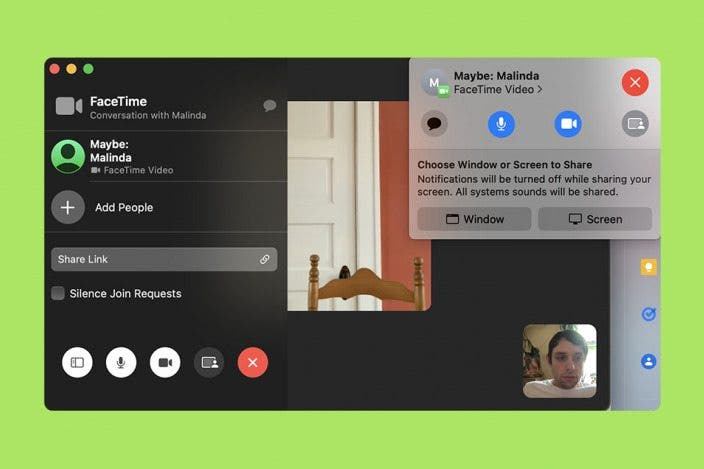
- Once you have started a FaceTime call, click the Share Screen icon.
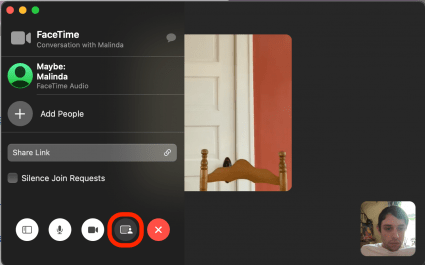
- If you want to share your entire desktop, click Screen.
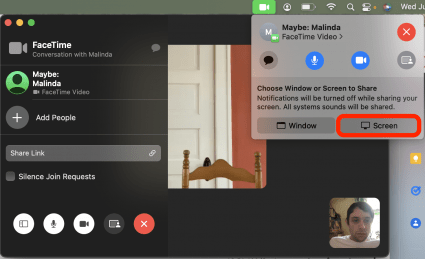
- Click Share This Screen to confirm.
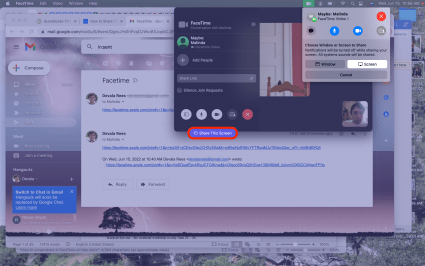
- If you want to change what screen you’re sharing, at any time, you can click Change Shared Screen.
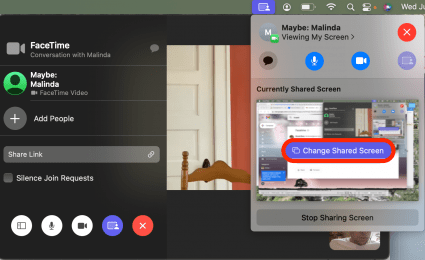
- If you want to share a specific window on your desktop, click Window.
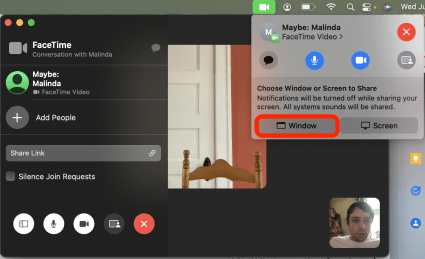
- Select the window you want to share, then click Share This Window to confirm.
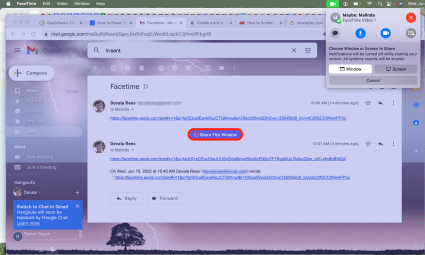
- If you want to change what window you’re sharing, at any time, you can click Change Shared Window.
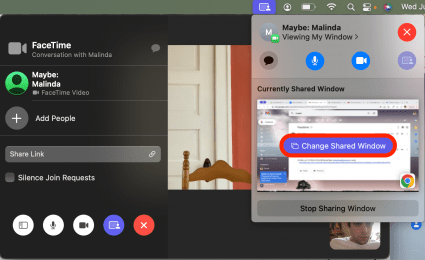
- When you're done sharing your screen, you can simply click Stop Sharing Screen or Stop Sharing Window.
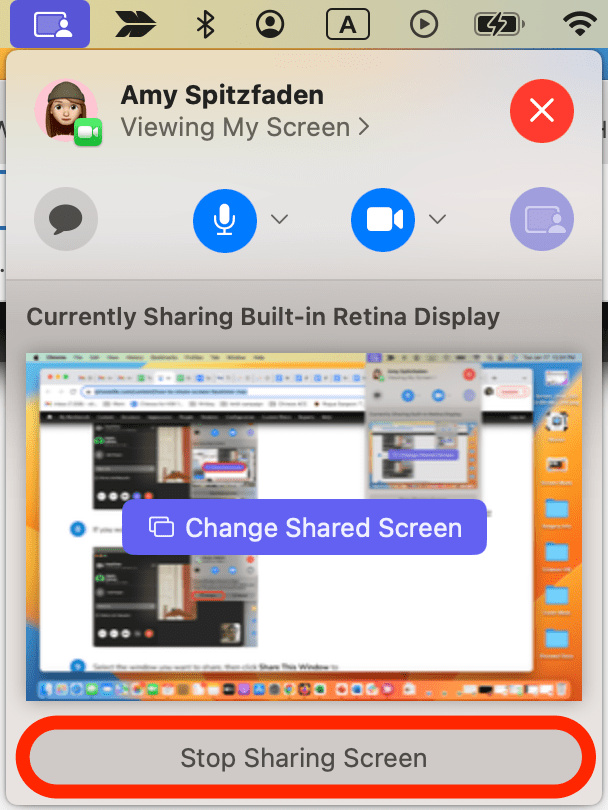
Now you can share your screen anytime you'd like on a FaceTime call!
Every day, we send useful tips with screenshots and step-by-step instructions to over 600,000 subscribers for free. You'll be surprised what your Apple devices can really do.


 Rachel Needell
 Olena Kagui

 Leanne Hays

 Amy Spitzfaden Both


 Rhett Intriago

