iPhone Photo Saving & Sharing: Text, Email, AirDrop, Shared Albums & Social Media
Here's how to save and share photos on your iPhone in the Messages app, Mail app, via AirDrop, and with Facebook and Instagram.


One of my favorite uses for my iPhone is taking and sharing pictures, but with so many different methods and platforms, it can get a little tricky. Let's cover everything about saved images and photos, including how to save and share pictures from text and iMessage, from email, with AirDrop and iCloud, from Shared Albums, and even social media platforms like Facebook and Instagram.
Related: How to Play Slideshows from the Photos App on iPhone
iPhone Photo Saving & Sharing: Text, Email, AirDrop, Shared Albums & Social Media
Here's our guide to photo saving and sharing photos on iPhone. For more great Photos app tutorials, check out our free Tip of the Day.
Save Photos from Text & iMessages on iPhone
A friend or family member sends you a text message with an adorable photo attached. Now you'd like to download the photo, but how? Just follow the steps below:
- Tap the photo or video.
- Tap on the Share icon at the bottom of your display.
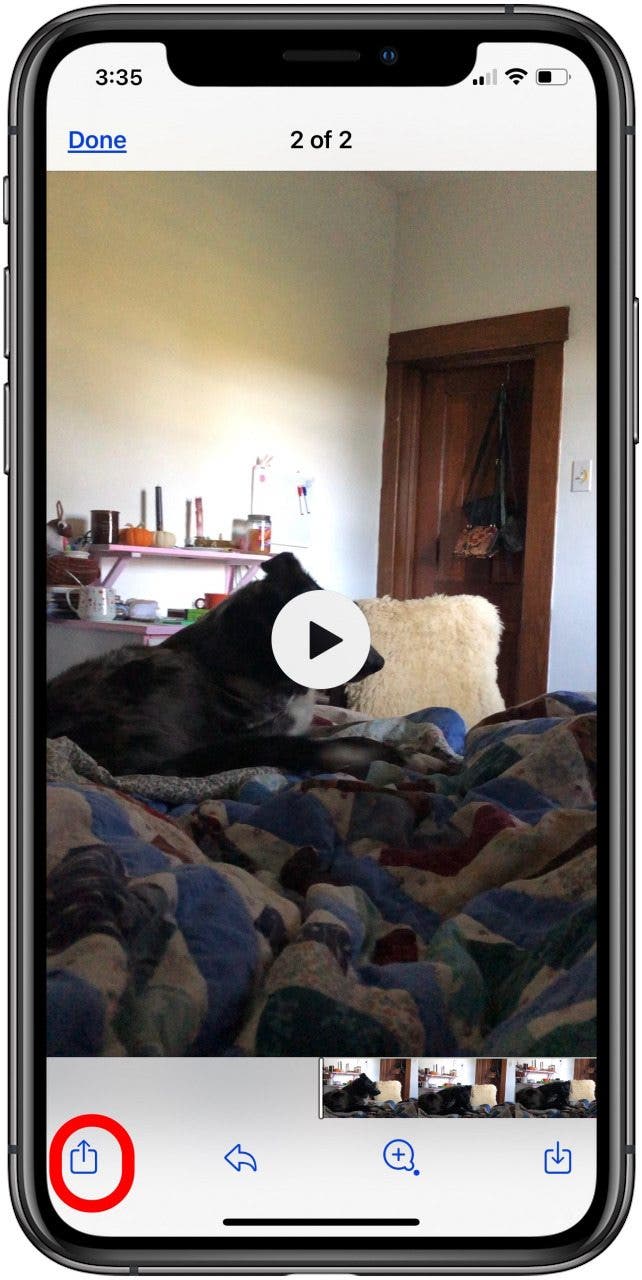
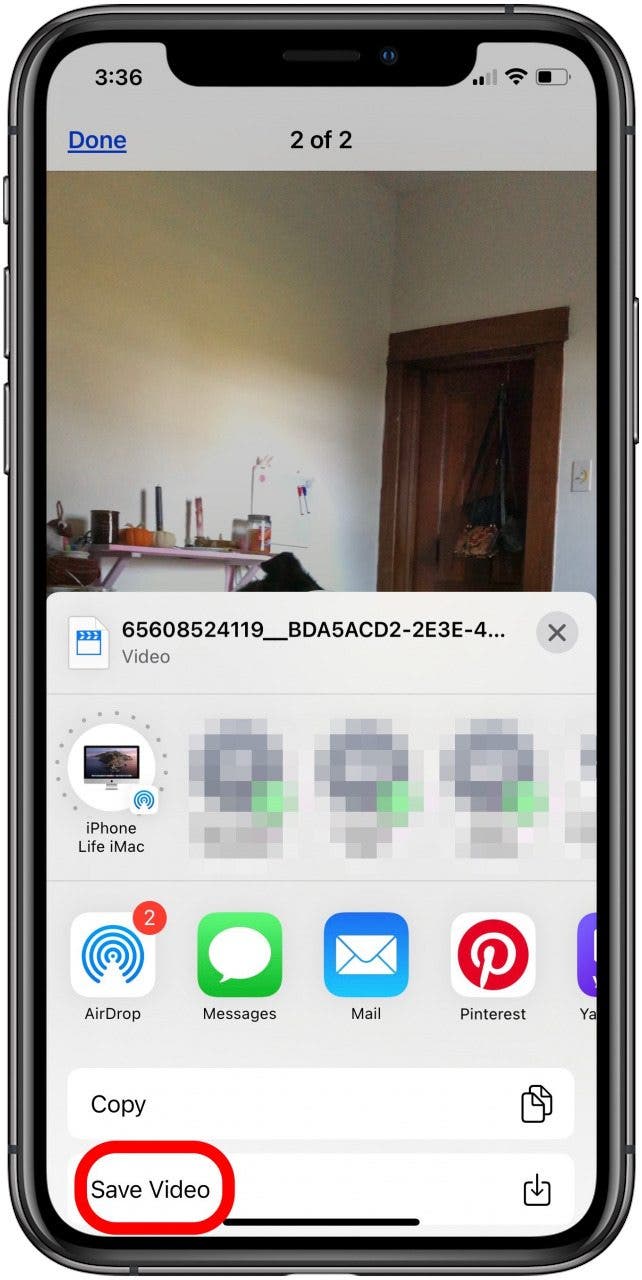
- A menu will appear with ways to further share the photo through a message, email, and more. Below these options, tap the Save Image or Save Video option.
- Now, when you open your Photos app, you'll see the image you just saved.
Interestingly enough, the photo will be sorted into place in the Photos tab depending on the day it was taken, not the day you saved it. If you're having a hard time finding your saved photo, this may be why. Tap on the Albums tab at the bottom of the display, then tap Recents, and you'll see your picture as the most recent in your queue. If you want to take it one step further, you can learn how to save a photo as a PDF on iPhone.
How to Save Multiple Photos & Videos from an iMessage Thread
If someone has sent you more than one photo or video you'd like to save, there's a convenient way to download this content all at once. To accomplish this:
- Open the Messages app and tap the thread you'd like to save photos from.
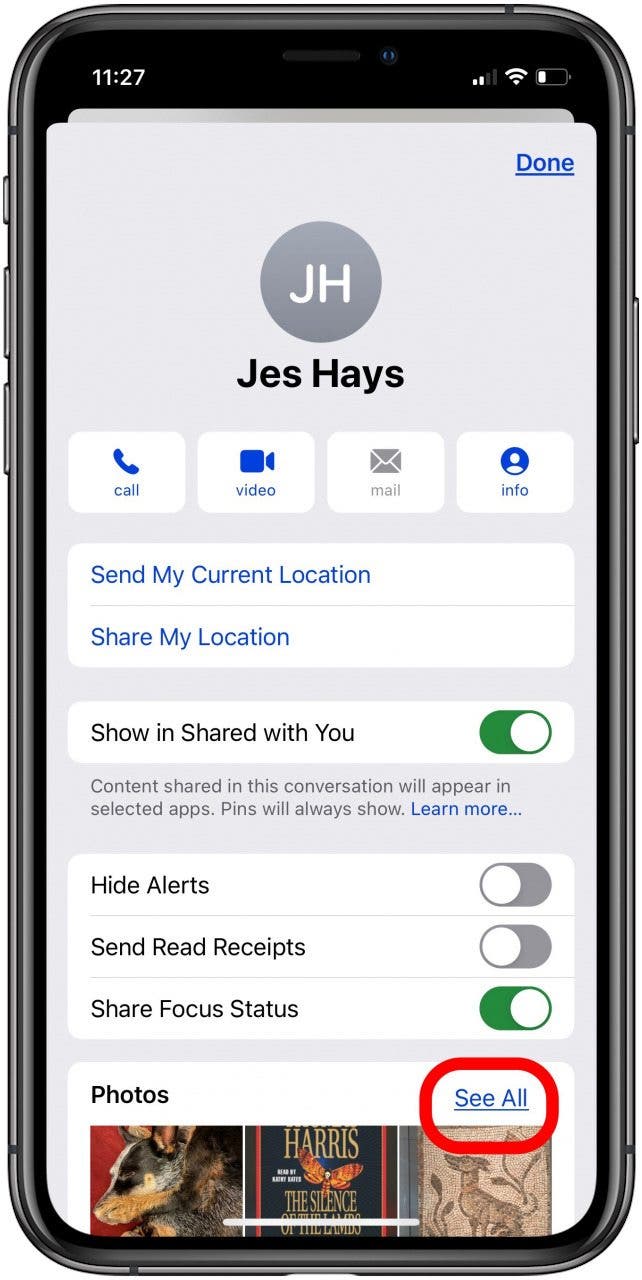
- Tap on the tiny arrow next to the sender's name.

- Tap See All next to Photos.
- Tap Select.
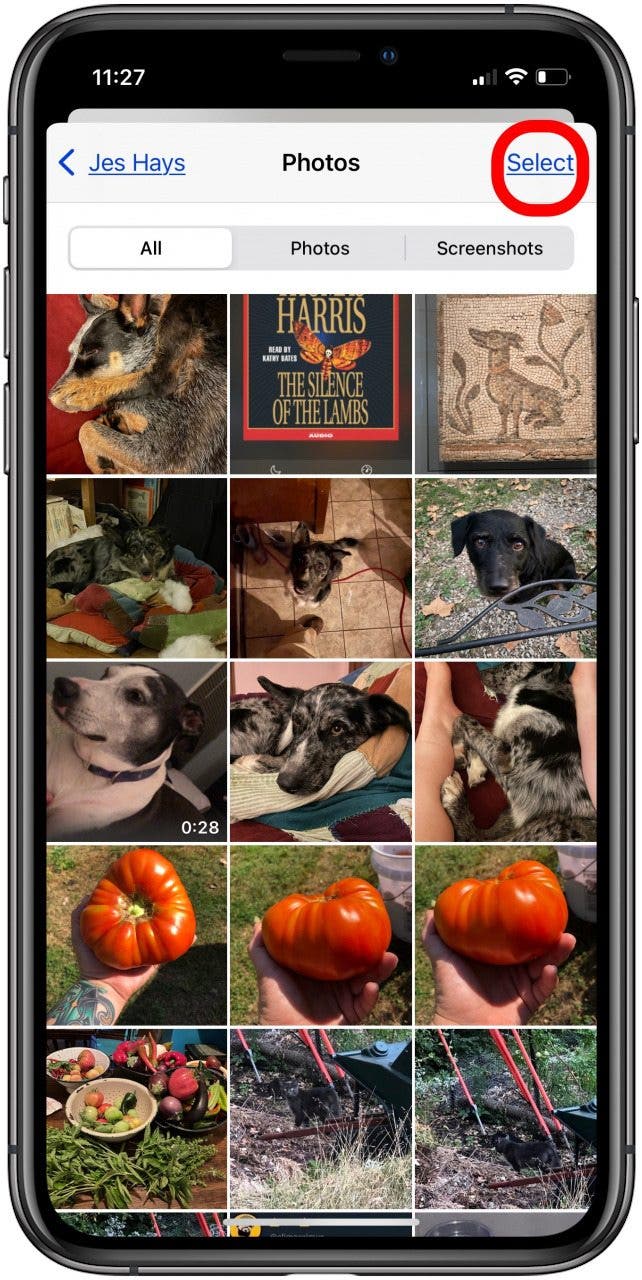
- Tap the pictures you'd like to download and tap Save.

Your selections will be saved to the Photos app.
How to Upload Photos & Videos to an iMessage
Now that you've learned how to save photos and videos that others have sent to you, it's time to learn how to reciprocate! To send a picture in an iMessage or text:
- Open the text thread with the person you'd like to share a photo with.
- Tap the photos icon (it looks like a rainbow flower).
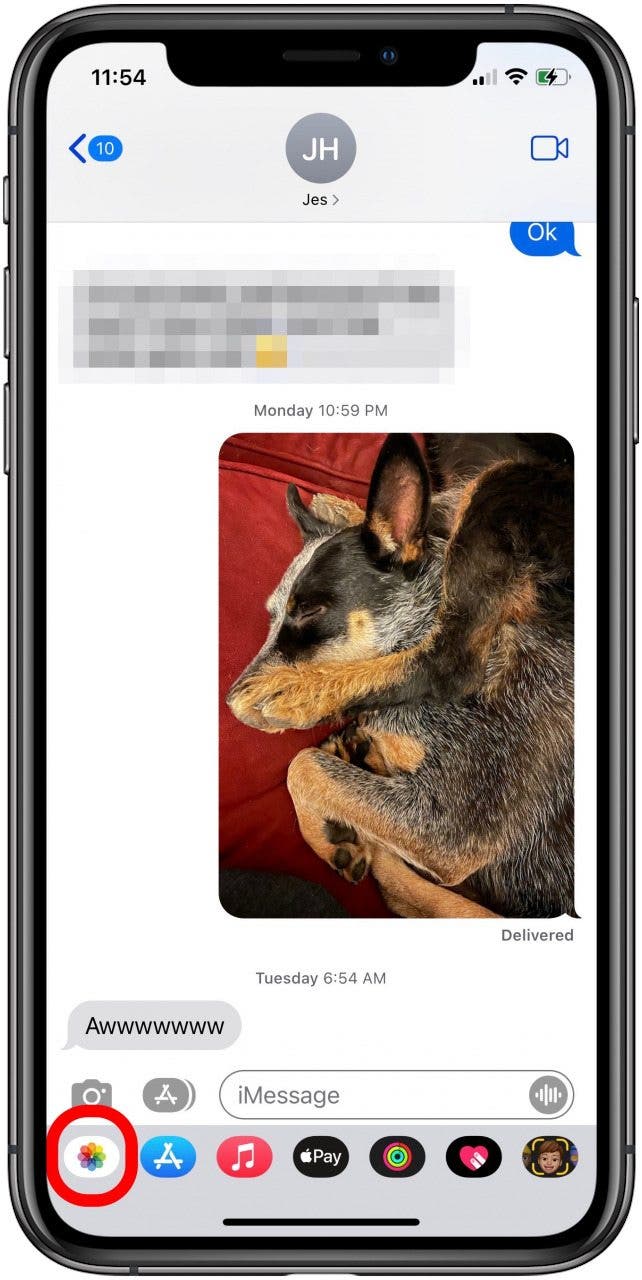
- Scroll and tap the photos and videos you'd like to share.
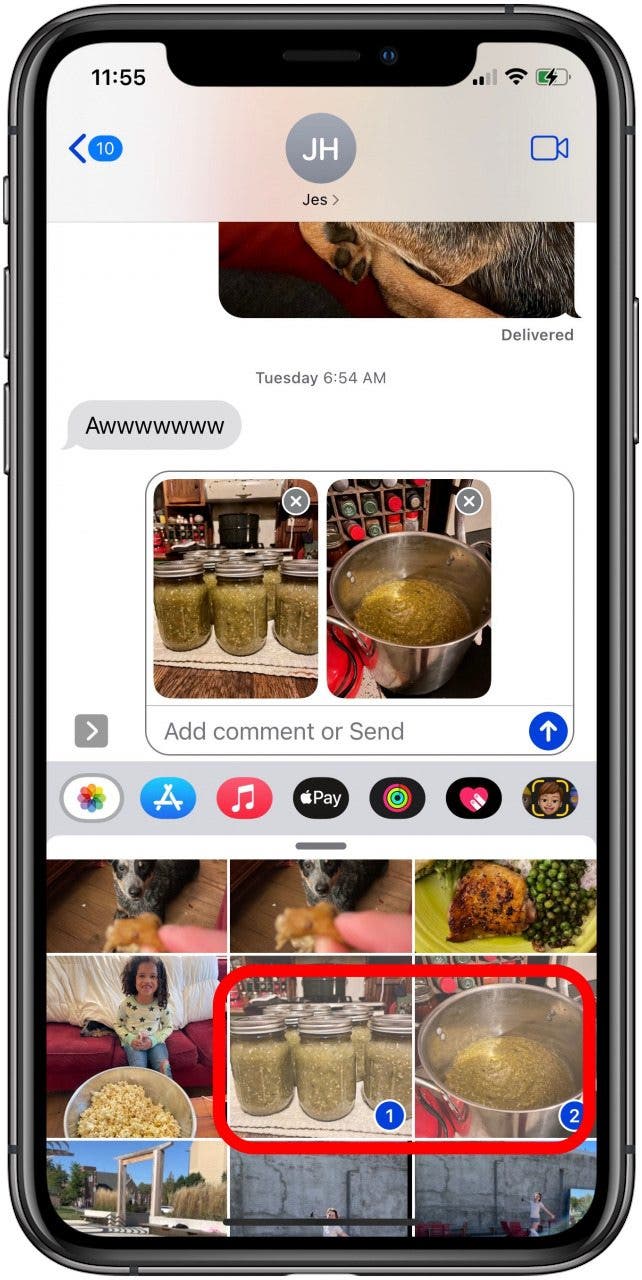
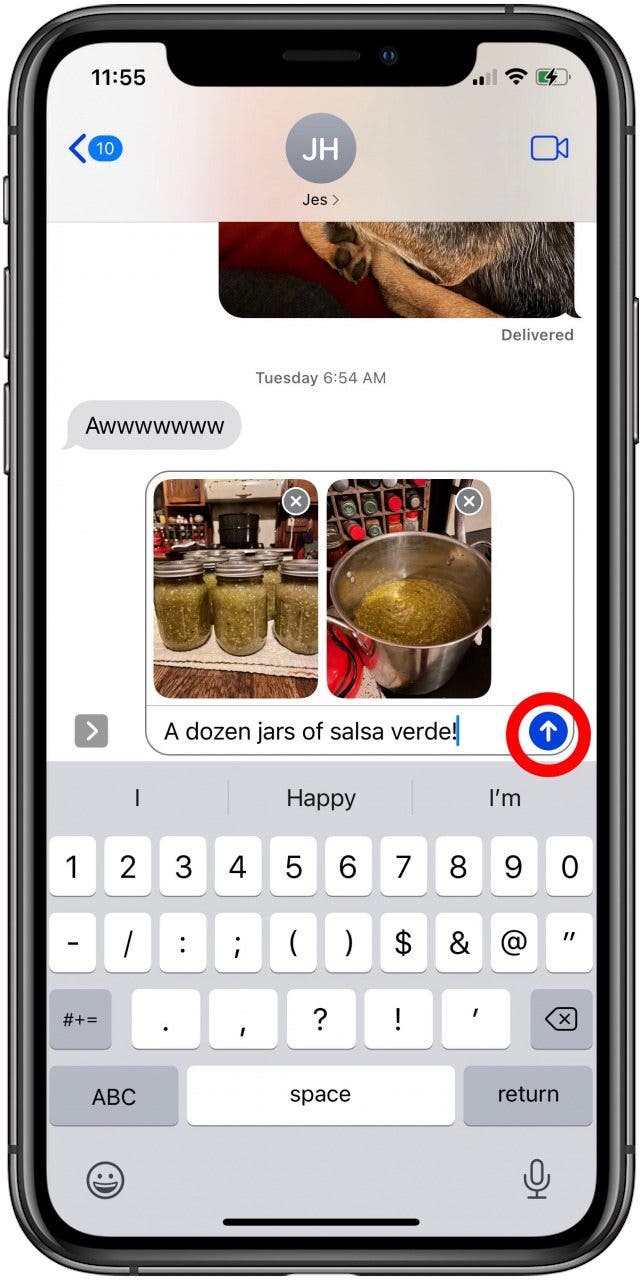
- The photo or video will appear within the text field; feel free to add text if you wish, then tap the Send icon.
How to Save Photos & Videos You Receive from Email on the iPhone
You can save pictures or videos from email messages right on your iPhone; here's how:
- In the Mail app, open the email with the photo(s) you want to save.
- Tap the image.
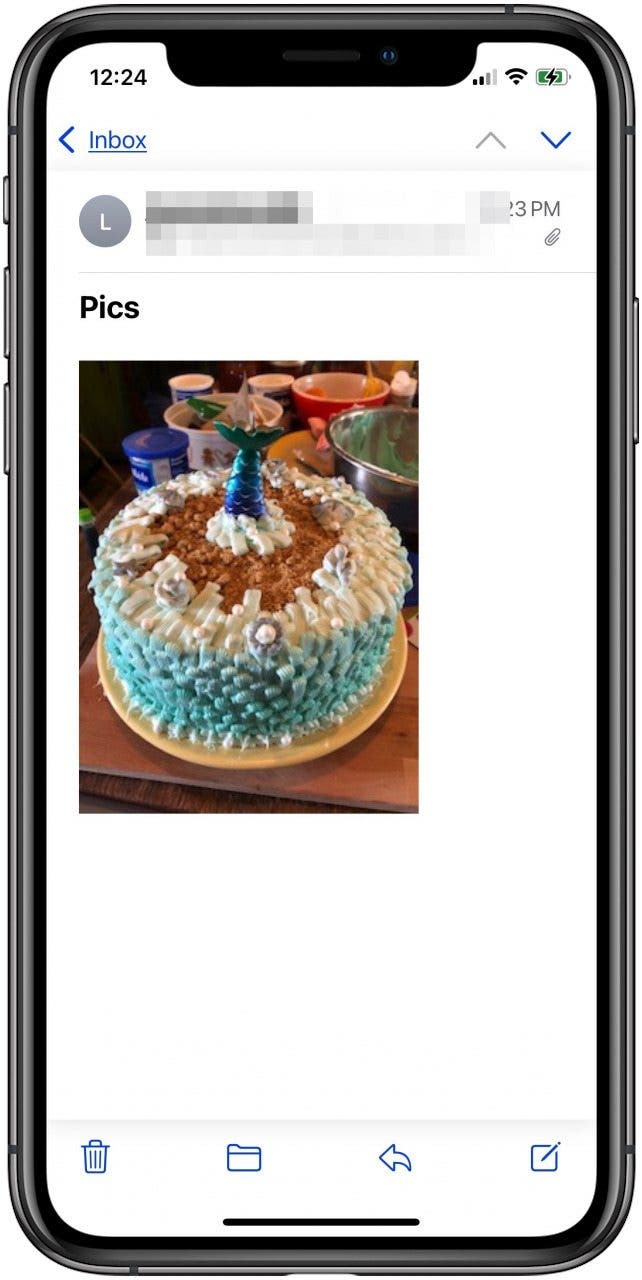
- To save the photo, tap the Share icon at the lower-left corner of your screen.
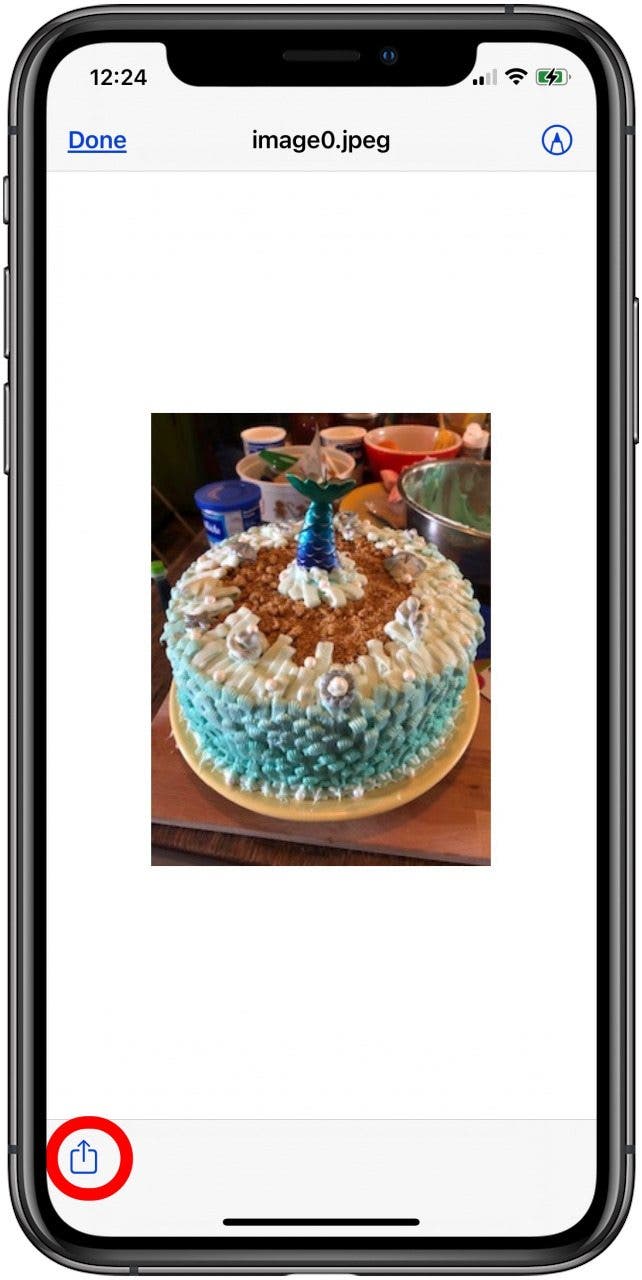
- Tap Save Image.

How to Upload & Email a Photo on Your iPhone
Copy & Paste a Photo into an Email
Now that you know how to save a photo from an email message, let's learn how to upload and share a picture via email. The first method, copying and pasting, happens from the same menu that allowed you to save an image from an email. For quicker ways to share photos, learn how to set up an iCloud shared library. If you'd like to share an image from an email:
- To copy and paste a photo from one email into a new email, tap the Share icon.

- Tap Copy.

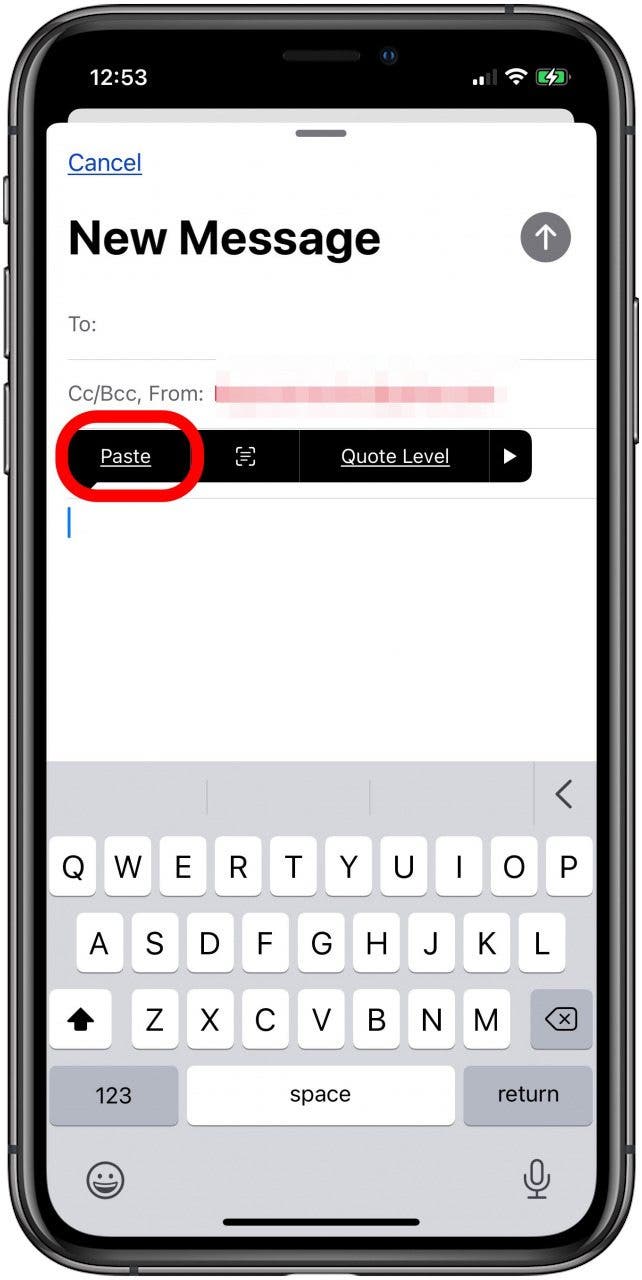
- To paste a copied photo, start a new email. Tap and hold in the body of the email and select Paste.
Choose a Picture from the Photos App to Send in an Email
For the second method, open your email app and start a new email, then:
- Tap the body of the email; an arrow will appear.

- Tap the arrow, then tap the Photo icon.
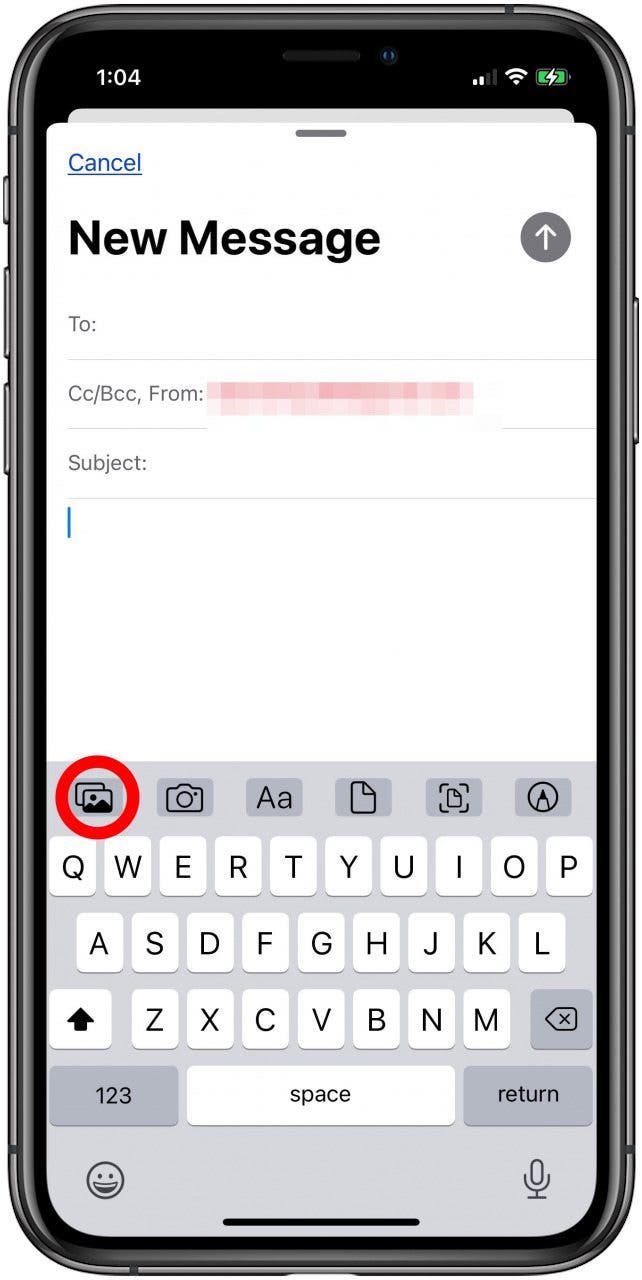
- Tap Recent Photos or All Photos, then tap the photo(s) you want to send.

- Add text if desired, tap the Send icon, and your email will be sent.

How to Share Photos with AirDrop
Getting Started with AirDrop
Follow this link to learn which devices and operating systems are compatible with AirDrop, as well as how to enable the feature.
How to AirDrop a Photo
- To AirDrop a picture, open the Photos app.
- Tap on one or more photos you want to share.
- Tap the Share icon that’s located in the lower-left corner of your iPhone.

- Tap AirDrop.
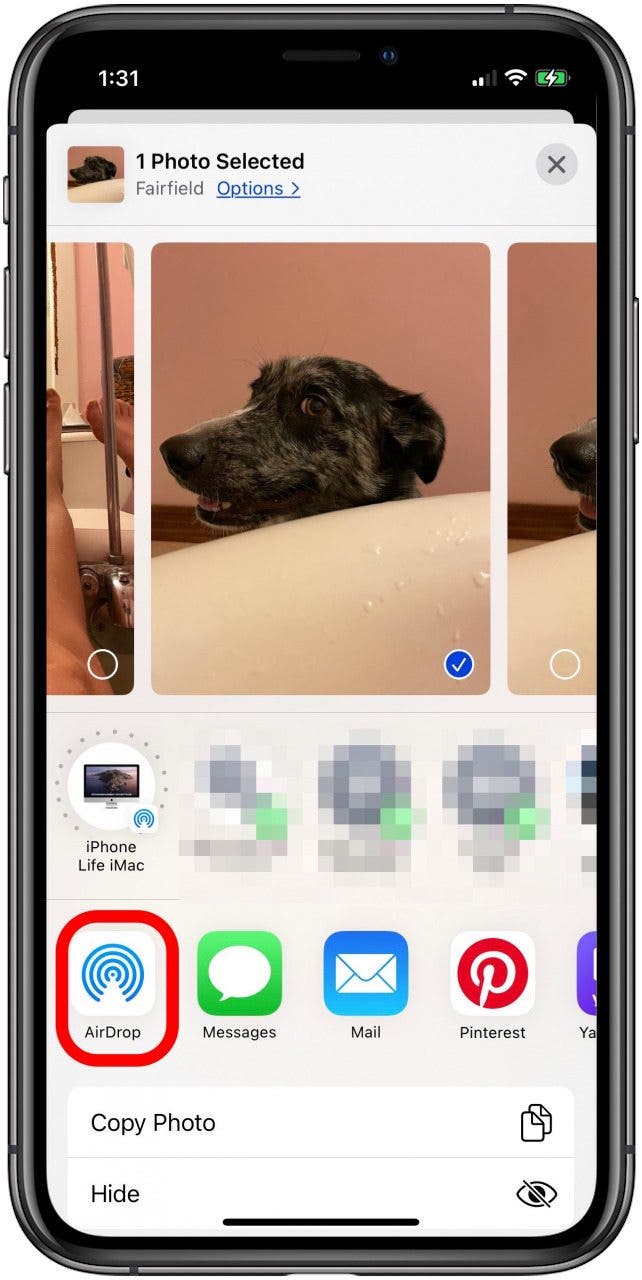
- Any available devices to receive your AirDrop will appear; tap the one you want.
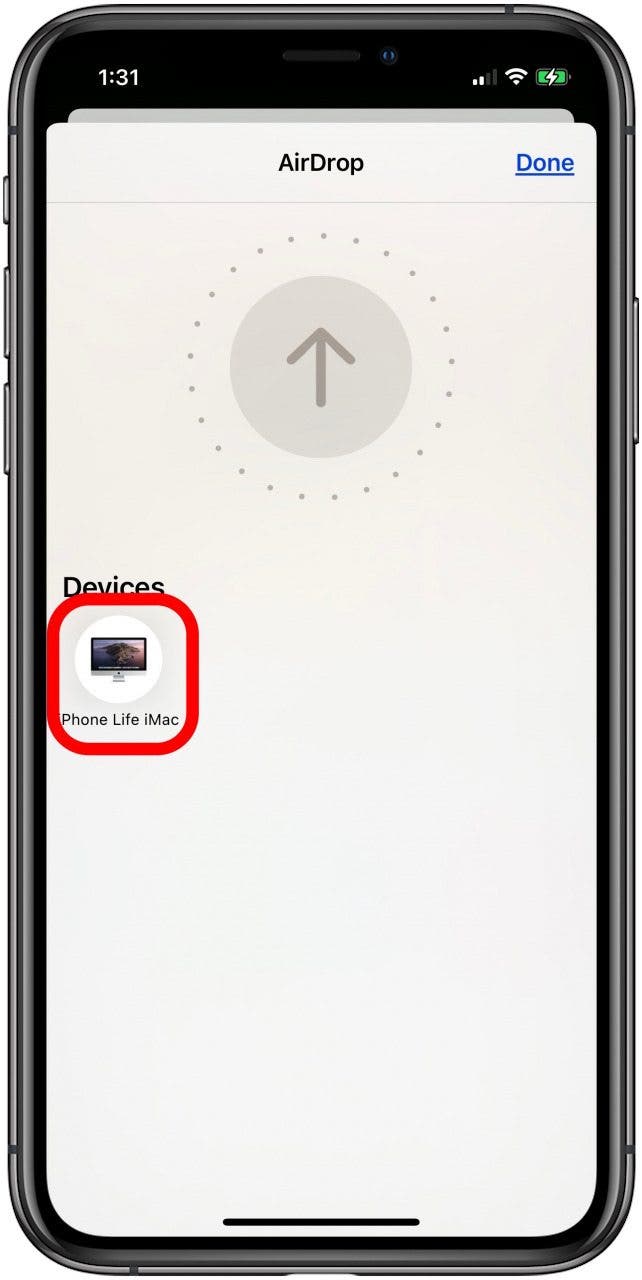
In this case, you can see that my Mac is the only device nearby that I can send these photos to. In more crowded places, I can see icons for many iPhones and other devices working in about a 30-foot vicinity of me.
If you're sending the photos to another of your devices, they'll automatically download and save. If you're sending pictures to someone else, they'll receive a notification that you're trying to AirDrop them something. They can then accept or decline it.
How to Save a Photo Sent with AirDrop
When you get a notification on your device that someone has AirDropped you a photo, how can you save it? This one is really easy!
- You'll see a notification on your iPhone that someone has AirDropped you a photo; tap Accept.
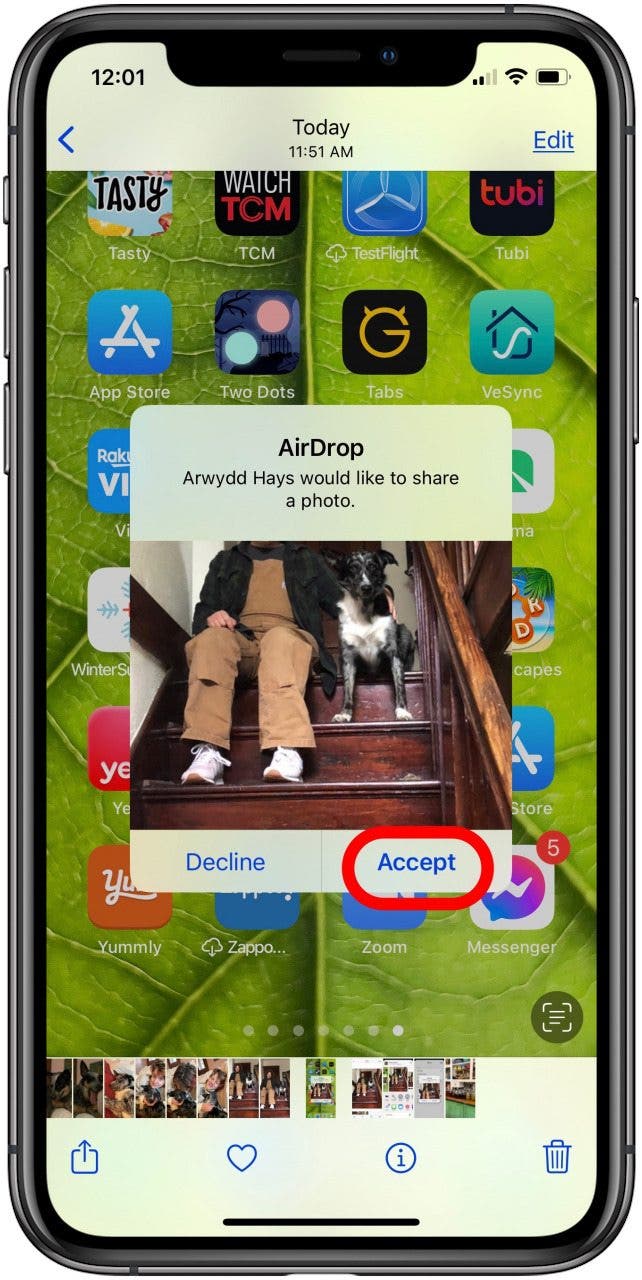
- The photo will automatically be added to your photo library in your Photos app.
How to Create a Shared iCloud Photo Album & Add People to It
This method is perfect for those times when you have a large number of photos to share or if you want to share photos on an ongoing basis. If you have just a few, email or iMessage will be quicker. Before you use this method of photo sharing, you'll need to set up iCloud drive for yourself. Once that's done, it's time to turn on Shared Albums.
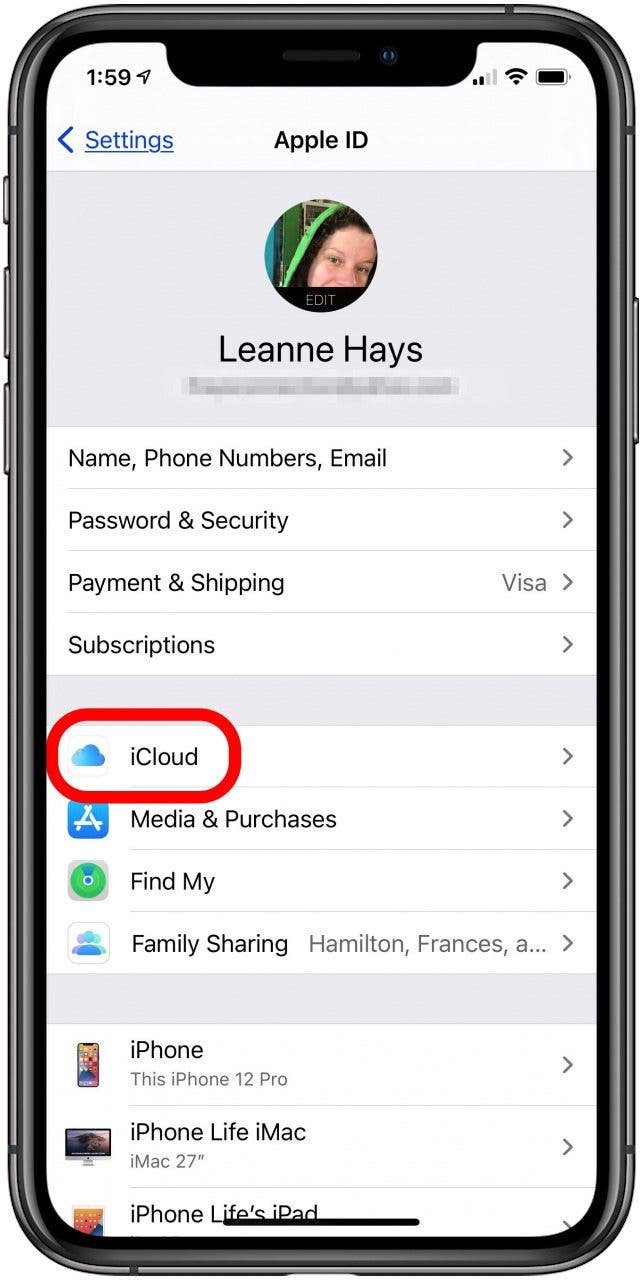
- Open the Settings app.

- Tap the banner with your name in it at the top of the page.

- Tap iCloud.
- Tap Photos.
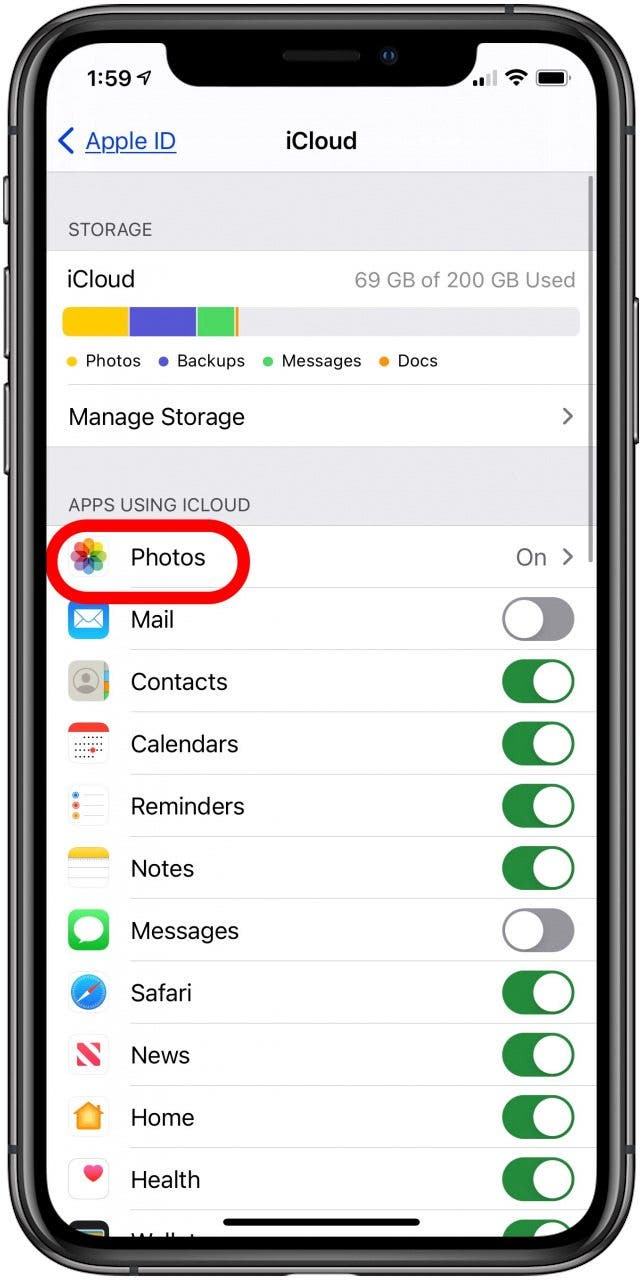
- Toggle on iCloud Photos and Shared Albums.

- If you'd like more storage space on your iPhone, tap Optimize iPhone Storage; this setting lets iCloud Photos automatically manage the size of the photo library on your device.
- If you decide you want to have the full versions of all photos and videos on your device, select Download and Keep Originals.

Now, if you'd like to put together a Shared Album for friends and family to be able to view, add to, and comment on, you can!
- Open the Photos app and tap on the Albums tab at the bottom of the page.
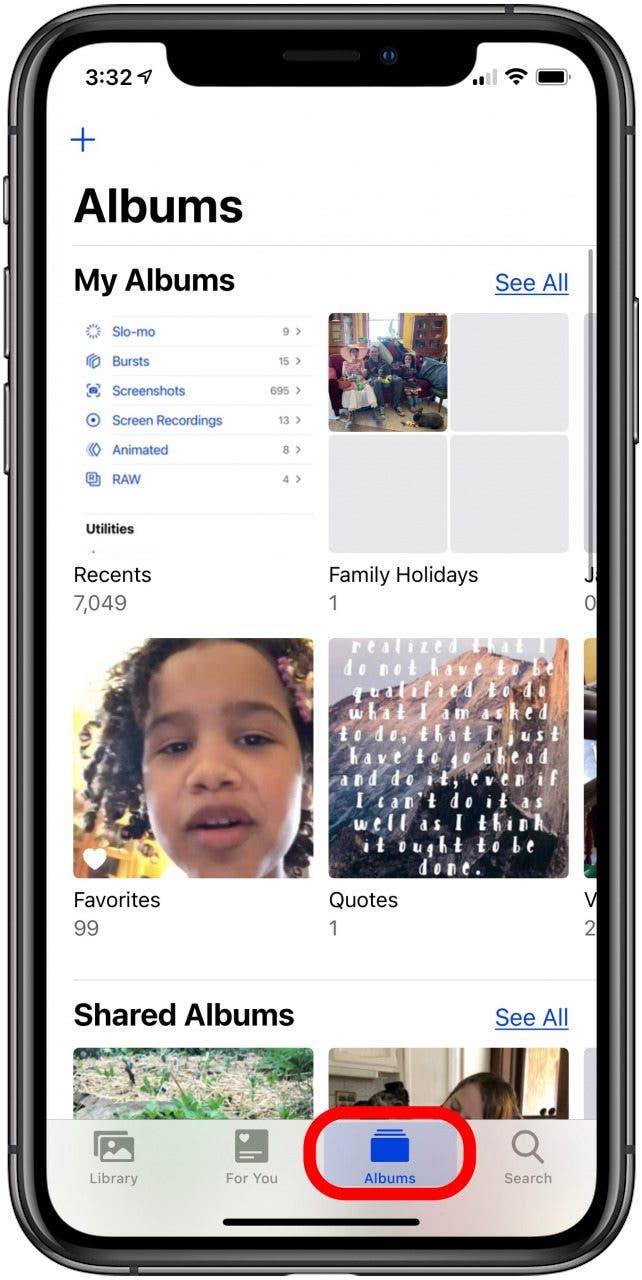
- Tap the plus sign at the upper-left of the display.

- Tap New Shared Album.
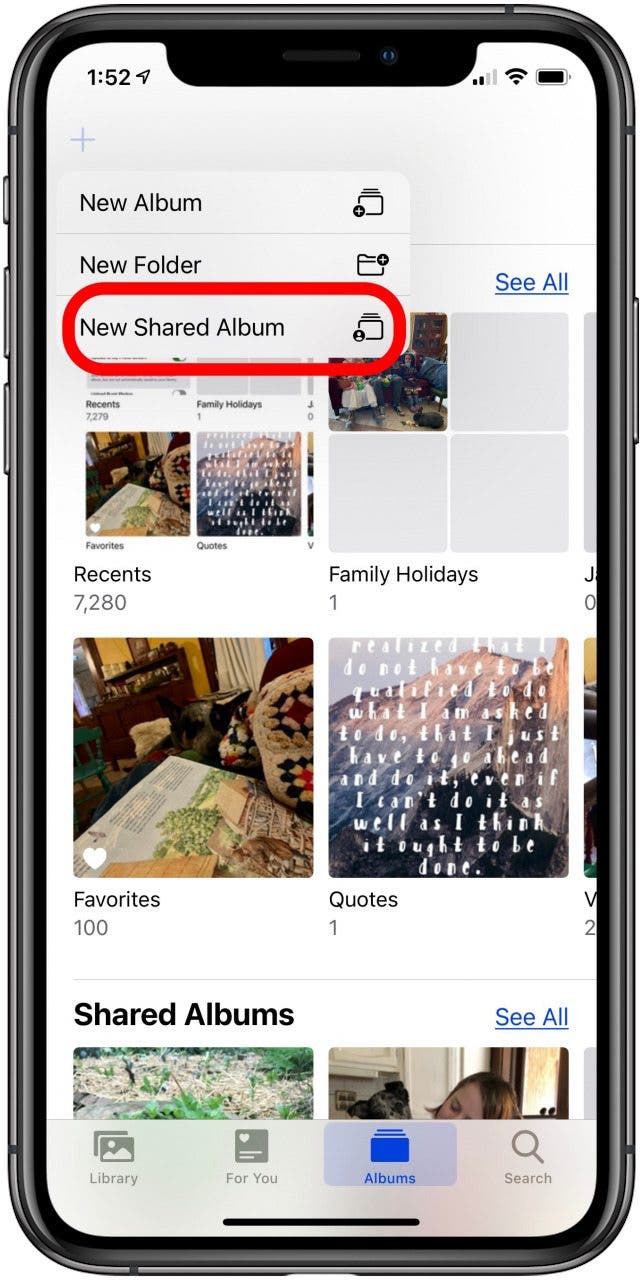
- Now you can name your album and tap Next.

- Type in email addresses, iPhone numbers, or enter people from your Contacts. You can enter up to 100 people! Tap the plus sign to add more contacts.
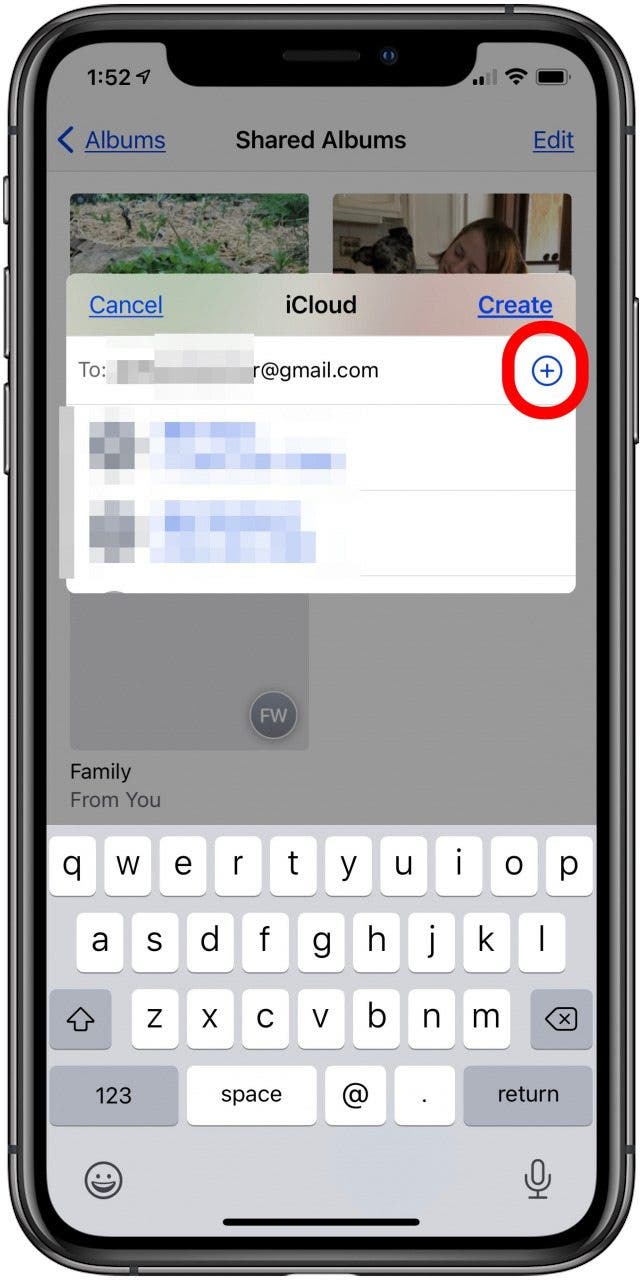
- Tap Create, and your Shared Album is done.
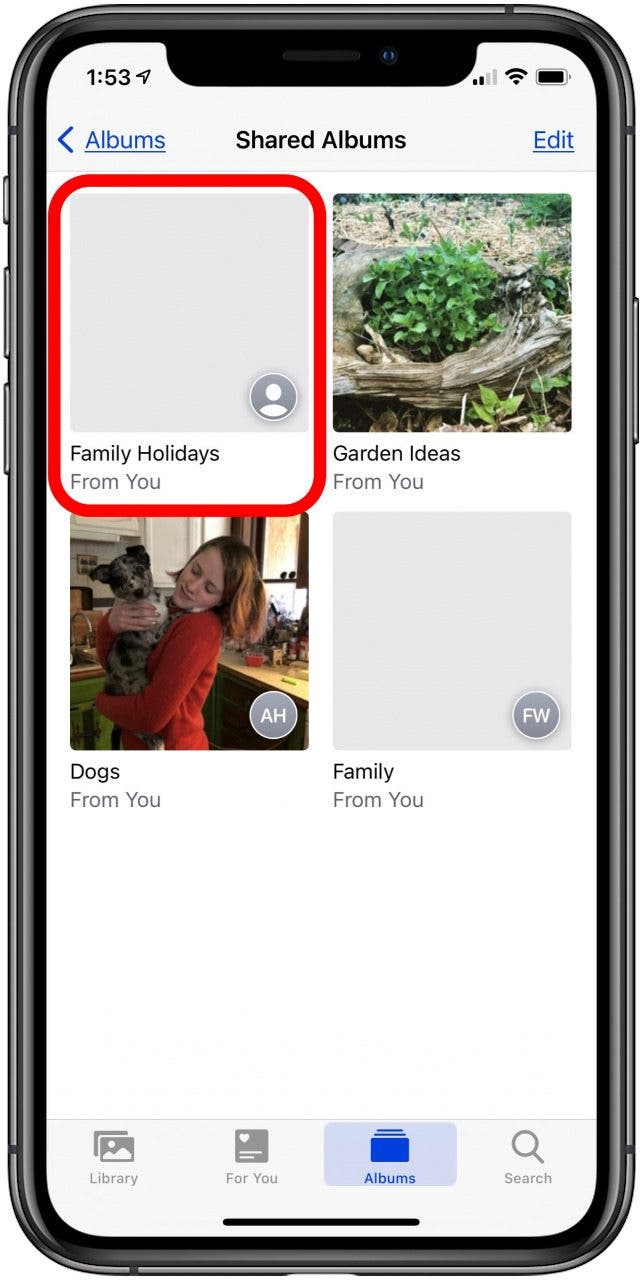
- You can find your album in the Albums tab.
How to Share Albums with Android Users
If you'd like to change your album settings so you can invite people who use Android or other non-Apple phones:
- Open the Shared Album you created.
- Tap the People icon at the bottom of the page.
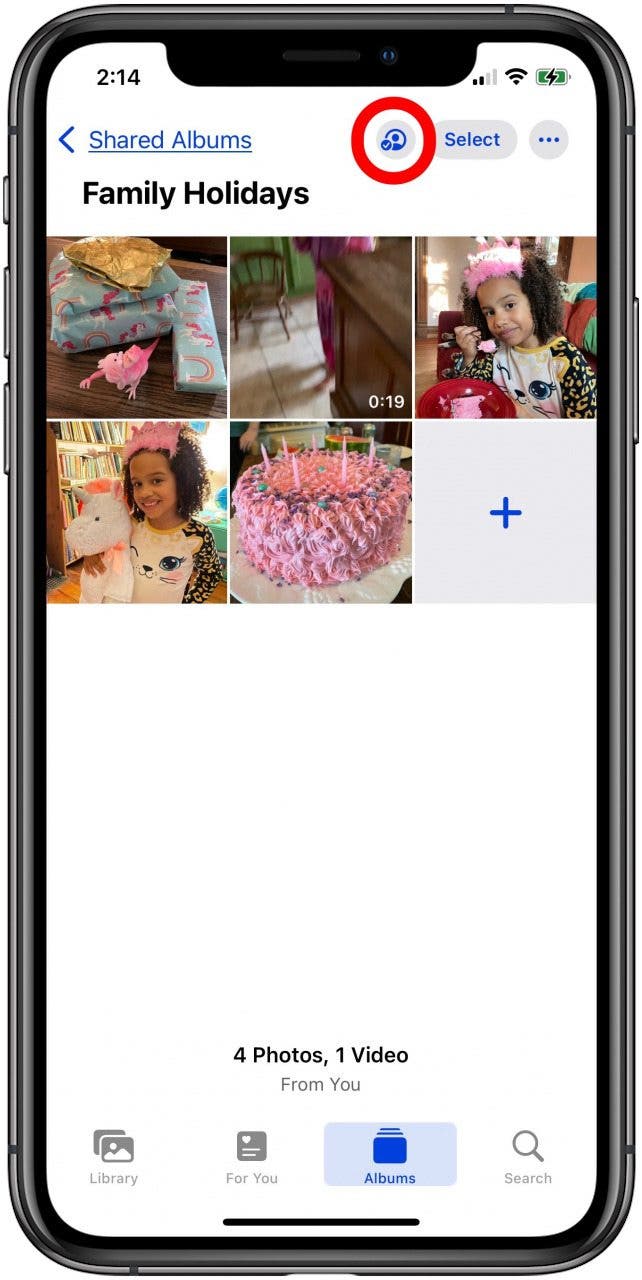
- Toggle on Public Website.

- Now you can click Share Link to share the album with your contacts, and it's available for public viewing at the link below Share Link.
How to Add Pictures & Videos to a Shared Album
To add photos and videos to a shared album:
- Tap the Library tab at the bottom of the Photos app, then choose the photo or video you'd like to share by tapping it.
- Tap the Share icon.

- Tap Add to Shared Album.
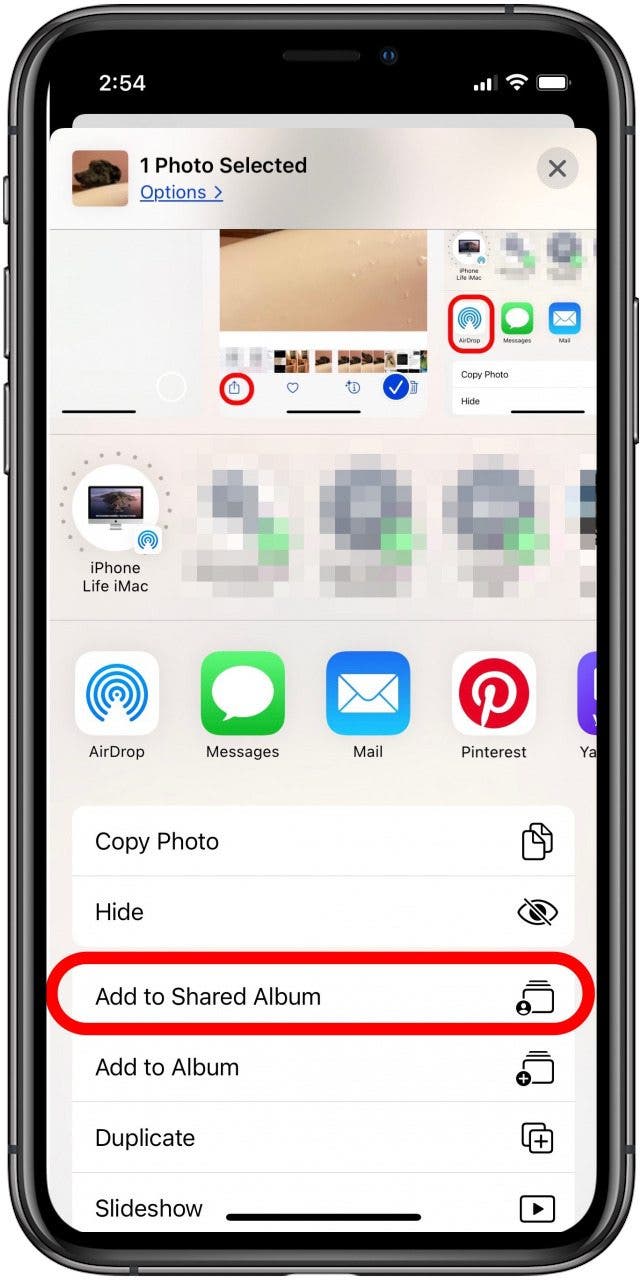
- Tap the album name to change it.

- Add a comment if you want, then tap Post.

How to Save Photos from Shared Albums
It's possible to save photos and videos from a Shared Album to your own photo library. Once you've opened the Shared Album:
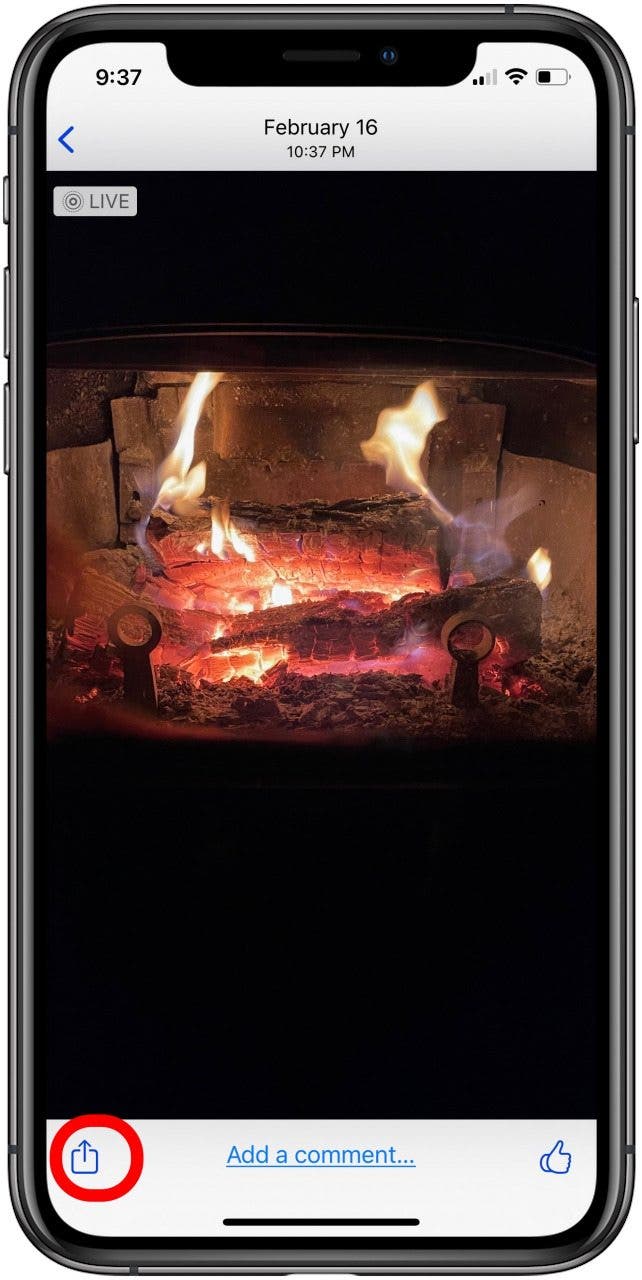
- Tap on one or more photos you'd like to save, then tap the Share icon.
- Tap Save Image or Save Video.
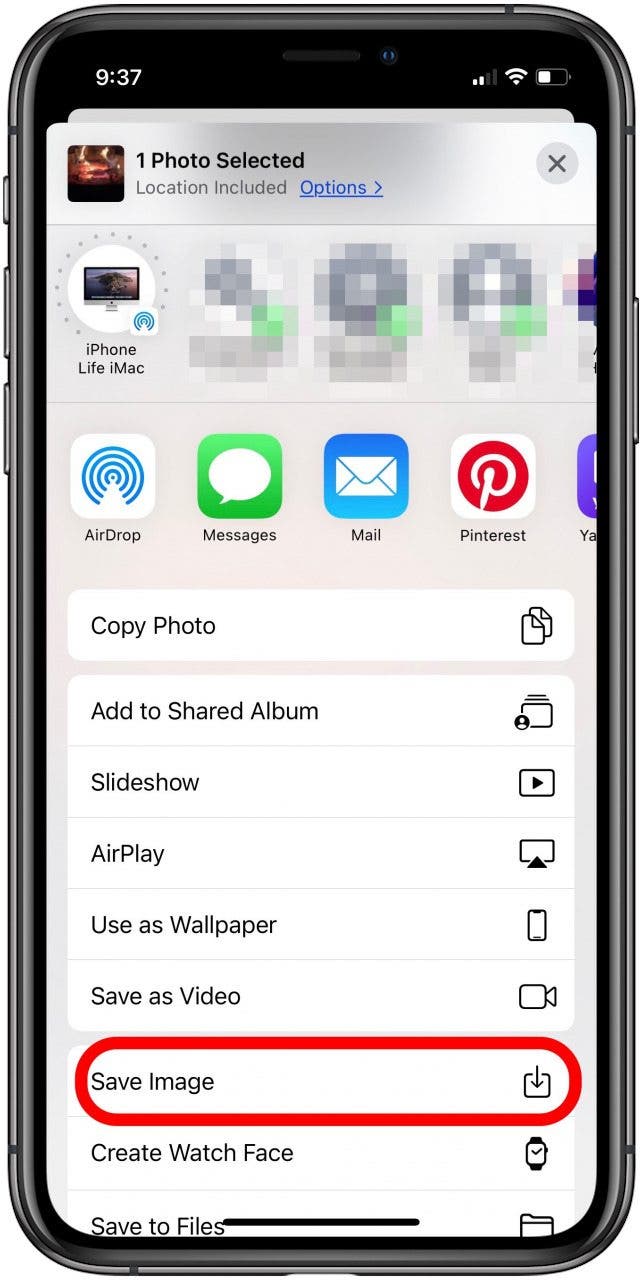
- The photo or video will be saved to your Photos app.
How to Share & Save Pictures from Social Media
I use social media to share photos and videos just as often as any of the other methods I've covered above. Below, I'll go over two of my favorite platforms, Facebook and Instagram, and how to upload images to and save pictures from these accounts.
Sharing Photos & Videos via Facebook Messenger
You'd like to send a photo or video to a friend via Facebook Messenger? Here's how:
- Open the Messenger app and tap the New Message icon at the upper right of your display.

- Choose the recipient of your message by entering their name in the Search Bar or choosing from the Suggested menu.
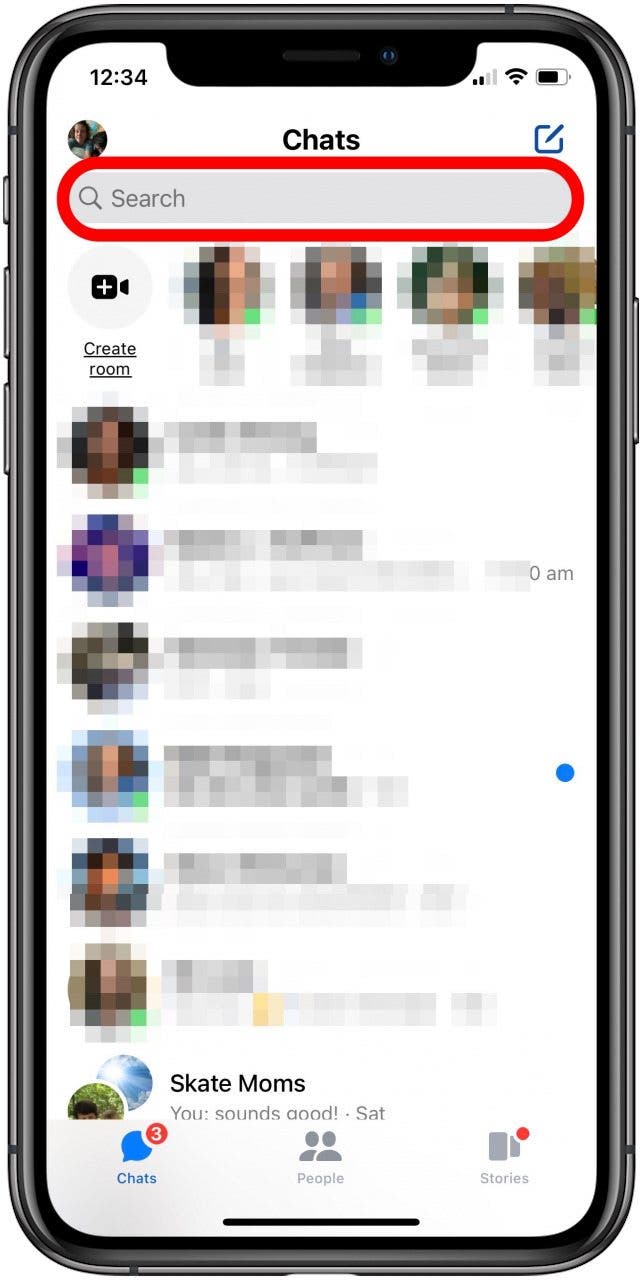
- Tap the Photo icon.

- Tap the photo or video you'd like to send. A white check in a blue circle will appear on it.
- Tap Send on the photo or video.

Saving Photos & Videos from Facebook Messenger
If you've received a photo or video via Messenger that you'd like to save:
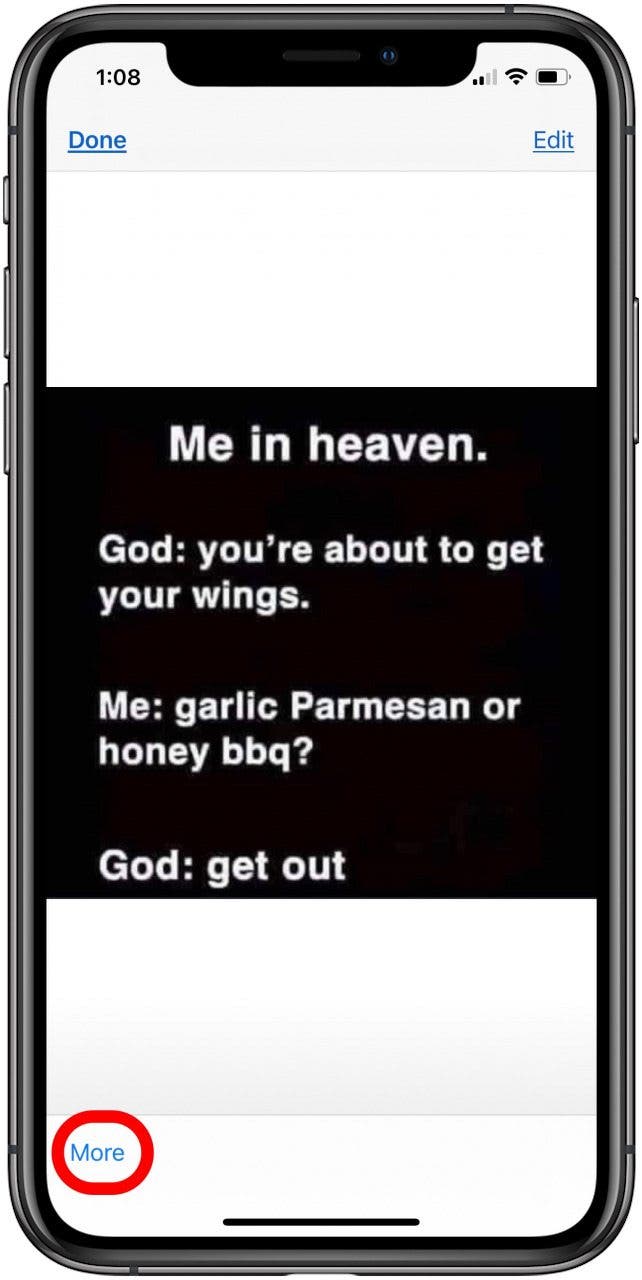
- Tap the picture, then tap More at the bottom of the display.
- Options will appear, including Forward, Share, and Save Photo, tap Save.
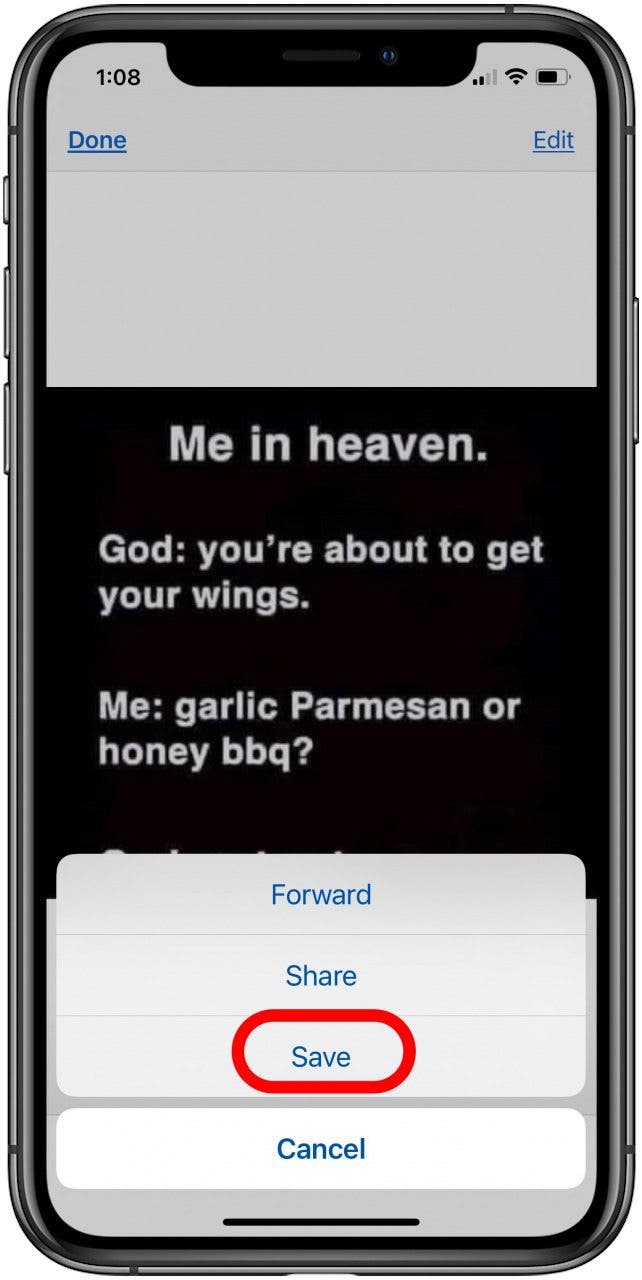
The image will be saved to your Photos app.
Sharing Instagram Posts
If you'd like to share a picture from your Instagram account:
- Tap your profile icon at the bottom of the home page to go to your profile.

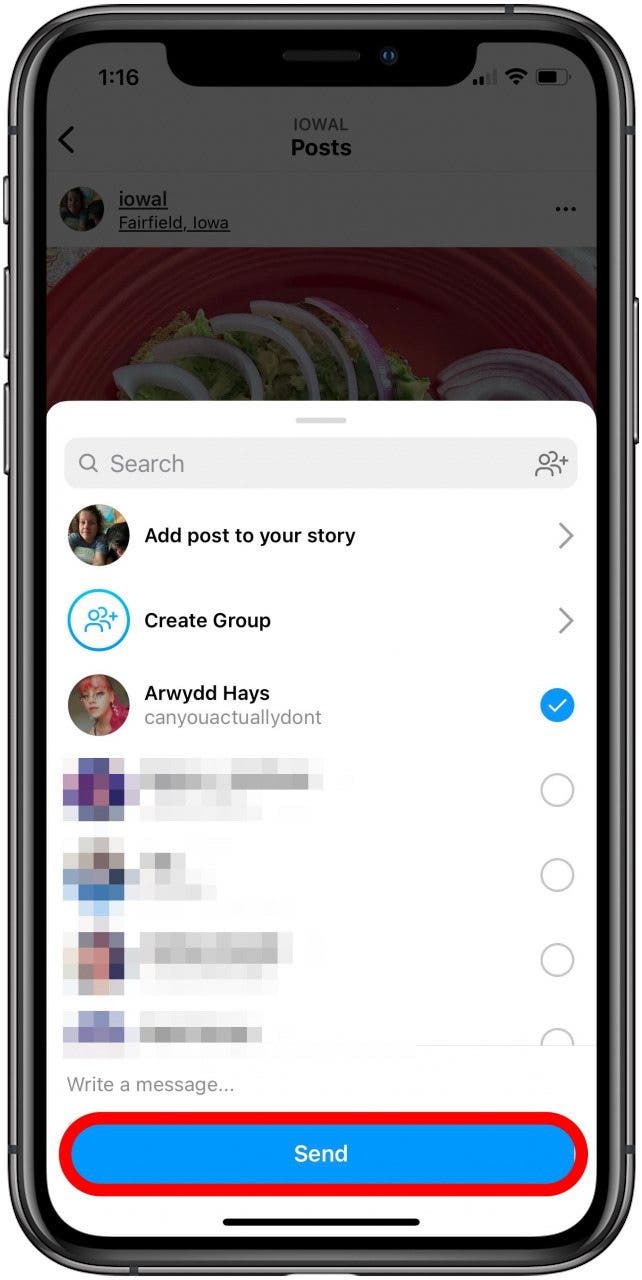
- Tap a photo you'd like to share, then tap the Instagram Send icon, which looks like a paper airplane.
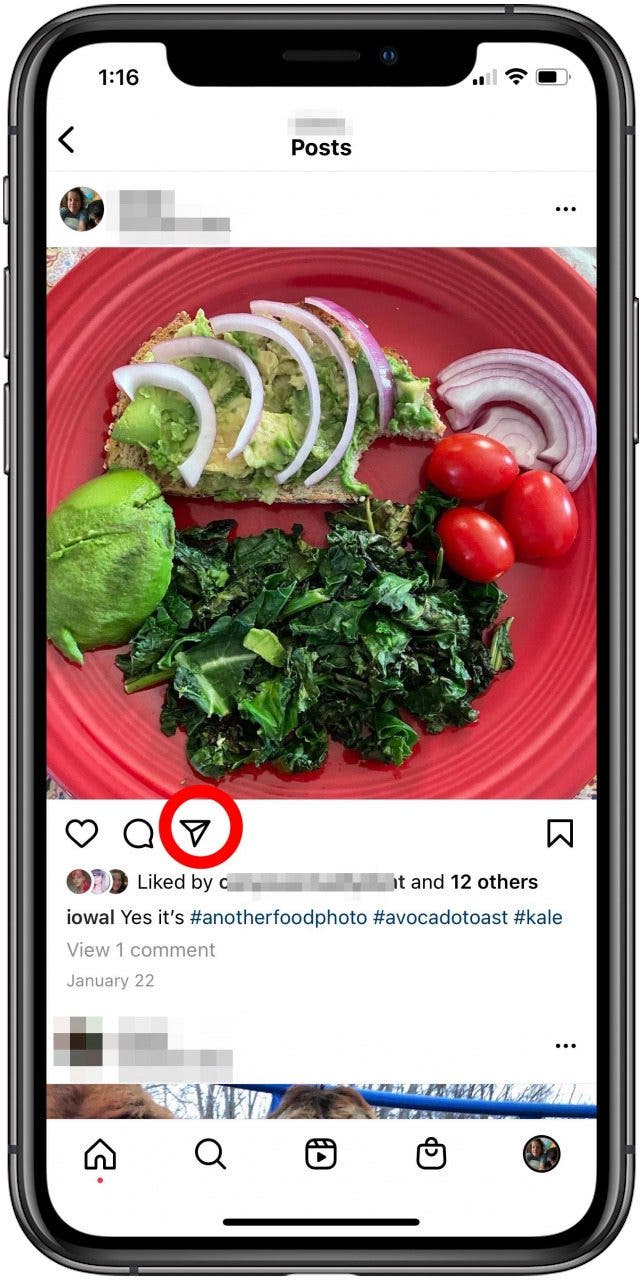
- A list of potential recipients will appear; there's also the option to search for a contact. Choose a person and tap Send; a link to your post will be sent.
Saving Pictures from Instagram
If you'd like to save an Instagram photo, it's possible, but please ask permission from the creator before editing or sharing these images, as all content on the platform is copyrighted. Let's first learn how to save an Instagram photo within the app; this is extremely useful because you can create collections for different topics and reference them whenever you need to.
- Tap on the bookmark icon at the bottom of the page under a photo you want to save.
- Once you've successfully bookmarked the post, the bookmark icon will turn black.

- Tap Save to Collection quickly, before it disappears.
- Choose a collection you've already created, or tap the plus sign to create and add this image to a new collection. Tap Save.

- To find a bookmarked post:
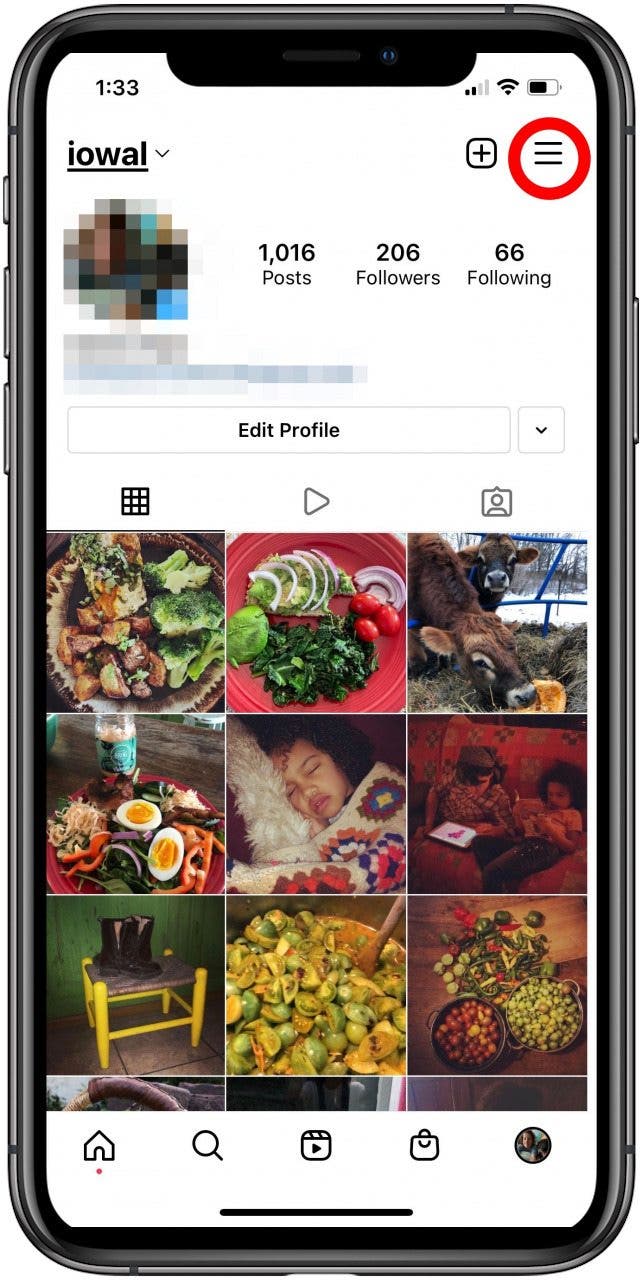
- Go back to your profile page and tap the "hamburger icon".
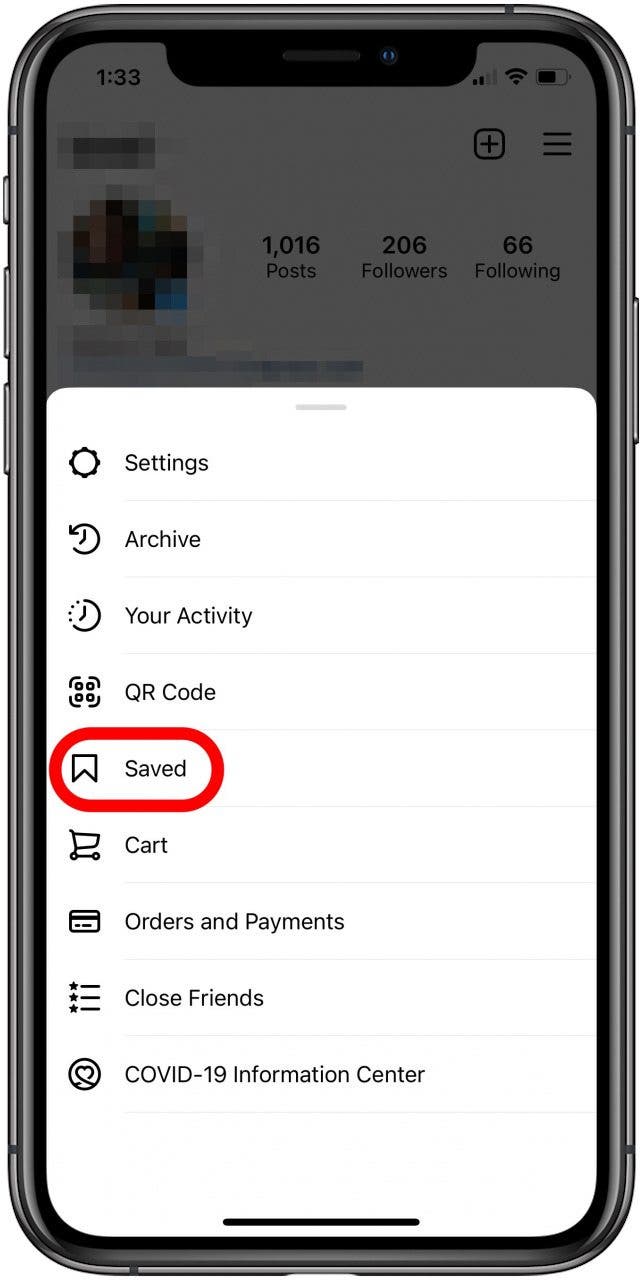
- Tap Saved.
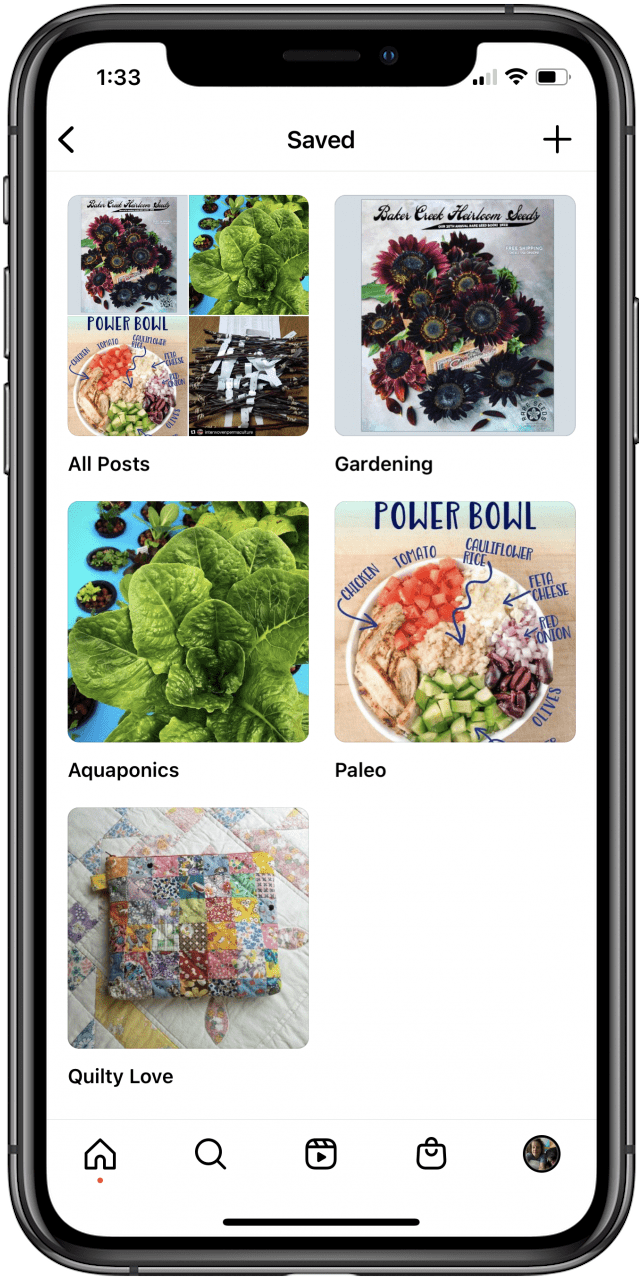
- Here's where all your bookmarks are saved.
Another option for saving Instagram posts is to take a screenshot of the page. This method is useful because if a post is taken down from Instagram, you'll still have the content you wanted to save.
How to Transfer Your Photos from iPhone to Computer (Mac or PC)
Now that you've learned how to save photos and videos to your iPhone from so many different sources, you might want to learn how to transfer photos to your computer as there are several different ways to accomplish this.

Leanne Hays
Leanne Hays has over a dozen years of experience writing for online publications. As a Feature Writer for iPhone Life, she has authored hundreds of how-to, Apple news, and gear review articles, as well as a comprehensive Photos App guide. Leanne holds degrees in education and science and loves troubleshooting and repair. This combination makes her a perfect fit as manager of our Ask an Expert service, which helps iPhone Life Insiders with Apple hardware and software issues.
In off-work hours, Leanne is a mother of two, homesteader, audiobook fanatic, musician, and learning enthusiast.


 Amy Spitzfaden Both
 Olena Kagui
 Rhett Intriago


 Rachel Needell

 Ravi Both


 Leanne Hays



 August Garry