How to Zoom In & Out of a Photo on Mac
Learn how to zoom in and out on a picture in the Photos app on your Mac to make editing easier.


Regardless of which photo editing techniques you use on your Mac, zooming in and out of a picture allows you to get a closer look at areas you may want to retouch or adjust. Here's how to zoom in and out of a picture in the Photos app on your Mac.
Related: iOS 15 Update: 6 Easy Ways to Transfer Photos from iPhone to PC or Mac
Why You'll Love This Tip
- See areas of a photo you're editing up close to view all the detail.
- Zoom in to make a photo edit and back out to see the effect.
How to Zoom In & Out of a Photo on Your Mac
Editing photos on your Mac is easier than on an iPhone, in my opinion, because you have a larger screen to work with. Here's one photo editing tip you'll use again and again in the Photos app on Mac: how to zoom in and out of a picture. And remember, once you've made a photo edit you like, you can copy and paste edits on a Mac. To learn more about editing photos on Mac or iPhone, check out our Tip of the Day newsletter.
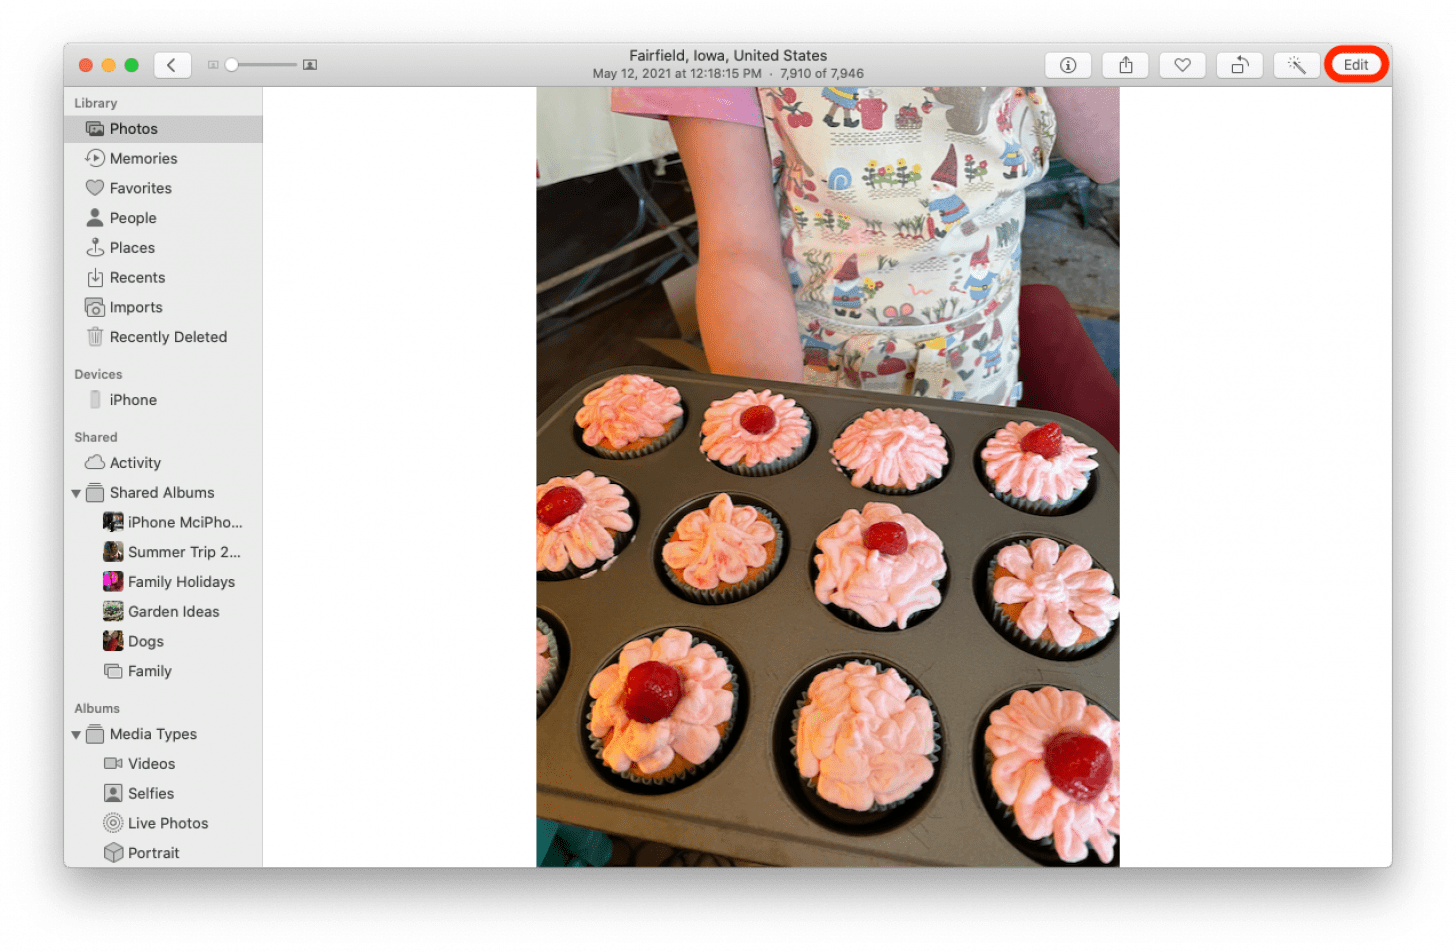
- Open the photo you want to edit, and click Edit.

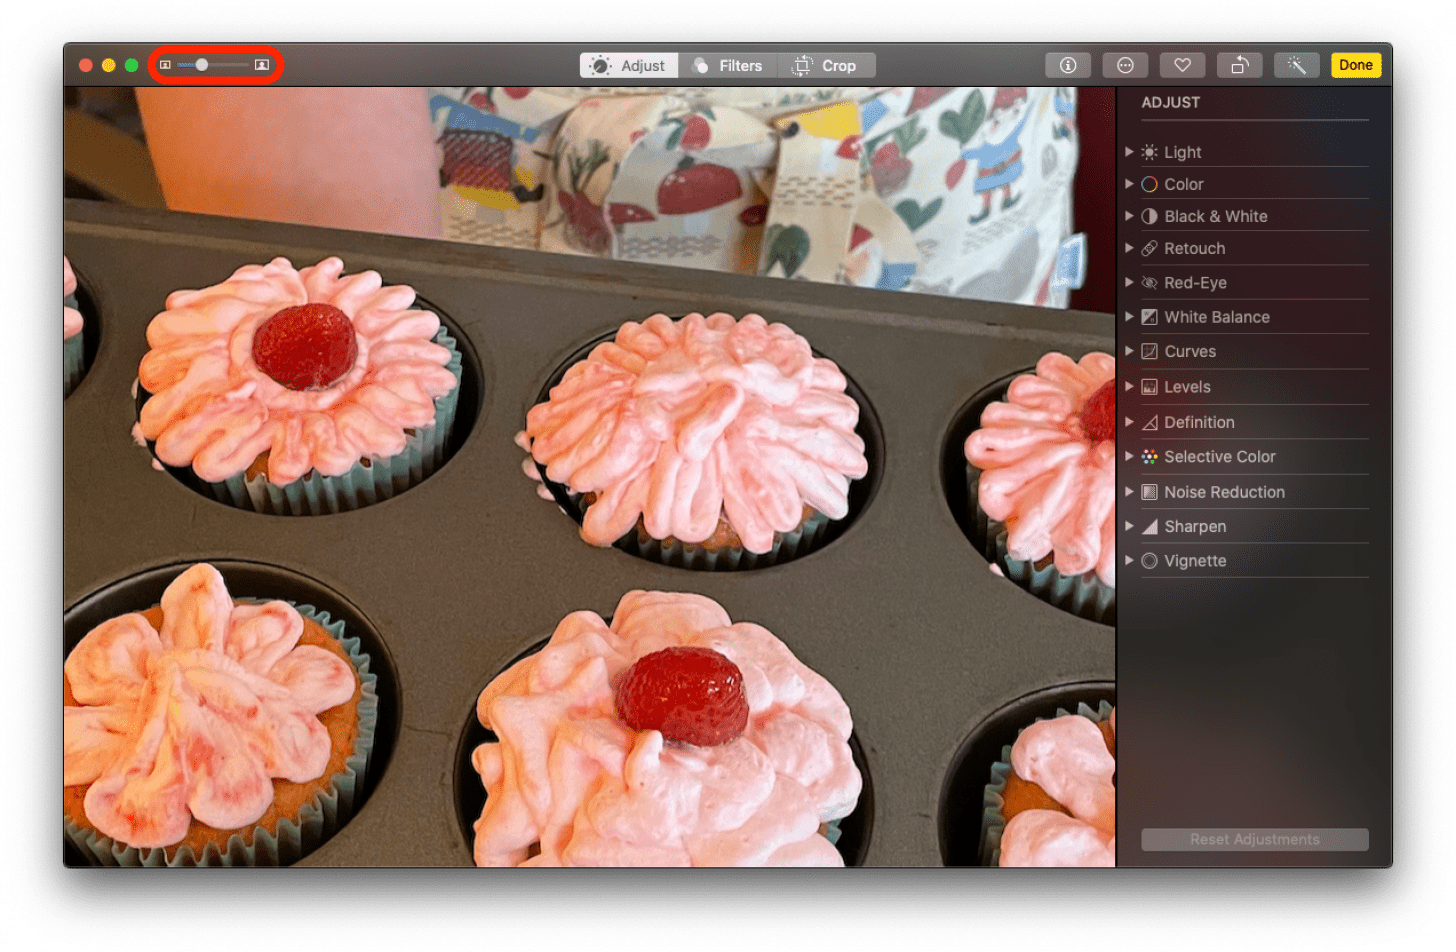
- Slide the dot on the zoom bar at the top of the screen to the right to zoom in.

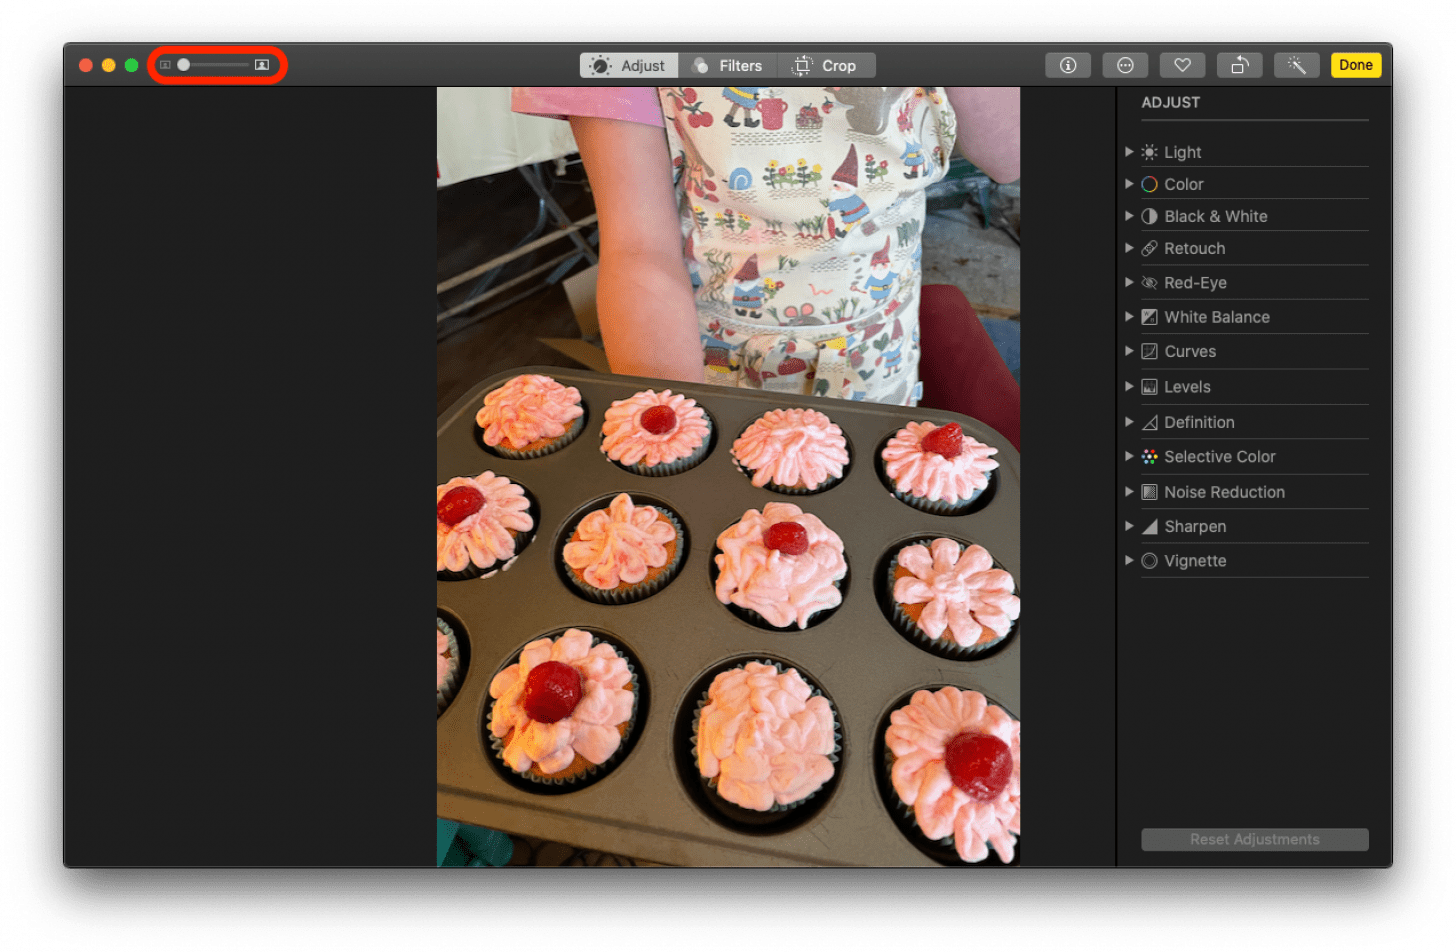
- Slide the dot on the zoom bar back to the left to zoom out.

- Now you can click the Adjust tab to the right of the zoom bar and use any of the tools that appear to work on your image.

Now that you know how to zoom in and out of photos on your Mac, you can get an eye on all the details of your photos. If you'd like to try another photo editing tip, here's how to put a filter on a photo in the Mac Photos app. Enjoy!
Every day, we send useful tips with screenshots and step-by-step instructions to over 600,000 subscribers for free. You'll be surprised what your Apple devices can really do.

Leanne Hays
Leanne Hays has over a dozen years of experience writing for online publications. As a Feature Writer for iPhone Life, she has authored hundreds of how-to, Apple news, and gear review articles, as well as a comprehensive Photos App guide. Leanne holds degrees in education and science and loves troubleshooting and repair. This combination makes her a perfect fit as manager of our Ask an Expert service, which helps iPhone Life Insiders with Apple hardware and software issues.
In off-work hours, Leanne is a mother of two, homesteader, audiobook fanatic, musician, and learning enthusiast.


 Olena Kagui

 Rachel Needell
 Leanne Hays
 Ashleigh Page


 Rhett Intriago
 Amy Spitzfaden Both


