The Ultimate Guide to Selfie Sticks


Tamlin Day pairs a lifelong love of technology with a passion for teaching, bringing approachable Apple expertise to his work as a writer and educator at iPhone Life.
Learn More Tamlin Day pairs a lifelong love of technology with a passion for teaching, bringing approachable Apple expertise to his work as a writer and educator at iPhone Life.
Learn MoreWhile planning your next family vacation or tropical getaway, you might find yourself wondering how some people grab those great group selfies without losing their iPhone over a waterfall. If you’ve ever found yourself fumbling for the shutter button while trying to take a perfectly framed self-portrait, then it might be time to consider a selfie stick. Read on to learn about the different types of selfie sticks and how to incorporate one into your next group selfie.
Selecting Your Selfie Stick
There are two basic models of camera sticks for selfie pictures. One allows you to take a picture using a button either attached to the stick or via a Bluetooth-enabled remote. Another model requires the timer setting in the Camera app. We’ll cover both types of selfie sticks in this article.
General Selfie Stick Advice
Before you start taking pictures, make sure your phone is secured in the clamp. Most selfie sticks will have a screw-like structure on the top to screw on either a digital camera or an iPhone clamp. Screw on the iPhone clamp and follow your manual instructions for securing your iPhone to the clamp. Most clamps are extendable, meaning you’ll be able to adjust them to fit the length and width of your model, but always check before you buy to make sure your selfie stick will fit your device.
To secure the clamp to your iPhone, extend the vertical bar so that you don’t have to squeeze your device into the clamp. Next, extend the horizontal bar until the length of your iPhone fits securely inside with no more than 30 percent of your phone hanging over the edge of the black bar. Finally, retract the vertical bar to secure your iPhone to the clamp.
Even with your iPhone secure to the clamp, you should spend some time practicing at home over a carpet before taking your selfie stick out for your first photo shoot. Once you’ve mastered the art of selfie stick, it’s time to head outside and snap away!
Wired & Bluetooth
Wired and Bluetooth-enabled selfie sticks both allow you to snap images without use of the timer setting in the Camera app. The wire connects to your lightning connector and controls your shutter button. If your selfie stick uses the lightning connector to operate your shutter button, then you’ll need to make sure your lightning connector is facing the vertical arm of the clamp so that the connector isn't obstructed. The selfie stick will take over the shutter button automatically. On some models of iPhone, your shutter button and volume up button are the same, so don’t be alarmed if you see the volume changing on your home screen. Just open the Camera App and the function will automatically switch to snapping pictures.
I found the downside to wired models is that when I squeezed the button with my thumb it jiggled the selfie stick and changed my framing. If you want to avoid the balance issues of the wired models, then you might prefer a Bluetooth-enabled selfie stick remote. For these models, the most important piece of advice is to always store your remote with the selfie stick. Usually, the remote has a lanyard for both your free hand and your selfie stick to make storage easier. To pair your remote, follow the instructions in your selfie stick's manual. Once you’ve paired your remote, you’ll be able to take pictures with the remote in one hand and the selfie stick in the other.
Timer Setting in the Camera App
If you prefer to use the timer setting in the Camera app, or if you lost your Bluetooth remote, don’t worry; we’ve got you covered. To take selfies using the timer setting, follow these instructions:
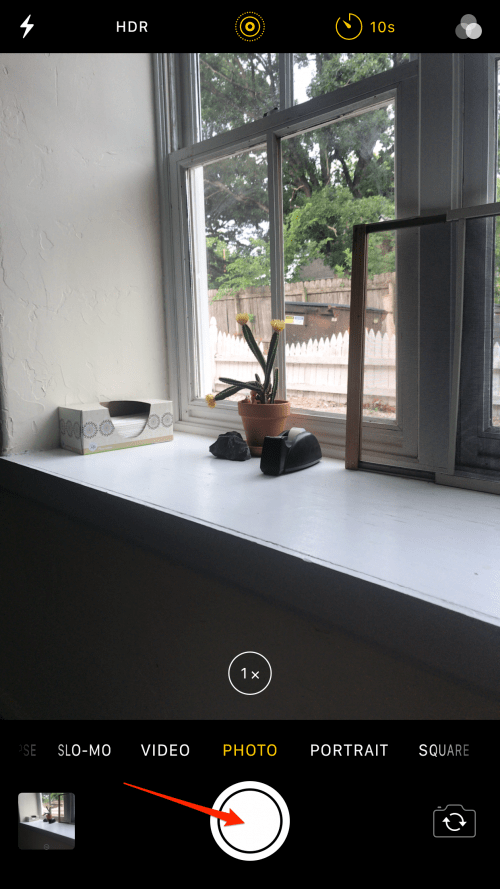
- Open the Camera App.
- Select the mode, lighting, and filters you want to use for the selfie.
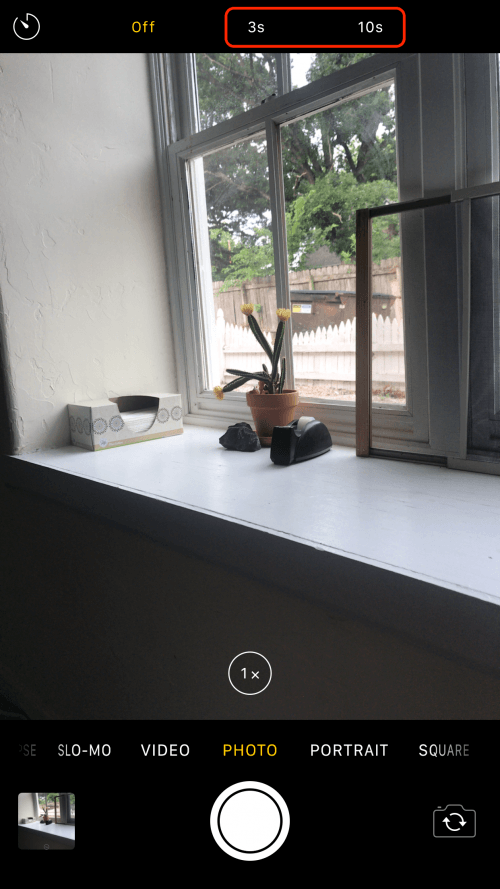
- Tap the timer on the top of your screen.
- Select either 3 or 10 seconds.

- Now, press the shutter button.
- You’ll see a white countdown begin on the bottom right of the screen, indicating that the timer is working correctly.
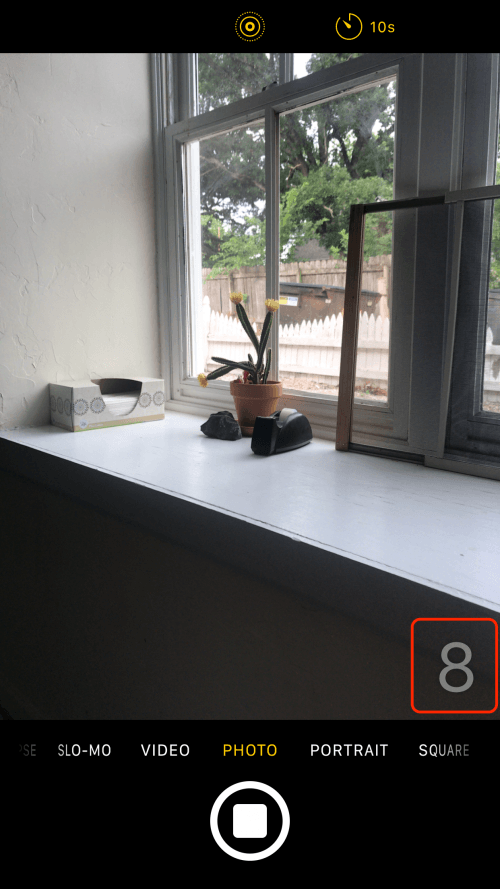
- Next, position your camera and wait for the flash.
- Note: If you want to disable the timer function, you'll need to tap on the timer and select off as opposed to the 3 or 10 second options.
Now you know everything you need to know before you go shopping for the perfect selfie stick. Whether you want to go wired, wireless, or use the traditional method of setting a timer, there's a selfie stick somewhere out there for you. While we’ve provided general advice in this article, it’s always important to read whatever installation instructions come with your selfie stick to make sure you’re using the device correctly. Once you’ve learned all there is to know about your model of selfie stick, you’ll be ready to go take that perfect group selfie and impress all your family and friends with your selfie stick expertise!
Top image credit: Hadrian / Shutterstock.com

Tamlin Day
Tamlin Day is a feature web writer for iPhone Life and a regular contributor to iPhone Life magazine. A prolific writer of tips, reviews, and in-depth guides, Tamlin has written hundreds of articles for iPhone Life. From iPhone settings to recommendations for the best iPhone-compatible gear to the latest Apple news, Tamlin's expertise covers a broad spectrum.
Before joining iPhone Life, Tamlin received his BFA in Media & Communications as well as a BA in Graphic Design from Maharishi International University (MIU), where he edited MIU's literary journal, Meta-fore. With a passion for teaching, Tamlin has instructed young adults, college students, and adult learners on topics ranging from spoken word poetry to taking the perfect group selfie. Tamlin's first computer, a Radioshack Color Computer III, was given to him by his father. At 13, Tamlin built his first PC from spare parts. He is proud to put his passion for teaching and tech into practice as a writer and educator at iPhone Life.
 Olena Kagui
 Rachel Needell

 Rhett Intriago


 Leanne Hays