How to Increase Font Size on Your Mac
Stop squinting! For easier readability, we'll show you how to change the font size on your Mac so you don't have to keep zooming in.


Whether you're working in low-light conditions or you've just been struggling to read the small font on your computer, read on to learn how to increase the text size on your Mac.
Related: How to Adjust the Size of Your Home Screen Widgets in iOS 14
For more information on how to adjust Mac settings, consider signing up for our free Tip of the Day. For now, here's how to make font bigger on your Mac:
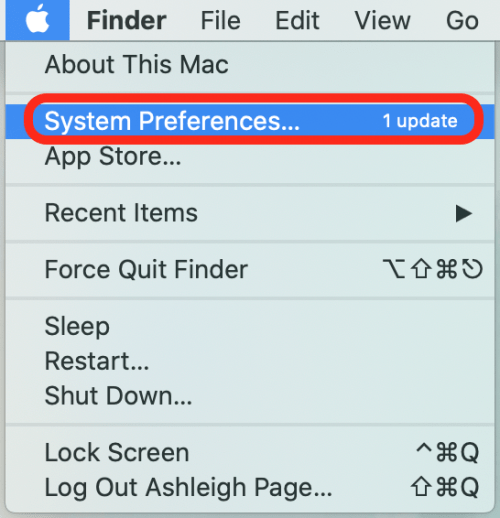
- Click the Apple menu and select System Preferences.
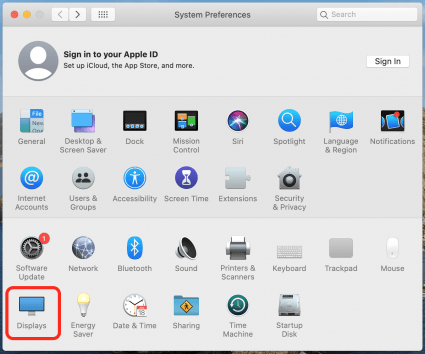
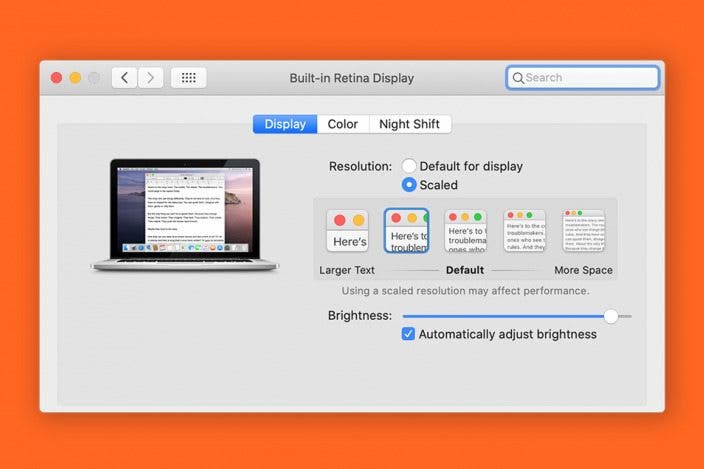
- Click the Displays icon.
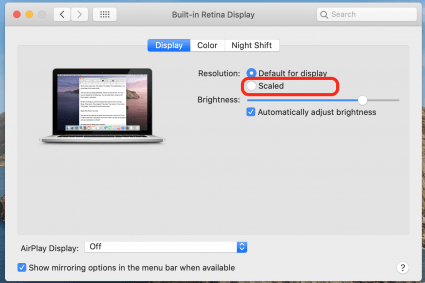
- Select Scaled.
- Click to select one of the larger text settings. (The option farthest to the left is the biggest default font setting.)
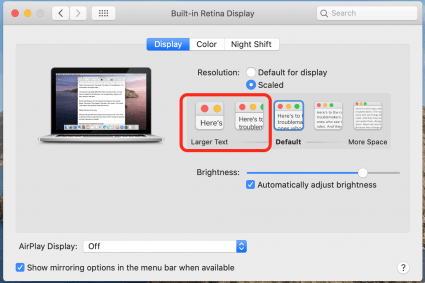
That's it! Now your default font setting has been updated, so all web content, menus, and folder names will now display in the updated size. To change it back, you can simply repeat these steps and select a different font size.
Every day, we send useful tips with screenshots and step-by-step instructions to over 600,000 subscribers for free. You'll be surprised what your Apple devices can really do.


 Rachel Needell
 Amy Spitzfaden Both

 Rhett Intriago

 Olena Kagui

 Leanne Hays
 Devala Rees
 Ravi Both


