How to Put a Filter on a Photo or Video on Mac
Learn how to apply and remove filters to and from pictures and videos in the Photos app on your Mac.


If you’ve been wondering, “How do I add a filter to a photo on a Mac?” it’s actually quite easy. Let’s go over how to apply filters to pictures on your Mac, and how to remove the filter or revert back to the original photo or video.
Related: How to Compare Edited Photos & Videos to the Original on Mac
Why You'll Love This Tip
- Use filters to enhance light, color, and more in your photos and videos
- Undo filter additions you don't like, or remove all filter effects and start over
How to Put a Filter on a Photo or Video on Mac
I really enjoy editing photos on my Mac instead of my iPhone because there’s so much more room to work in! Here's how to add a filter to a photo or video in the Photos app on your Mac, how to remove that filter, and how to restore your picture or video to its original state.
- Open up your Photos app and double-click the photo you'd like to modify.
- Click Edit in the top-right corner of the screen.

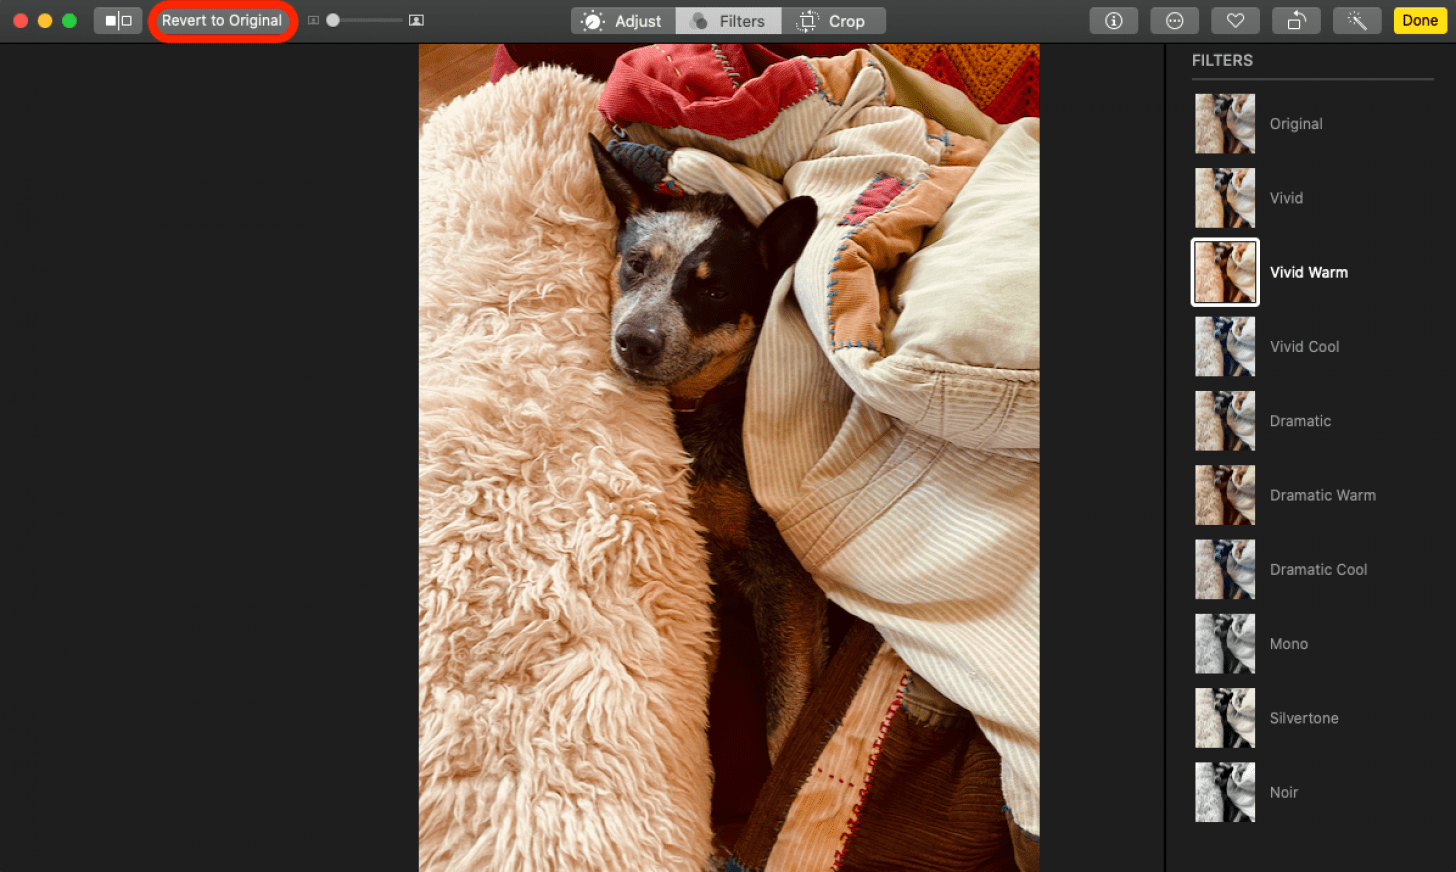
- Click Filters in the toolbar or press F while editing.
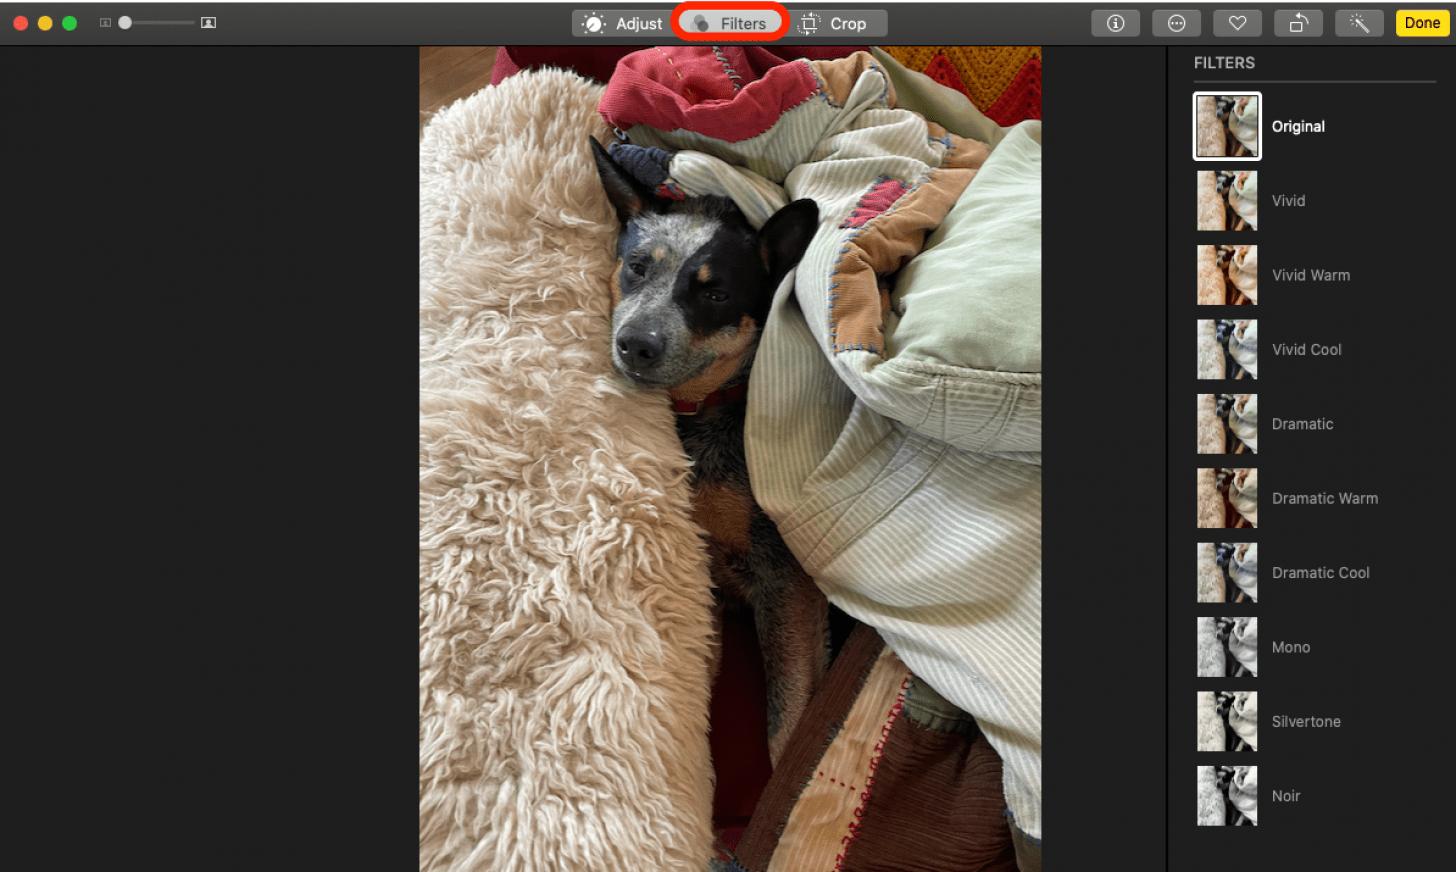
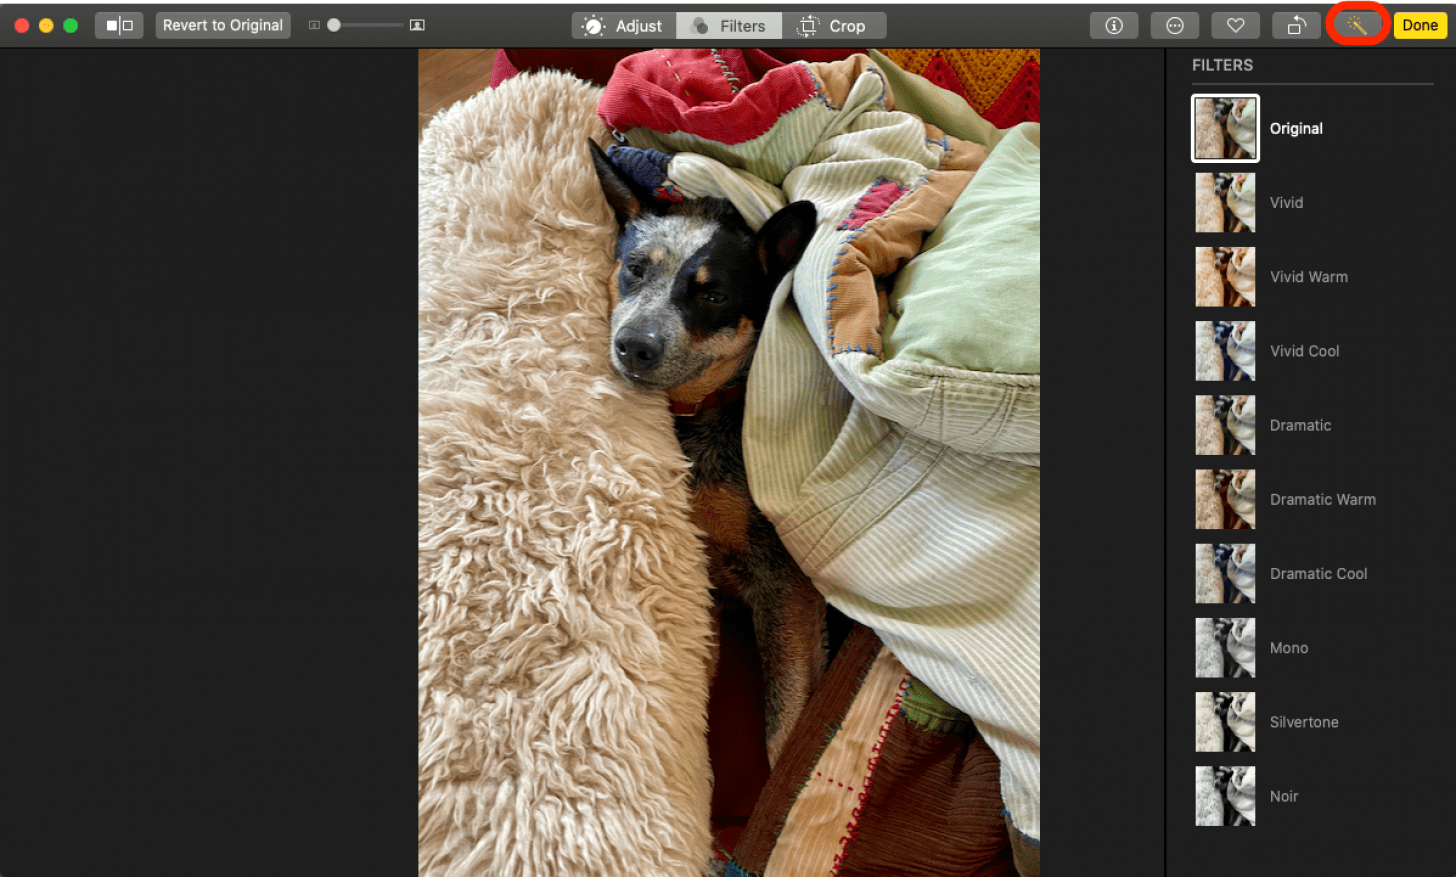
- Click the Auto Enhance icon, and the Photos app will automatically filter your photo.
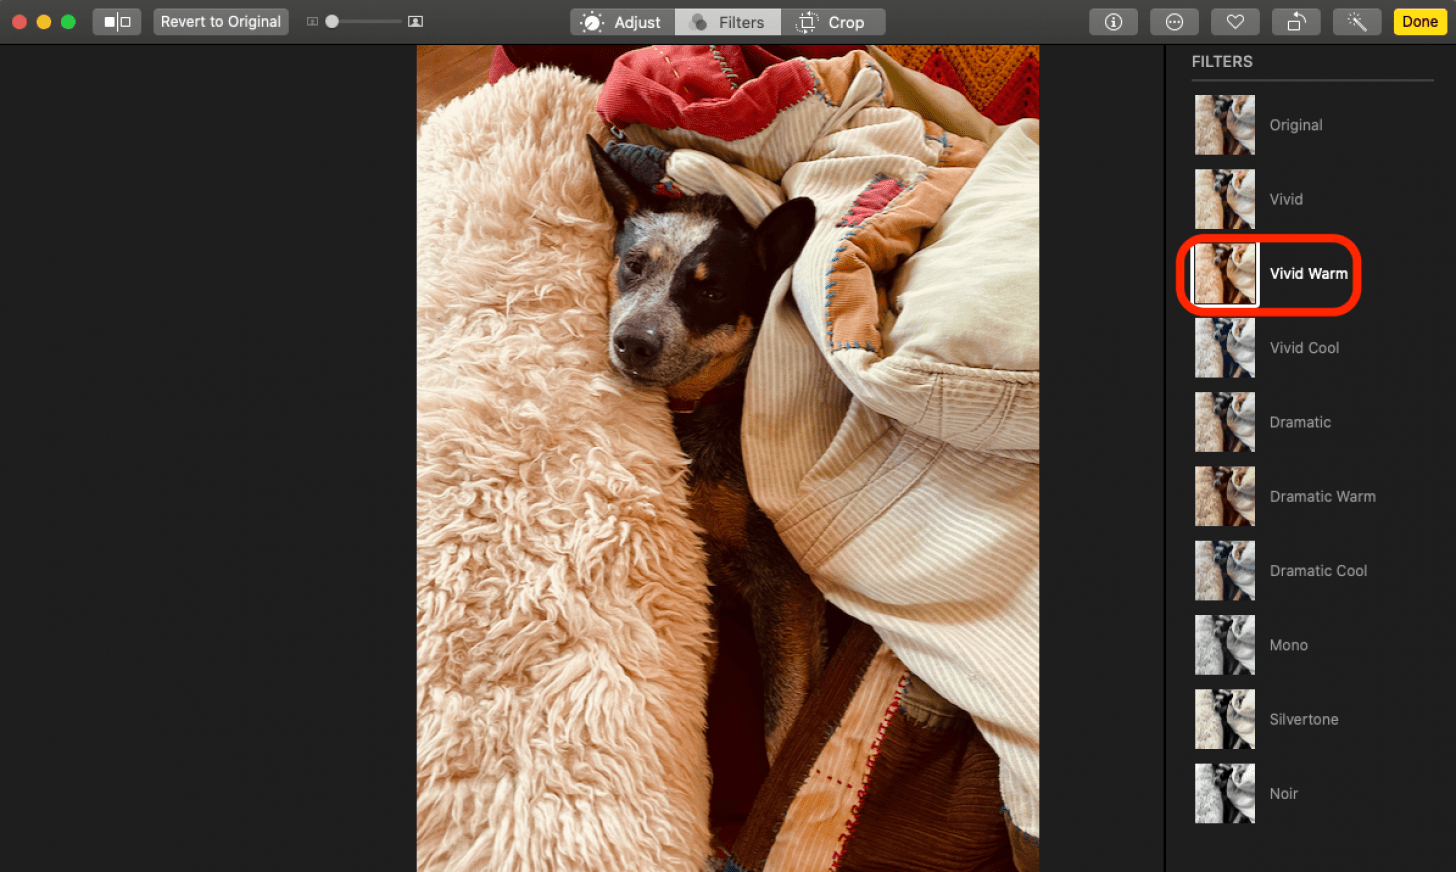
- Click a filter.
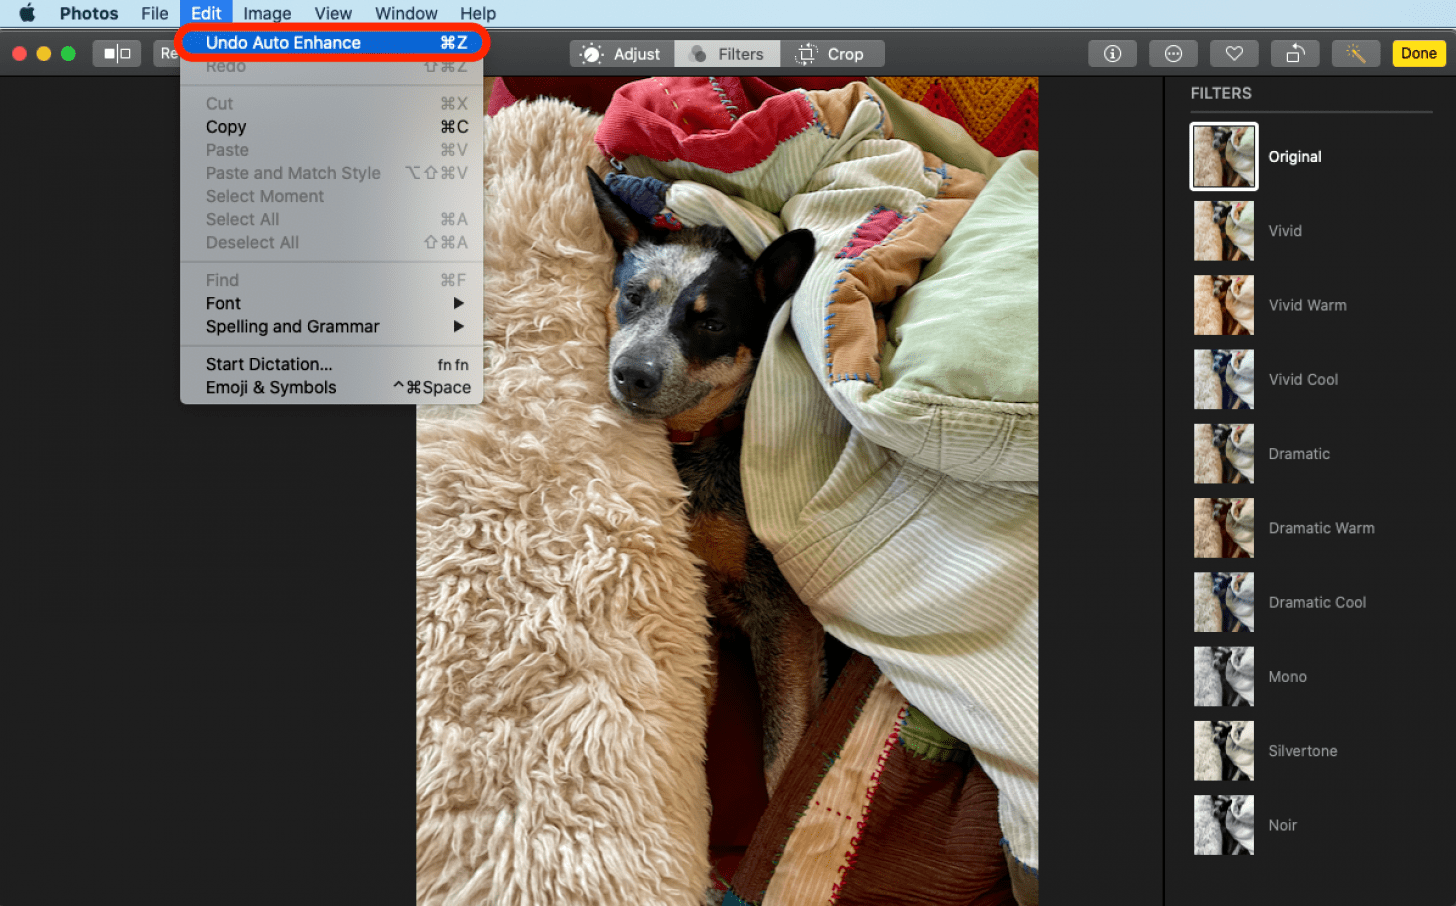
- Click Edit in the top toolbar, then Undo to undo your last edit.
- Click Revert to Original to remove all edits.
You may also want to learn how to duplicate a photo or video on a Mac, so you can edit only the copy.

Leanne Hays
Leanne Hays has over a dozen years of experience writing for online publications. As a Feature Writer for iPhone Life, she has authored hundreds of how-to, Apple news, and gear review articles, as well as a comprehensive Photos App guide. Leanne holds degrees in education and science and loves troubleshooting and repair. This combination makes her a perfect fit as manager of our Ask an Expert service, which helps iPhone Life Insiders with Apple hardware and software issues.
In off-work hours, Leanne is a mother of two, homesteader, audiobook fanatic, musician, and learning enthusiast.

 Amy Spitzfaden Both
 Leanne Hays
 Rachel Needell

 Olena Kagui
 Rhett Intriago
 Cullen Thomas


 Nicholas Naioti


