Securely Sign In to Websites & Apps Using Your Apple ID


The Sign in with Apple button lets you use your Apple ID to sign in to websites and their associated apps securely, privately, and without the hassle of a million different passwords to keep track of. Sign in with Apple looks just like the Sign in with Google and Sign in with Facebook buttons you often see when creating new accounts, but unlike Google and Facebook, Apple doesn’t give away any of your information—no advertising profiles, no usage statistics. Read on to find out how to use Login with Apple to secure and simplify your online life.
Why You'll Love This Tip:
- Quickly sign up for websites or apps without having to enter the same information over and over again.
- Create a private account for websites and apps by hiding your email.
How to Log In with Apple ID
System Requirements
This tip works on iPhones, iPads, and Macs running the latest software. However, the steps below were created on iPhone. Find out how to update to the latest version of iOS.
To use Sign in with Apple, you'll need an Apple ID with two-factor authentication enabled and a strong password. If you do not have a strong password, I recommend doing an iCloud password reset and switching to a more secure password. All Apple IDs now come with two-factor authentication by default, so this should already be on. Here's how to sign in with Apple ID on iPhone:
Note
Not all apps and websites support Sign in with Apple yet, but more and more will soon. Keep an eye out for the option when creating new accounts.
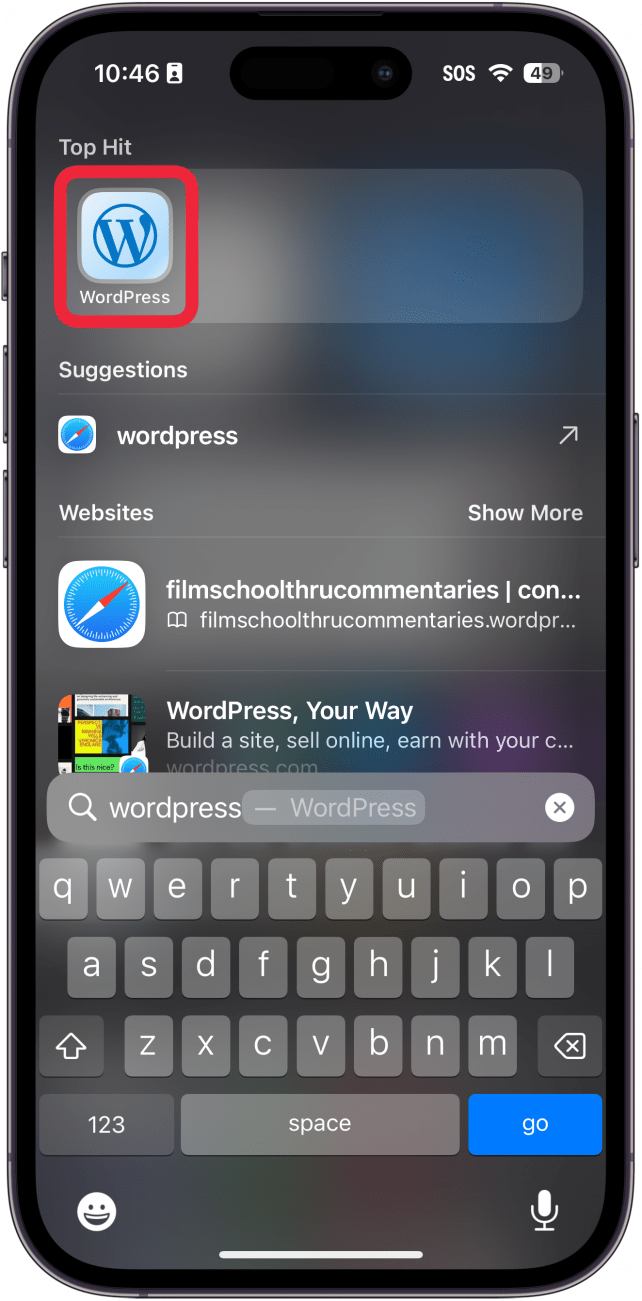
- Either navigate to a supported website or open an app that supports Sign in with Apple. For demonstration purposes, I'll use the WordPress app.
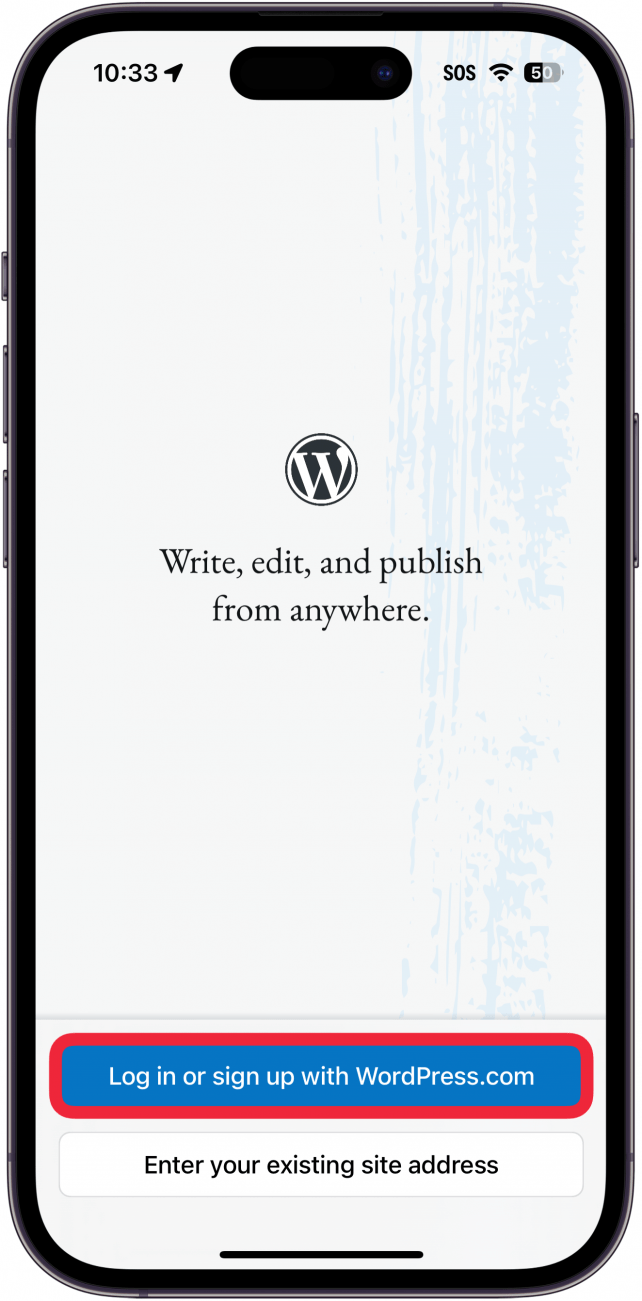
- Tap Log in or sign up with WordPress.com. Depending on the website or app, this will probably look different.
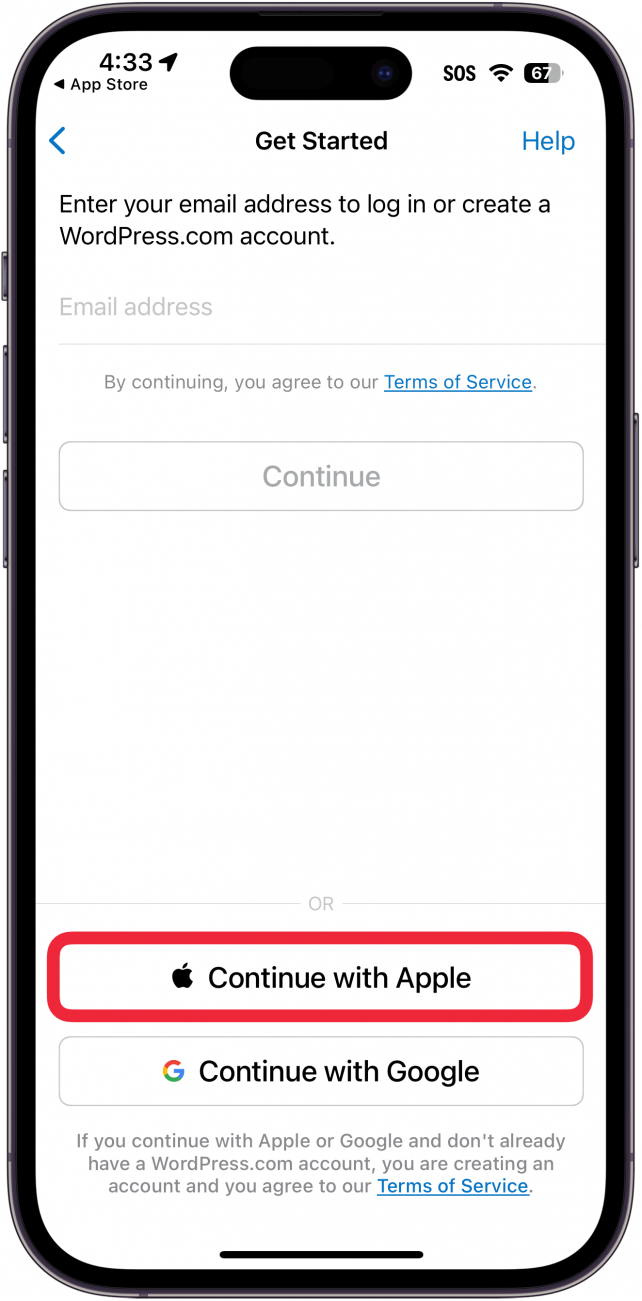
- Tap Continue with Apple. This is the Sign in with Apple button. If you don’t see it, then try updating the app in the App Store.
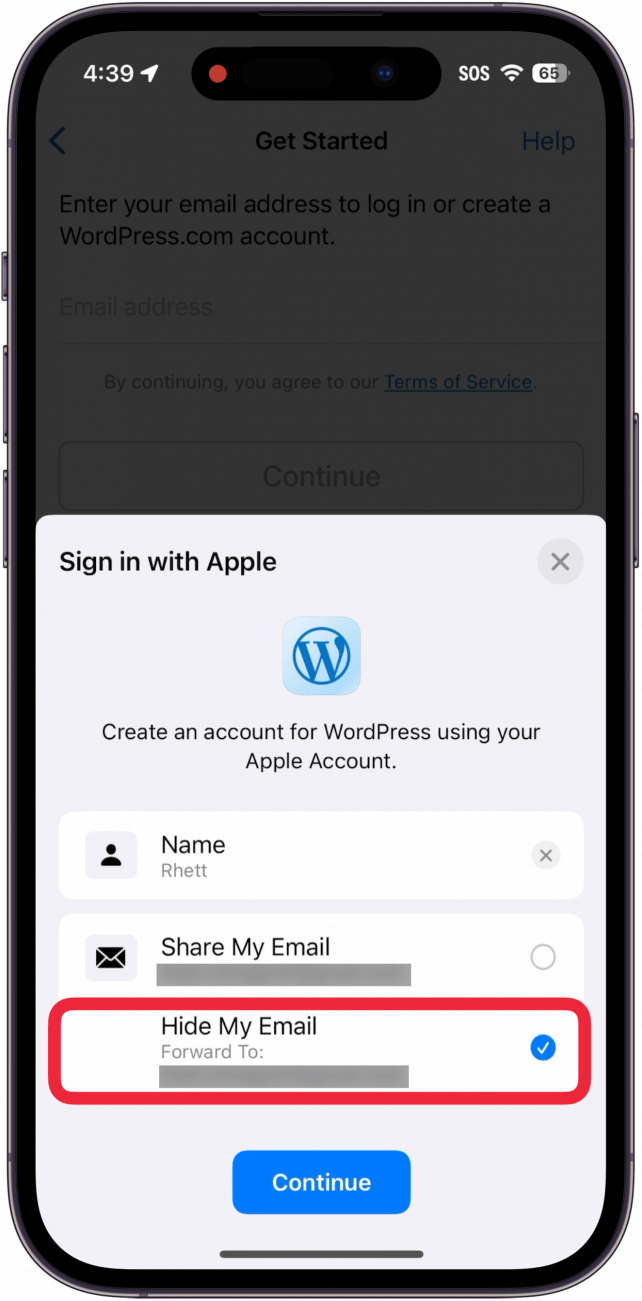
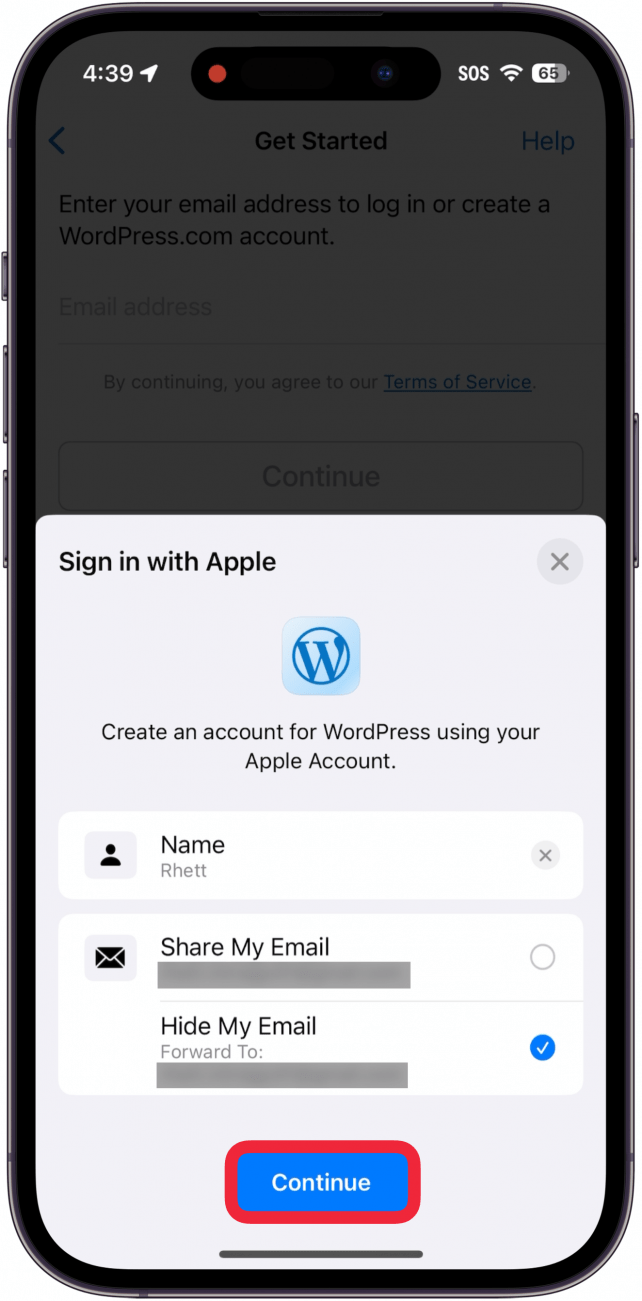
- You’ll be presented with an info card showing what name you’ll be sharing, and asking whether you want to share your email or hide your email from the app. For the greatest privacy, I recommend tapping Hide My Email.
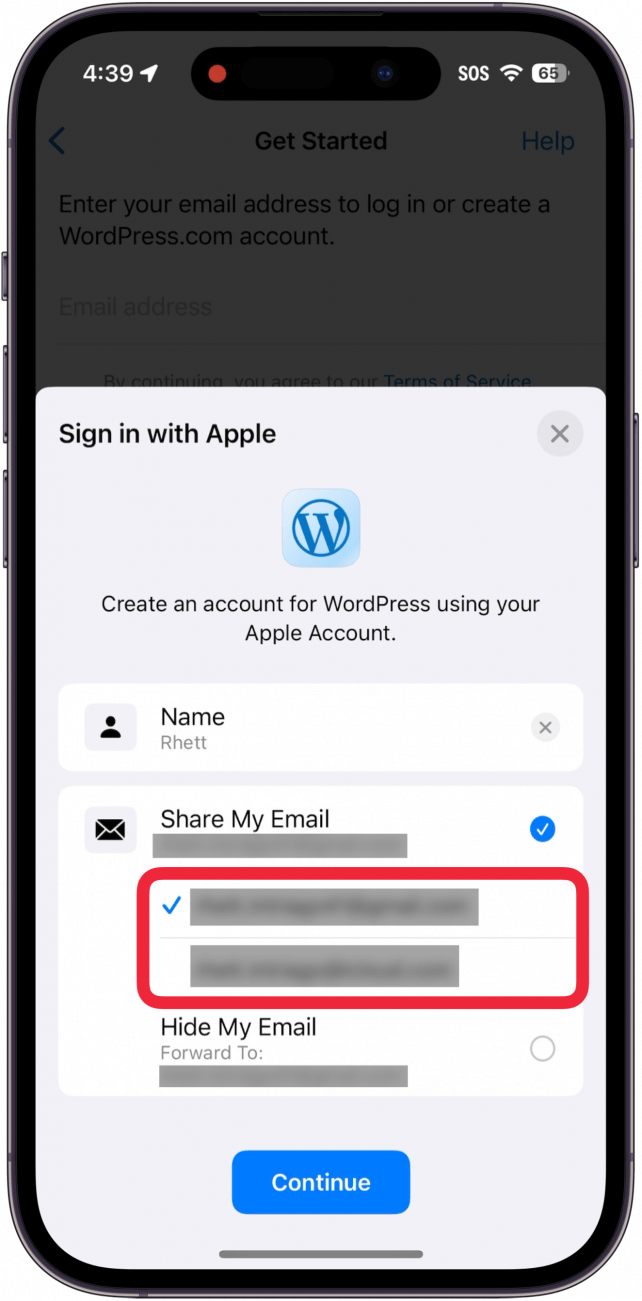
- You can also tap Share My Email if you want to share your email address instead. If you have more than one email address associated with your Apple ID, you can select the one you want.
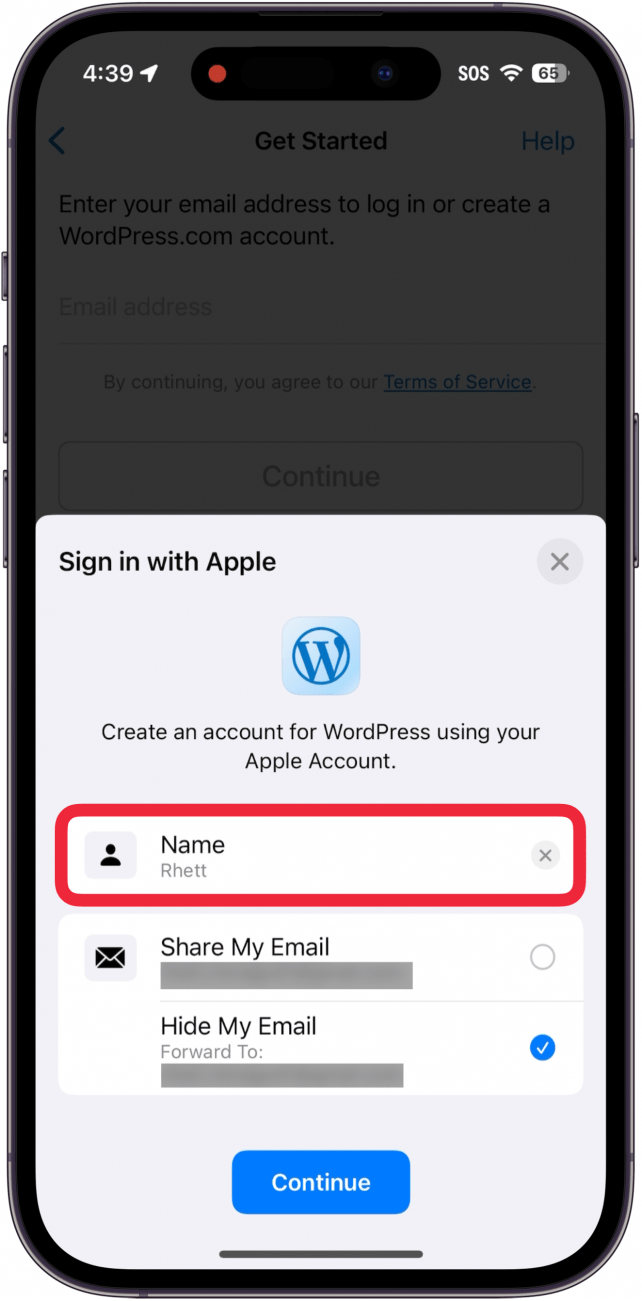
- You can also tap your name and edit your first and last name. This can be useful if you want to hide your real name from an app or website.
- Tap Continue at the bottom of the screen.
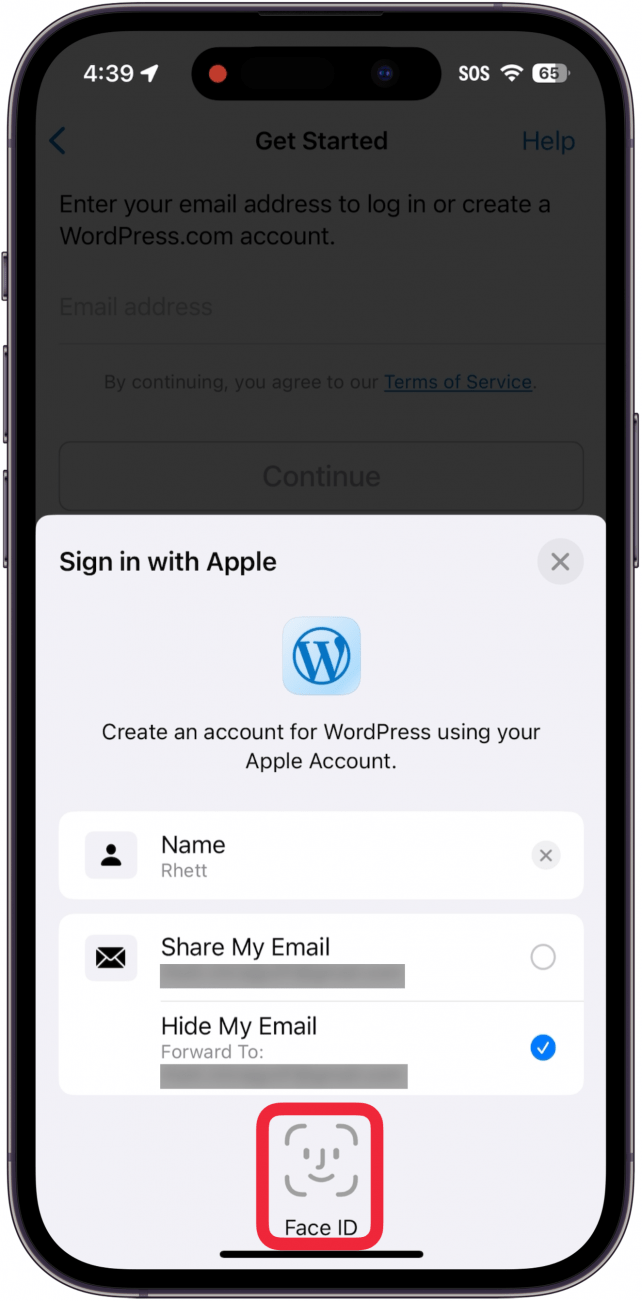
- Use Face ID or tap continue with passcode and enter your device code if Face ID fails. Don't worry: Apple doesn't share your device code or your Face ID/Touch ID information with the third-party app. You will then be logged in to your new account.
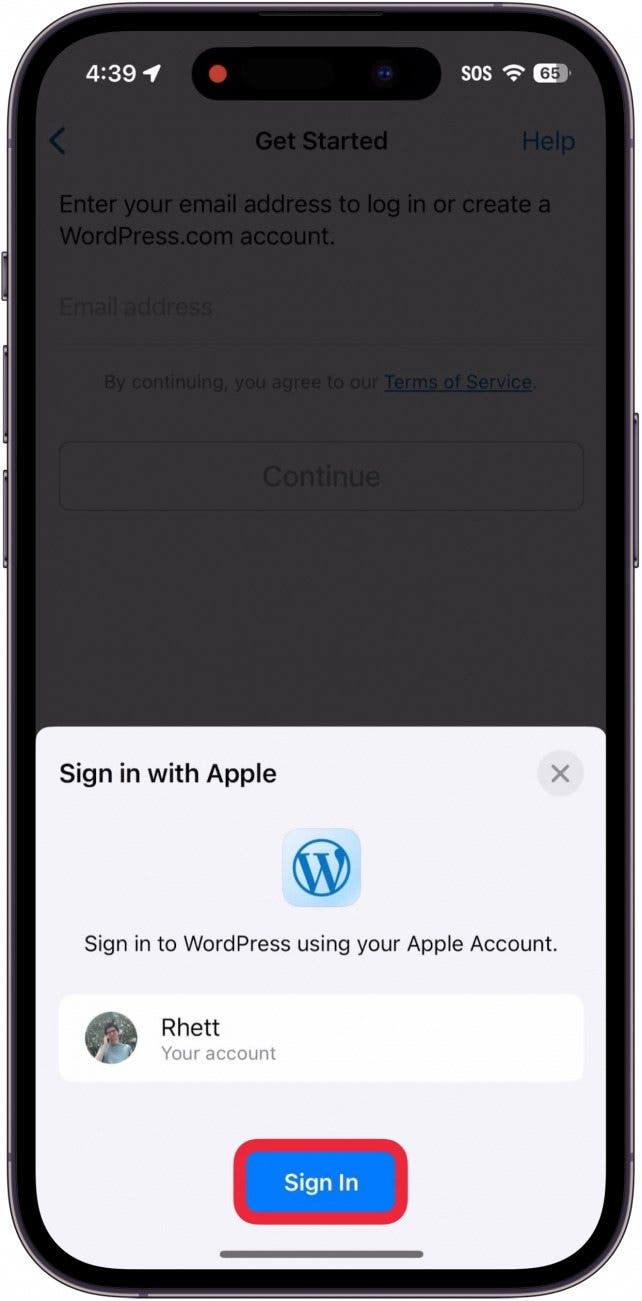
- In the future, when you want to log in, just look for the Continue with Apple button and tap it.

- You'll see a card stating your Apple ID email. Tap Sign In at the bottom. Face ID will do its thing (or use Touch ID or enter your device code), and you'll be logged in privately, securely, and without hassle.
That's how to use login with Apple ID. It’s that easy! You can use Sign in with Apple anywhere you see the option listed. Note that this service is for creating new accounts. If you already have an account, and want to switch to using Sign up with Apple with it, then you will probably have to cancel your existing account and start a new one. You can change your Sign In with Apple email, if you'd like to do that instead. Hopefully Apple will convince app developers to let us convert our existing accounts to Sign in with Apple; but until then, we can enjoy the benefits whenever we download a new app that requires authentication.
Every day, we send useful tips with screenshots and step-by-step instructions to over 600,000 subscribers for free. You'll be surprised what your Apple devices can really do.

Cullen Thomas
Cullen Thomas is a senior instructor at iPhone Life. For ten years as faculty at Maharishi University, Cullen taught subjects ranging from camera and audio hardware to game design. Cullen applies a passion for gadgetry to answer questions about iPhones, iPads, Macs, and Apple cloud services; to teach live classes; and to specialize in the privacy and security aspects of the Apple ecosystem. Cullen has dual degrees in Media & Communications and Literature, and a Masters degree from the David Lynch Graduate School of Cinematic Arts.
Offline, Cullen designs videogames with Thought Spike Games, writes fiction, and studies new nerdery.
Mastodon: @CullenWritesTech@infosec.exchange
Email: cullen@iphonelife.com

 Rhett Intriago
 Michael Schill
 Rachel Needell
 Olena Kagui


 Amy Spitzfaden Both


 August Garry
 Leanne Hays