Lock Your Apple ID with a Physical Key
Use a security key to authenticate your Apple ID.


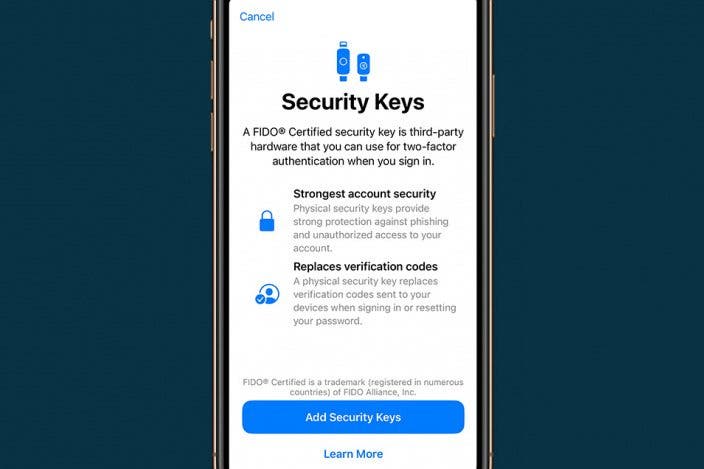
Enabling two-factor authentication is a great way to secure any account, but Apple takes things a step further with physical security keys. These fancy gadgets serve as an extra barrier to safeguarding your Apple ID from security breaches.
Why You’ll Love This Tip
- Prevent hackers from gaining access to your Apple ID.
- Authenticate your Apple ID faster than entering a six-digit code.
Security Keys Come to Apple ID
System Requirements
This tip works on iPhones running iOS 16.3 or later. Find out how to update to the latest version of iOS. Additionally, all of your other Apple devices will need to be on the latest software, or you will need to remove them from your account. You will also no longer be able to use iCloud on Windows.
Security keys are physical items that can be used to verify your identity when logging into your Apple ID. If you are planning to use security keys, make sure you have at least two. Your iPhone will not allow you to set them up without two of them. This is so that if you lose one, you will have another as a backup. For more iPhone privacy and security advice, be sure to sign up for our free Tip of the Day newsletter.
Note: If you are using hardware keys for your Apple ID, then you should also consider using them for your other accounts as well. For example, accounts that control your recovery email address or your password manager, and for any file-sharing apps you use, such as iCloud, Google Drive, OneDrive, or DropBox, etc.
Now, here’s how to set up security keys for your Apple ID on iPhone or iPad:
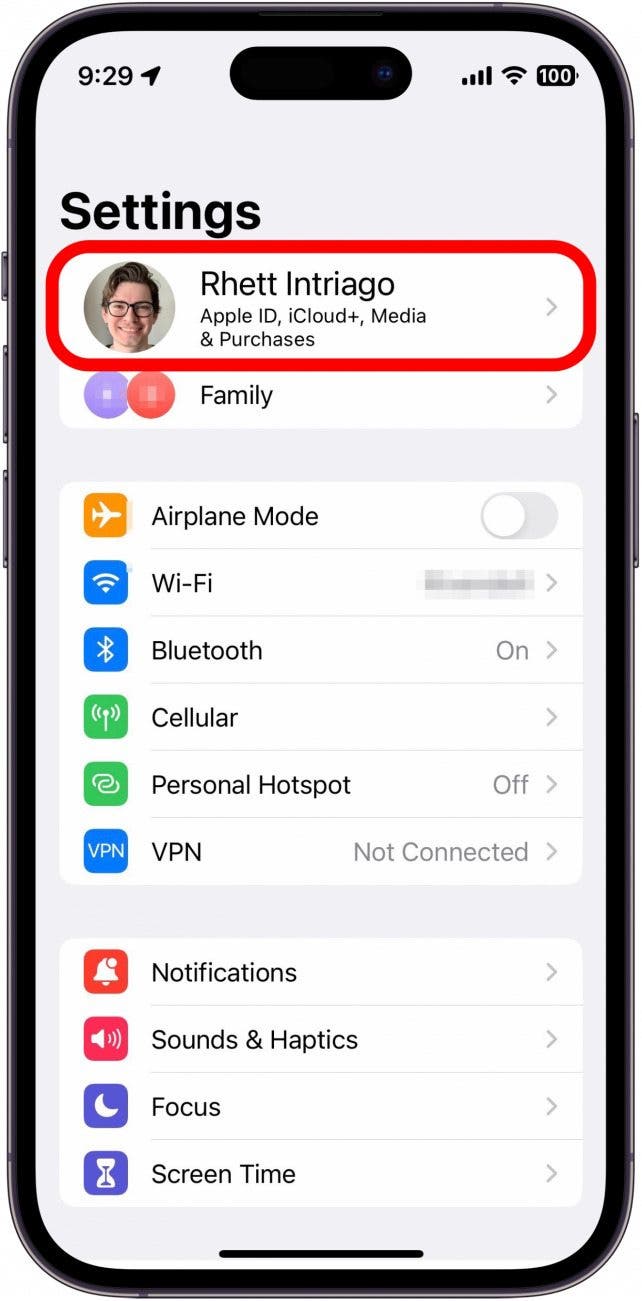
- Open the Settings app, and tap your name.
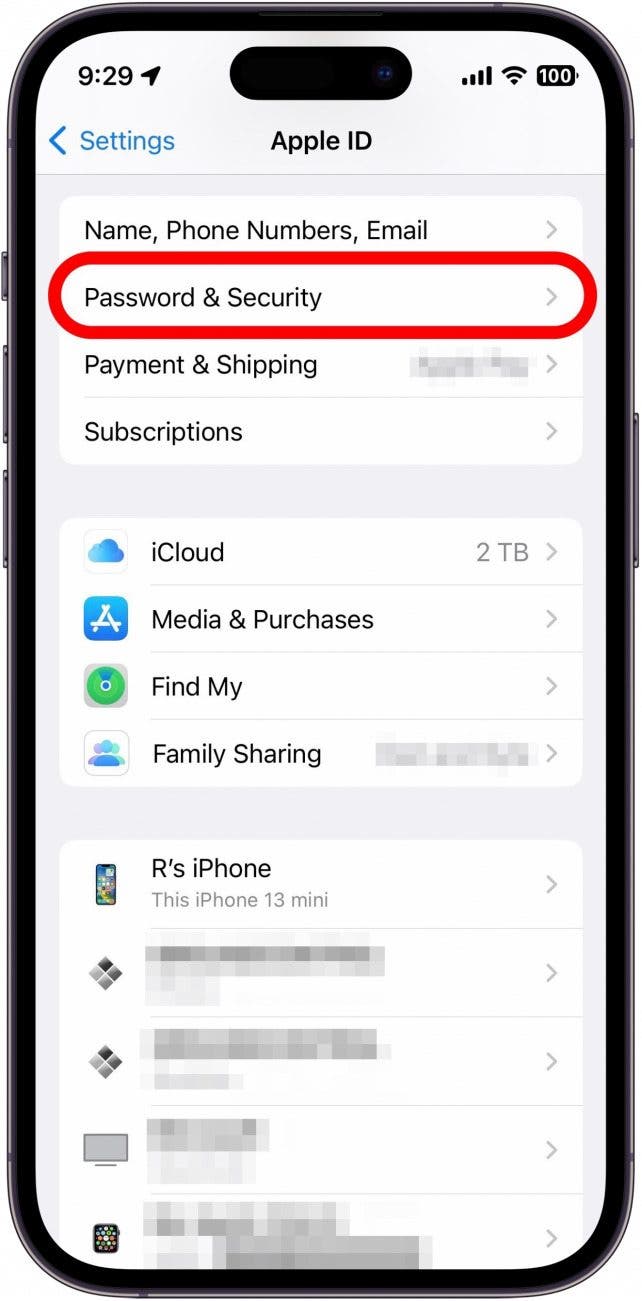
- Tap Password & Security.
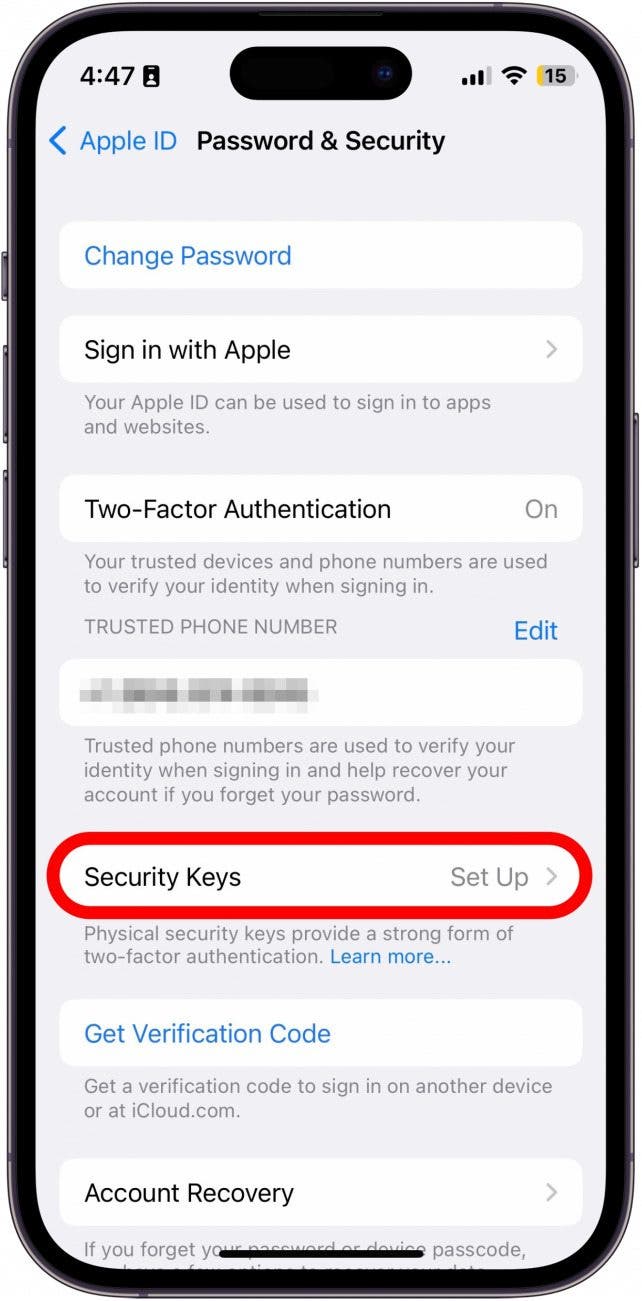
- Tap Security Keys.
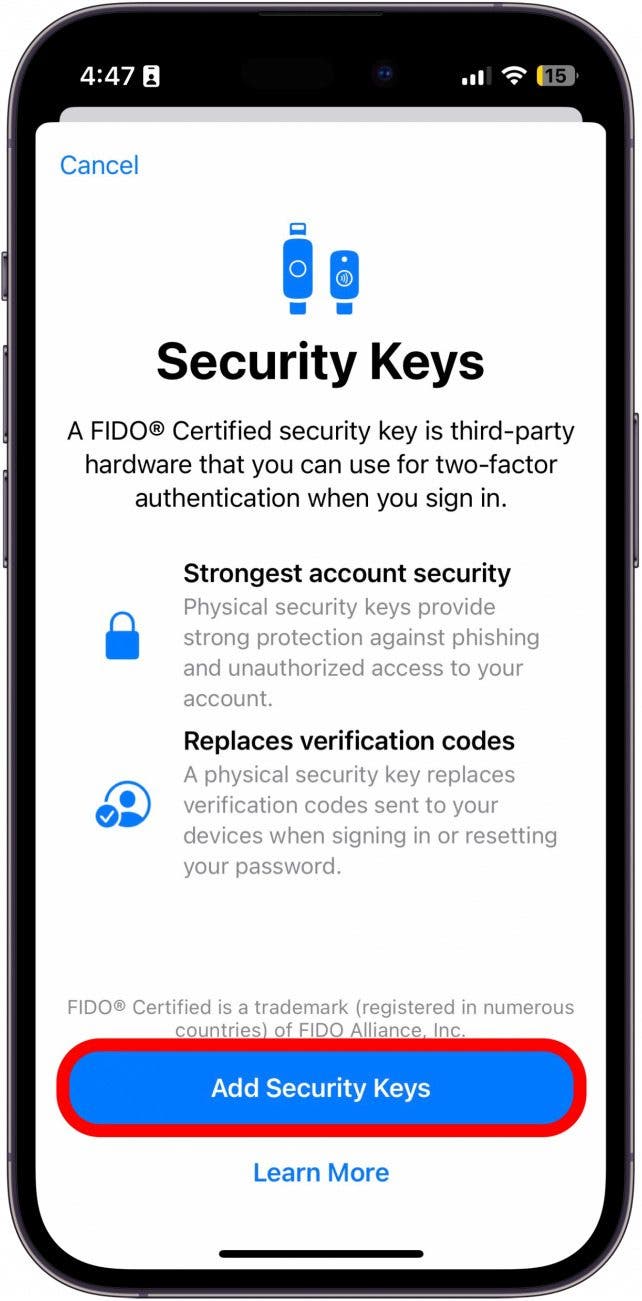
- Tap Add Security Keys.
- Tap Continue.
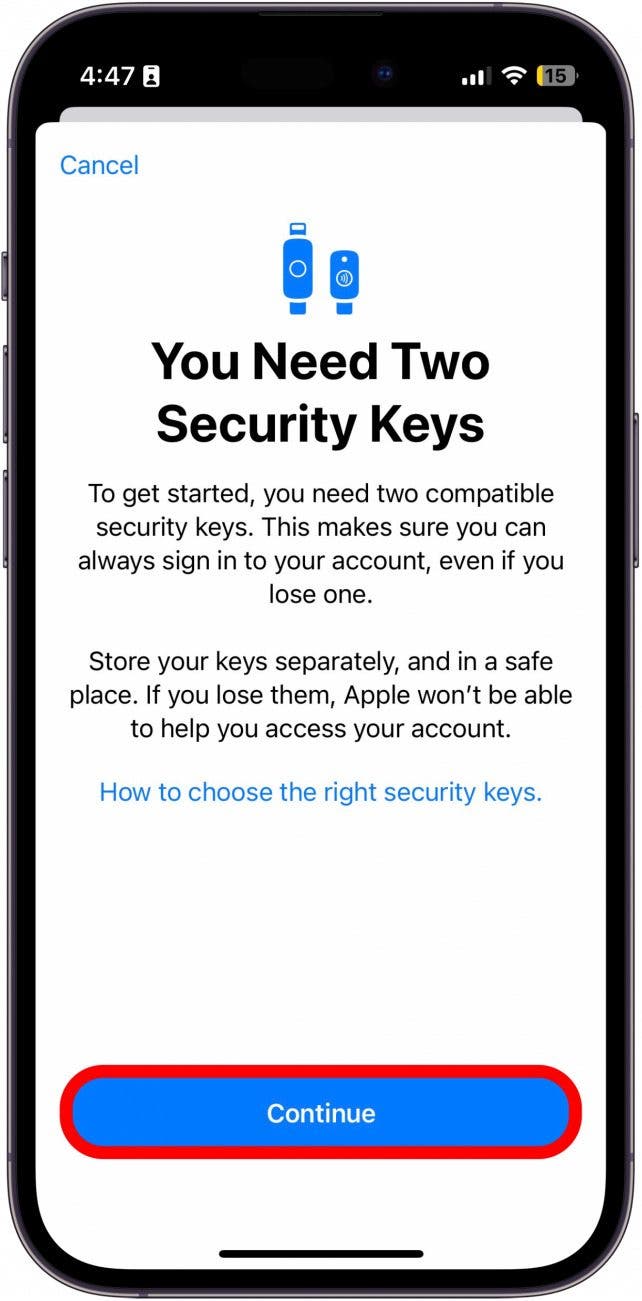
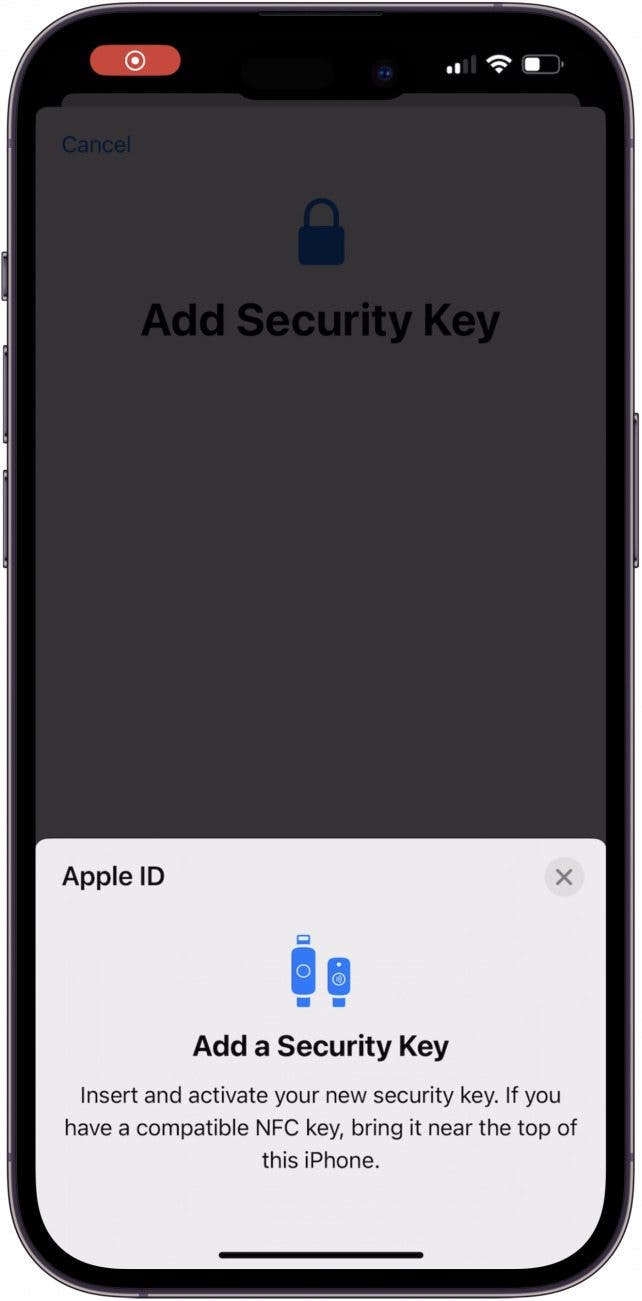
- Insert your security key or, if you have a near-field communication (NFC) key, hold it lengthwise across the top of your iPhone.
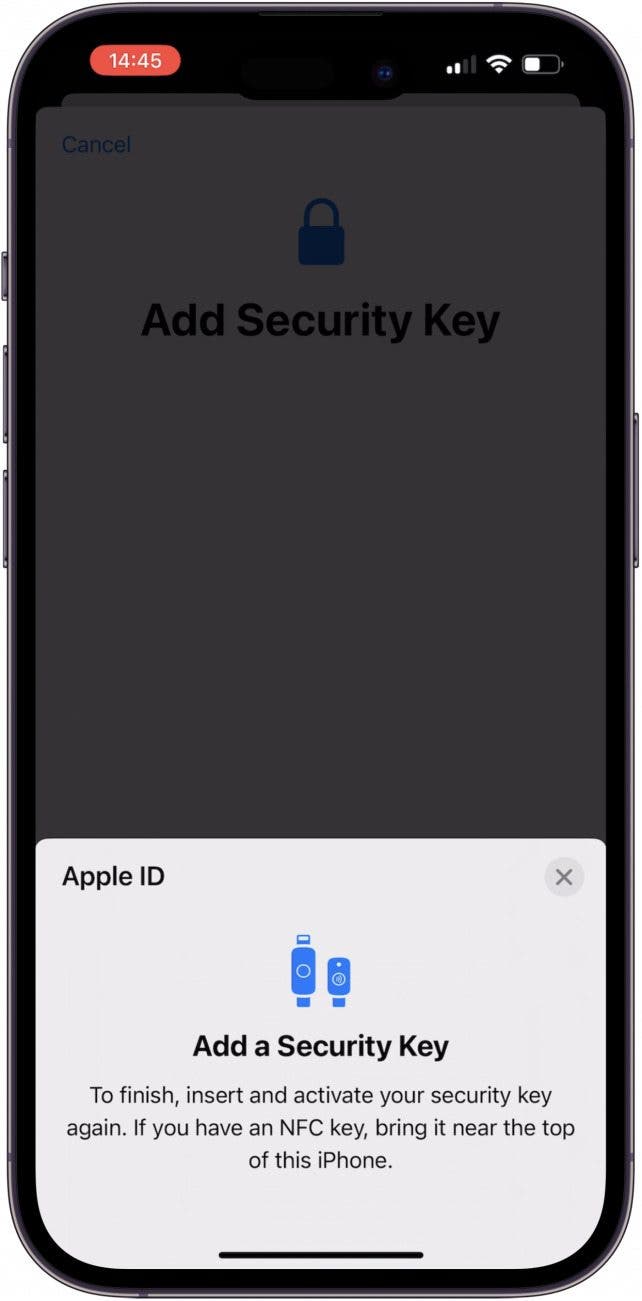
- You may be asked to insert your security key or hold it against the top of your iPhone again.
- Enter a name you'll remember into the name field.
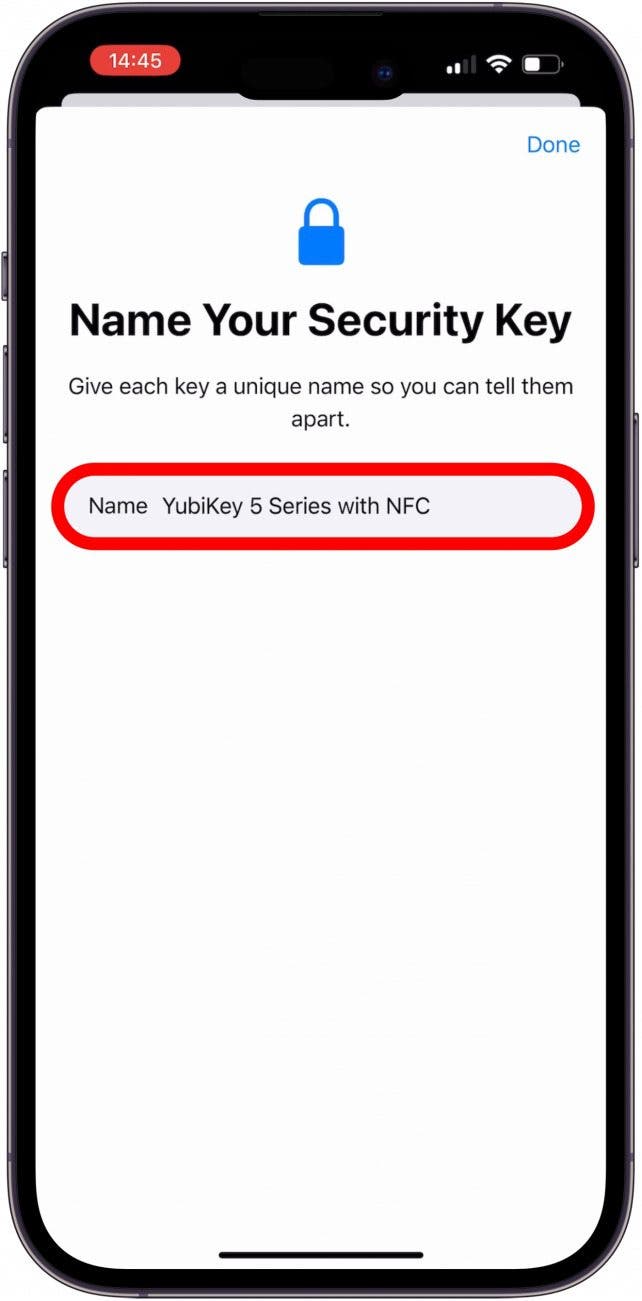
And that's it! Now, you can just tap Done. Apple already requires a second factor besides your password whenever you try to log in: a six-digit code that is normally either texted to you or sent to one of your other Apple devices. However, with a physical key, you use the key instead of any code or pop-up. No text message. No code.
Additionally, you don’t have to worry about accidentally giving away access to your account. Since a physical key is always required to log into your account, even if someone has your account password, they won’t be able to get in.

Rhett Intriago
Rhett Intriago is a Feature Writer at iPhone Life, offering his expertise in all things iPhone, Apple Watch, and AirPods. He enjoys writing on topics related to maintaining privacy in a digital world, as well as iPhone security. He’s been a tech enthusiast all his life, with experiences ranging from jailbreaking his iPhone to building his own gaming PC.
Despite his disdain for the beach, Rhett is based in Florida. In his free time, he enjoys playing the latest games, spoiling his cats, or discovering new places with his wife, Kyla.
 Olena Kagui
 Rachel Needell
 Rhett Intriago

 Leanne Hays

 Amy Spitzfaden Both

