For years, people have been asking whether or not the iPad can replace the laptop. While I still think the laptop is best for certain work tasks, I have found the iPad to be an incredibly powerful productivity tool, once you have it set up right. Especially with the addition of Stage Manager on the M1 iPads, this small but mighty tablet is well on its way to being a replacement for a computer, but it still has a ways to go.This section is dedicated to simple tips that can help take your iPad experience to the next level!
View the Desktop Versions of Websites
When browsing on the iPad, many websites will already show the full desktop version in Safari. However, in some cases you may be shown the mobile version of a website. Mobile versions of sites are great in that they offer streamlined, simplified options. But when you’re using your iPad for work, sometimes you need all of a websites’ features. To check whether you’re in desktop or mobile view while browsing in Safari, follow the steps below:
-
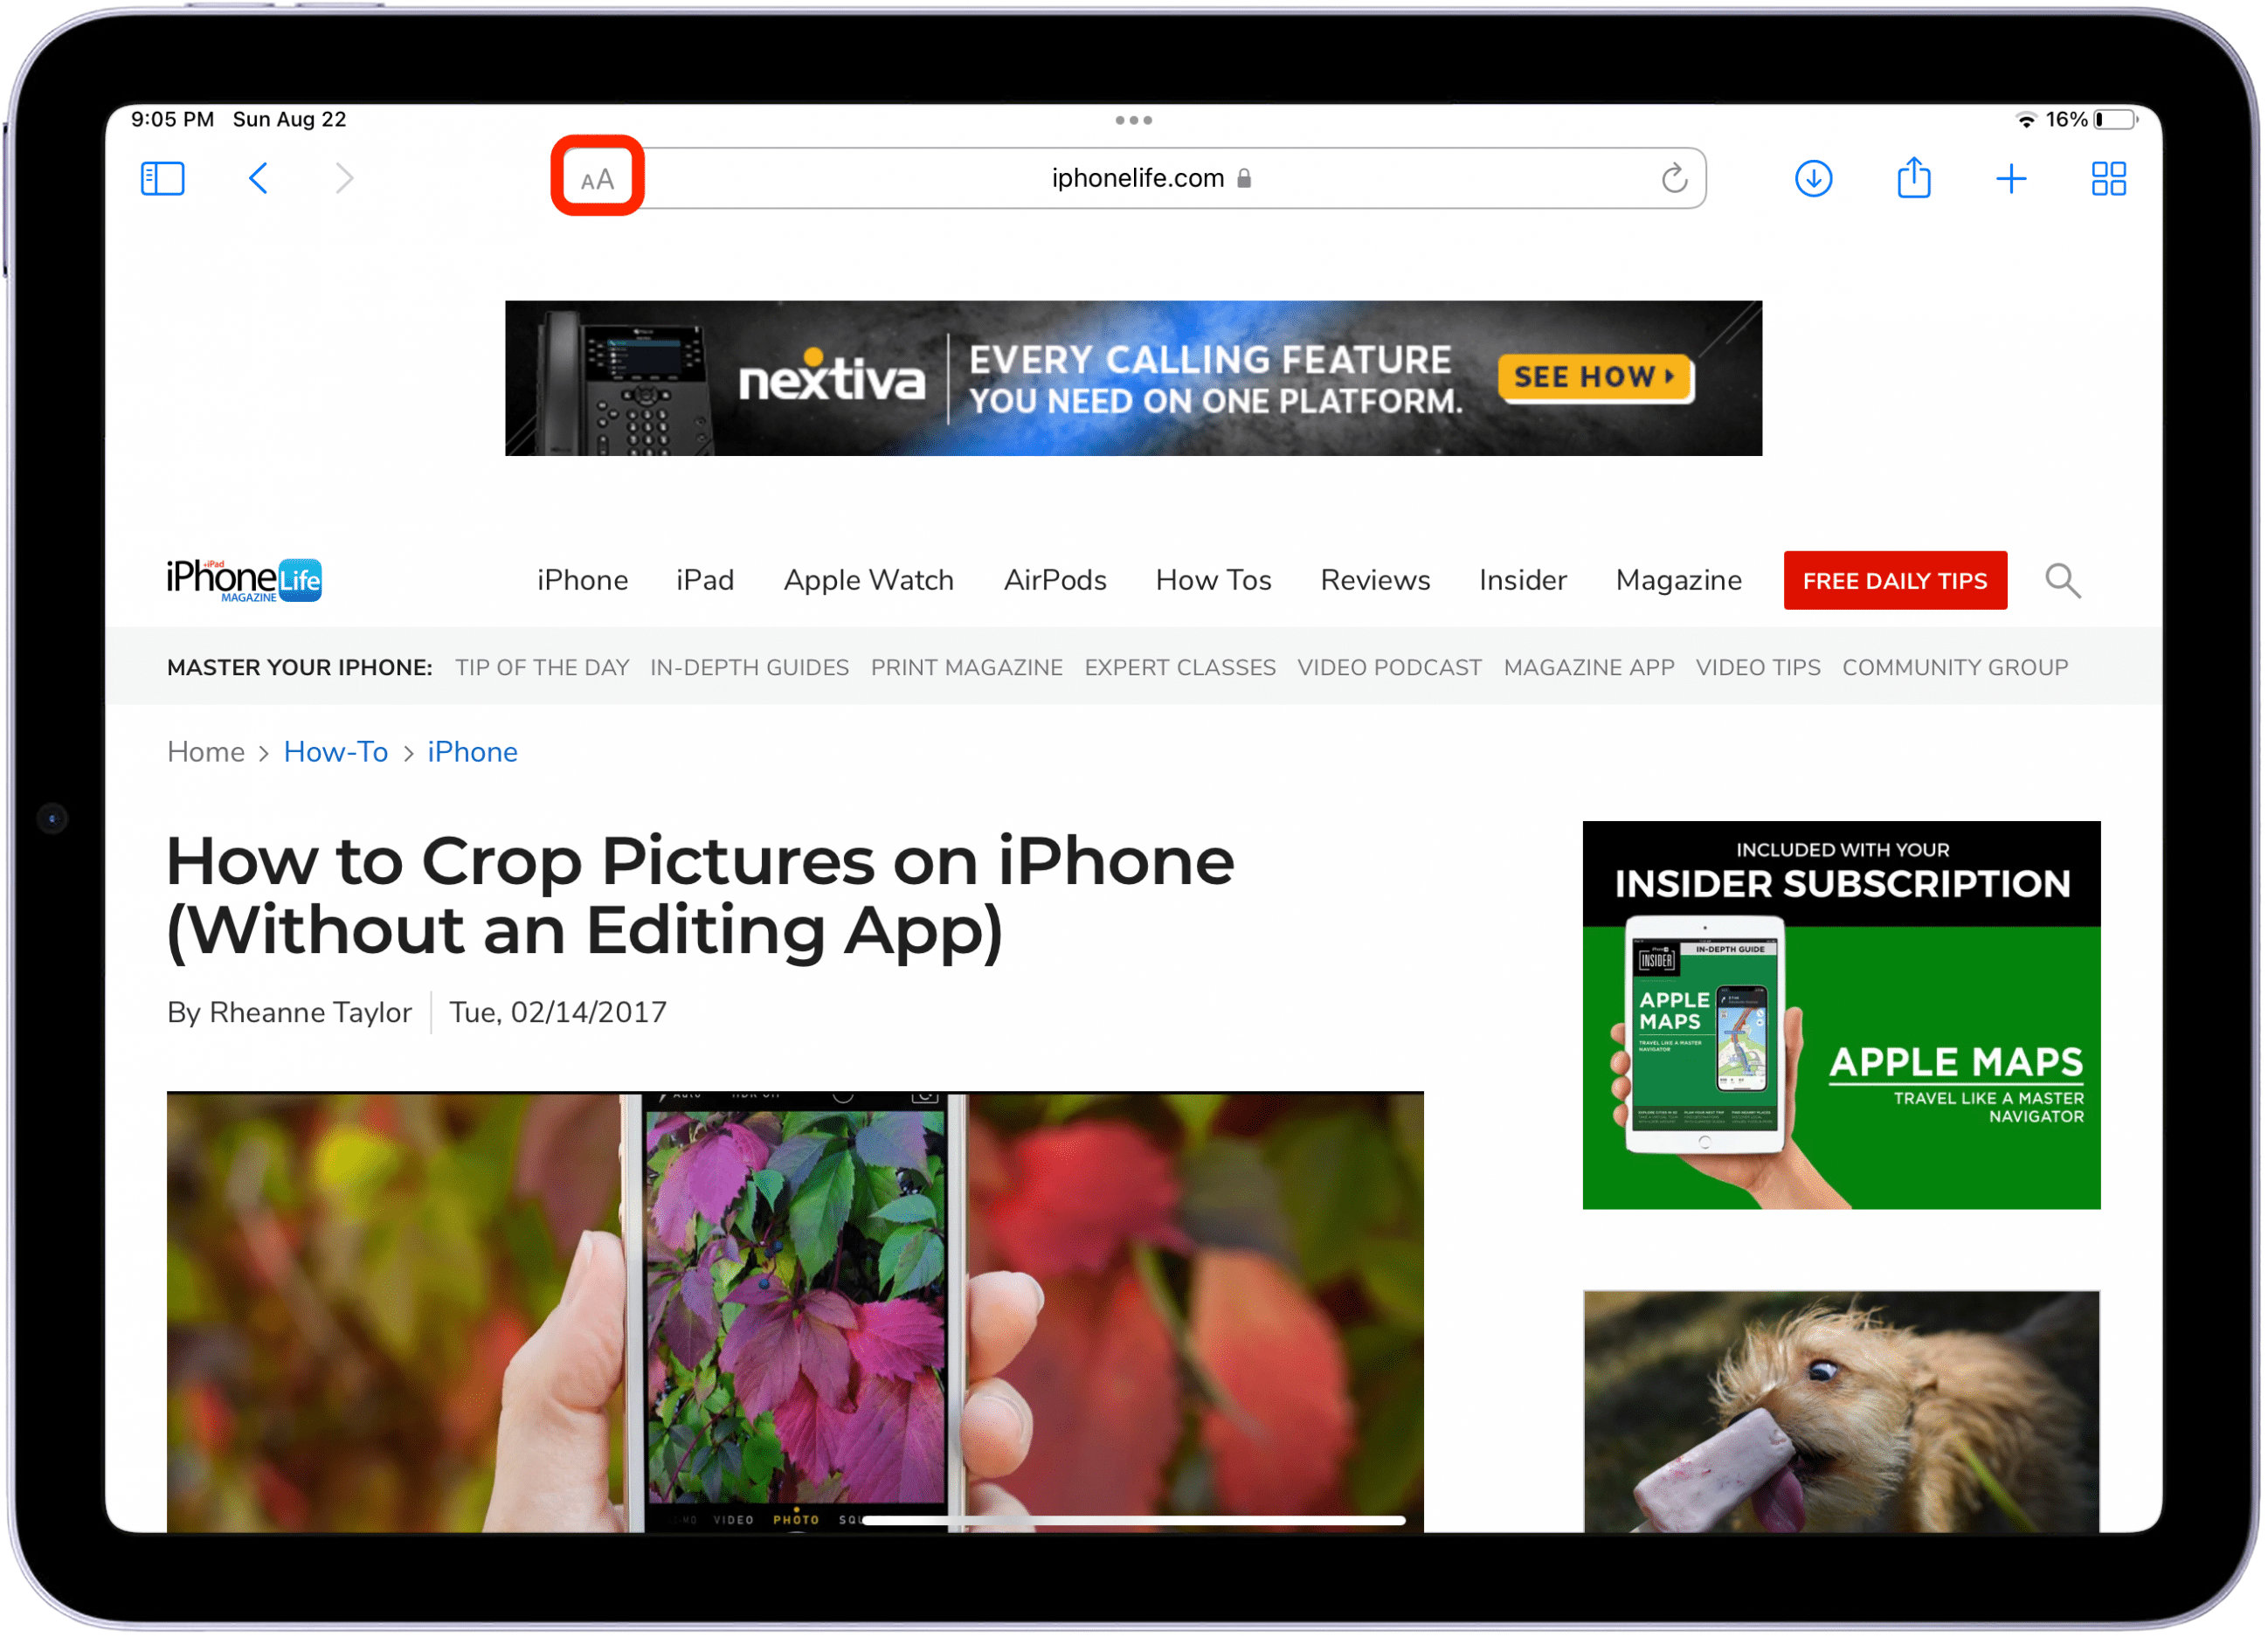
Tap the double “aA” icon in the Safari toolbar.
-
If you’re already in desktop mode, you’ll see an option that says Request Mobile Website. If you’re in mobile viewing mode, you’ll see an option that says Request Desktop Website. Tap the Request Desktop Website option to switch to this viewing mode.
-
To make requesting requesting desktop versions your default when browsing in Safari, tap Website Settings and enable Request Desktop Website toggle.


Enable Reader View in Safari
If you want to do research on your iPad, you want the reading experience to be great. Since web pages are often cluttered with ads and menus, you can get distracted if you're just trying to focus on reading the text. Fortunately, Safari has a Reader Mode that removes all those distractions and presents the page's text and images in a simple and attractive fashion.
-
To invoke Reader Mode, just tap the double “aA” icon next to the address bar, and tap Show Reader View. (Note: not all web pages can be viewed in Reader Mode.)
-
For easier reading, you can also change text font and background color. To exit Reader Mode, simply tap the “aA” icon and select Hide Reader View.


View Downloaded Files in Safari
When you download something in Safari, you’ll notice a Download menu in the toolbar. When you tap on this menu, you’ll be able to view your downloads the same way you would on your computer.
-
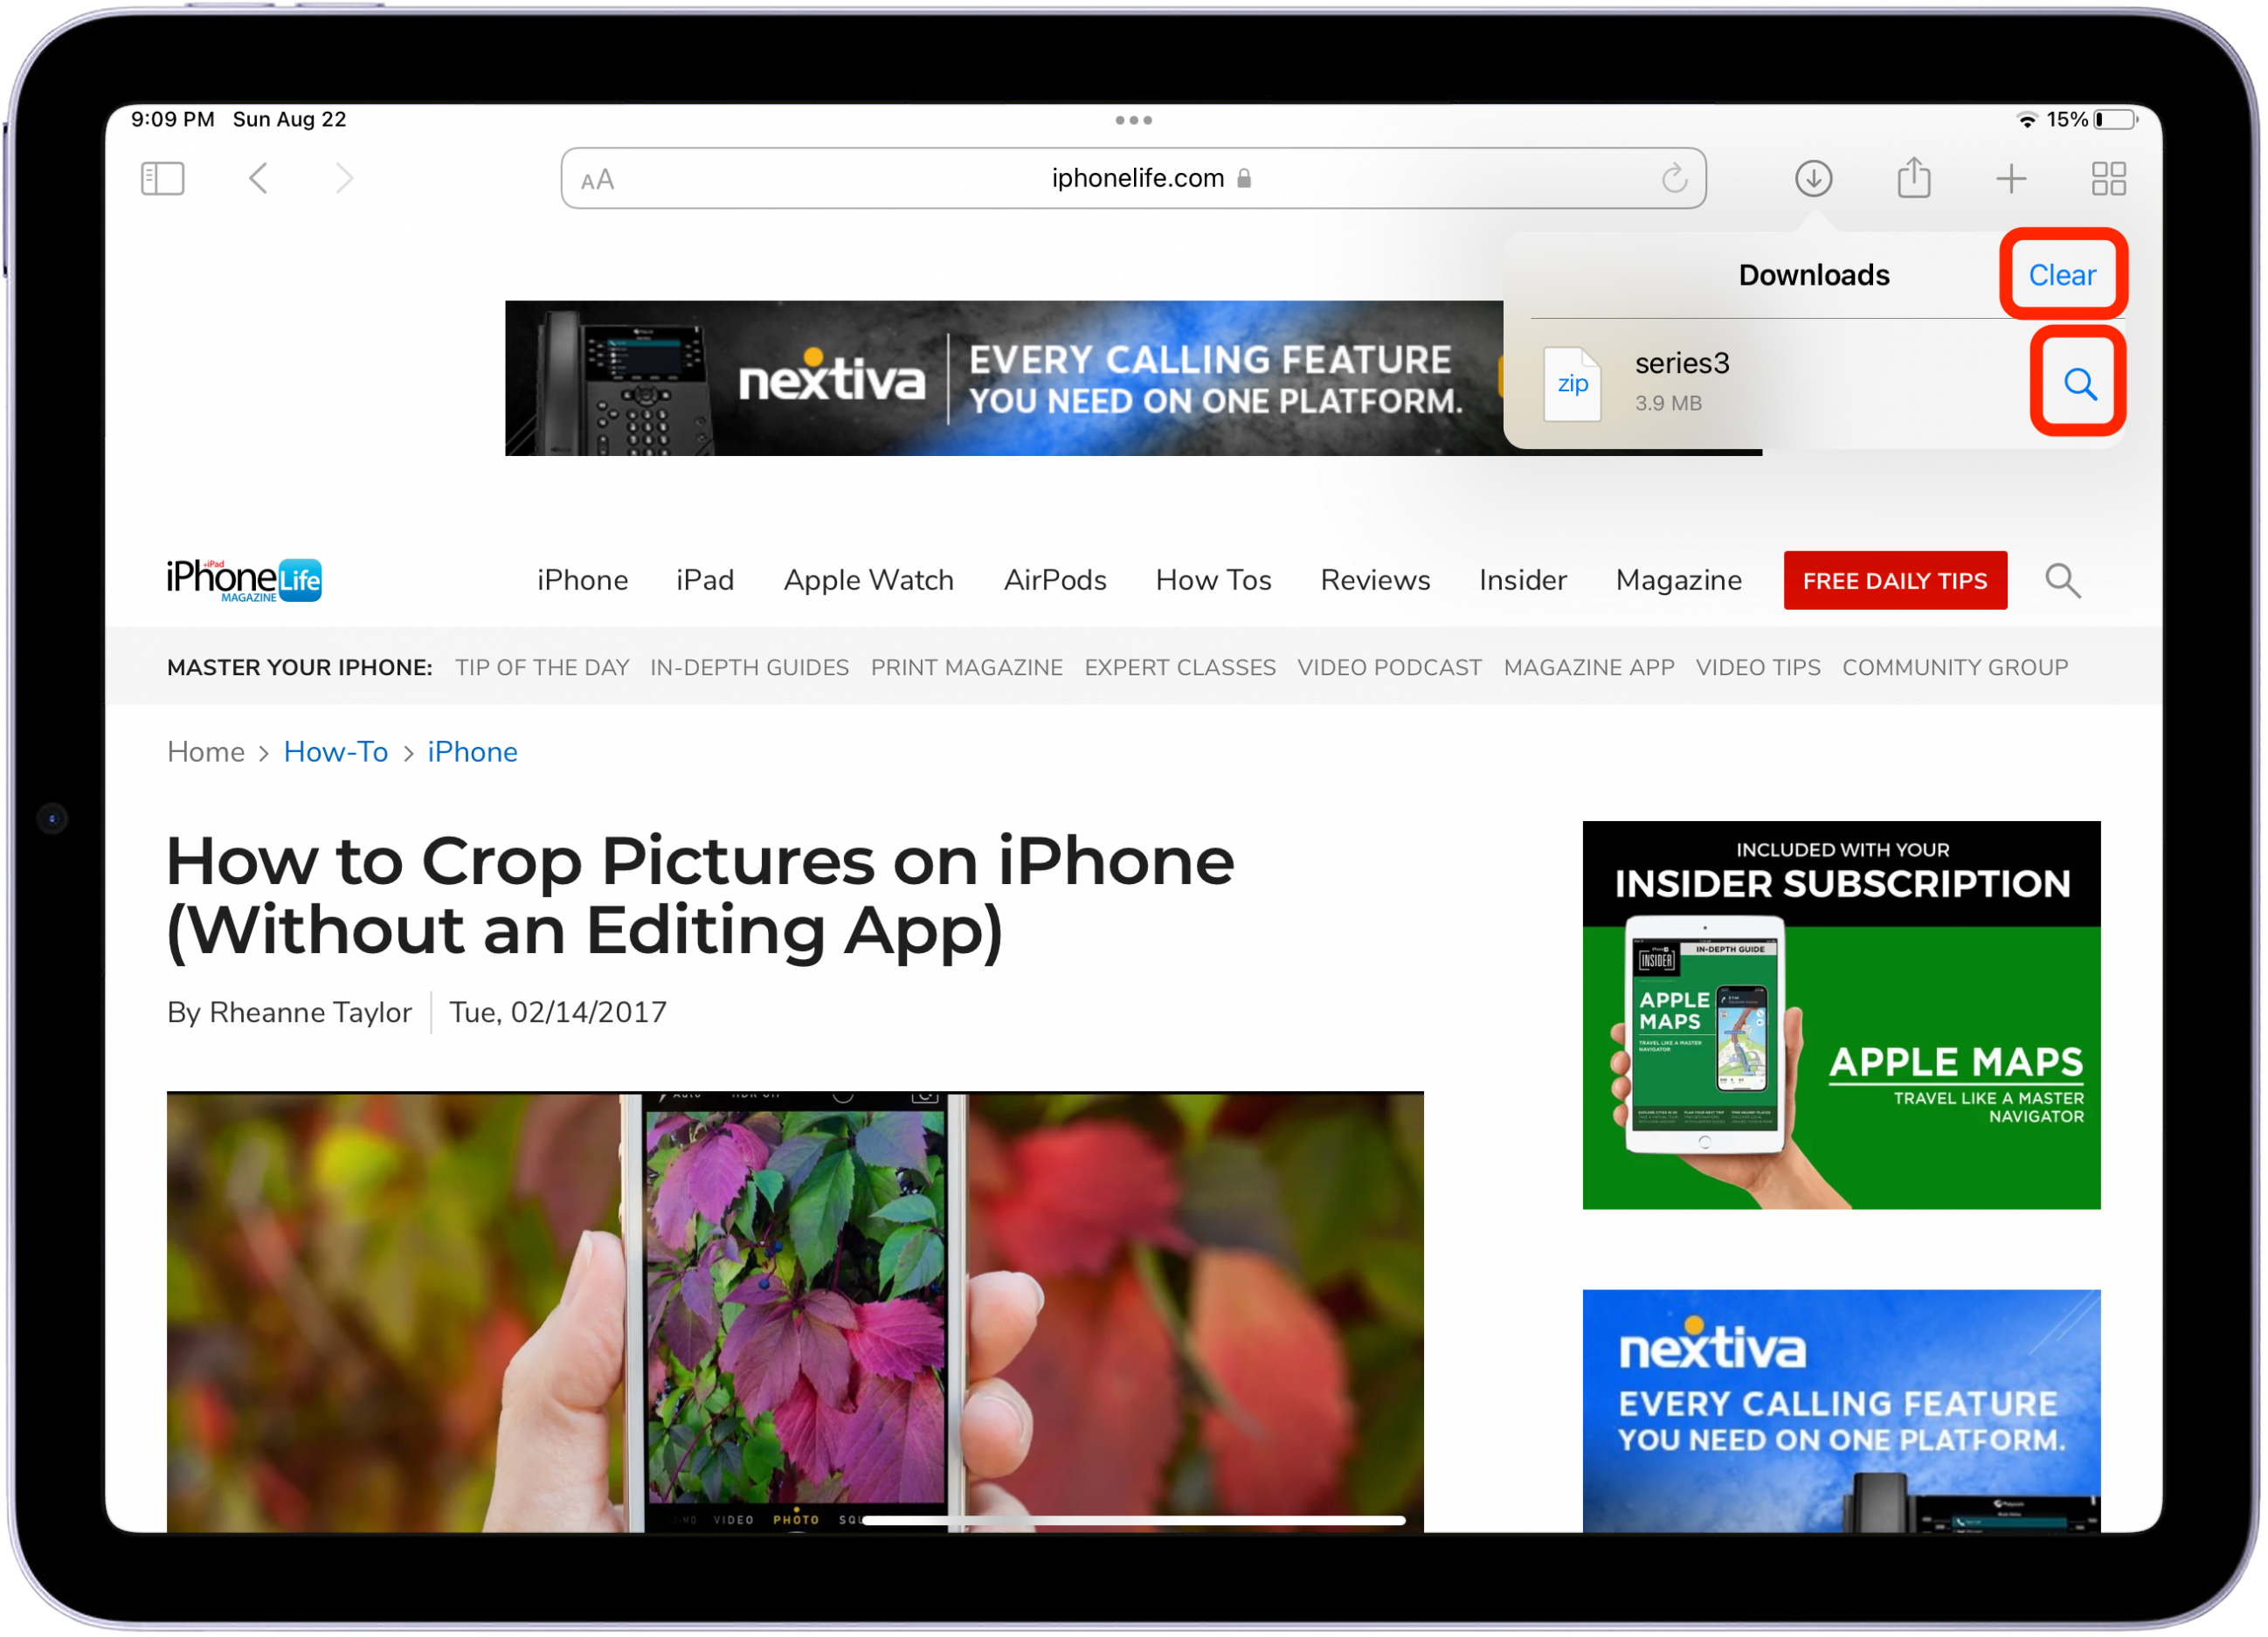
Tap on the Download button in the toolbar to view your downloads.
-
You’ll see a list of your previous downloads, as well as current downloads. Tap the magnifying glass icon next to your download to view the folder it’s and move it where you like. Tap Clear to clear your downloads.
-
You can also access downloaded files by closing Safari and opening the Files app and tapping the Downloads folder. Tap the file or folder to open it.


By default, your downloads will stay in the Files app Downloads folder until it is manually deleted. However, your Safari download tab will be cleared after one day. If you want to adjust this so that files stay in your Safari Download Manager until manually cleared, open Settings, tap Safari, tap Downloads, tap Remove Download List Items, then select Manually.
Set Safari Tab Groups
If you have multiple tabs that you often reference for work or other areas of interest, you can save these links in a Safari Tab Group. Then when you open Safari, you can simply tap the Tab Group to open all the related links at one time. This is far more efficient than opening individual links one by one! Read below to learn how to create a Tab Group:
- Open Safari. If the sidebar isn’t already open, tap the rectangular icon in the corner called the Menu button.
- Tap the Tab Group icon. From there, you can select whether you’d like to create a New Empty Tab Group or create a Tab Group from the tabs you have open. Add a name for your new Tab Group and tap Save.
- Tap your Tab Group in the sidebar to open and view the windows saved in the group. Tap the plus icon to add a new tab and tap the delete button to remove the tab from the group. When finished editing the Tab Group, tap Done.


NEW! Collaborate with Shared Tab Groups in Safari
With iPadOS 16, Tab Groups got even more convenient with the ability to share them across devices. Now, you have the ability to share these tab groups with friends and family, making planning a trip or collaborating on projects even easier! To share a tab group,
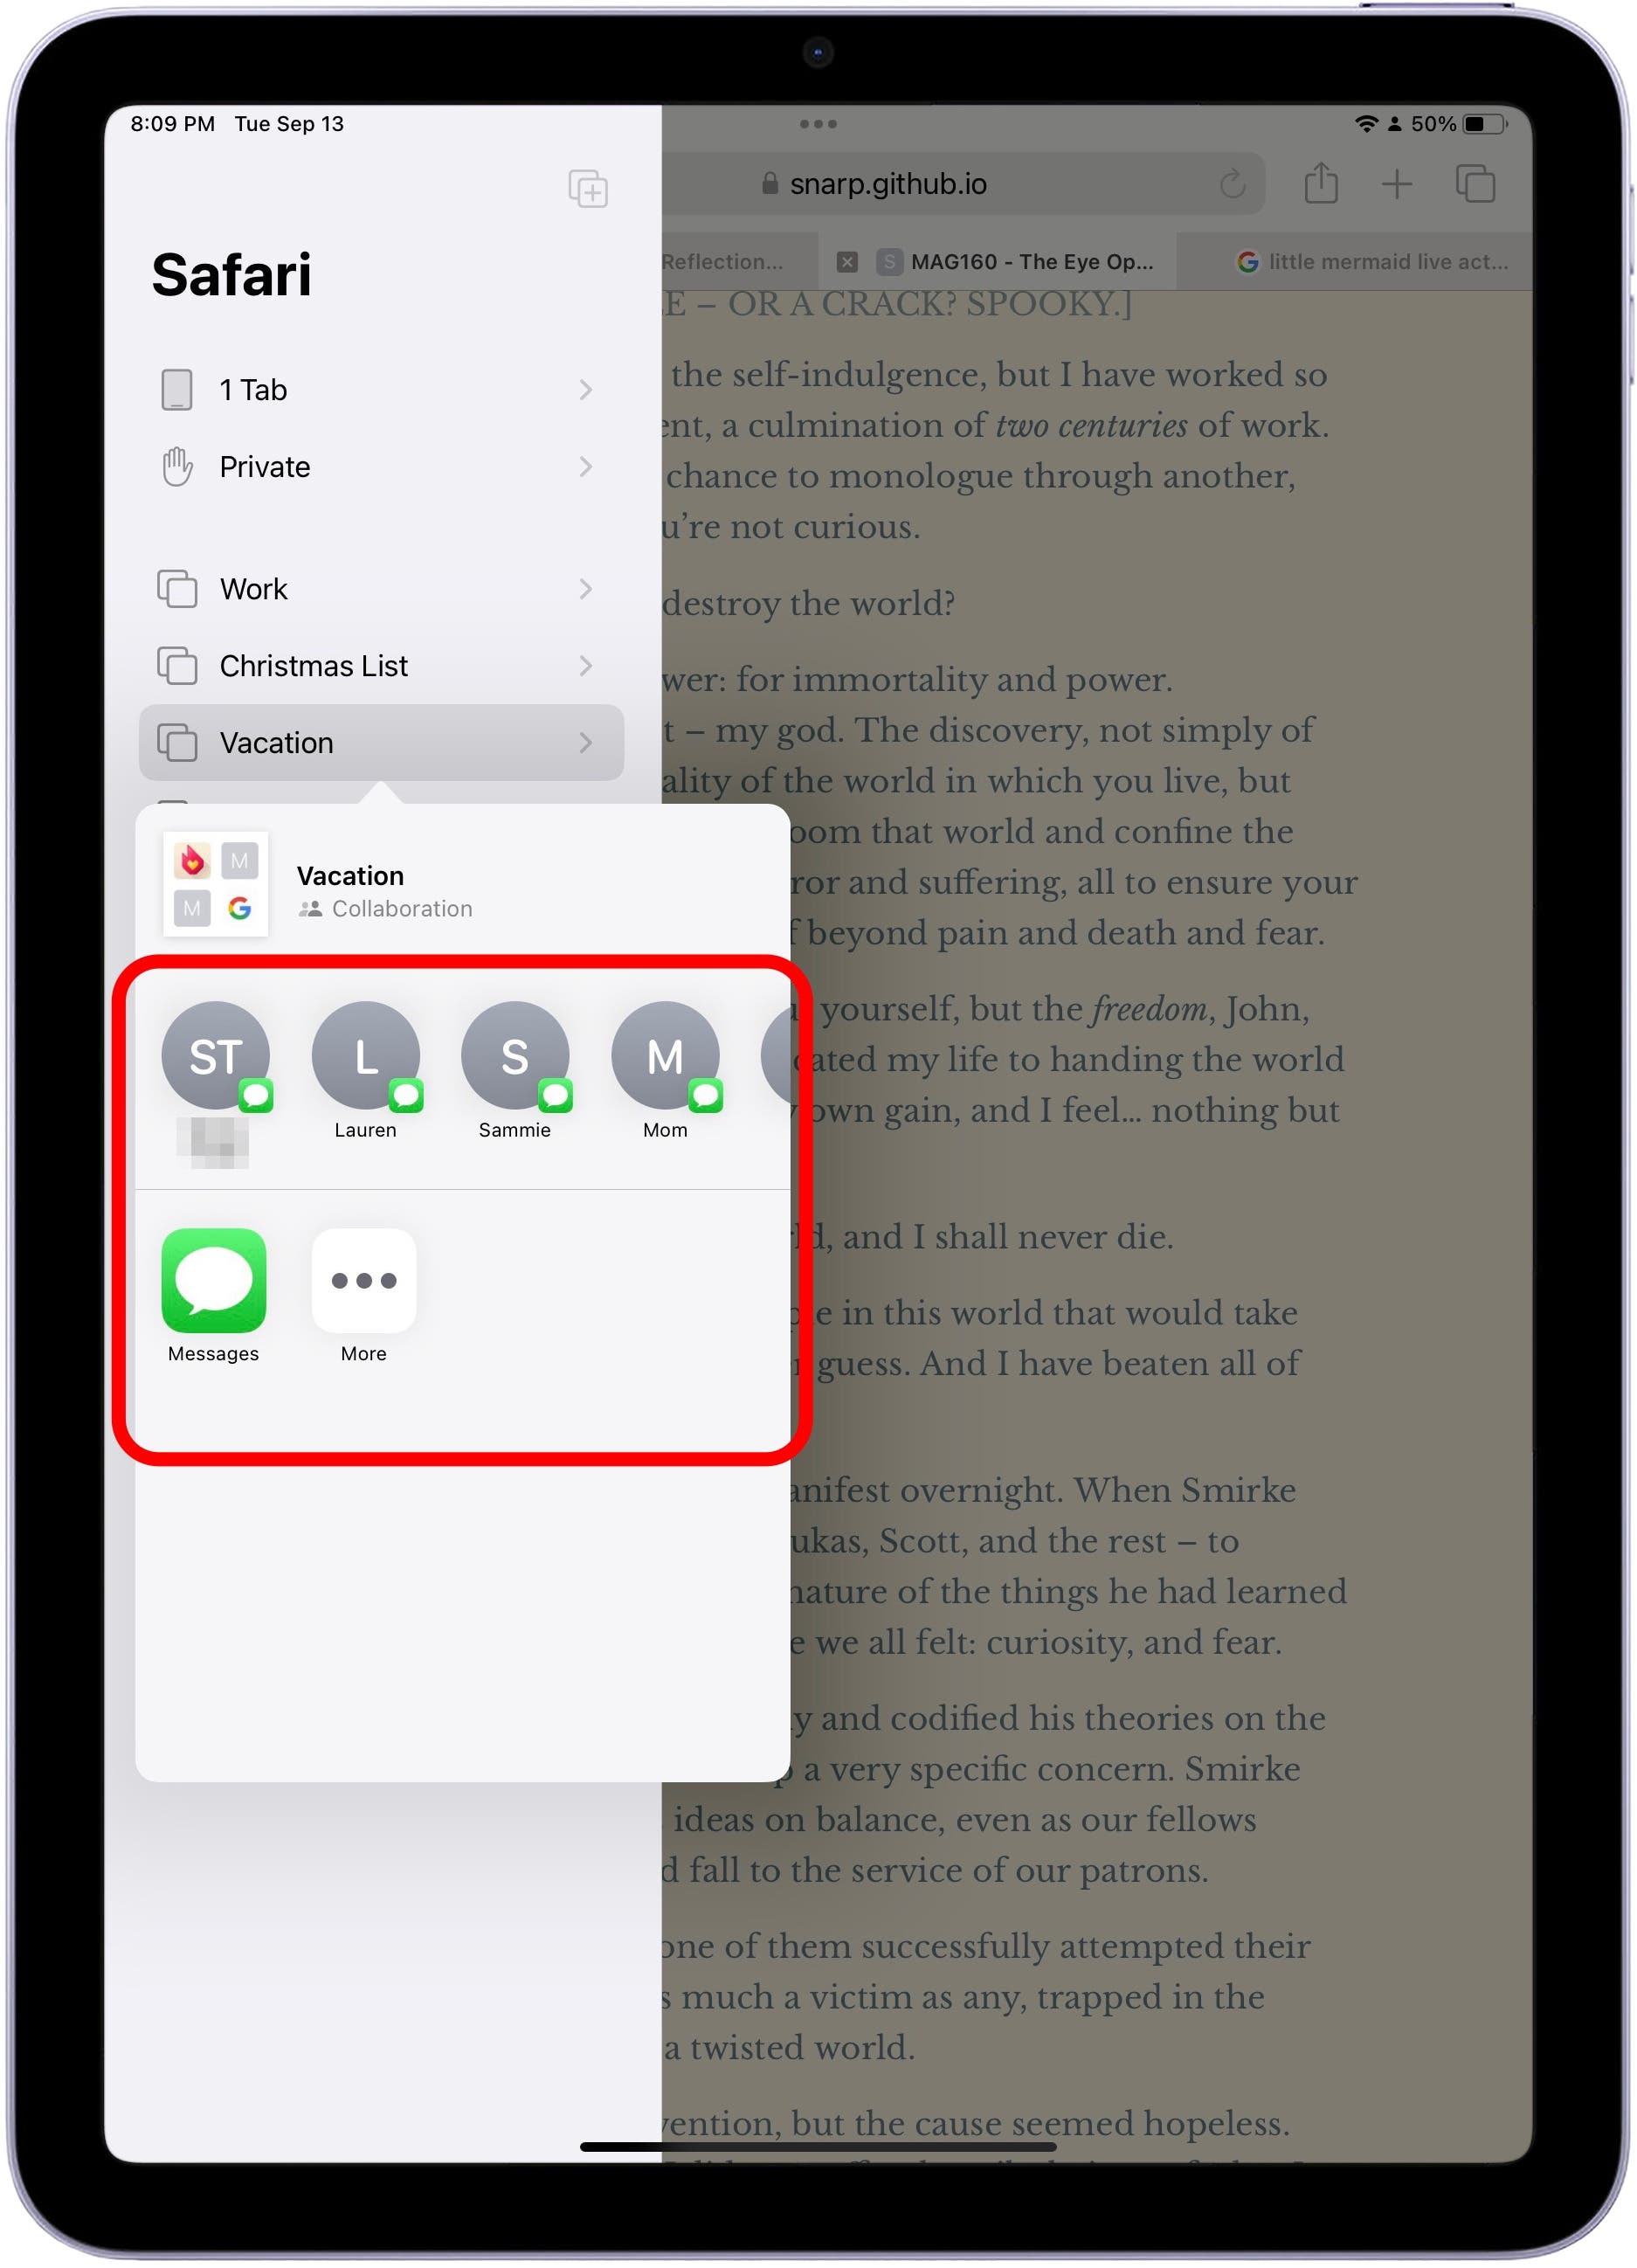
- Open Safari and tap the Menu button. Press and hold the tab group you want to share, and then select Share.
- From here, a menu will pop up that will allow you to select where and to whom you’d like to share the tab group with. Personally, this feature will make Christmas shopping so much easier for my family!

Lock Rotation on Your iPad Screen
Your device screen is set to automatically rotate between horizontal and landscape view depending on the position of your iPad. This feature is incredibly useful, but occasionally I find my device screen automatically switching when I don’t want it to. To stop this from happening, you can temporarily disable screen rotation so your view holds the same orientation. To enable or disable screen rotation:
-
Swipe down from the top-right corner of your screen to open the Control Center. (On an iPad with iOS 11 or earlier, swipe up from the bottom edge of your screen.)
-
Then tap the Rotation Lock button. When enabled, your iPad will hold the same screen orientation regardless of the device position.


As a final note, some apps don't support rotation, so your screen might not rotate even if Rotation Lock isn't enabled.
Use Photos Sidebar to Find Pictures
In many ways, the Photos app on the iPad is very similar to the Photos app on the iPhone. However, there are some key differences, the main one being that your iPad has a navigation sidebar that allows you to sort, search, and view content with various filters. We’ll walk through how to make the best use of the Photos sidebar, so that you can efficiently navigate and find the content you’re looking for!
-
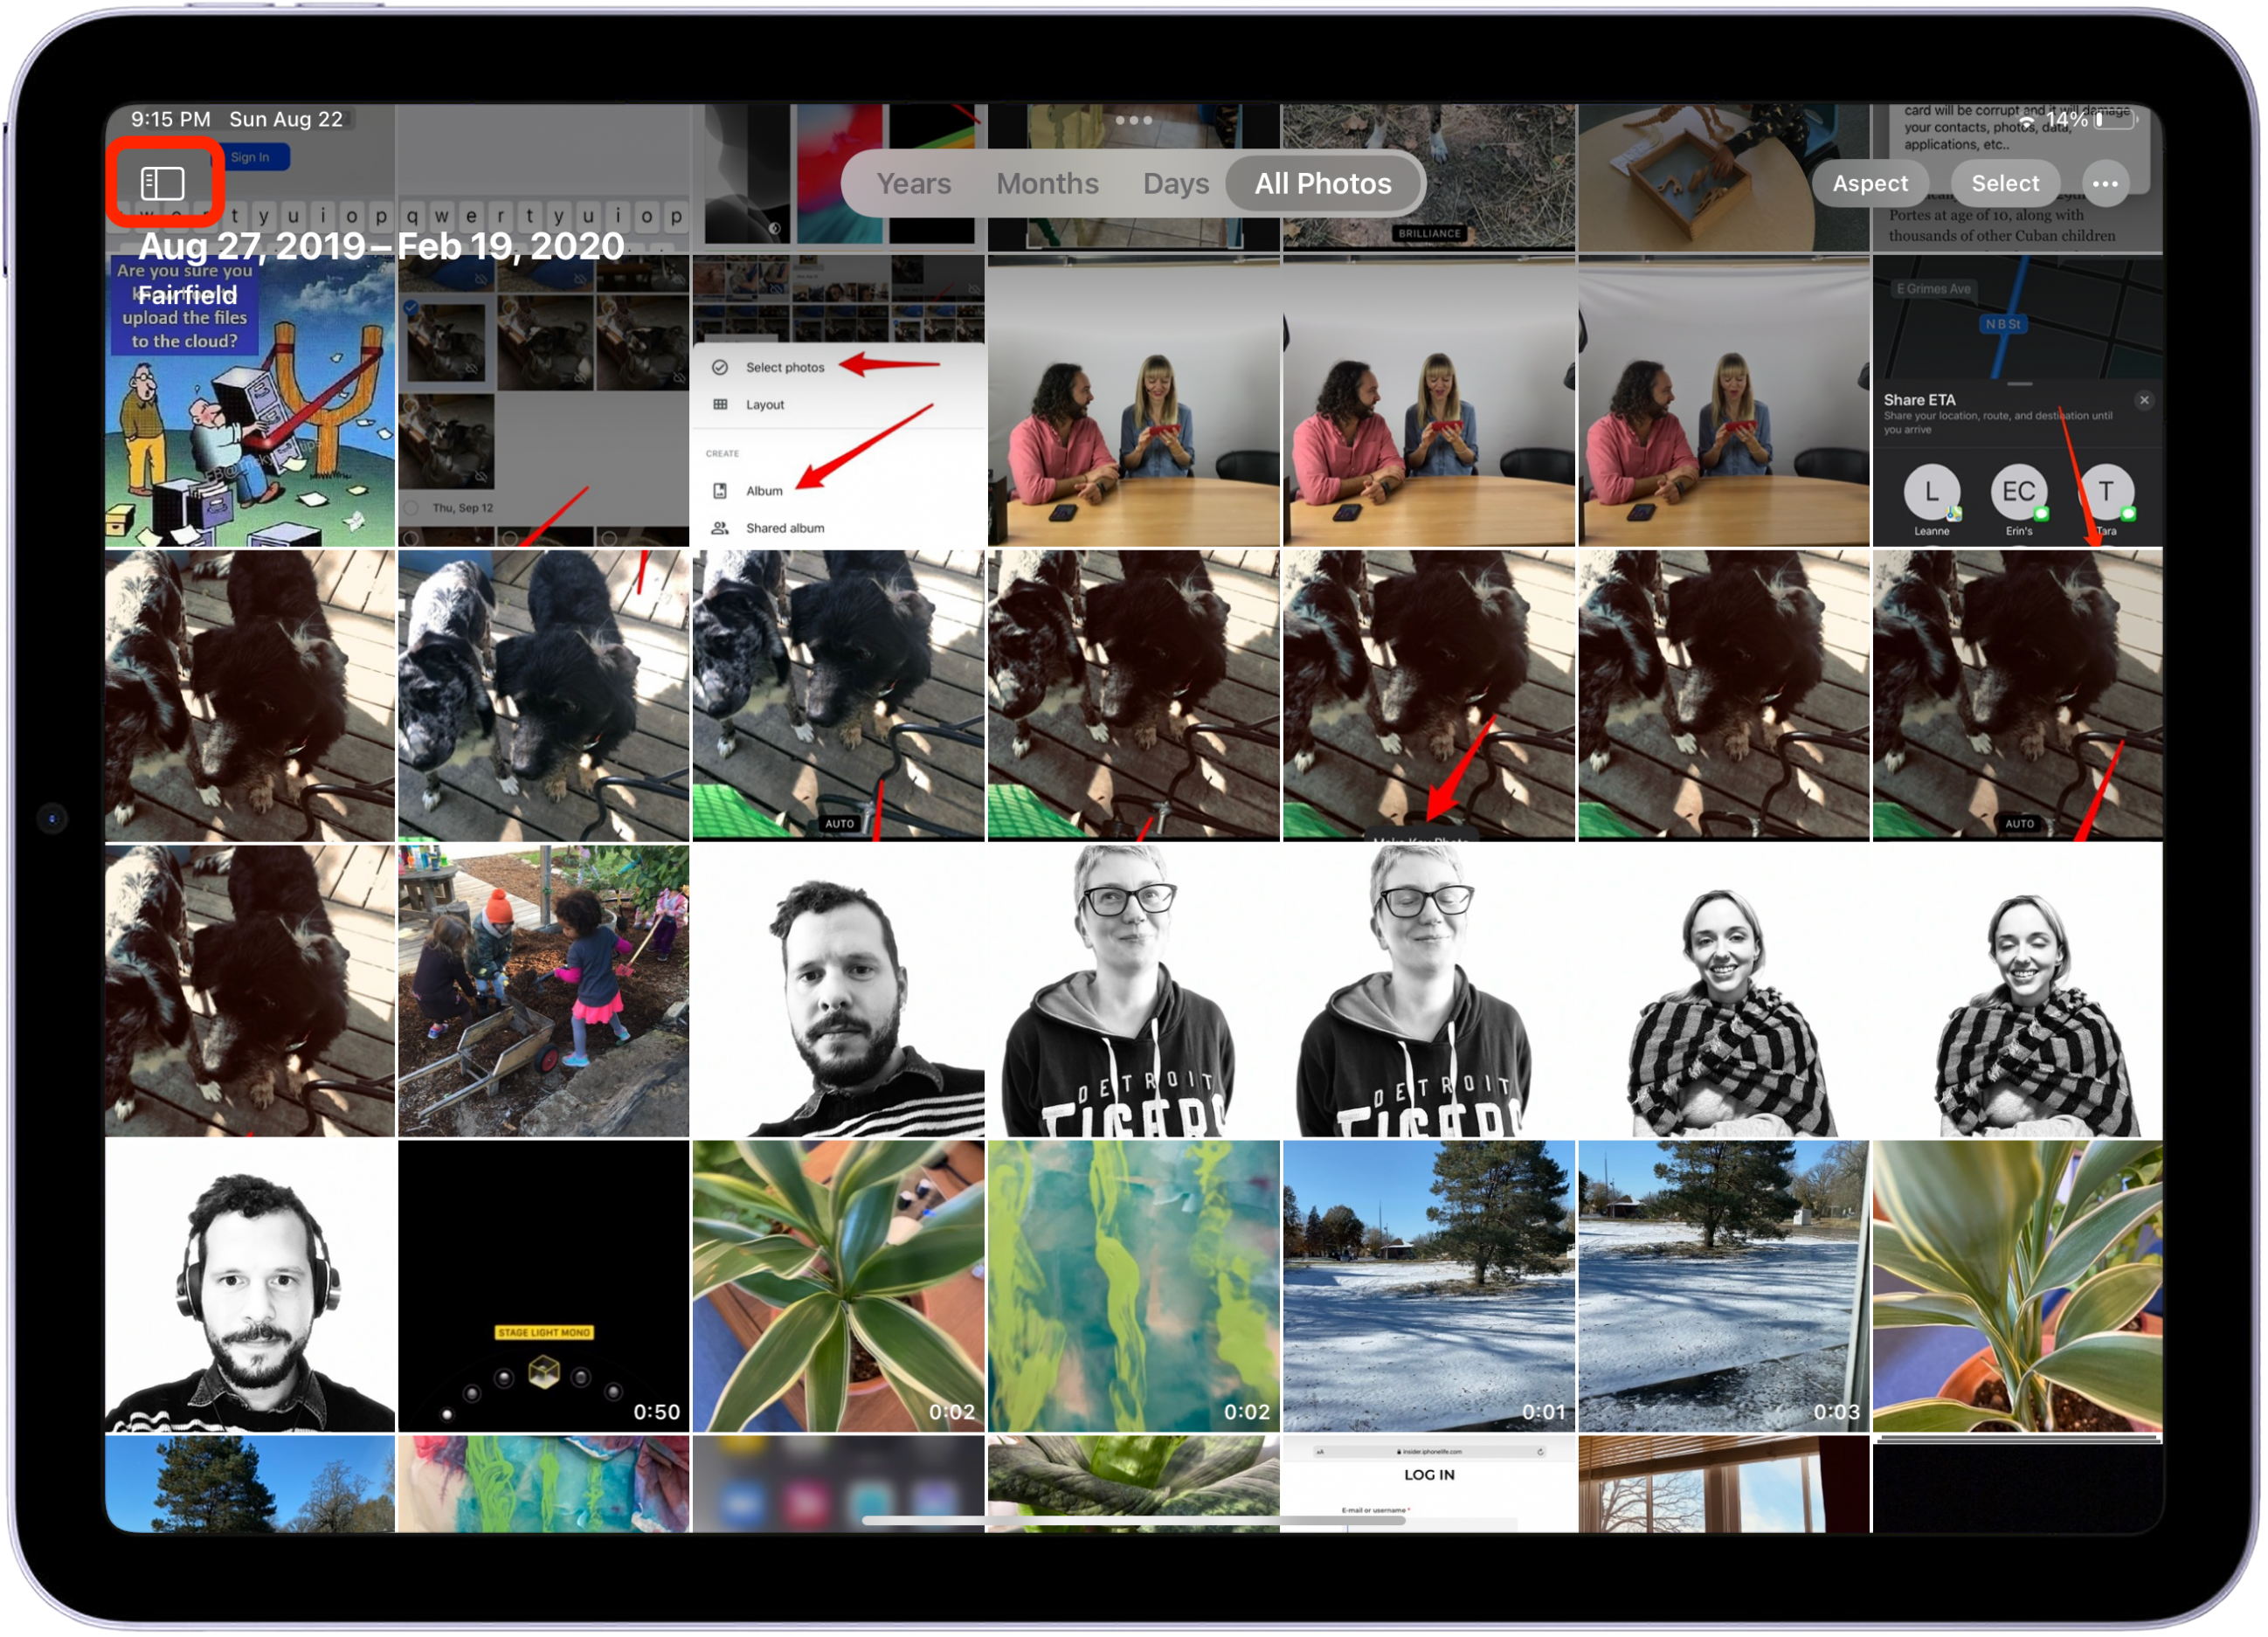
Open the Photos app. To view the navigation sidebar, you can either tap the Sidebar icon or swipe right on the screen.
-
The section below allows you to sort your Photos by various methods. Tap Library to view the gallery of your photos, or you can tap People or Places to sort photos by a specific person or location. There is also a For You tab, which includes items shared with you. So if people send you photos in Messages, these will now automatically appear in this section.
-
You can also view Recently Deleted or Imported photos under the Utilities section.
-
At the bottom of the sidebar, you can see My Albums and Shared Albums. From here, you can tap to create a new album or tap an existing album to view it.


NEW! Taking Notes with the Notes App
The iPad is my go-to note taking device. In combination with the Apple Pencil and the amazing Apple-native Notes app, taking notes on the iPad is efficient, convenient, simple, and honestly fun. I love the ability to switch back and forth between handwritten notes and typed text along with the many customizations and organizational options like bulleted lists, headings, tables, and more. If you love the Notes app as much as we do, be sure to check out our comprehensive Notes App Guide that goes more in-depth on all the cool features the Notes app has to offer! Here, we’ll just cover the basics and some cool or interesting ways you can use the Notes app on you iPad.
Quick Note
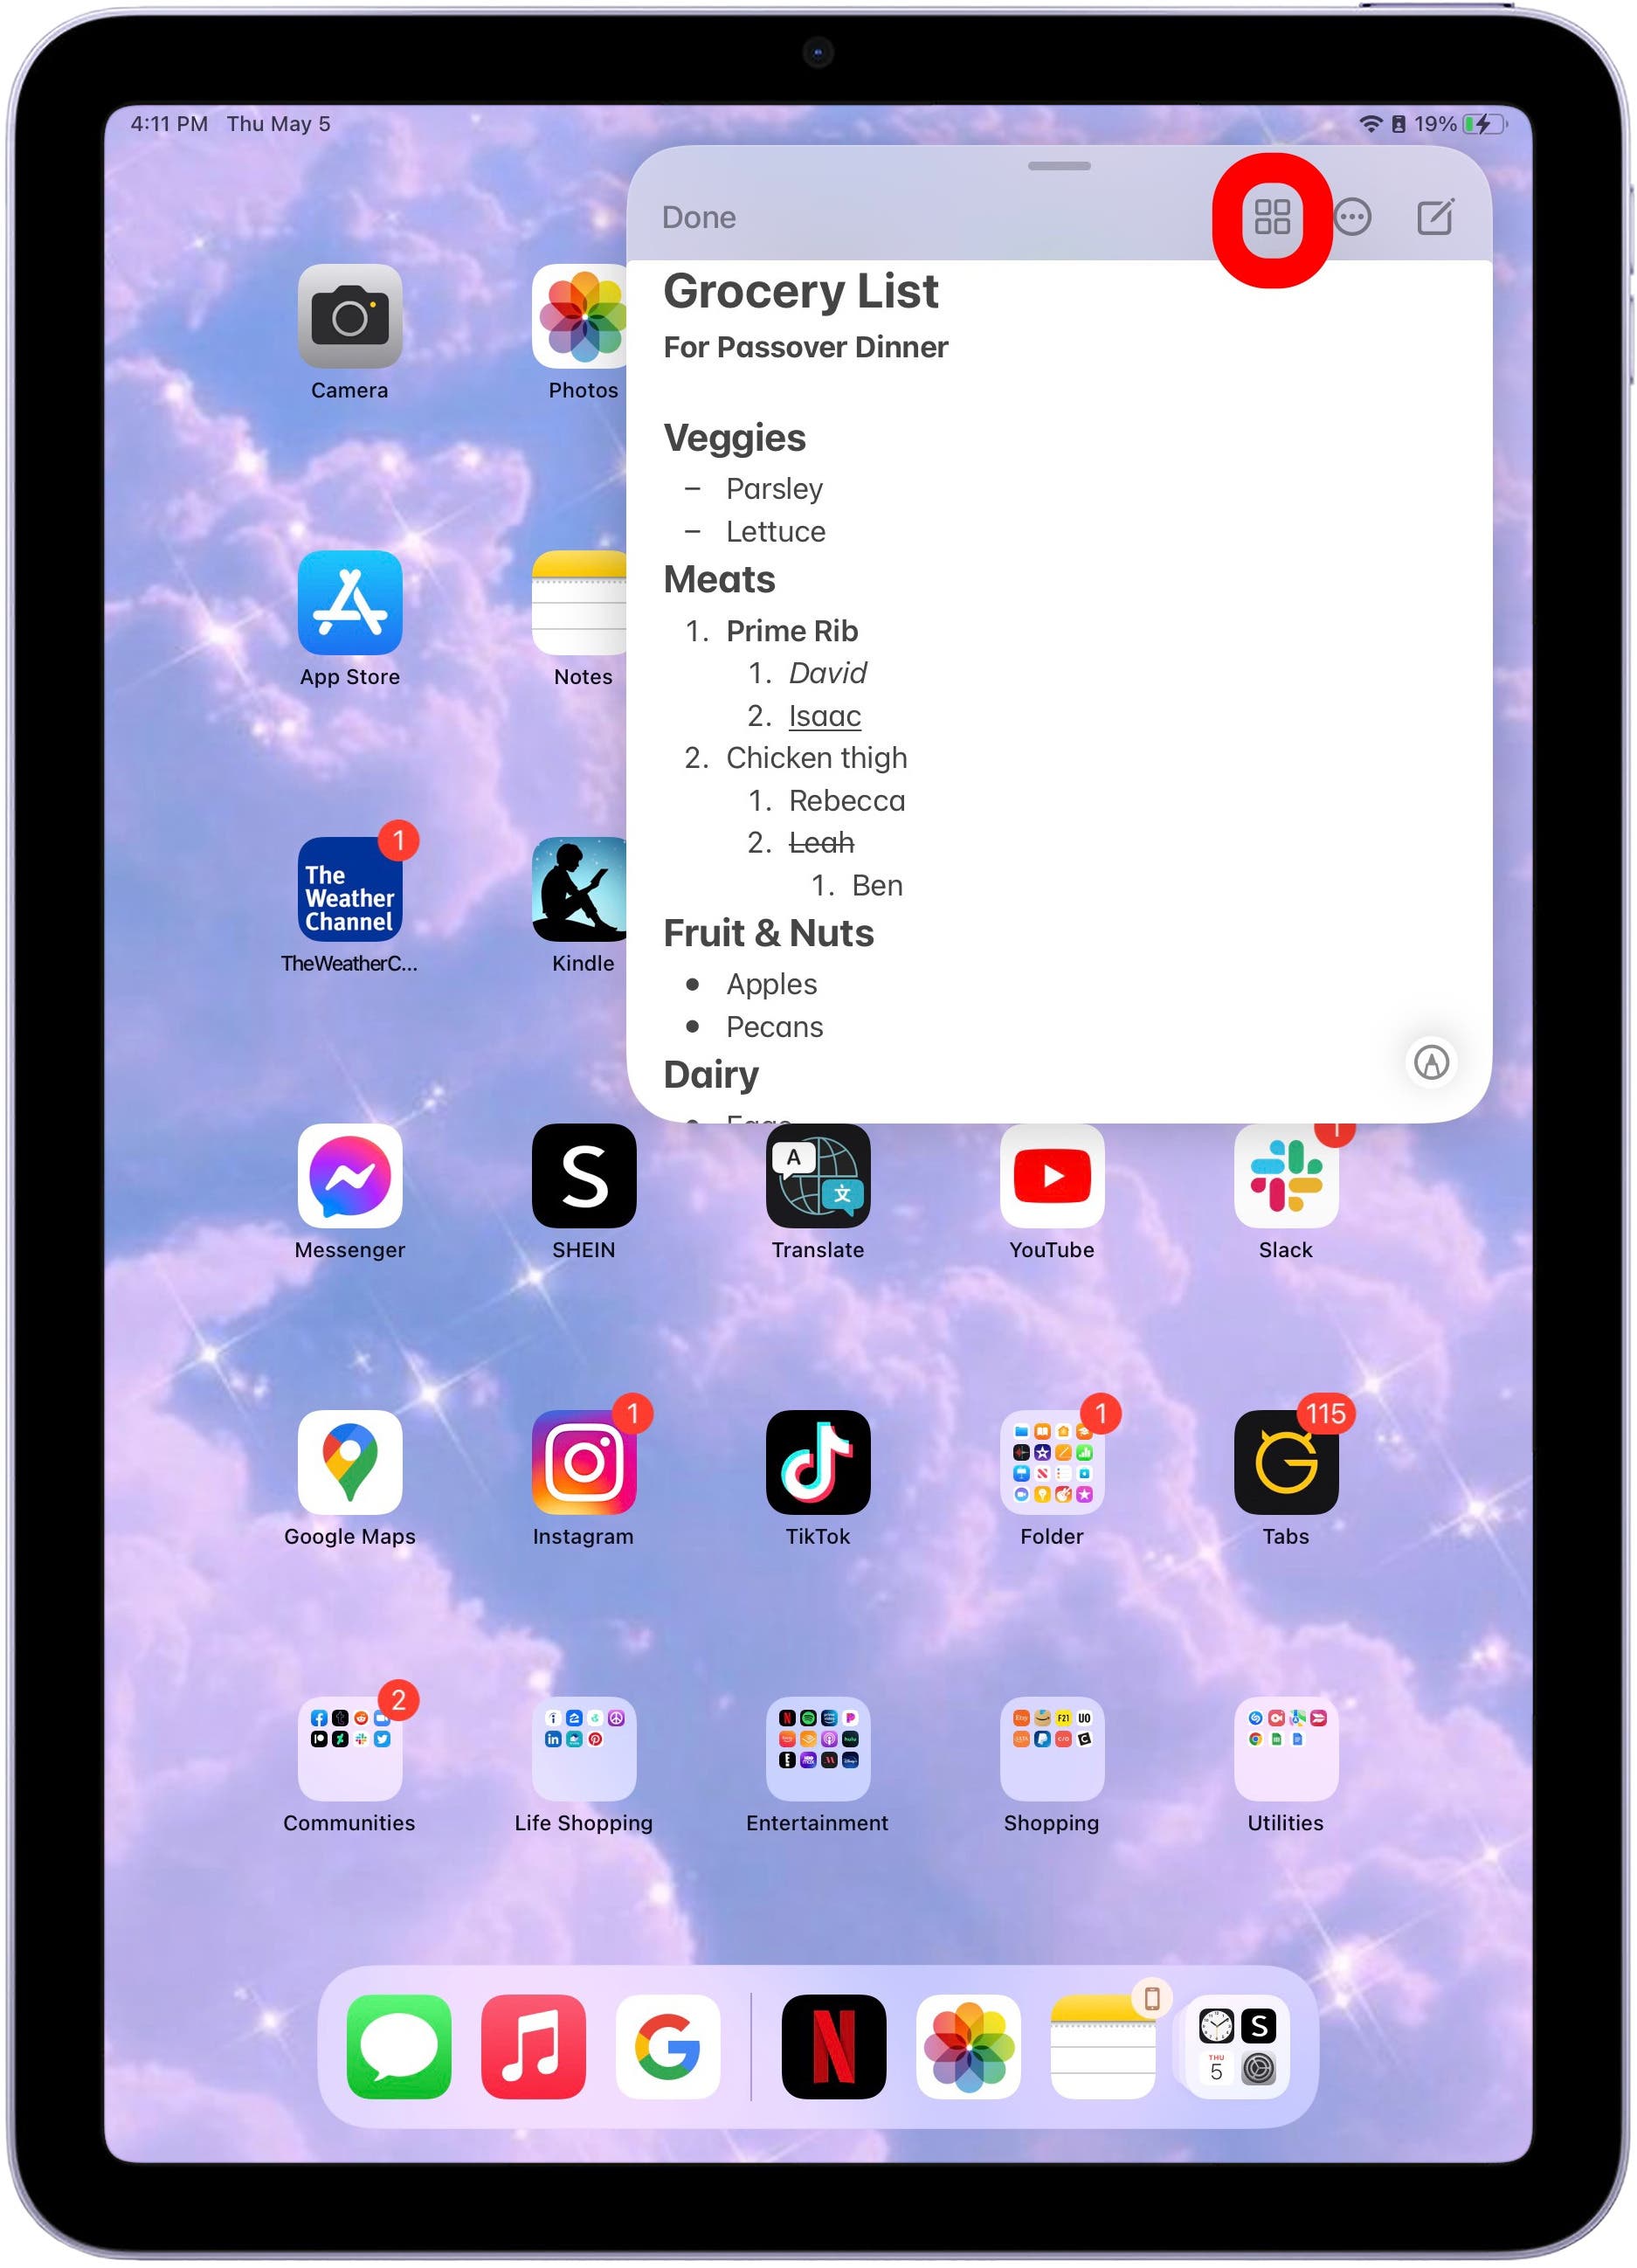
Quick Note is a floating note editor available from your iPad Home Screen or while working in any app. This feature is great for quickly jotting down important information like a phone number or saving a website link without completely exiting the app you’re working with. Because Quick Note is an added Notes app feature, not a separate app, you won't find a Quick Notes app on your device. Instead, you can create a Quick Note no matter what app you're in, or directly from your iPad Home Screen.
- Just swipe up from the bottom-right corner of your iPad. Tap anywhere in the Quick Note window to begin typing, or simply start scribbling with your Apple Pencil or third-party stylus.
- You can also tap the grid icon to see your notes in the Notes app.
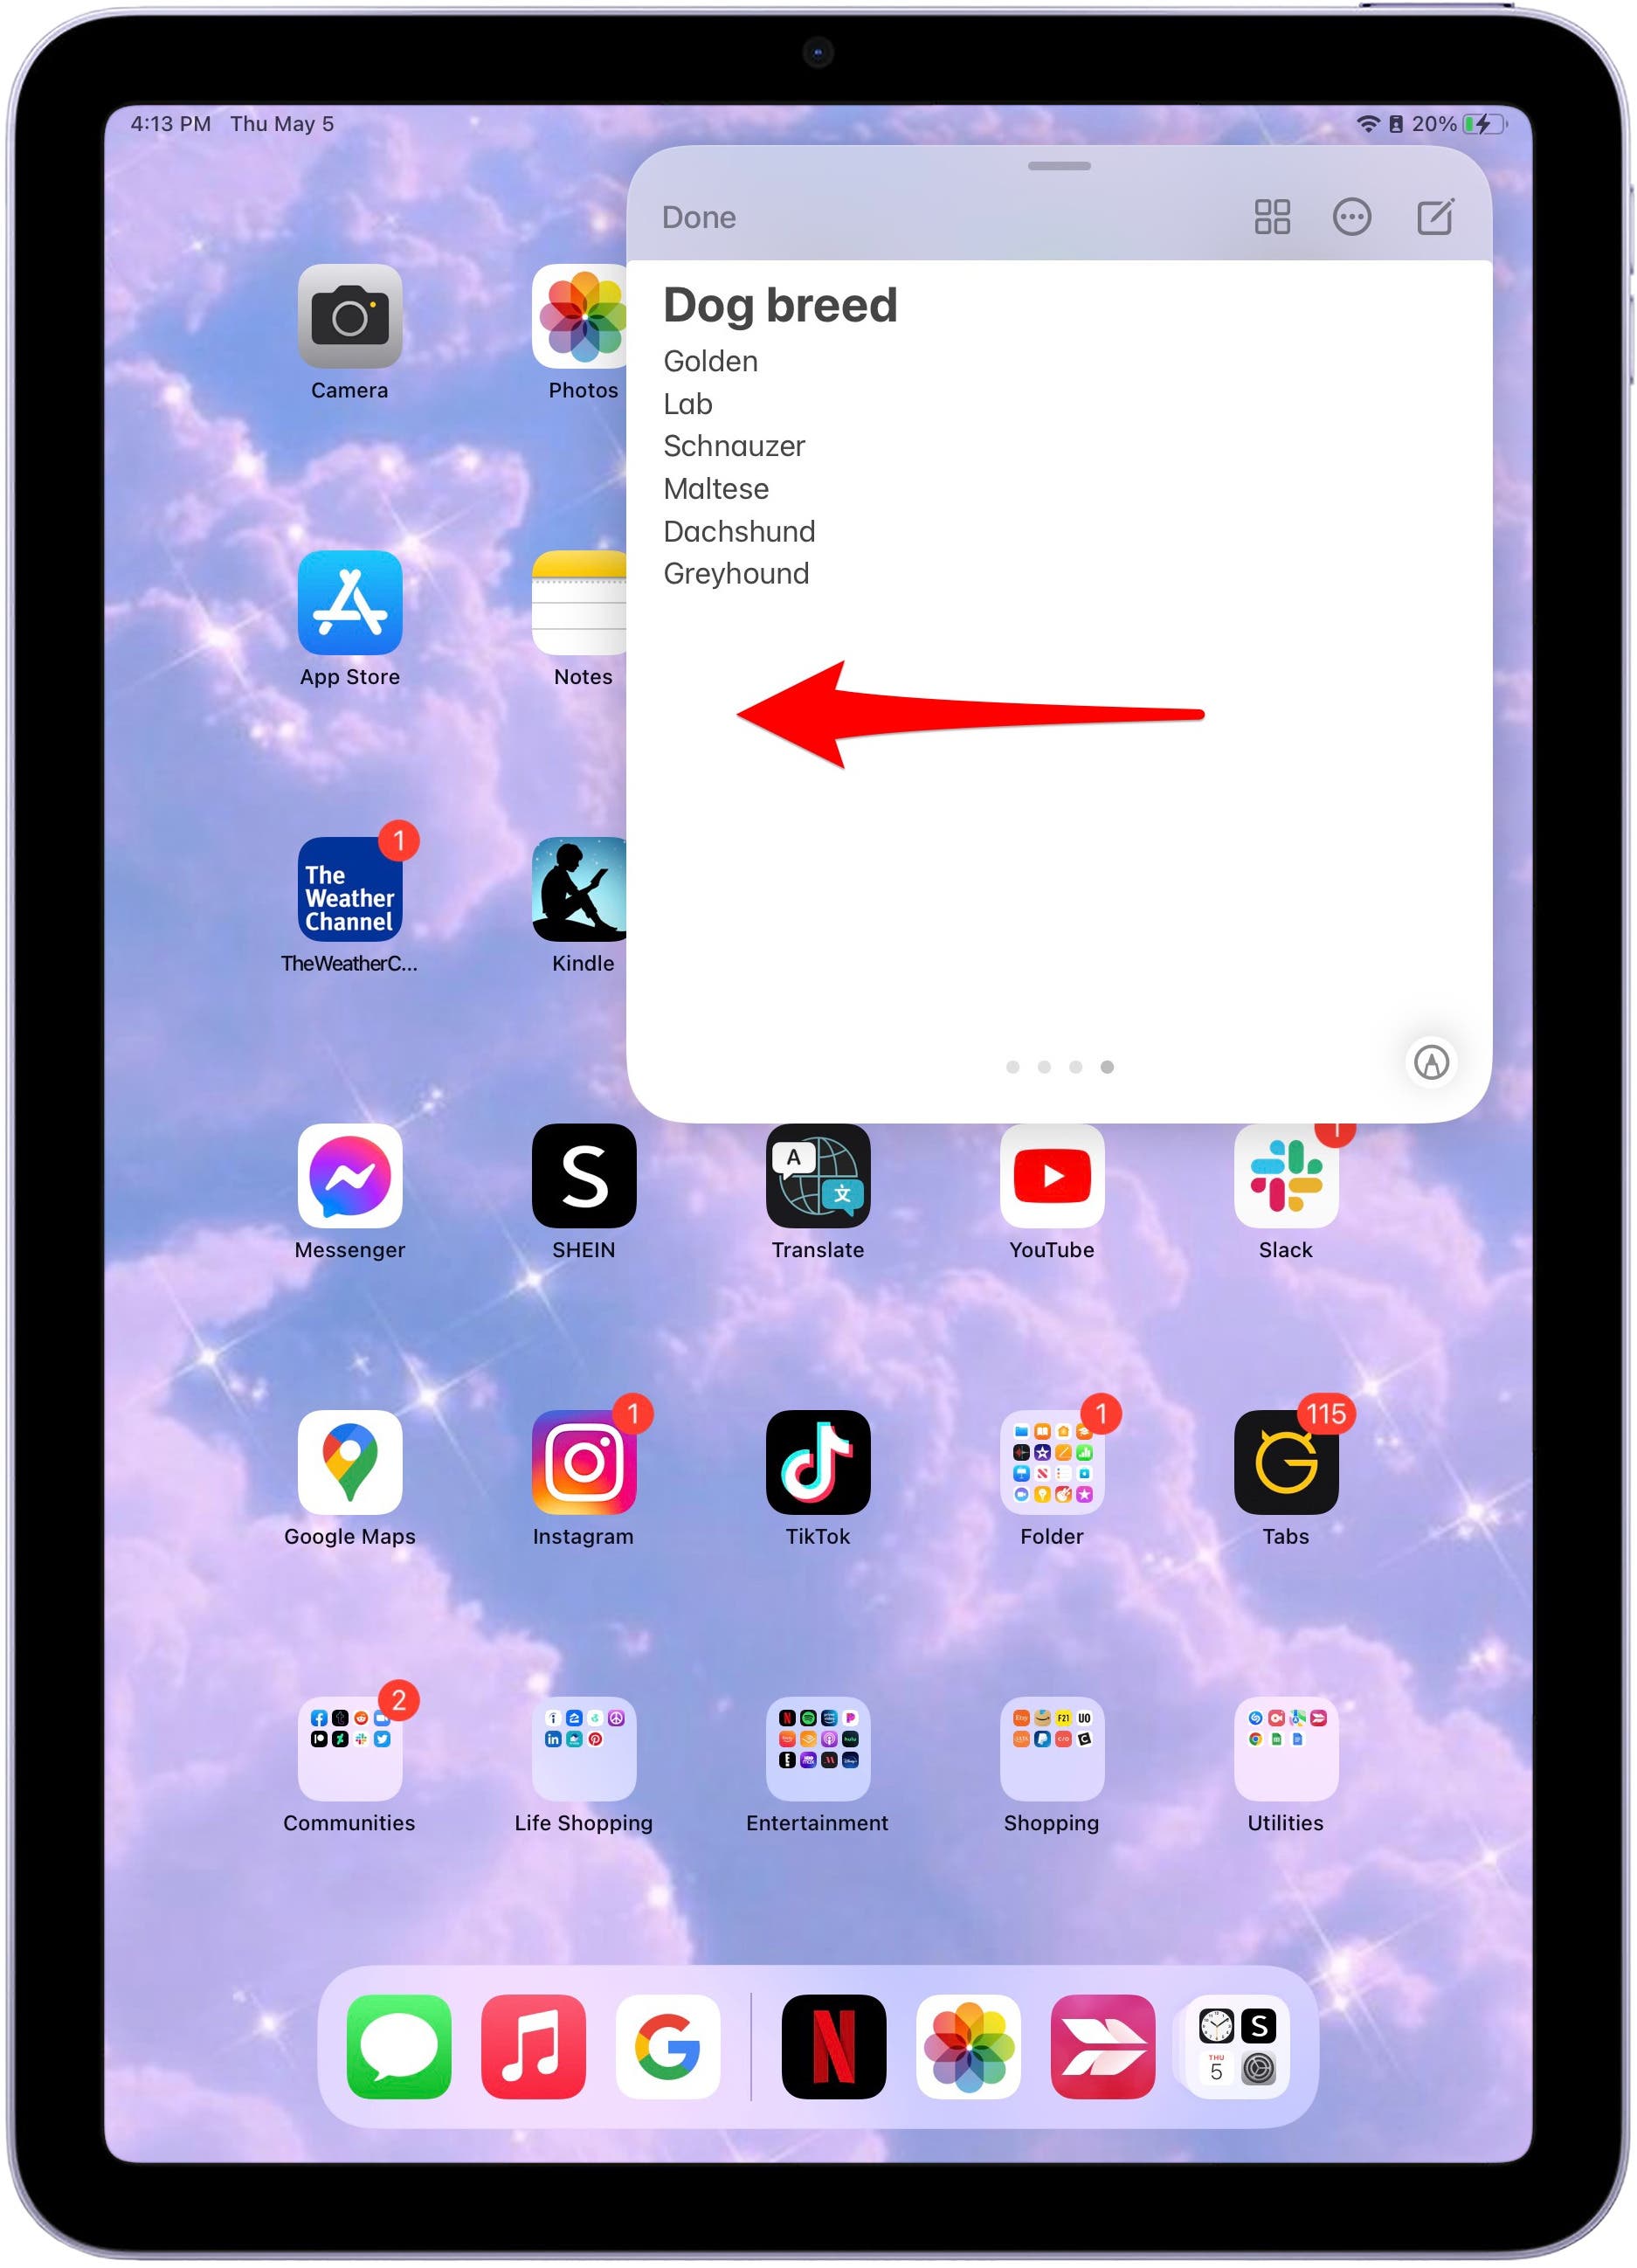
- To hide a Quick Note, tap and drag the top bar to the side of your screen.
- You can scroll through other Quick Notes by swiping right or left.
- Then, tap Done to close Quick Note altogether.



Notes App Basics
To get started taking notes,
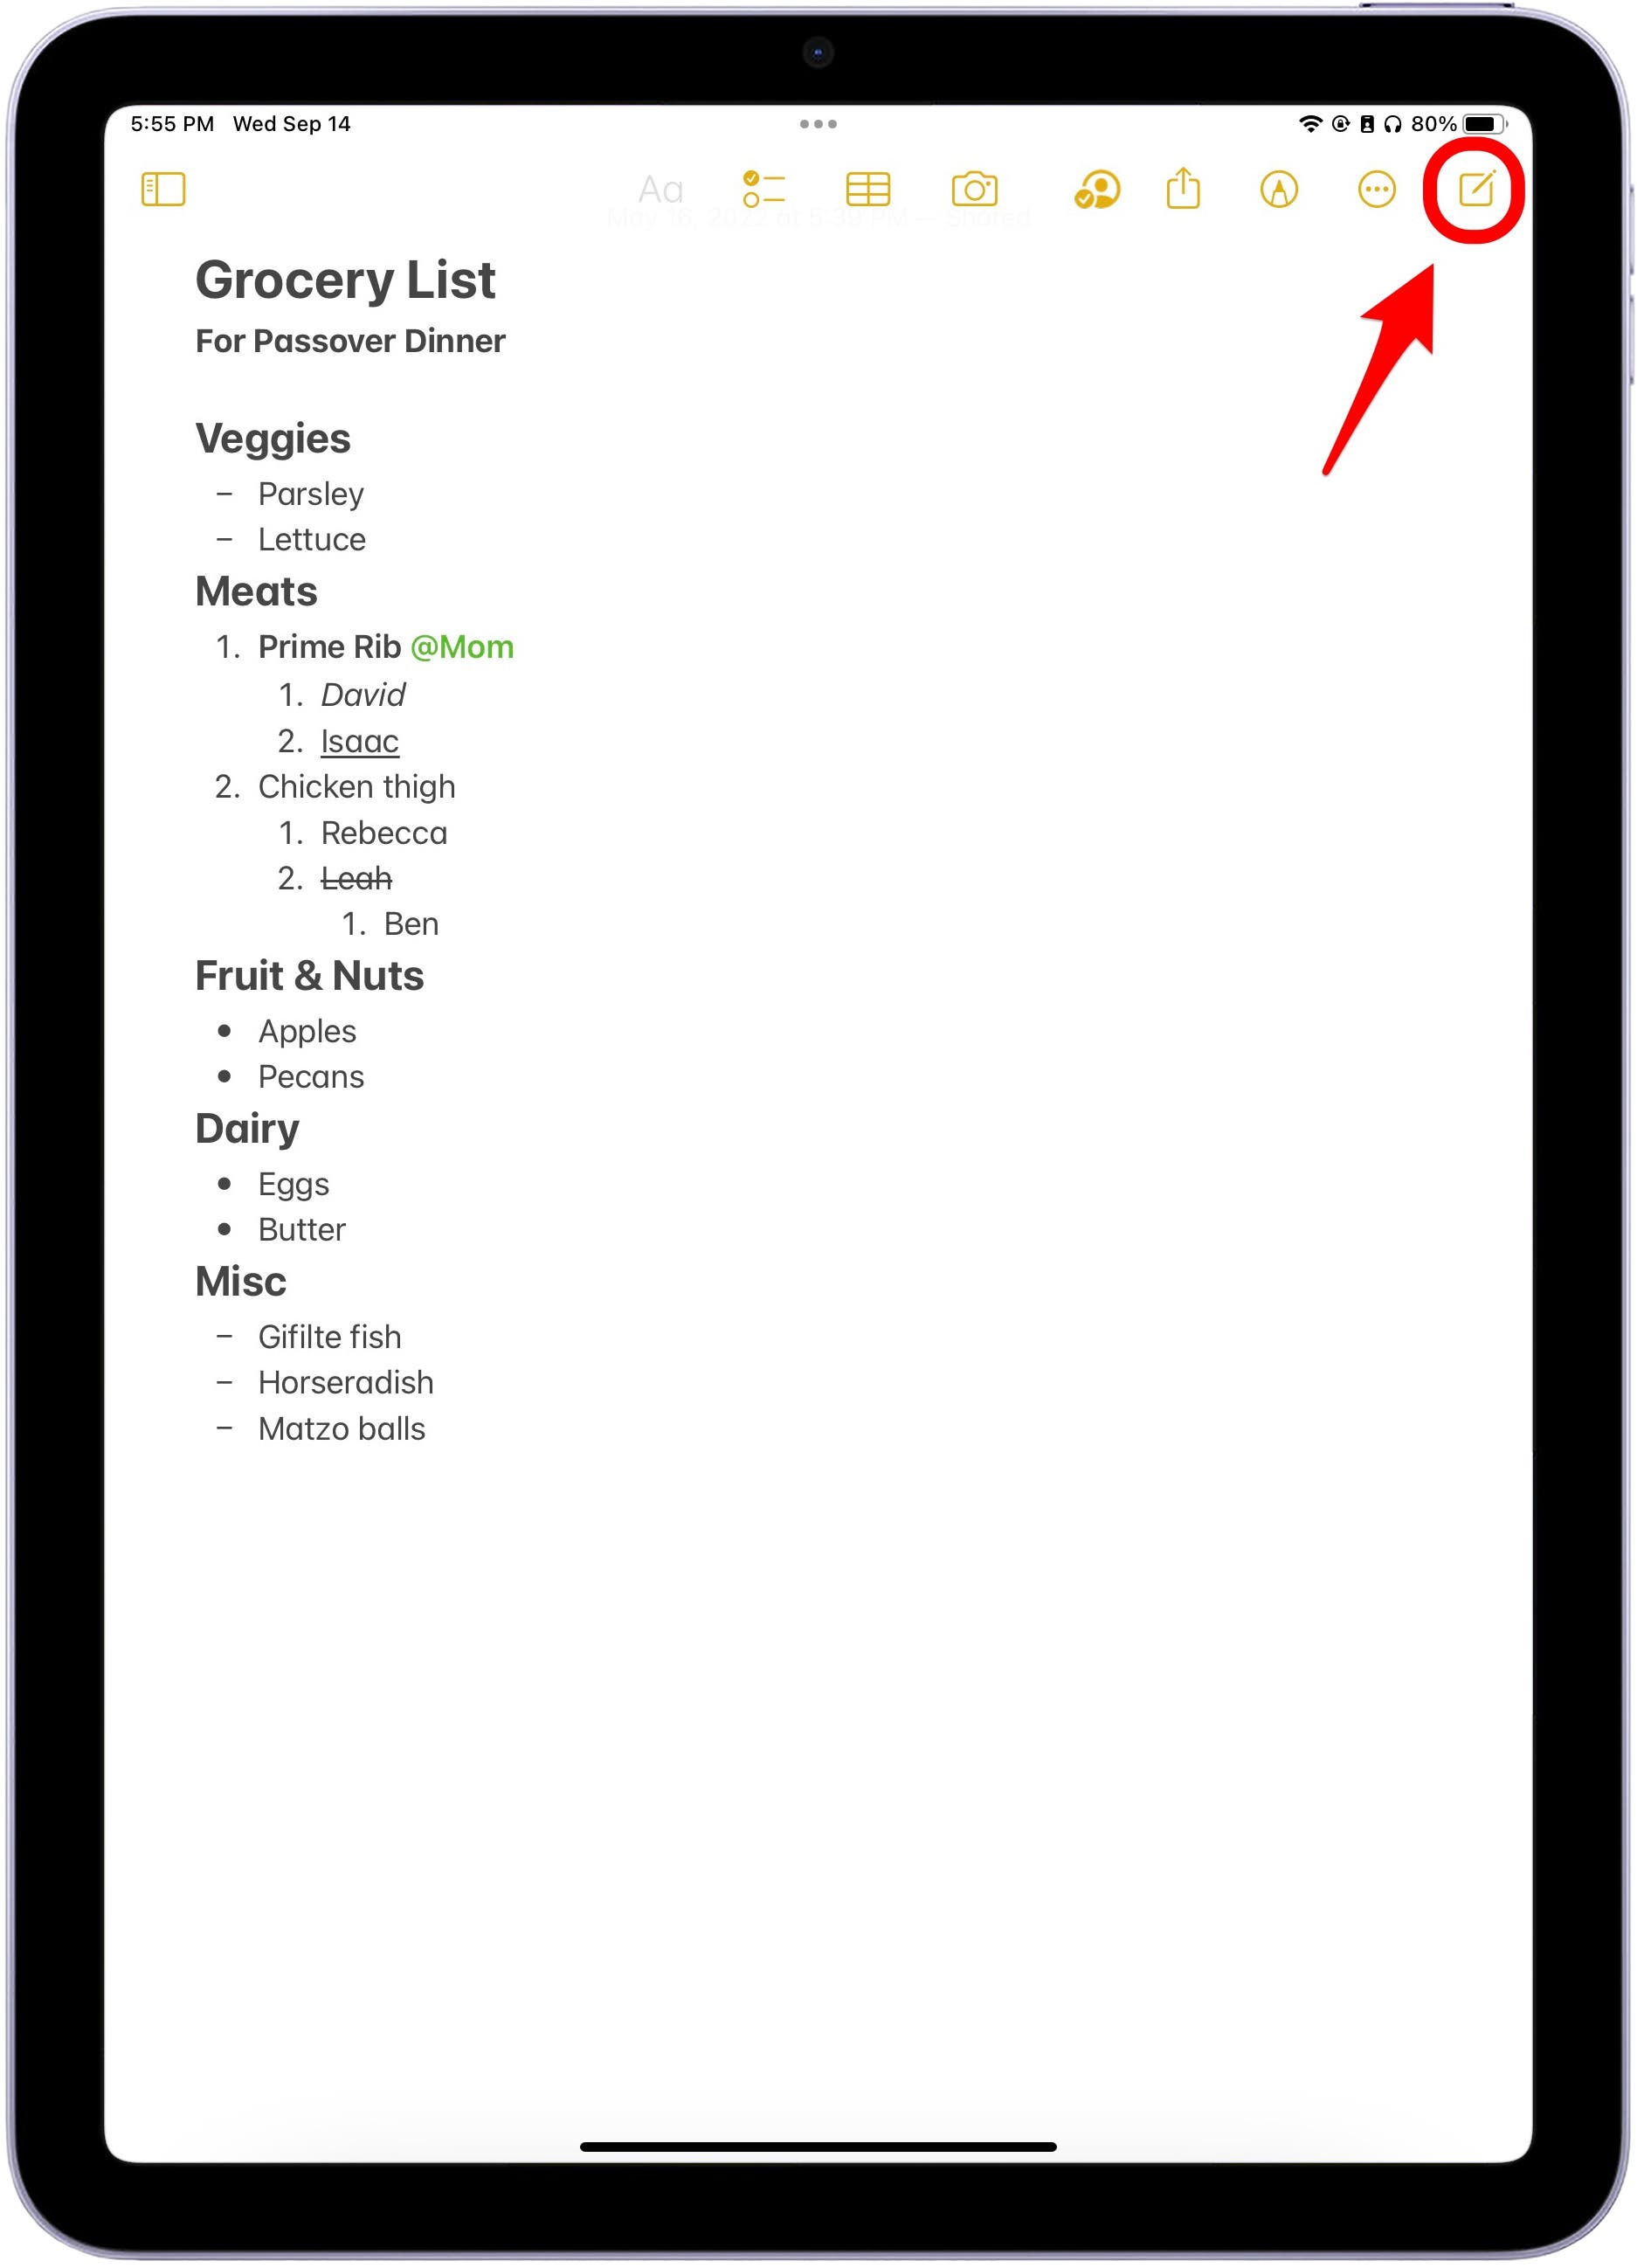
- Open the Notes app and tap the New Note icon in the top right corner.
- Next, you can access formatting options by tapping to type, and then pressing the “Aa” icon.
- This will bring you to a menu that shows all your formatting customization options.


You have five different options for the size of your font. This is useful if you want to differentiate between adding titles, headings, or subheadings. You also have four different options for font appearance like bold, italic, underline, and strikethrough, which is also great for differentiating between importance. Finally, the third row offers three list options: dash, numbered, and classic bullets. Next to these are paragraph indenting tools, meaning you can click those buttons and the whole section will move either to the right or left.
Tables & Graphs
Adding tables and graphs to your notes can be a really great way to organize information and keep your notes looking sharp and easy to read.
- To add a table to your note, begin composing your note and then tap the grid icon above your keyboard. By default, your table will have two columns and two rows. Tap inside a cell to enter words or numbers. Once you’ve filled in the existing cells, tap enter on the keyboard, and a new row will appear instantly.
- Another way to add or delete rows is to tap the three dots on the side of the table.
- To add or delete additional columns, tap the three dots at the top of the column.


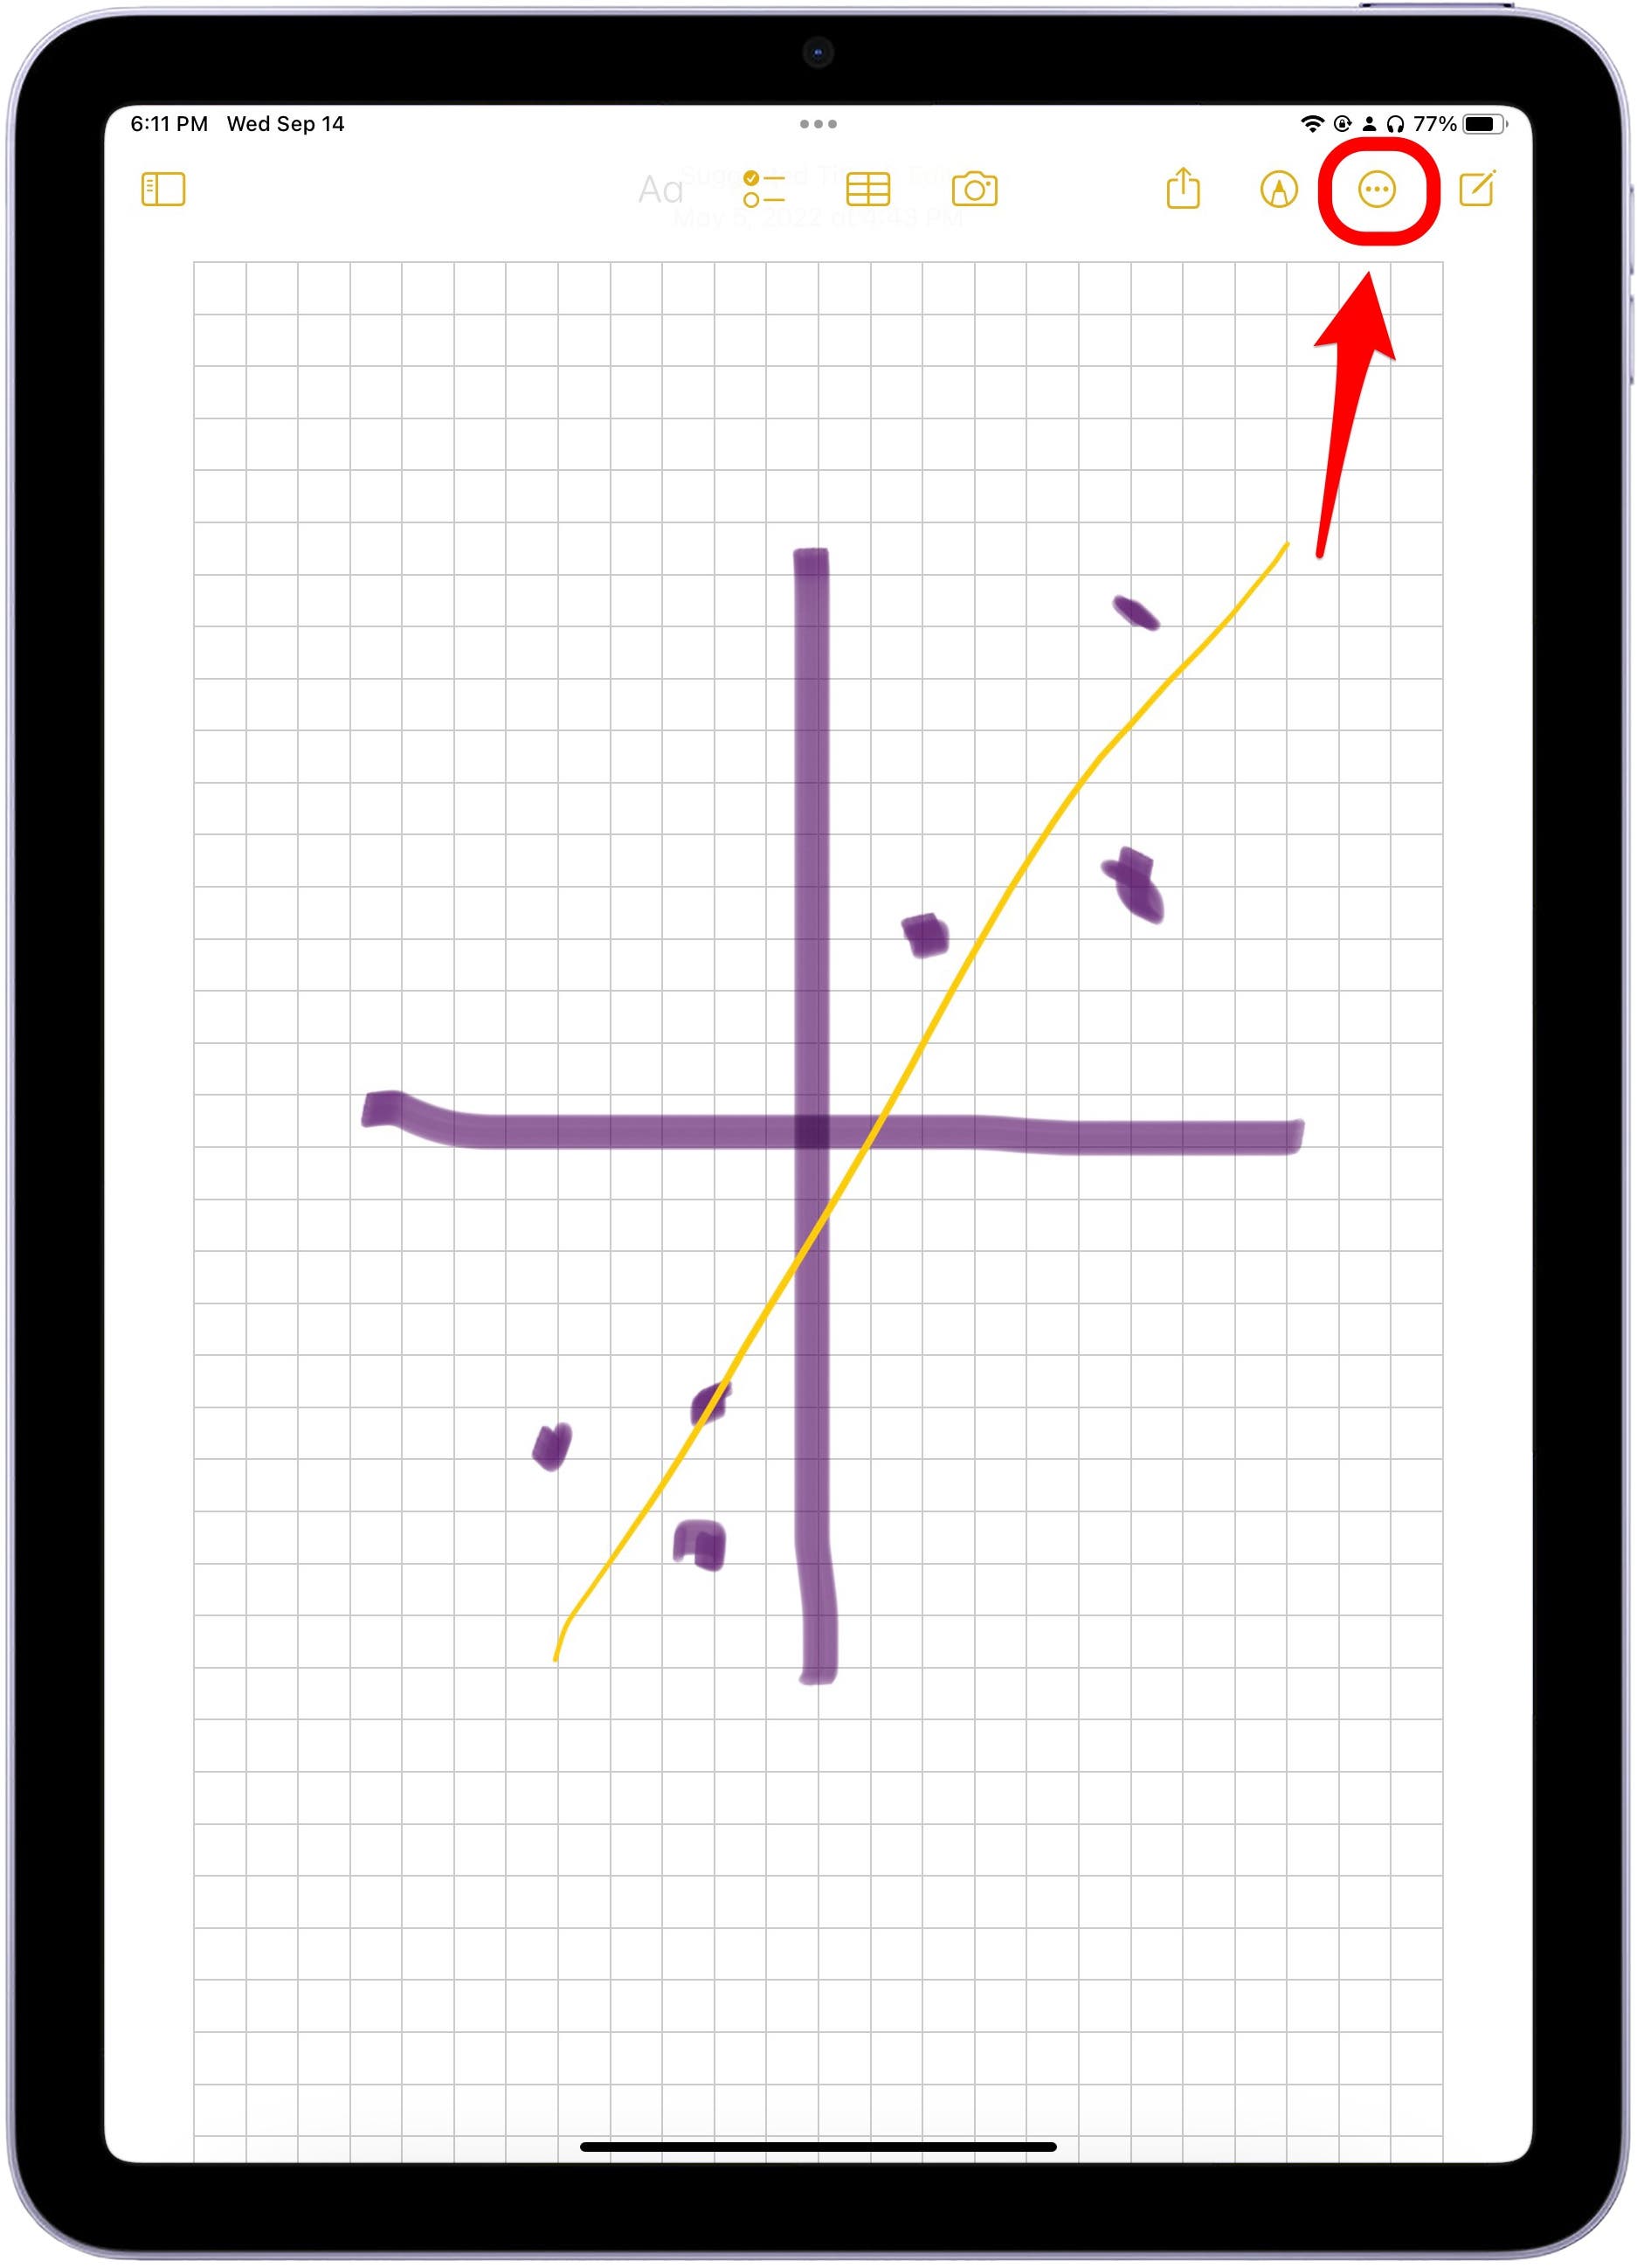
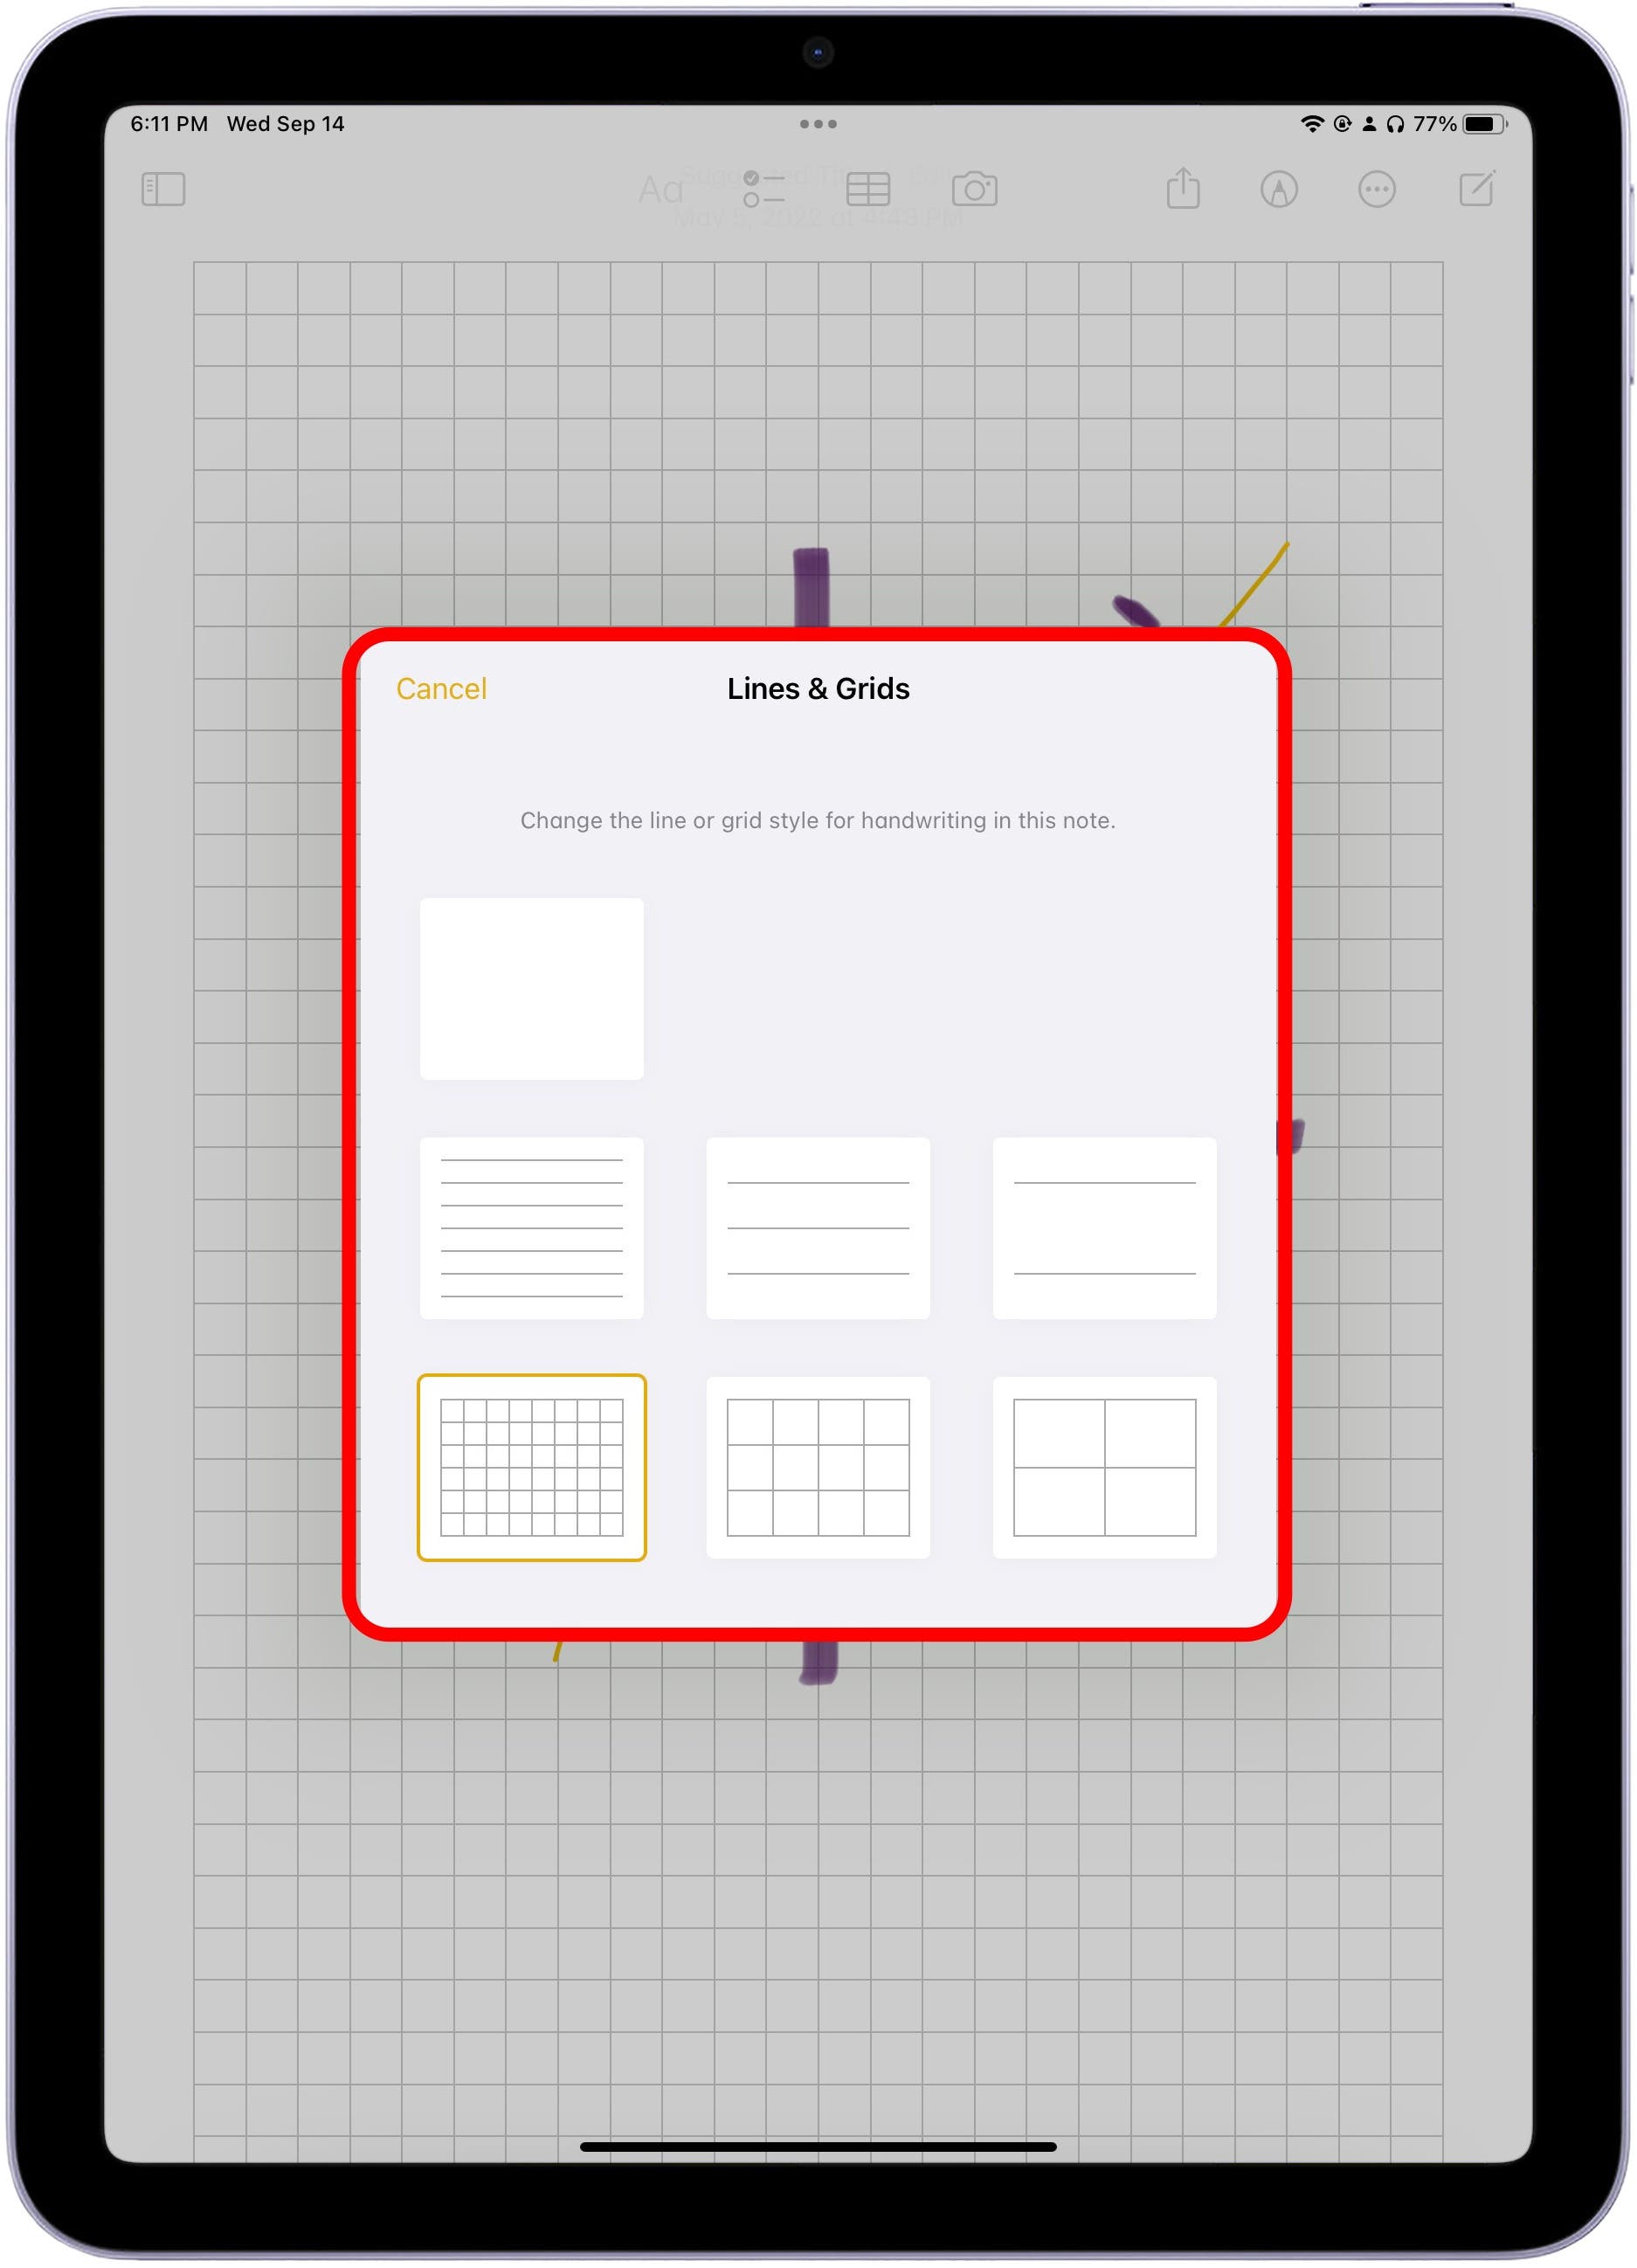
If you’re someone who prefers to use lined or graph paper, you have the option to add these features while in sketch. The lines and graphs feature only works while sketching, but you can still add a lined or graph section to any note where you may need to draw a graph or symbol. To turn this feature on,
- Click the three dots in a circle at the top of the note.
- Next tap Lines & Grids.
- Then you can select what style of lines you’d like.

Share & Tag Someone in Notes
If you’re working on a joint project with a friend or colleague, you can use note-sharing to make it easier to collaborate with other Apple users. This feature allows the Notes app to function a lot more like Google Docs, but because it is through a native Apple app, you will be able to access the shared note on all your devices quickly and easily. This is such a convenient way to keep up on shared lists and tasks like a grocery list for a house with multiple family members, an office supply log, or a project to-do list. We have used this feature at iPhone Life when we went on a company camping trip and wanted to make sure everyone brought their assigned items.
Firstly, note sharing only works for notes you’ve saved in iCloud.
- To share a note, tap the Share Note icon at the top.
- You can then choose how you’d like to send an invitation, whether through Messages, email, Facebook, Slack, and more.
- Here, you can also choose whether you want the recipient to be able to edit the note, or if you want it just to send a copy. Enter the recipient and tap Send. They’ll receive a link that allows them to open the Note on their iPhone and can either add or edit it or view it only.


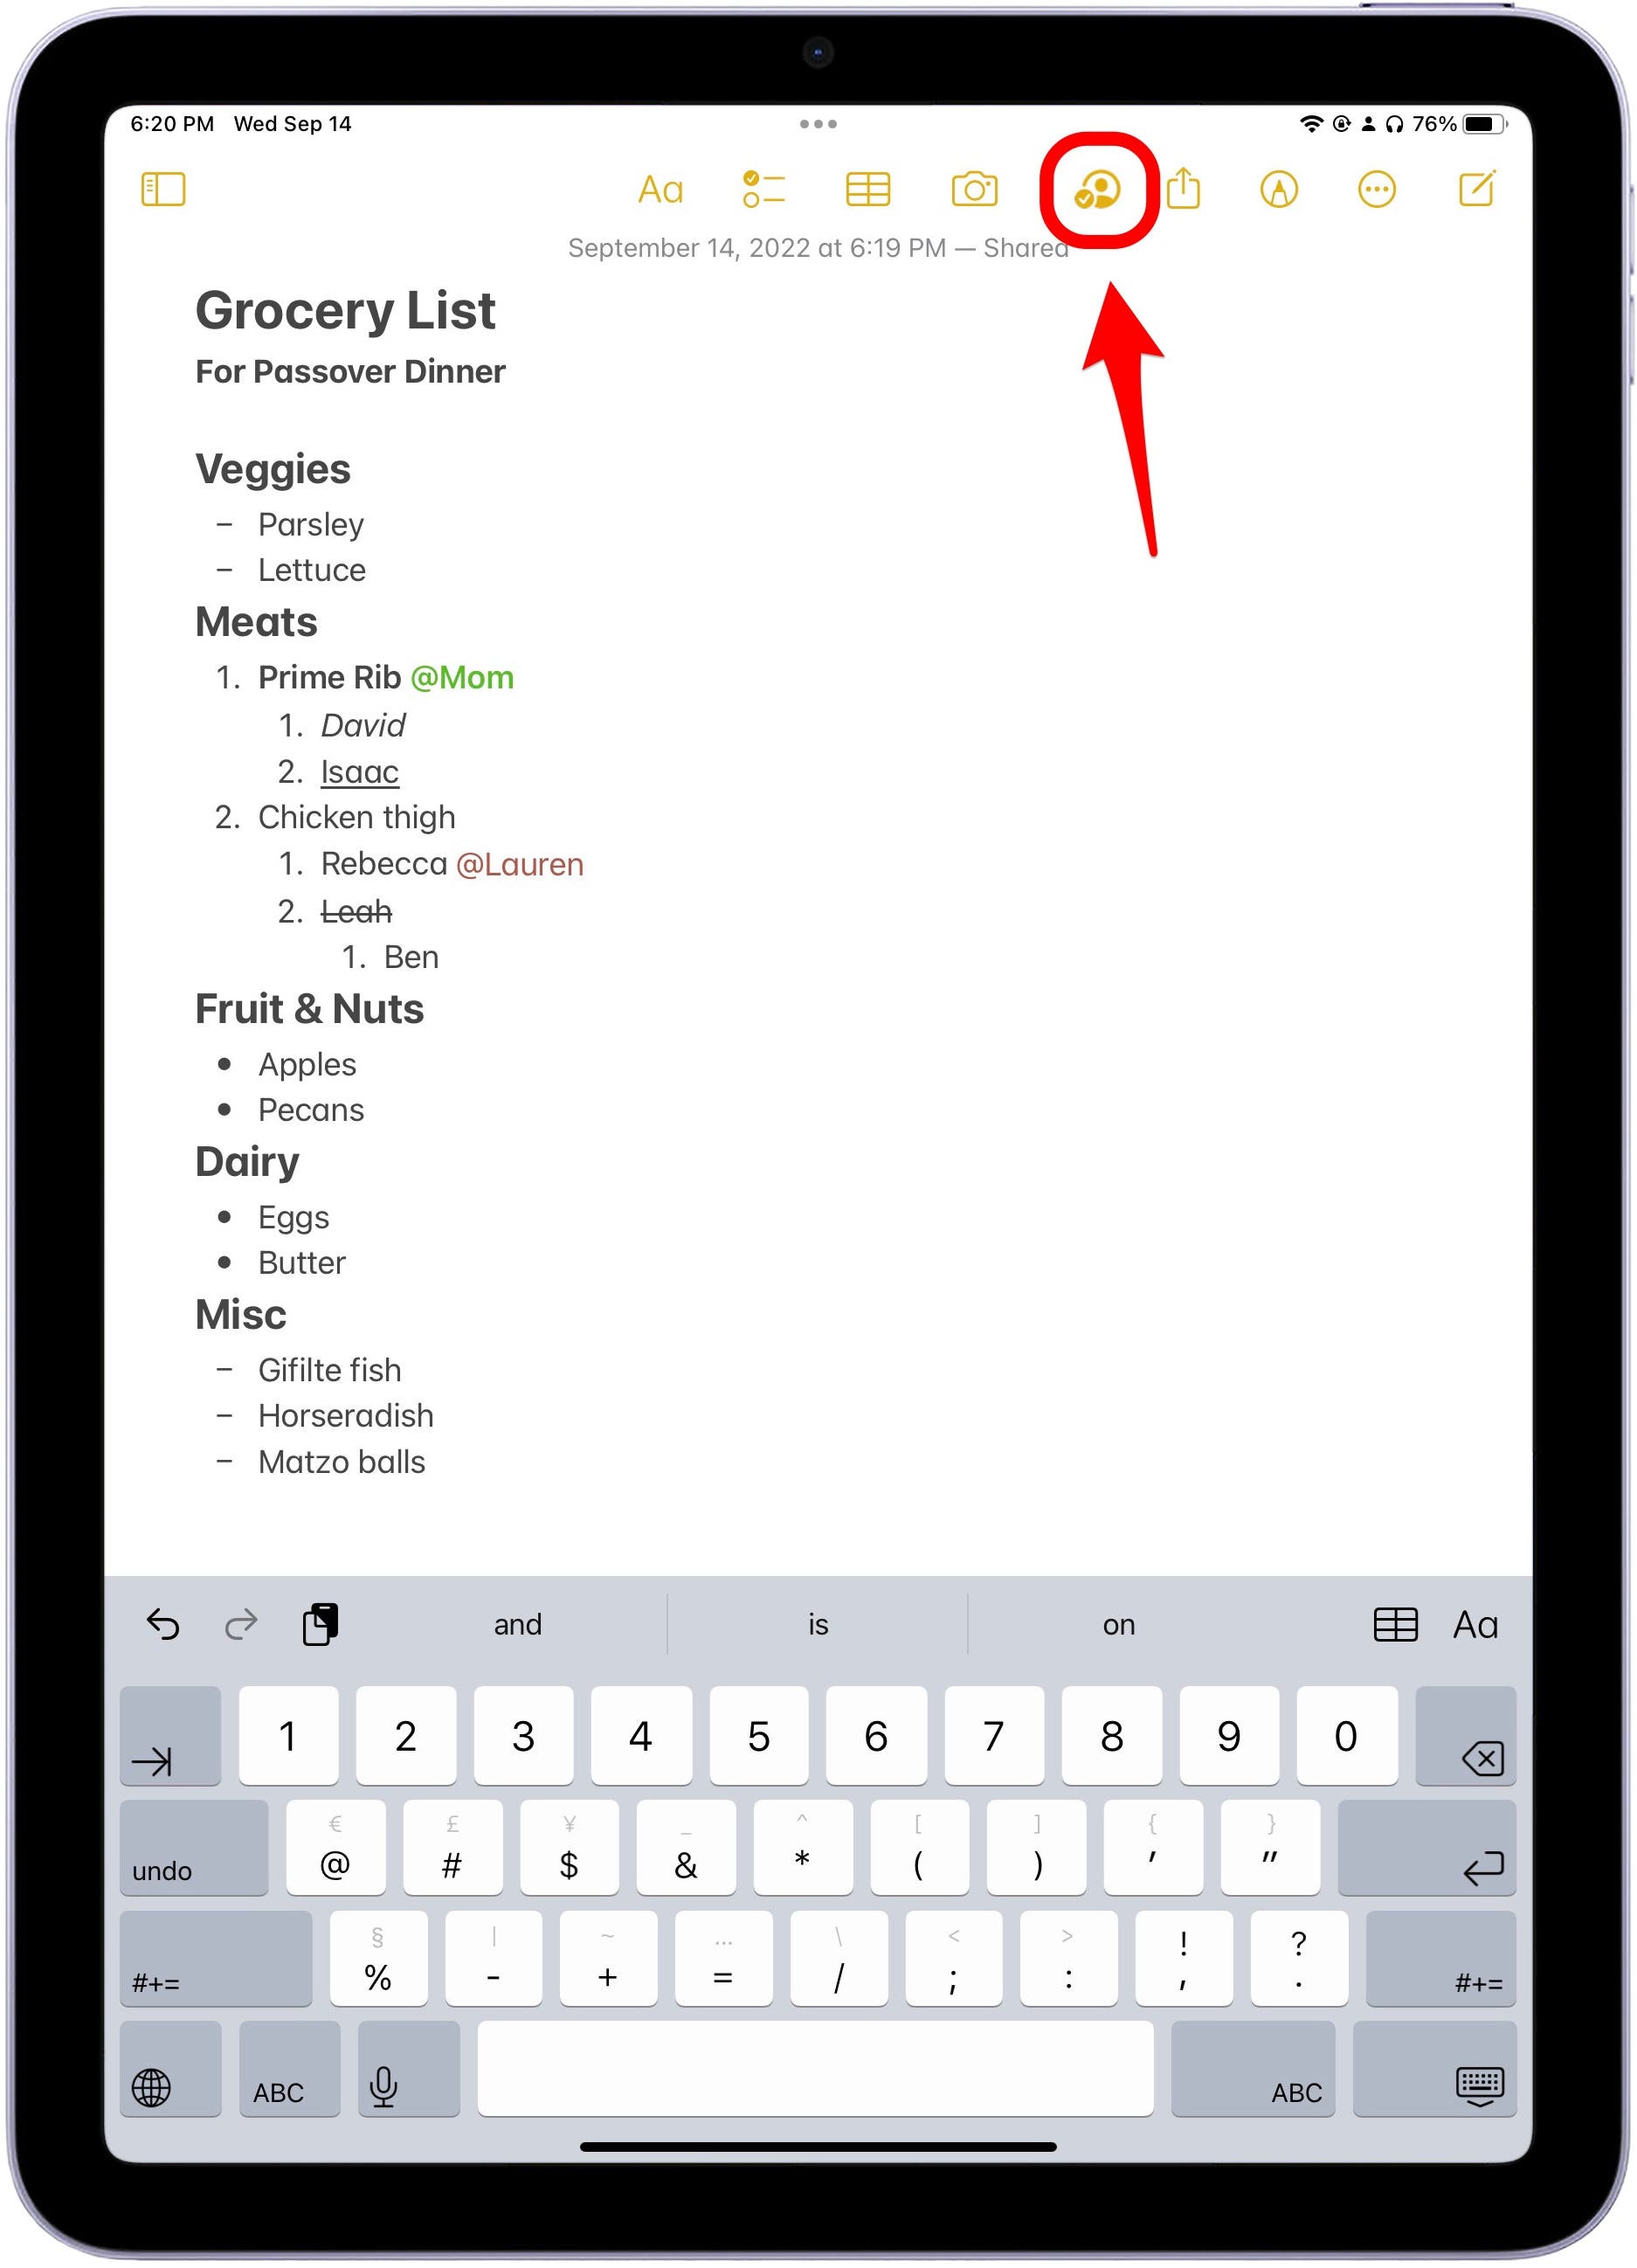
Before you can tag someone in a note, you must first share an iCloud note with the people you want to tag.
- Open that note. Then, place your cursor where you would like to tag someone and type the '@' symbol.
- The names of people the note is shared with will appear at the top of the keyboard. Tap the name of the person you wish to tag. You will then see their name in color text appear in the note. Once a person has been tagged in a note, they will receive a text notification about the mention and will be able to open the note to see the latest changes and edits.
- You can see who is collaborating on a note with you at any time by tapping the avatar icon at the top.
- From there, you can view updates, Activity, and Highlights, and manage your shared note.
- Under the Manage Shared Note option, you have the ability to add or remove people, highlight any changes made to the note, hide alerts, or edit sharing options and controls.




Find Saved or Deleted Documents with the Files App
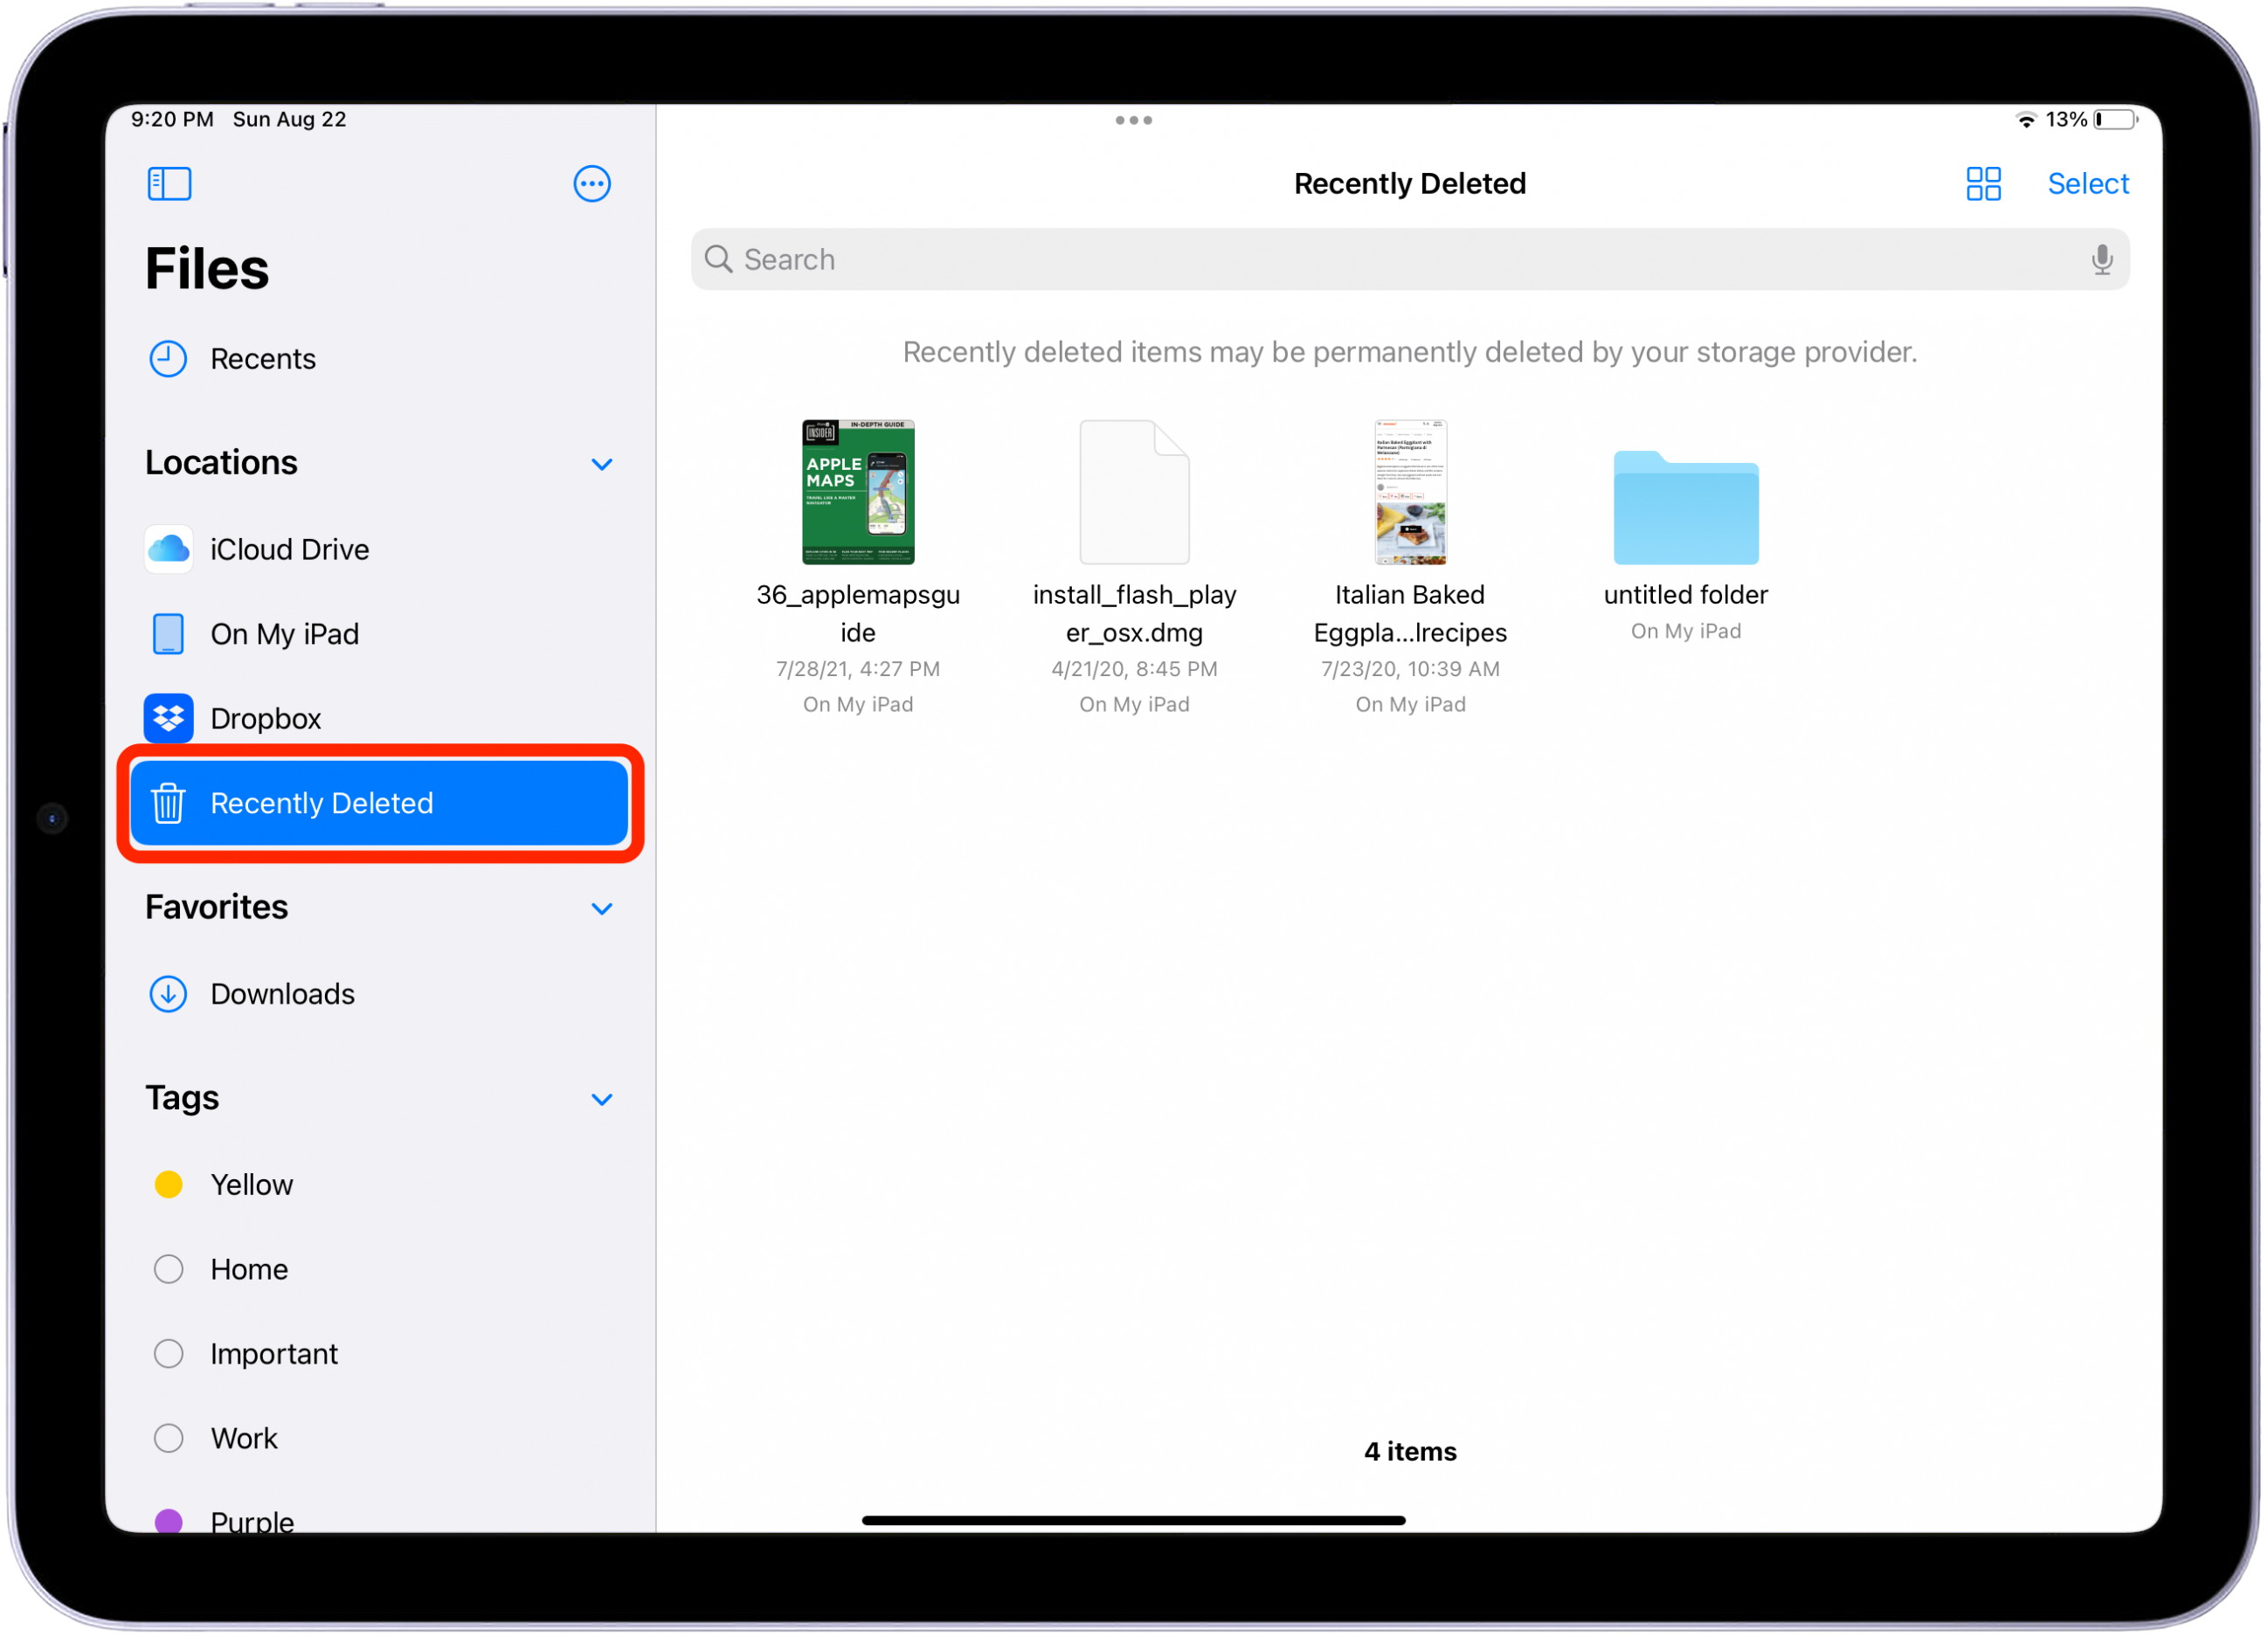
If you’ve ever closed (or accidentally deleted) a document or media file on your iPad and are not sure where it went, you can quickly find it again in the Files app. Here’s how:
-
Open the Files app. Tap the On My iPad option on the sidebar to view the files saved on your device. You can create your own folders or use the default folders. By default, a folder is created for the content saved from each app, such as GarageBand and Pages. Tap a folder or file to open and view the content.
-
Tap the Sidebar icon in the top left corner or swipe right on your iPad screen. This will open the navigation sidebar. Tap Recently Deleted to view and recover any files you’d like to keep.

Printing from Your iPad
Using an AirPrint compatible printer is the easiest method to wirelessly print from your iPad. The good news is that most major manufacturers have AirPrint installed in their latest models. In order to use AirPrint, the printer must be connected to the same Wi-Fi network as your iPad. If you haven’t already, connect your printer to your Wi-Fi network, then follow the steps below to print from your iPad.
-
Open the app you want to print from. To find the print option, tap the app’s Share icon or the More icon (three dots).
-
Tap Print. If you can’t find the print option, you may need to check the app’s Help section, as not all apps support AirPrint. However, most native Apple apps, such as Safari or Photos will support AirPrint.
-
Tap Printer to select a printer. Choose the number of copies and other print options, such as paper size. Tap Print.


If you’re printing web articles, I always recommend enabling Safari Reader View first, as this will print without ads. To access Safari Reader View, simply tap the “aA” icon in the address bar and tap Show Reader View. Then follow the steps above to print.

