* This article is from our Tip of the Day newsletter. Sign Up. *
The images you receive on your iPhone don't automatically save to your Photos app. Fortunately, you can easily save pictures from iMessages or Facebook to your iPhone. You can even bulk save photos from a Messages conversation! Here are the step-by-step instructions on how to transfer photos in these scenarios.
Related: How to Transfer Photos from Your iPhone to Your Computer

Learn How to Save Pictures to Your iPhone
iPhone users have wondered how to download Facebook photos, how they can bulk save all their Facebook pictures, and how to save images from Facebook Messenger. We'll show you how to save photos from each of the following locations:
Save Photos from the Messages App
Do you want to save photos that you've sent in a text message or that someone sent you? You can save pictures by scrolling to find them and tapping to download them. However, you can also view everything sent in every conversation and quickly download multiple images at once.
How to Save Photos from Text Messages on Your iPhone
Newer versions of iOS make it particularly easy to save a photo from your text message history. You can long-press (touch and hold) on the picture and reveal a menu of options, including saving and sharing.
- Open the Messages app and navigate to the conversation with images you want to save.
![Open the message with photos that you want to save]()
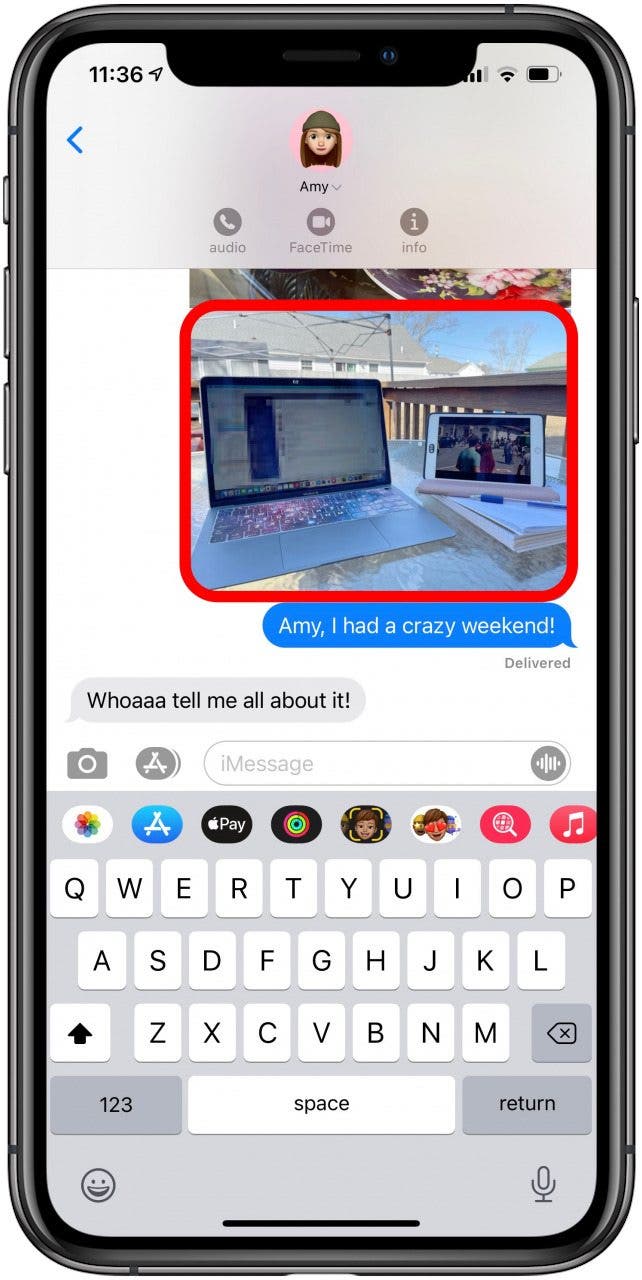
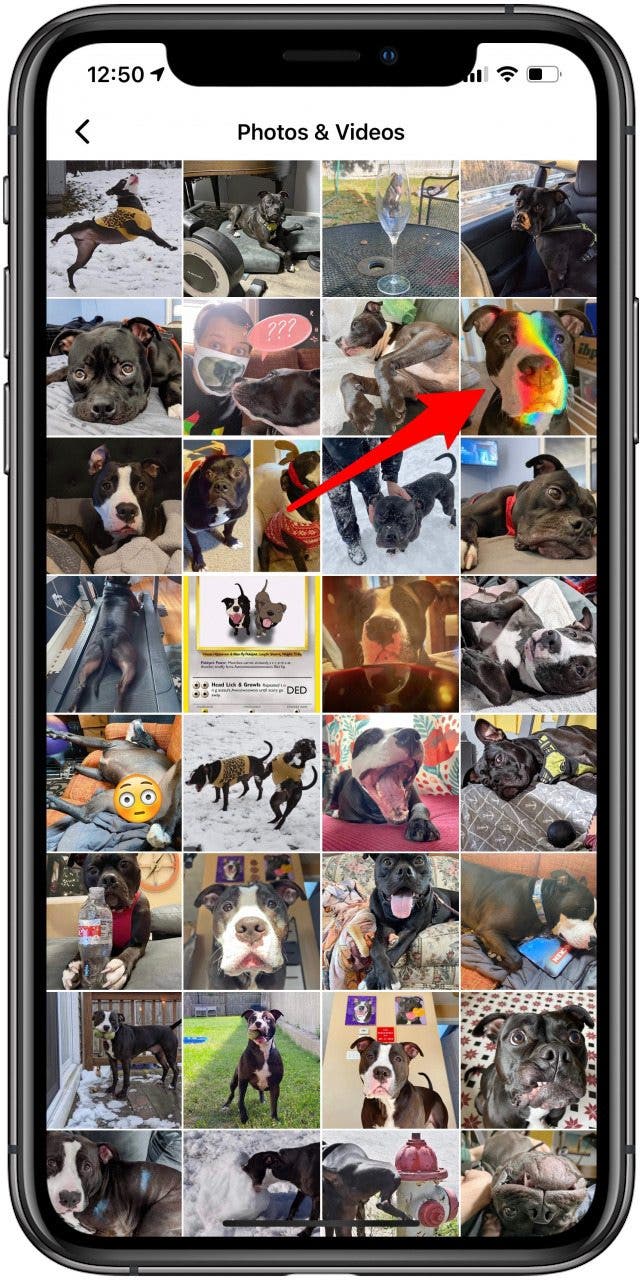
- Locate the image you want to save.
![Locate the image you want to save from Messages App]()
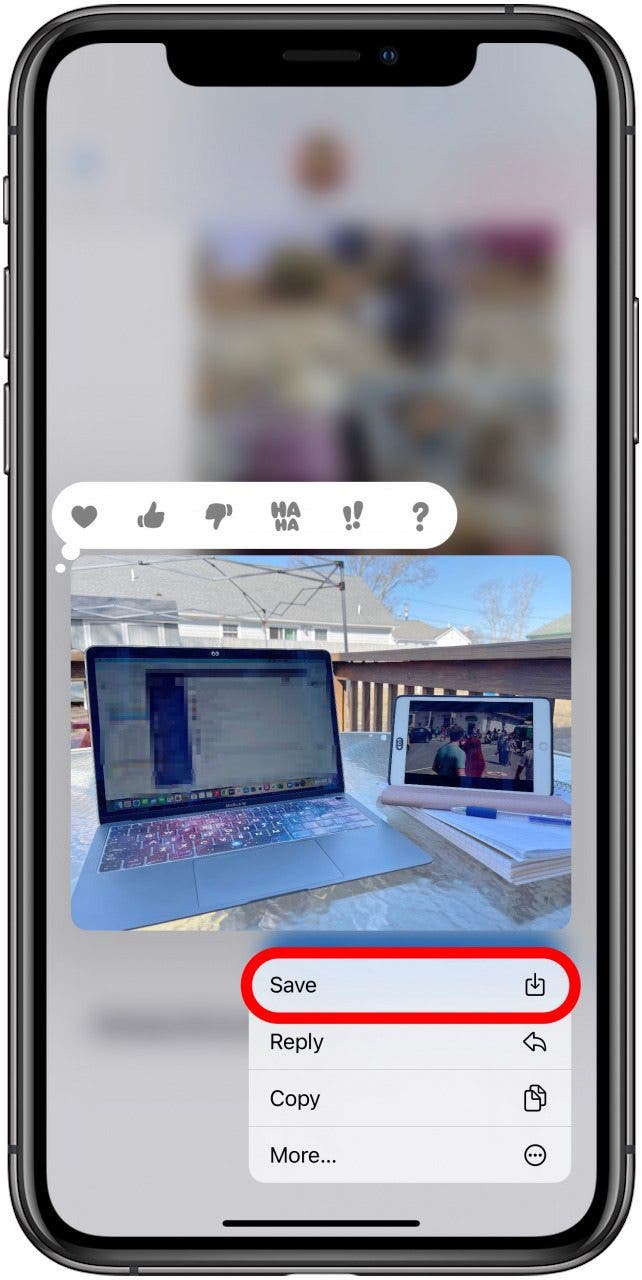
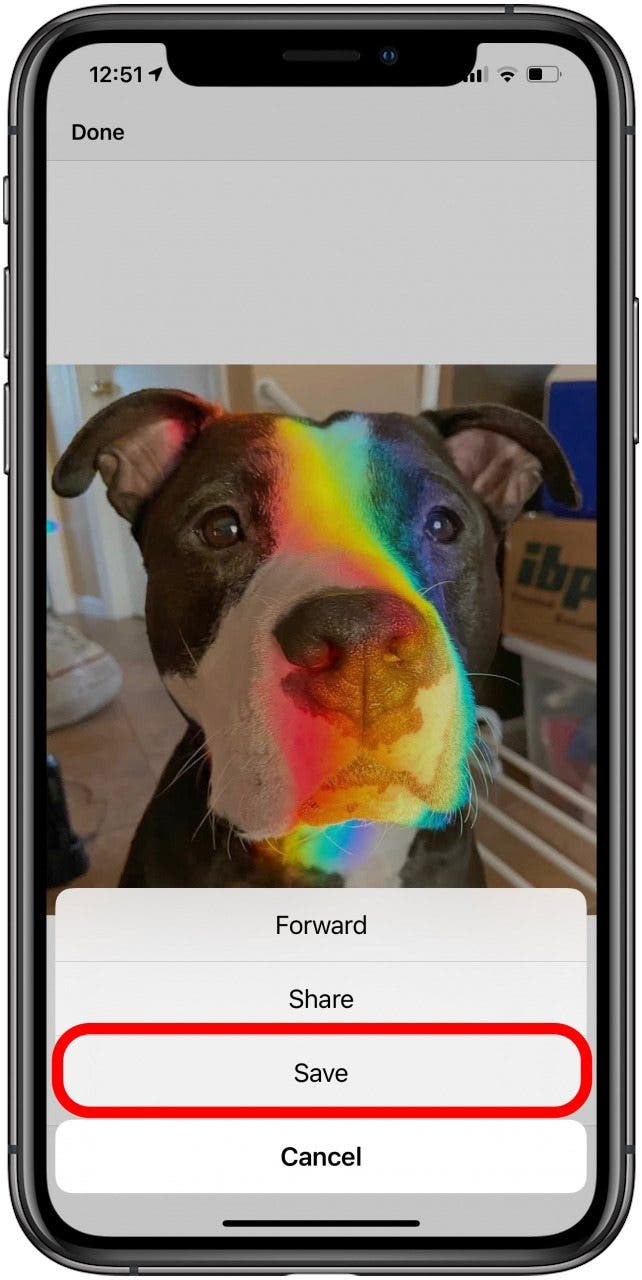
- Long-press (touch and hold) the image until options appear.
- Tap Save to download your image to your gallery.
![Tap Save to download your image to your iPhone gallery]()
If you have an iPhone 6s or earlier you'll need to:
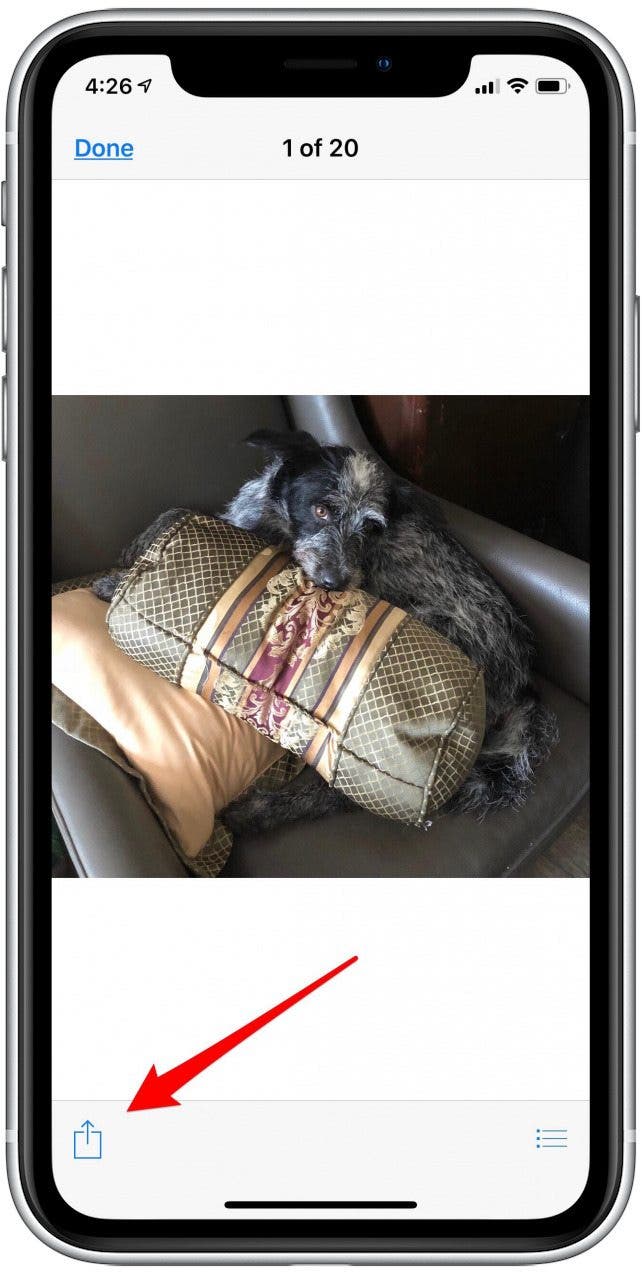
- Tap the photo.
- Tap the Share icon at the lower left of your display.
![how to save pictures from text messages iphone]()
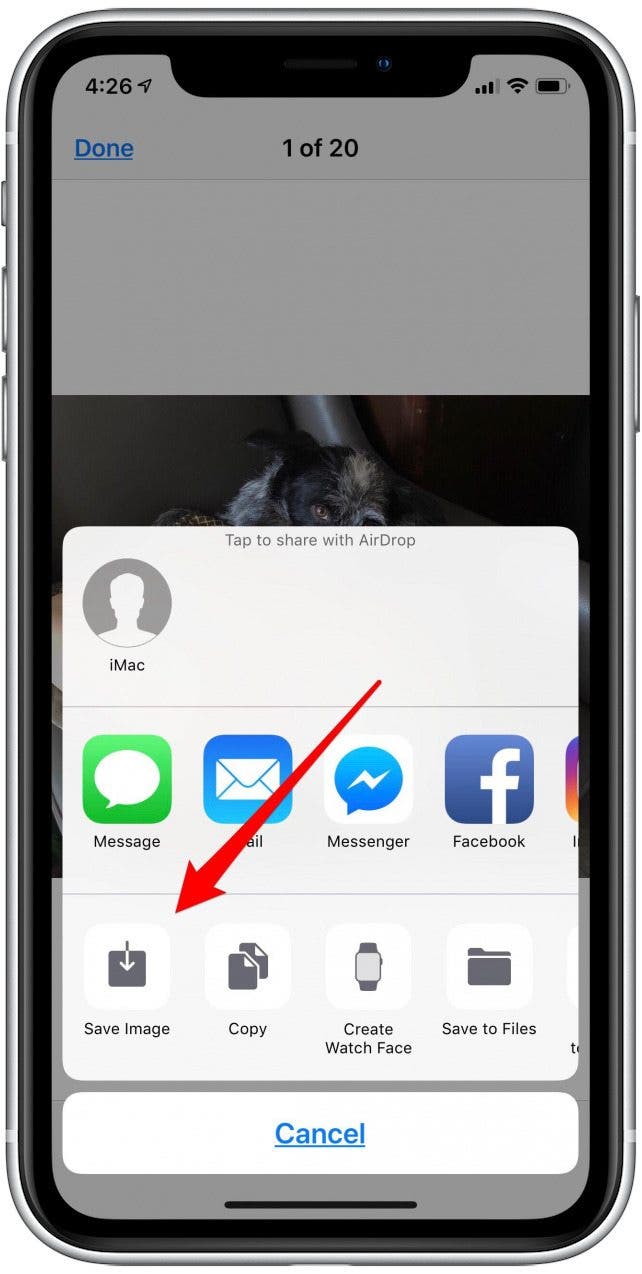
- Choose Save Image to save your photo to your iPhone.
![how to download photos from messenger]()
How to Save Multiple Images from Messages on Your iPhone
You can download all the images you've ever exchanged with a single contact. Neat, don't you think?
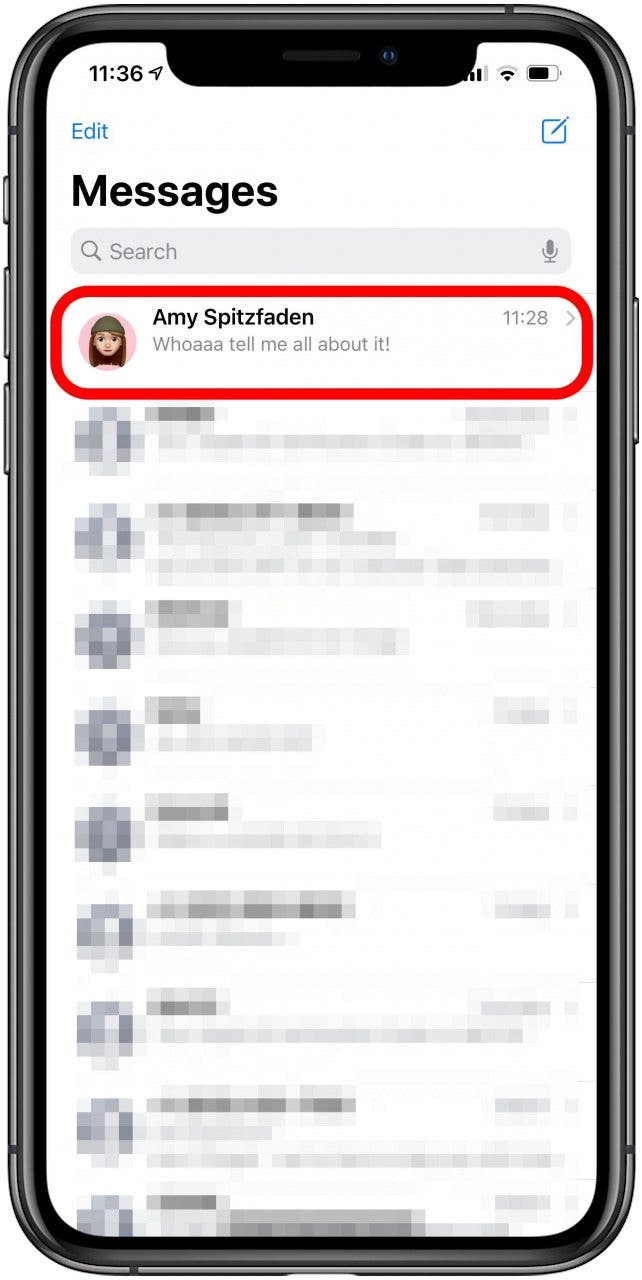
- Open the text message conversation with the images you want to save.
![Open the message with photos that you want to save]()
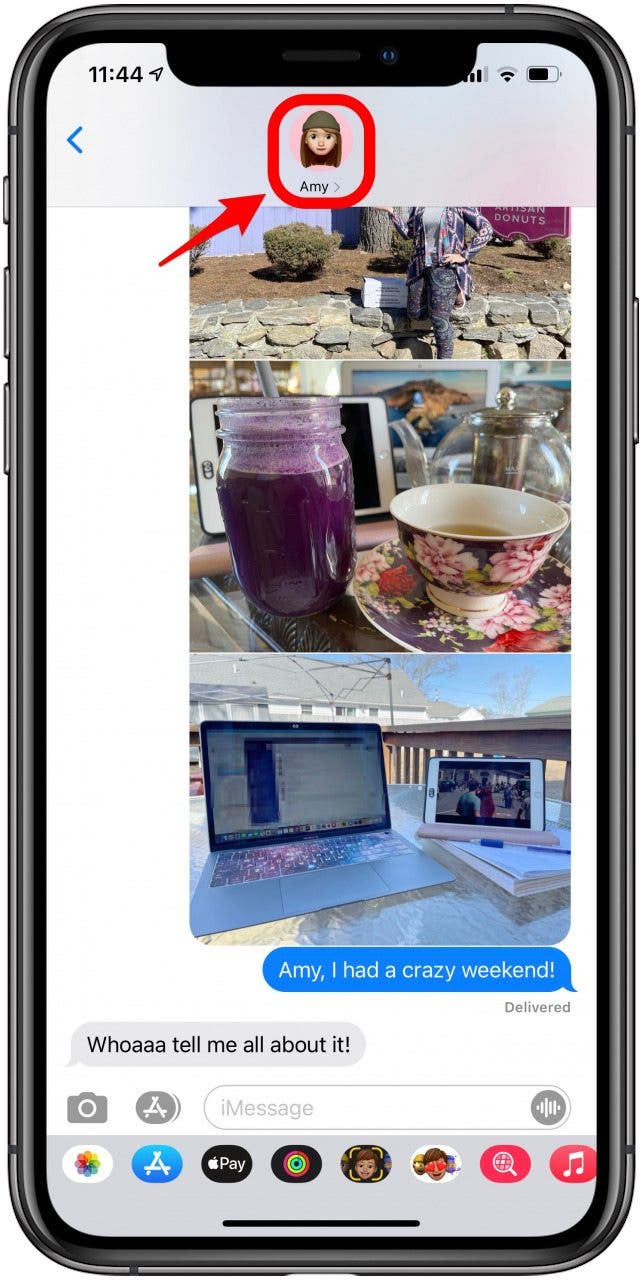
- Tap the person's name at the top of the text thread.
![Tap the person's name at the top of the text thread.]()
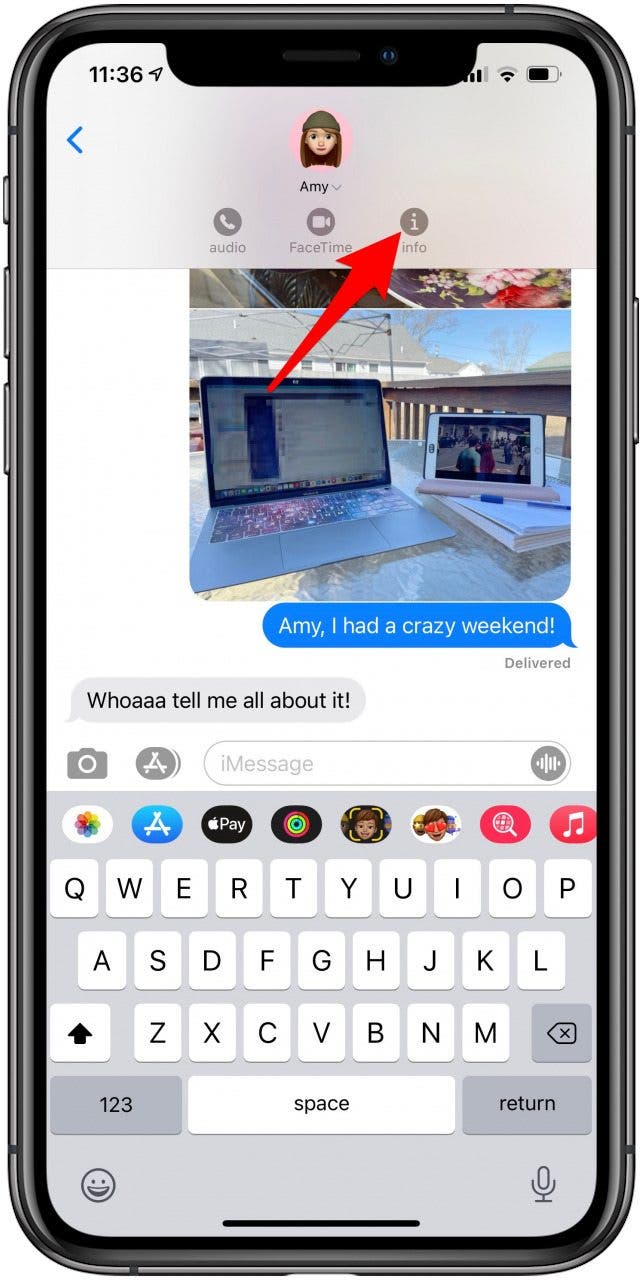
- Tap the info icon.
![Open the text message conversation with the images you want to save.]()
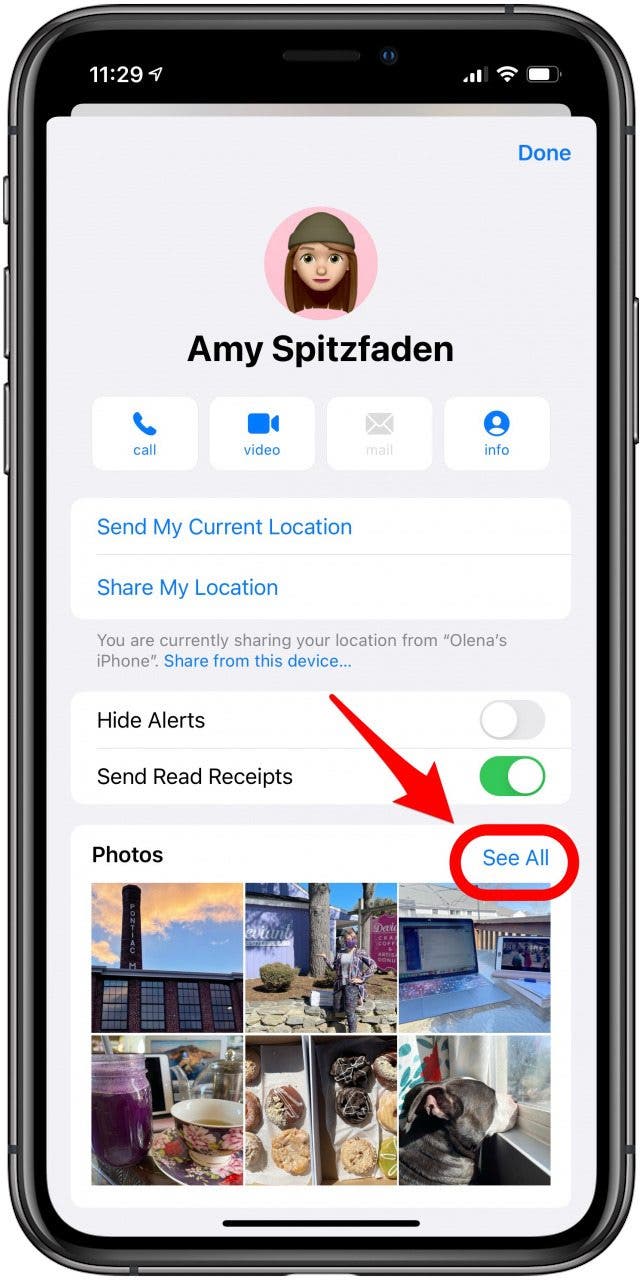
- You'll see a contact information card.
- At the bottom, you’ll find a set of recent images. Tap See All.
![Tap the person's name at the top of the text thread.]()
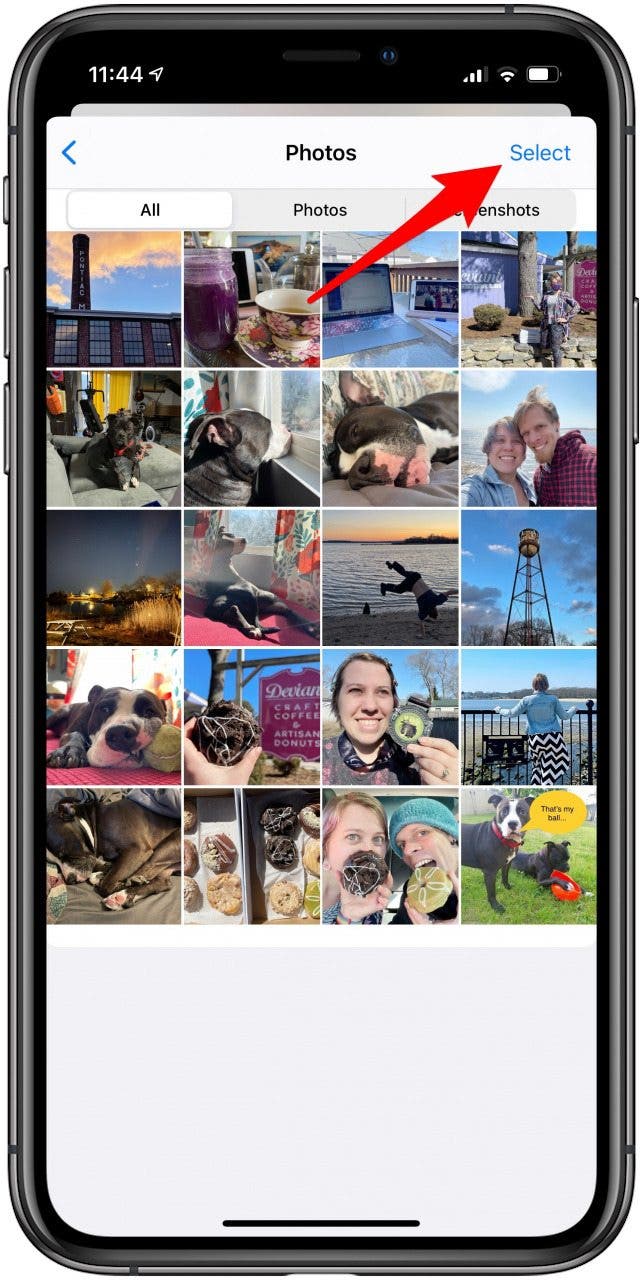
- Tap Select in the top-right corner of the page.
![Tap Select in the top right corner of the page.]()
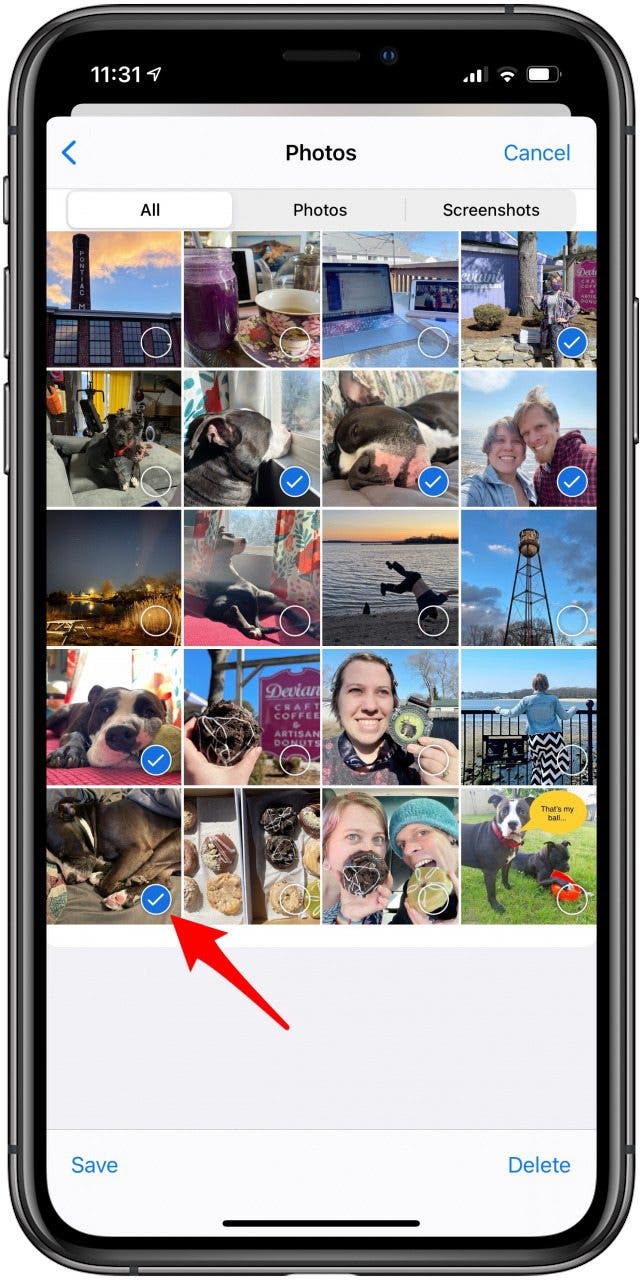
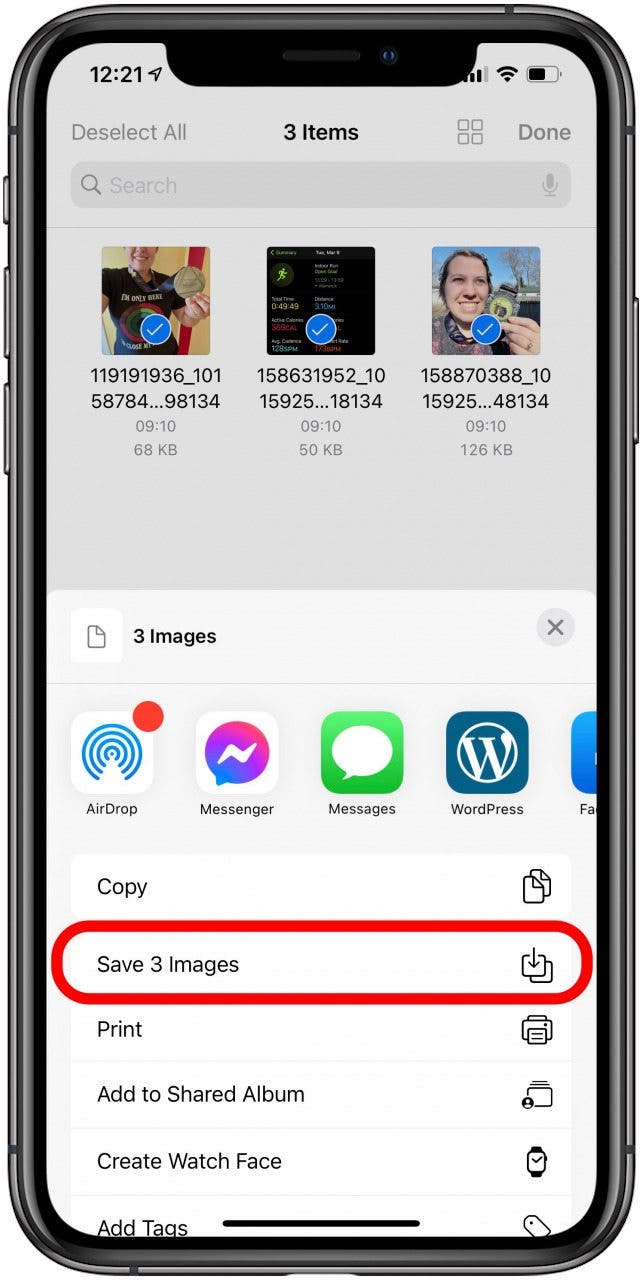
- Now you can select as many of the images as you’d like. Tap each image you want to save. After tapping, there will be a blue circle with a checkmark in the corner to indicate an image is selected.
![Tap each image you want to save.]()
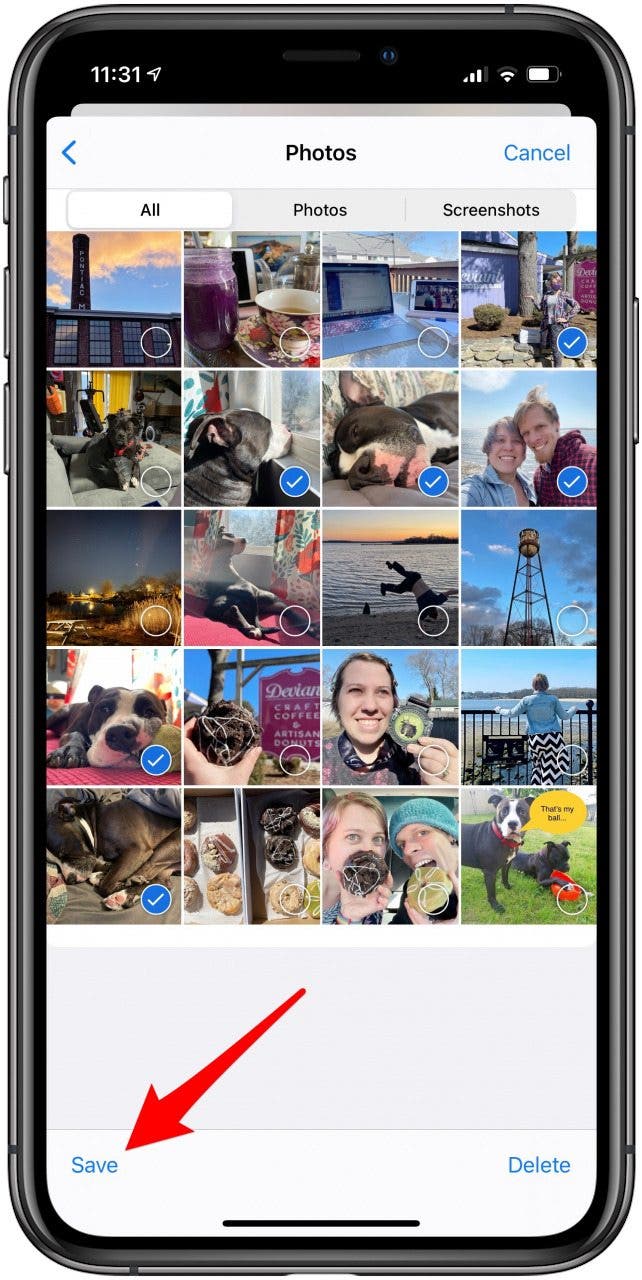
- Tap Save to download the photos to your iPhone.
![Tap Save to download the photos to your iPhone.]()
Now you know how to save photos from iPhone's Messages app to your gallery!
Save Photos from the Facebook App
Do you want to save photos that you've posted on your Facebook page? You can save them individually by tapping to download them. However, you can also download all the photos you've posted in a particular date range. You may also choose to save photos from Facebook Messenger.
How to Save Photos from Facebook to Your iPhone
When it comes to Facebook, you can save individual images with the Facebook app on your iPhone. If you need to save ALL of your Facebook pictures, you’ll have to download a zipped folder and open it in the Files app to transfer the contents to your photos.
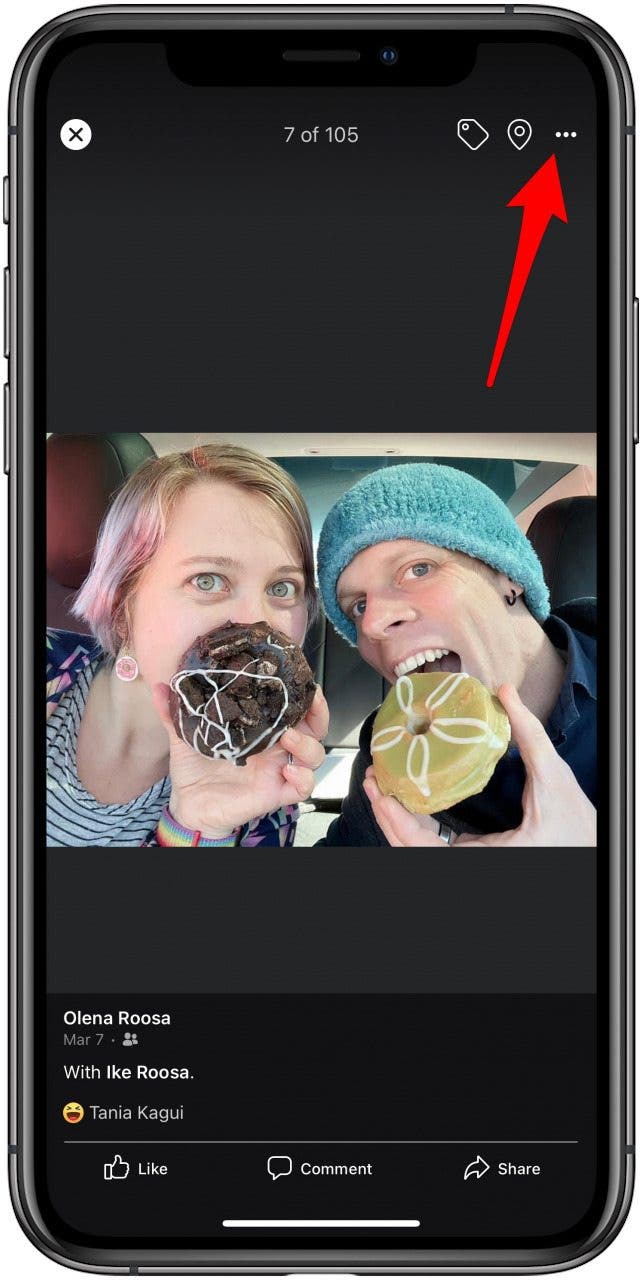
- From the Facebook app, locate the photo you'd like to save. Tap on the photo.
![From the Facebook app, locate the photo you'd like to save.]()
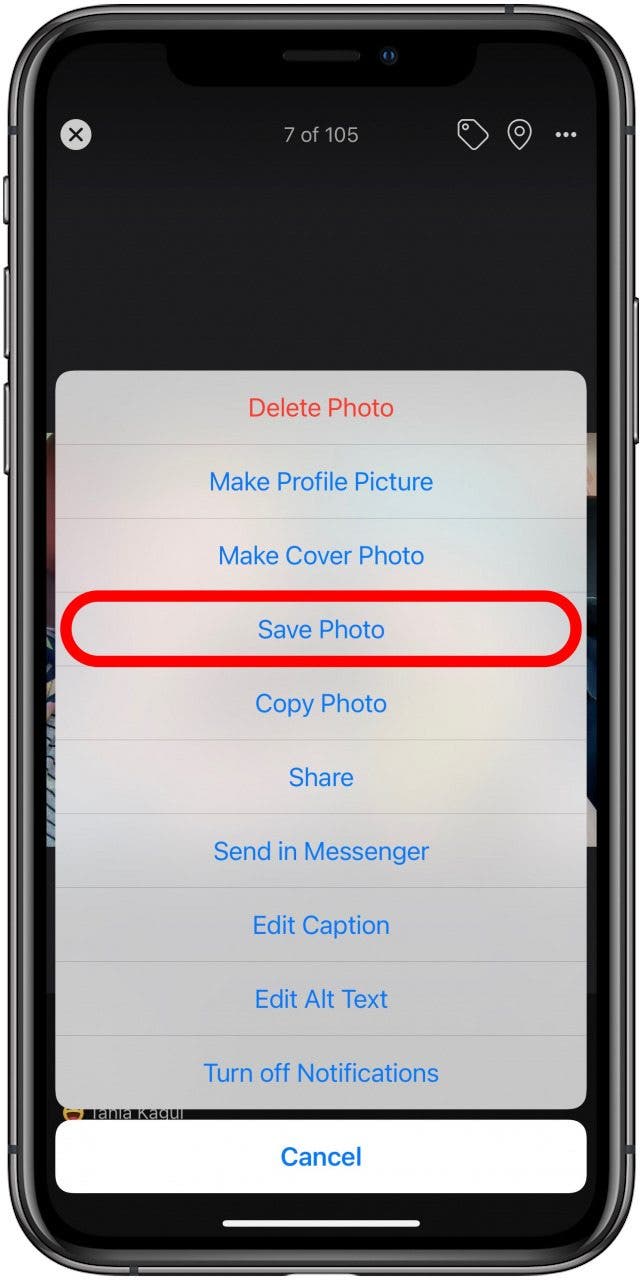
- Tap the three dots in the upper-right corner.
![Tap the three dots in the upper right corner]()
- Select Save Photo.
![Select Save Photo on Facebook]()
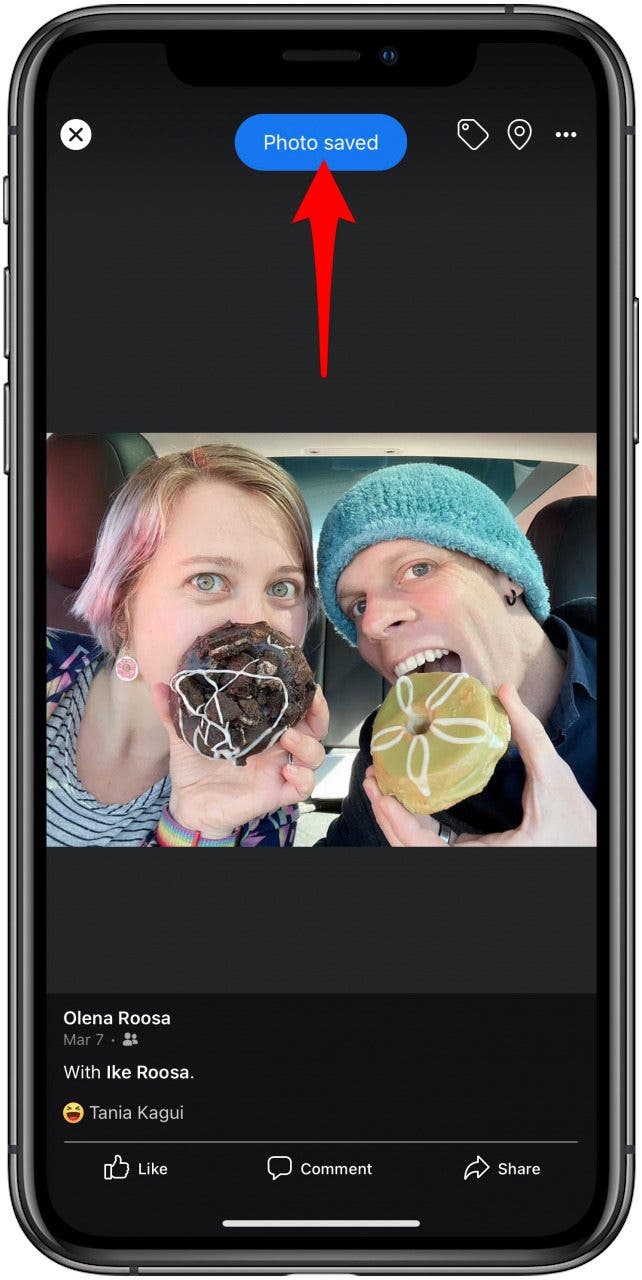
- There will be a confirmation that the photo was saved.
![There will be a confirmation that the photo was saved.]()
Now you know how to do an iMessage download!
How to Download All Your Photos from Facebook to Your iPhone
Facebook gives you the option to download all of your data, and this includes your photos. Images retrieved this way won't be as high-quality as those you shoot with your iPhone because Facebook doesn't store them with all the detail of an original image.
Here's how to download all Facebook photos at once:
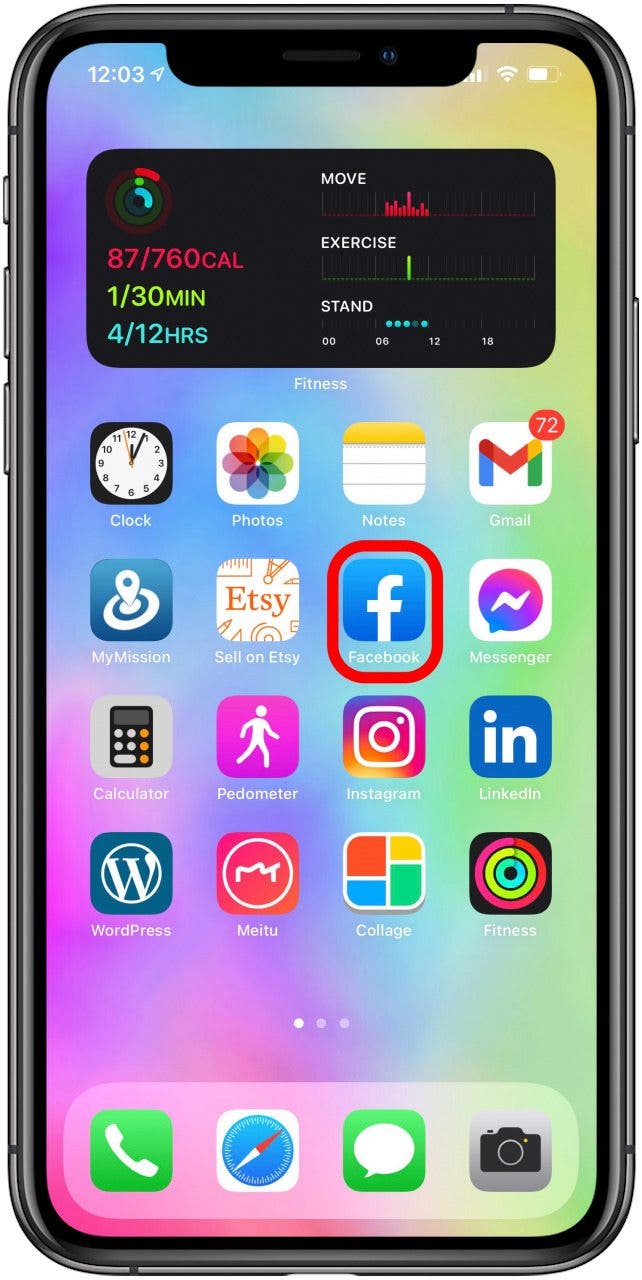
- Open the Facebook app.
![Open the Facebook app]()
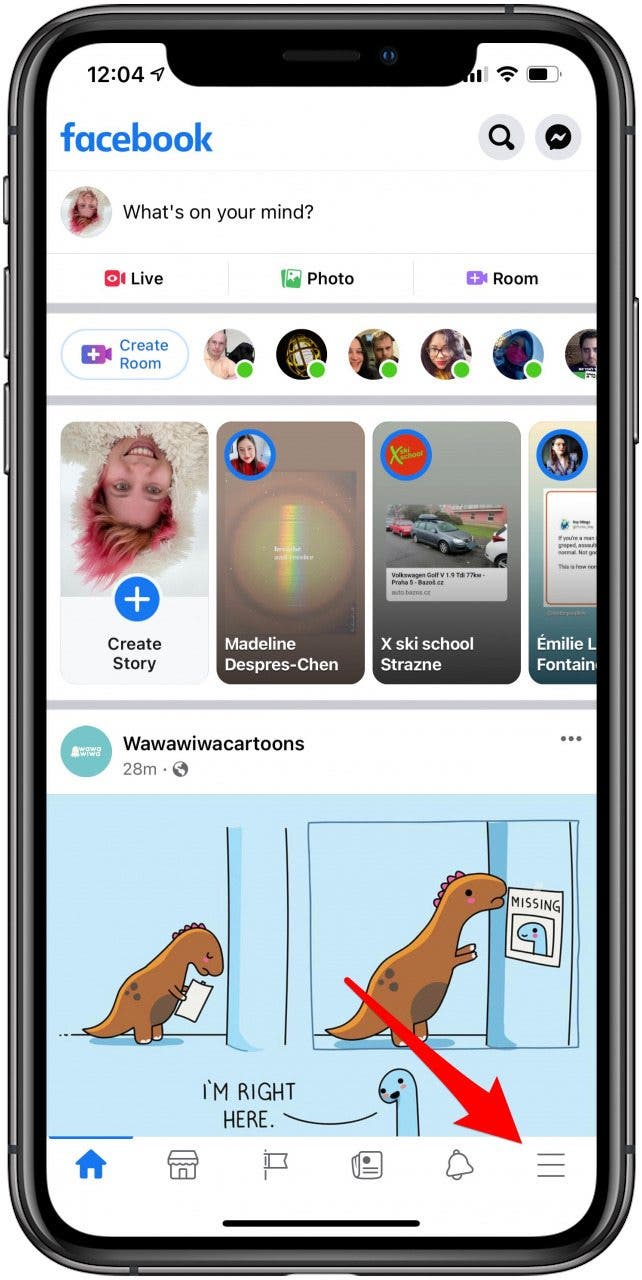
- Open your Facebook menu tab by tapping the menu icon, which looks like three stacked horizontal bars at the screen's bottom right.
![Open your Facebook menu tab by tapping the three stacked horizontal bars]()
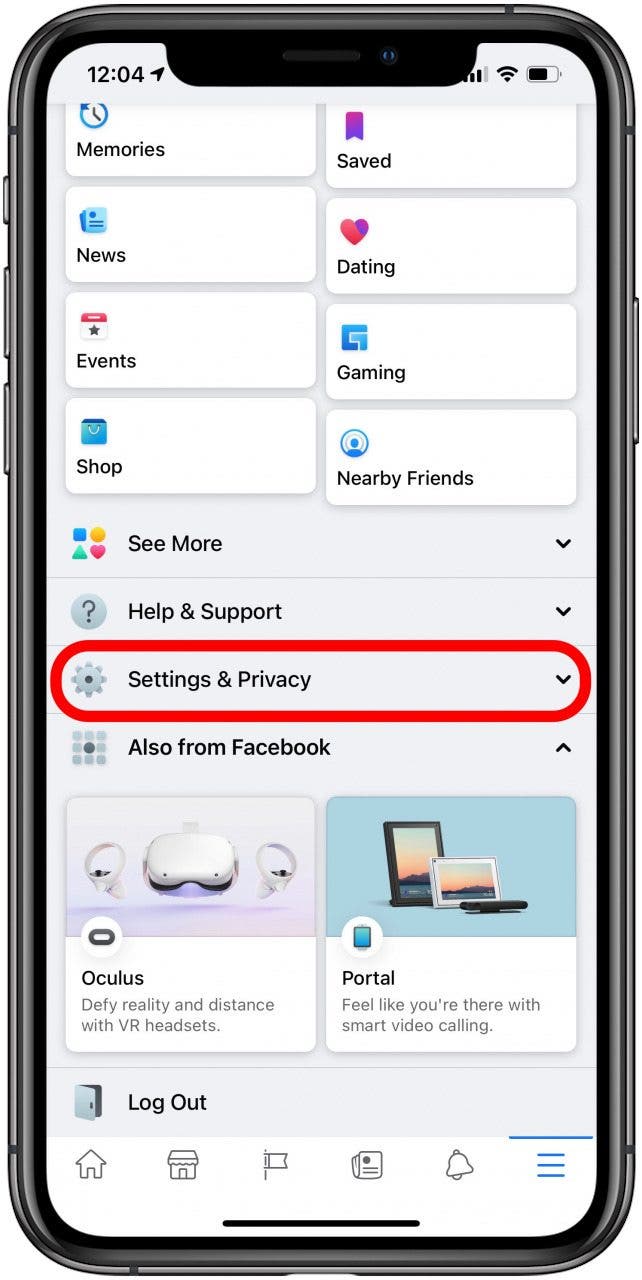
- Scroll down to tap Settings & Privacy to expand that section of the menu.
![Scroll down to tap Settings & Privacy on Facebook]()
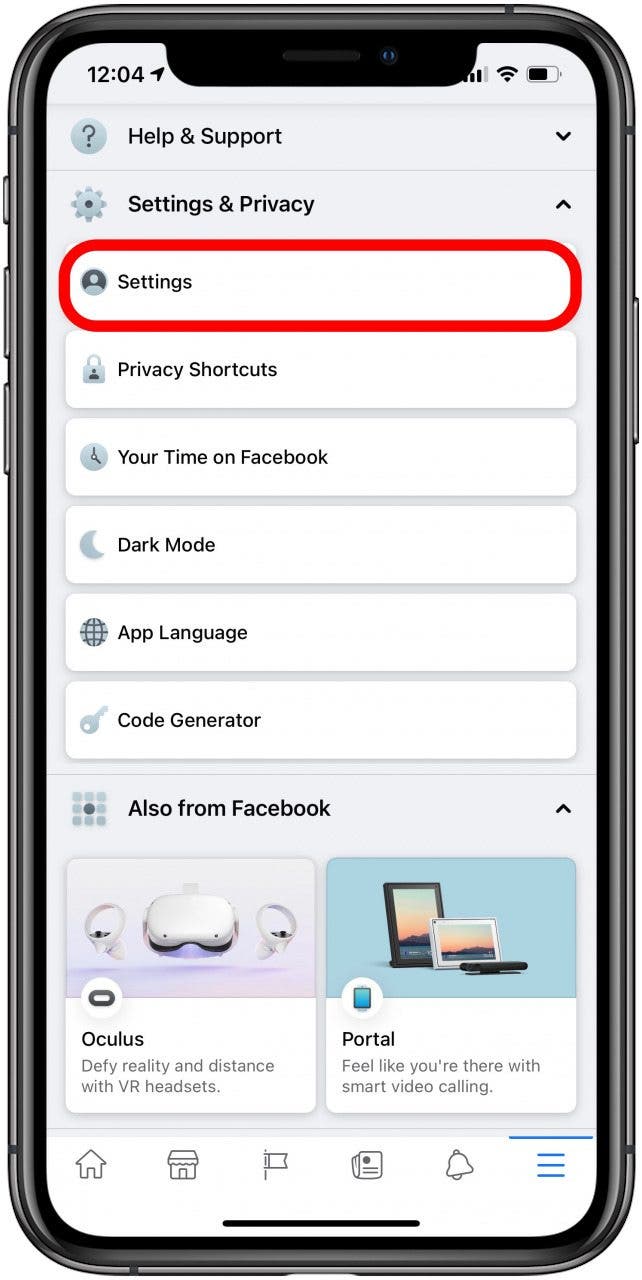
- Tap Settings.
![Tap Settings on Facebook]()
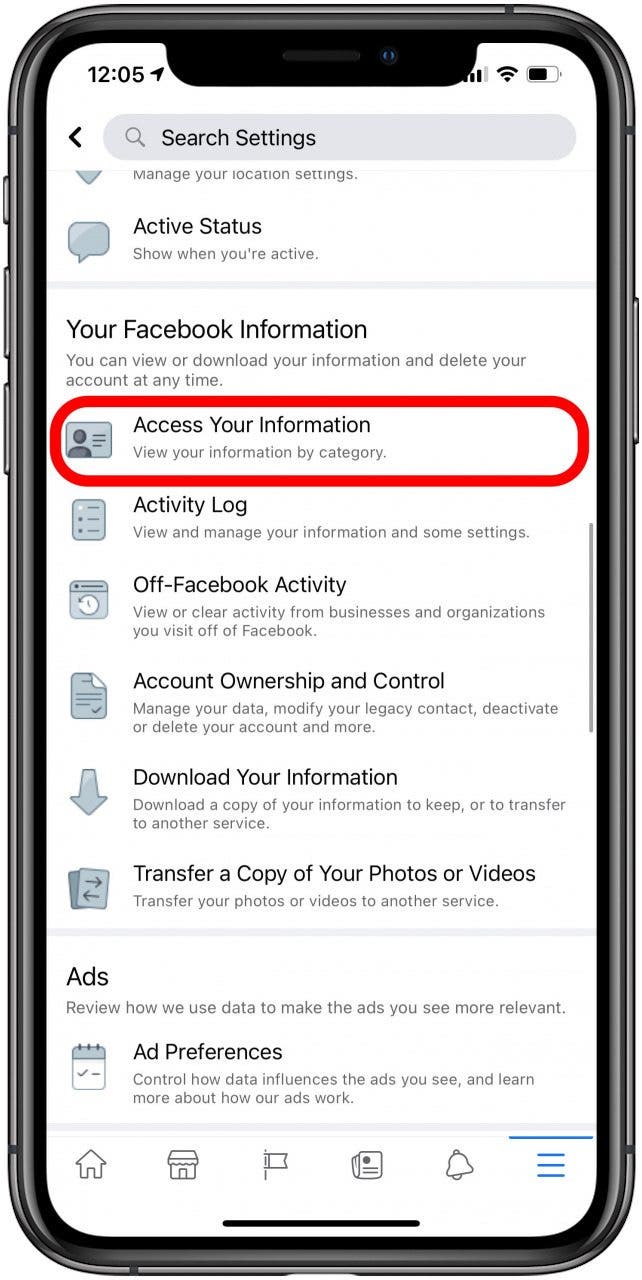
- Scroll down to find the section called Your Facebook Information.
- Tap Access Your Information.
![Tap Access Your Information on Facebook]()
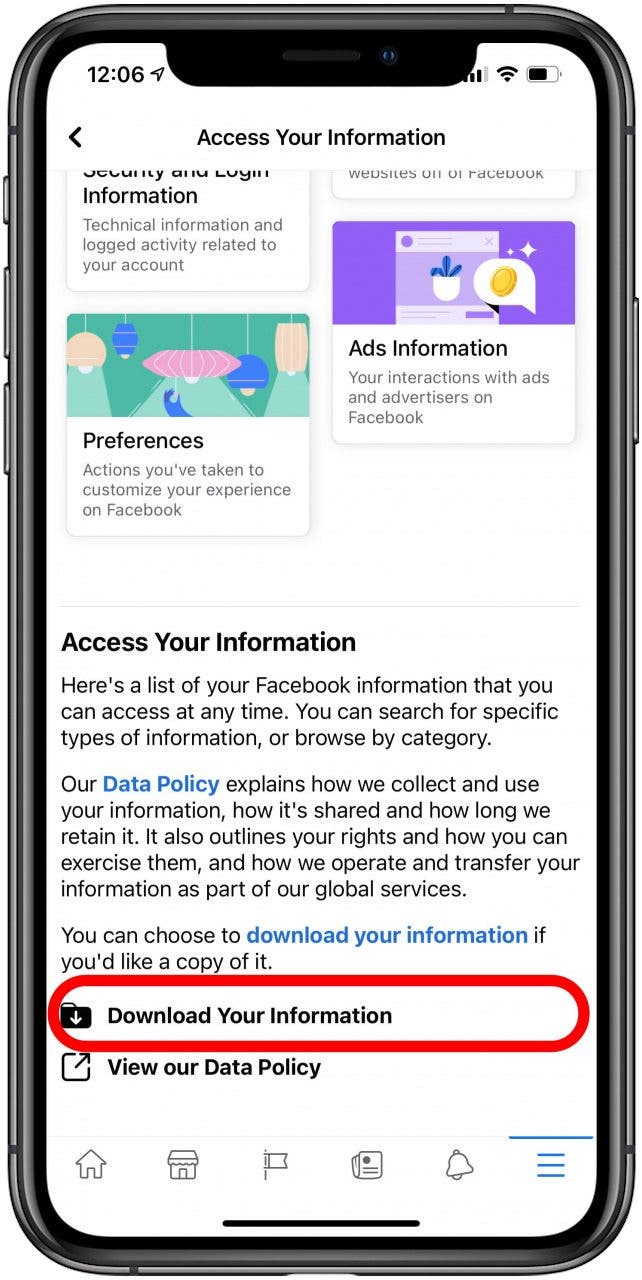
- Scroll down and tap Download Your Information.
![Scroll down and tap Download Your Information.]()
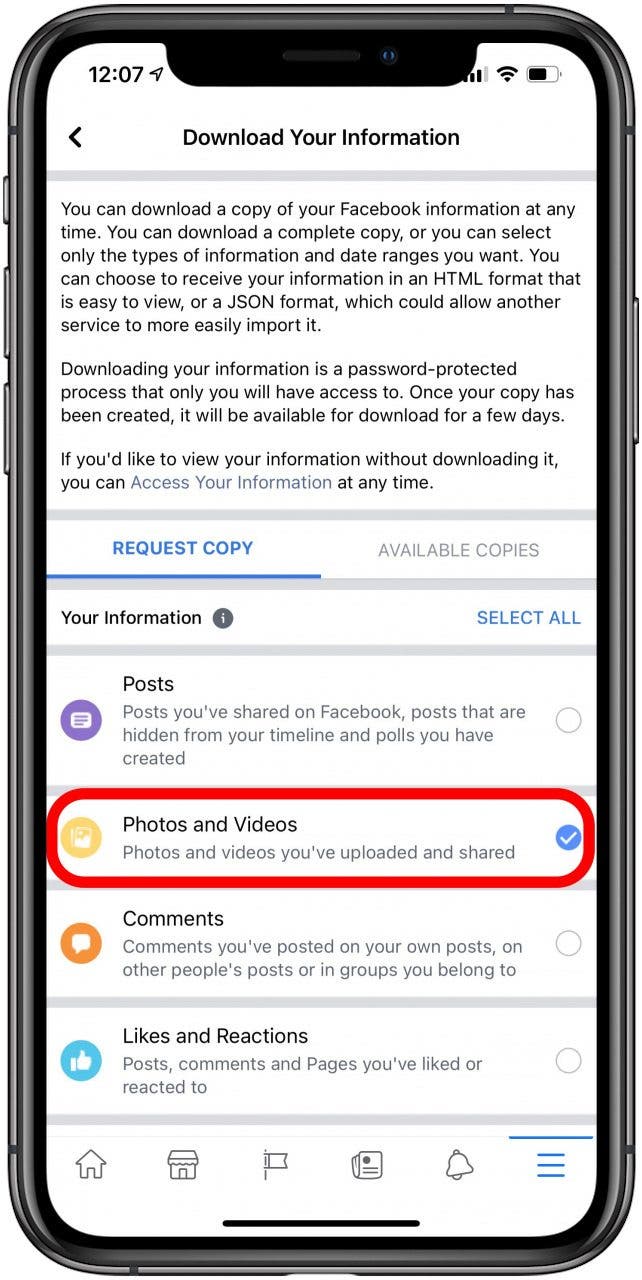
- Now you'll have a choice of which data you'd like to archive. Make sure to select only Photos and Videos. If you choose to, you can tap DESELECT ALL and then select just the Photos and Videos you want to save!
![Scroll down and tap Download Your Information.]()
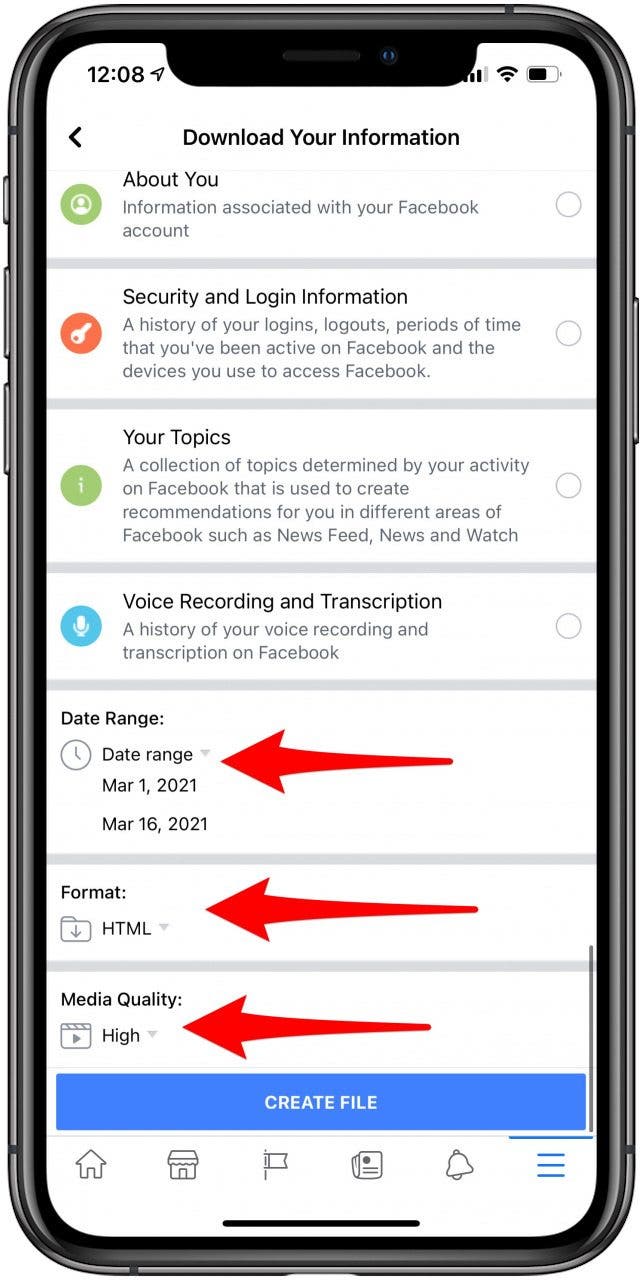
- Scroll down and choose the date range, format, and quality for your photo file. I recommend setting media quality to High.
![Scroll down and choose the date range, format, and quality for your photo file.]()
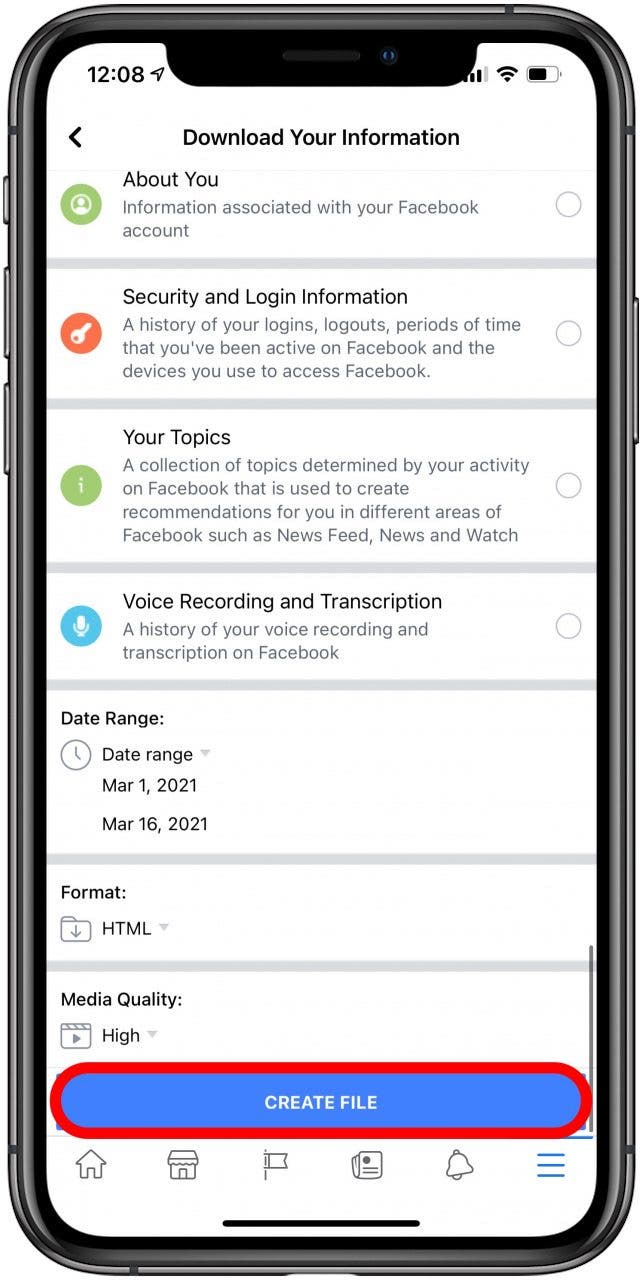
- Tap Create File. If you select a larger range, it may take some time.
![Tap Create File on Facebook]()
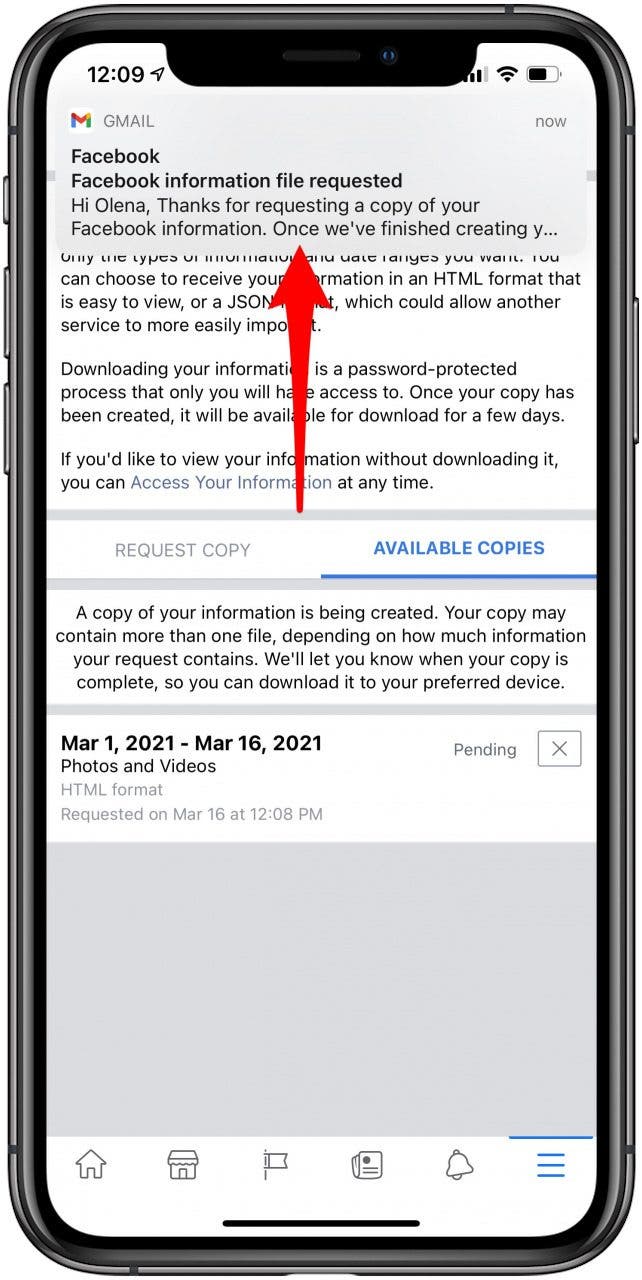
- Next, Facebook will inform you that it's working to archive your photos and make them available for download.
![Facebook will inform you that it's working on archiving]()
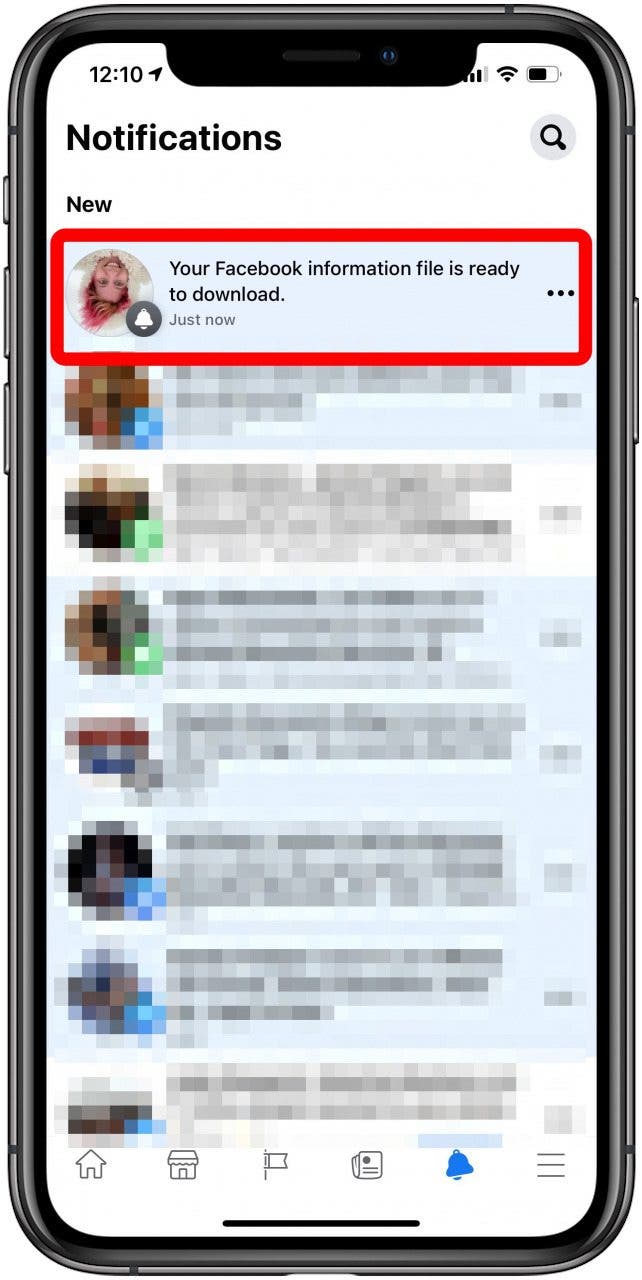
- Eventually, you'll get a Facebook notification informing you that your download is ready. Tap the notification.
![Tap the notification on Facebook.]()
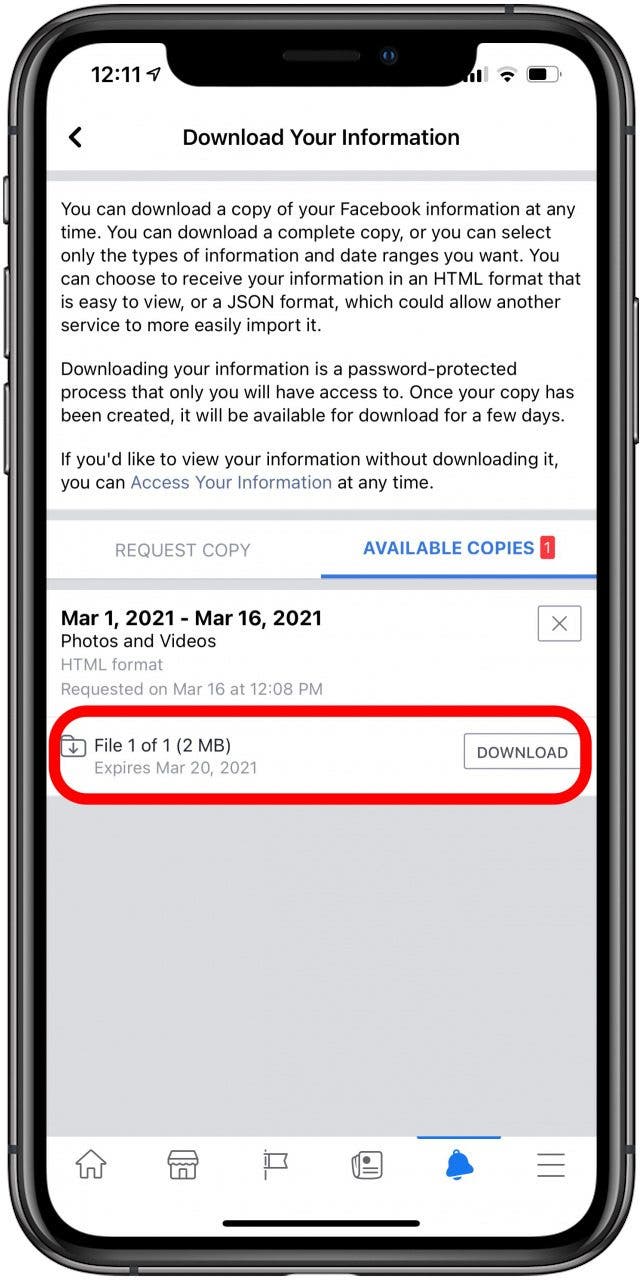
- Tap Download.
![You'll be transferred into your default web browser to complete the download]()
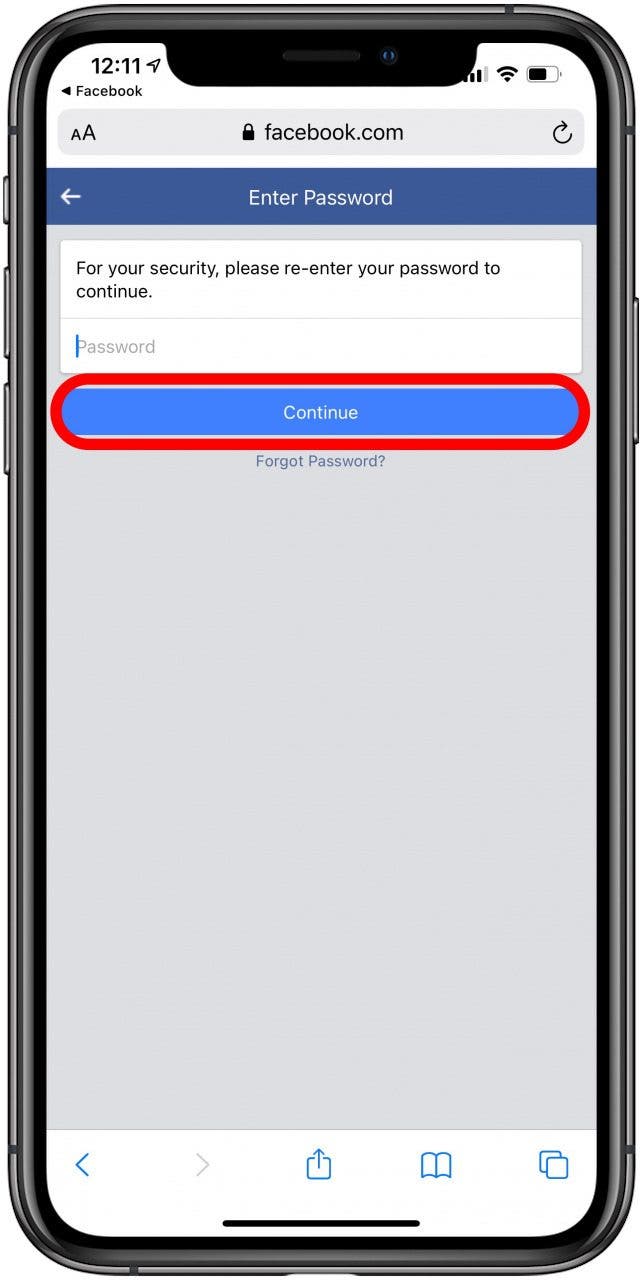
- You'll be transferred into your default web browser to complete the download, and you may have to log in to Facebook.
![Tap Download to save all your photos and videos from Facebook]()
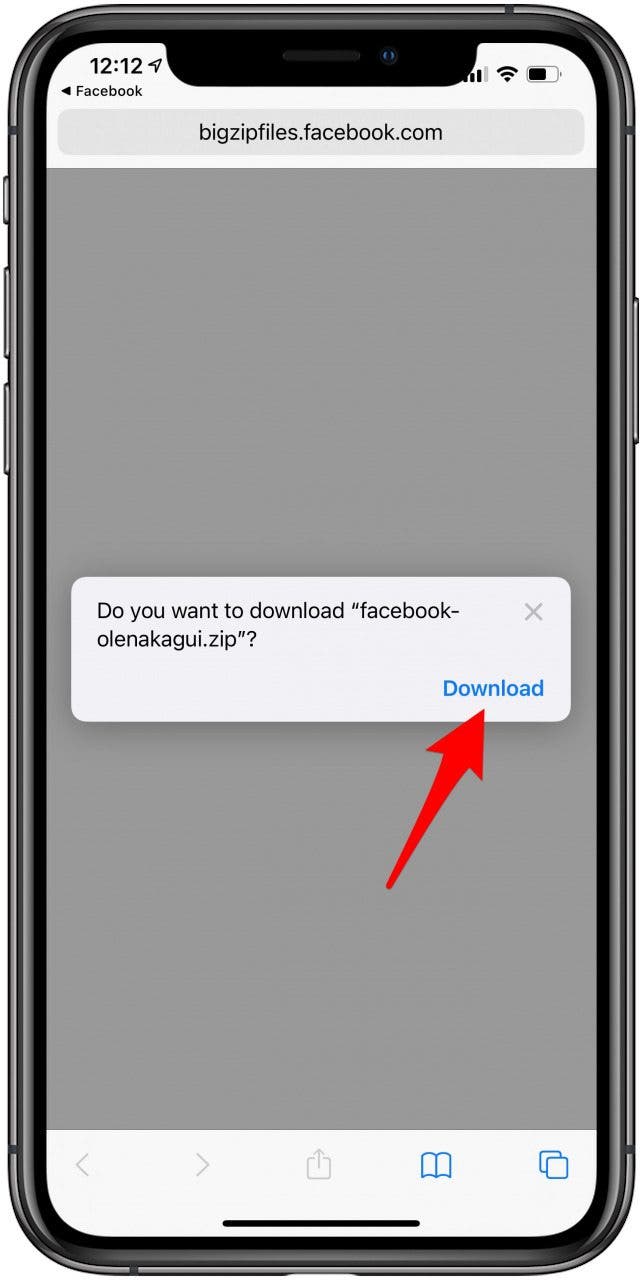
- Tap Download.
![Tap Download to save all your photos and videos from Facebook]()
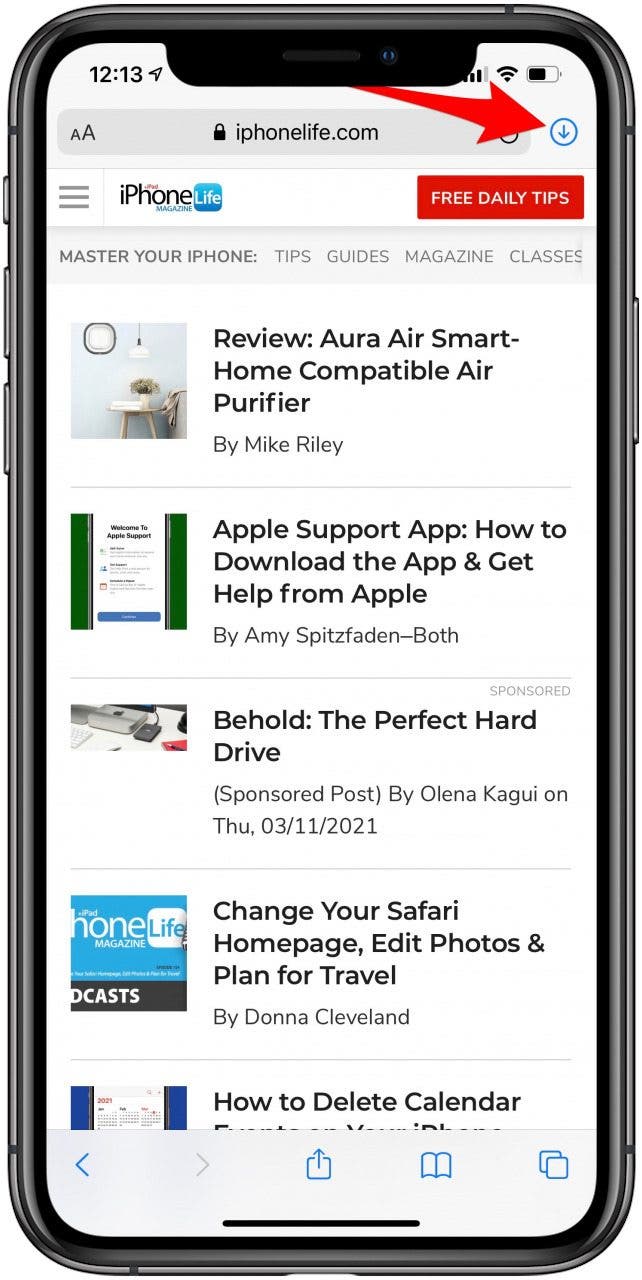
- Tap the down arrow in the top-right corner of your browser.
![Tap the downward arrow in the top right of your browser]()
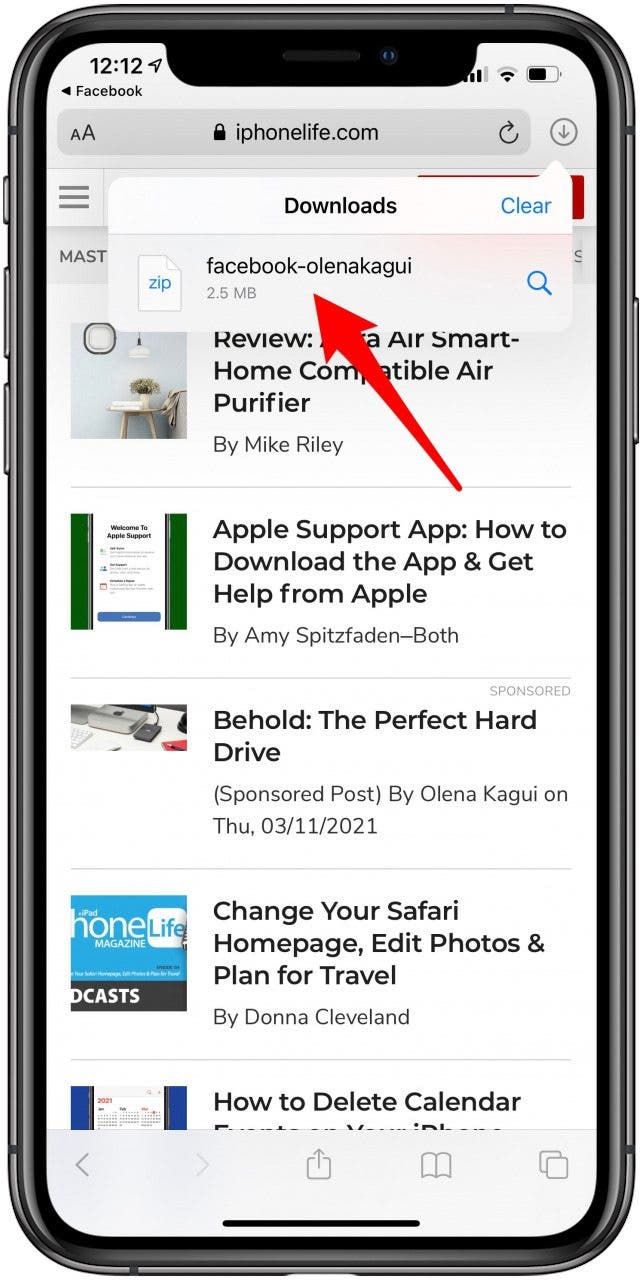
- Tap on the zip file. This will take you to your Downloads folder on your iPhone.
![Tap on the zip file.]()
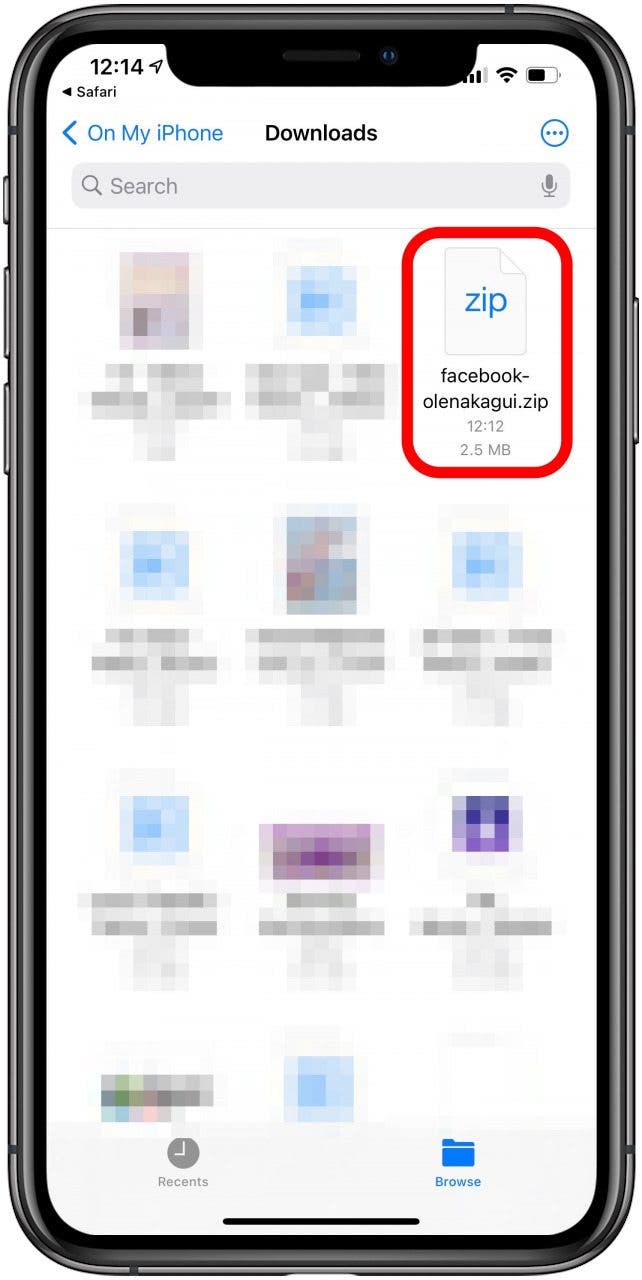
- Tap the folder to unzip it. This decompresses the files and makes them accessible.
![Tap the folder to unzip it.]()
- Open the folder.
![Open the folder.]()
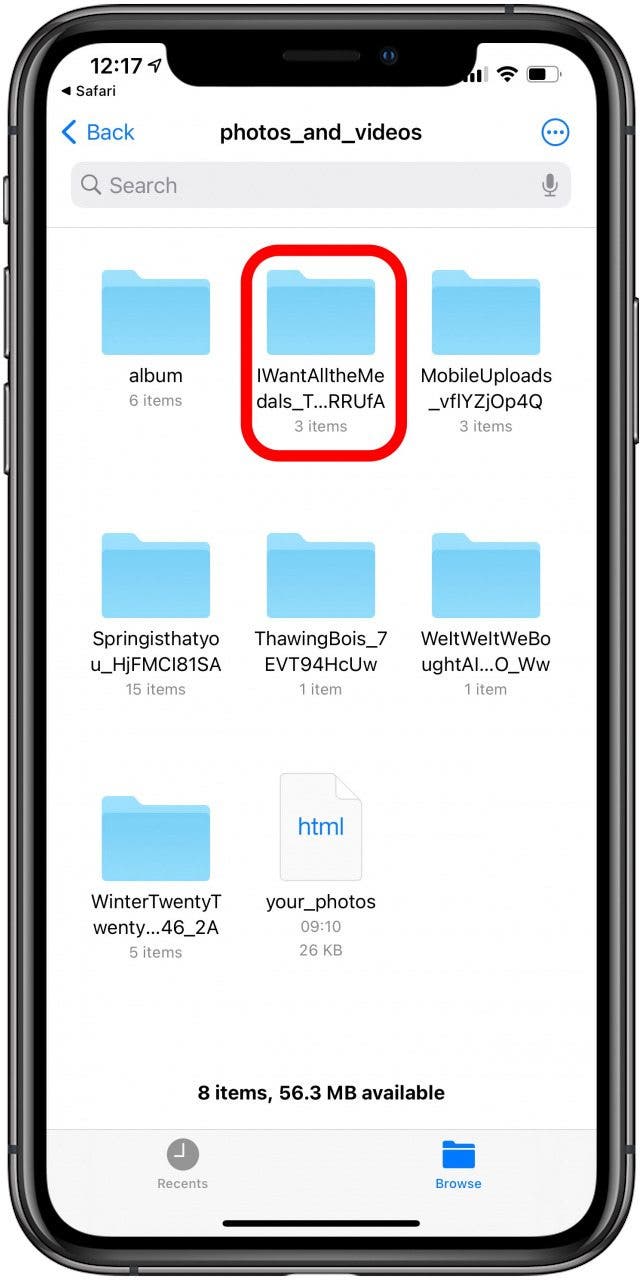
- Go to photos_and_videos. You will see several folders with your album names.
![Go to photos_and_videos.]()
- To save the photos in a folder, you need to tap the folder.
![To save the photos in a folder, you need to tap the folder.]()
- To save one photo at a time, you can tap the image and use the share icon at the bottom left to save it to your gallery.
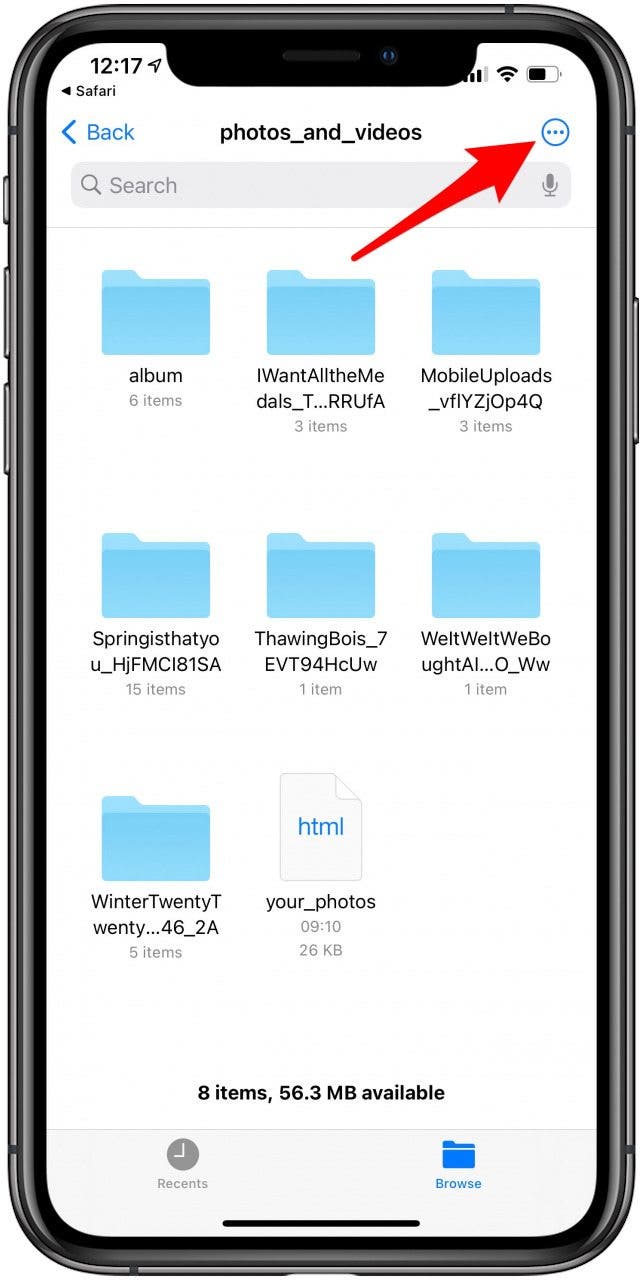
- To save multiple images, you need to tap the three dots in the top-right corner.
![To save multiple images, you need to tap the three dots in the top right corner.]()
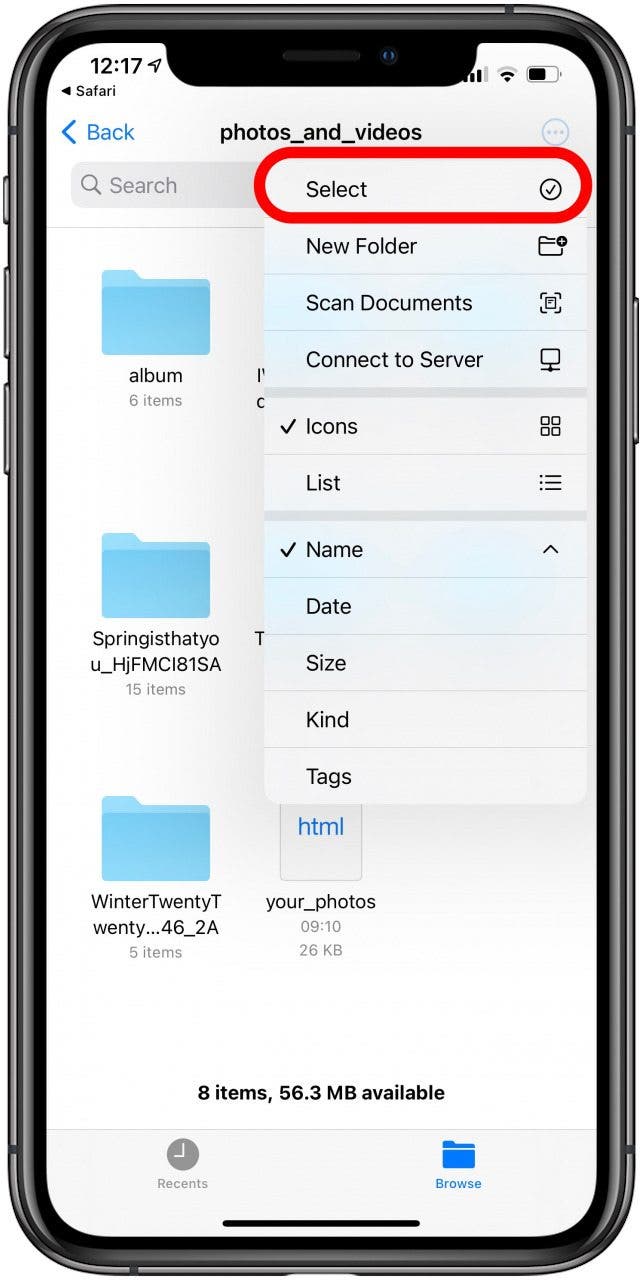
- Tap Select.
![Tap Select.]()
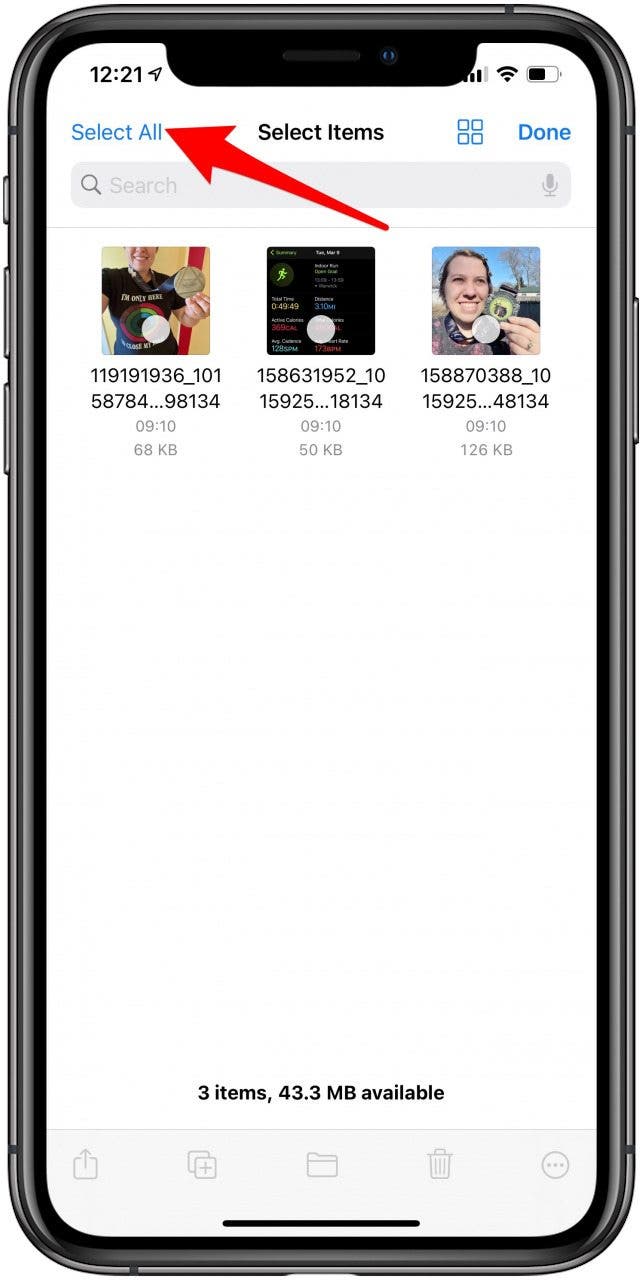
- Tap Select All.
![Tap Select All.]()
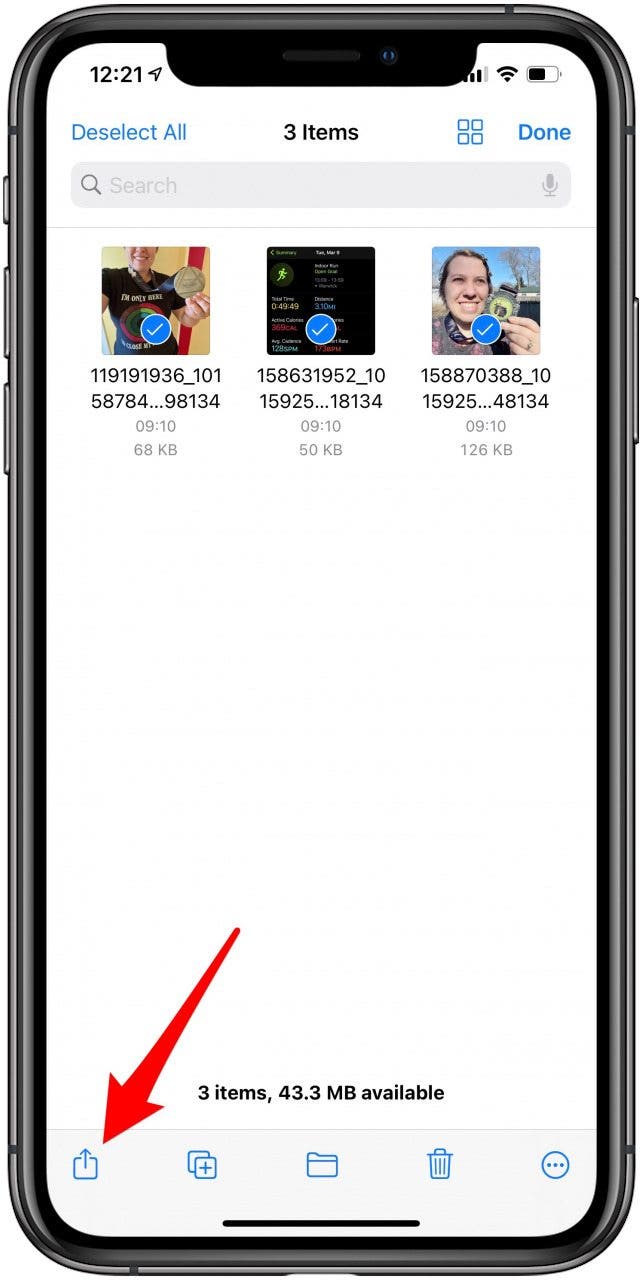
- Tap the share icon in the bottom-left corner.
![Tap the share menu icon in the bottom left corner.]()
- Tap Save [#] Images.
![Tap Save (#) Images.]()


Whew! You've done it, you've saved pics from Facebook! Facebook may not make it easy to download all of your photos at once, but now you know how to do it! This is an excellent way to recover pictures you might not have anywhere else.
Save Photos from the Facebook Messenger App
When you do the Facebook photo download of everything you've uploaded, it saves everything you've posted. Unfortunately, this will not include the photos you've sent on Facebook Messenger. To do that you need to follow these steps:
How to Save Photos from Facebook Messenger on Your iPhone
- Open Facebook Messenger and find the conversation containing images you want to save.
![Open Facebook Messenger and find the conversation containing images you want to save.]()
- You can tap an image and then skip to step four if that's the only image you want to save.
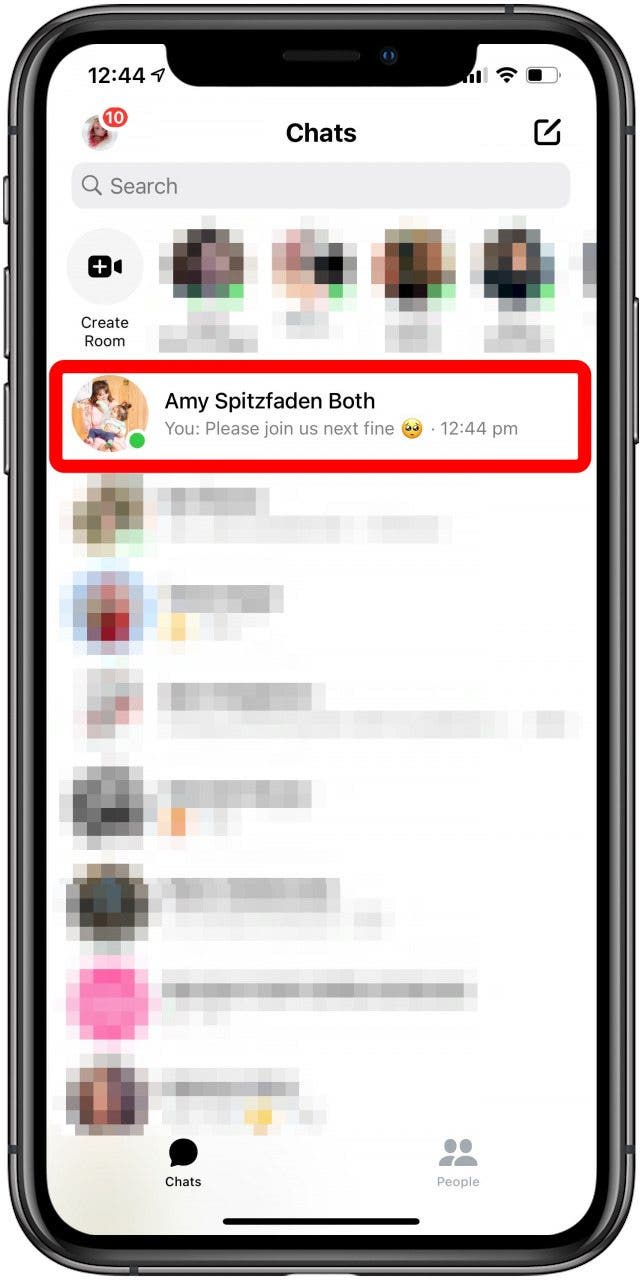
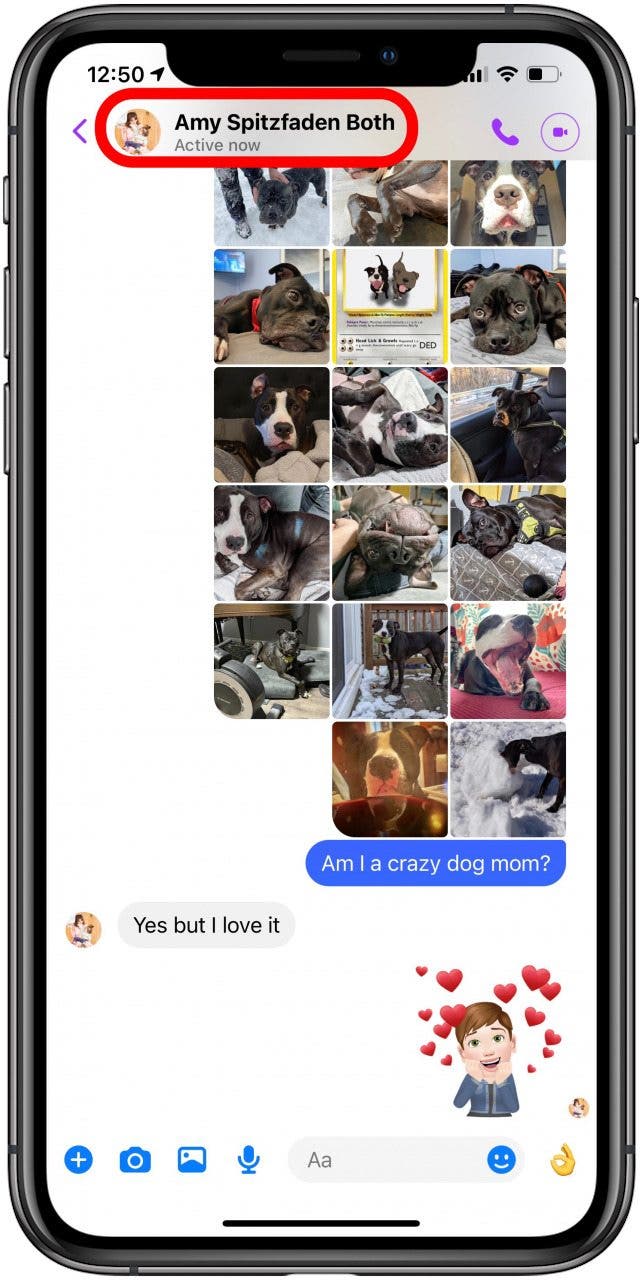
- Otherwise, if you don't want to scroll through your whole message history looking for photos, tap the name of your contact at the top of the screen.
![Tap the name of your contact at the top of the screen.]()
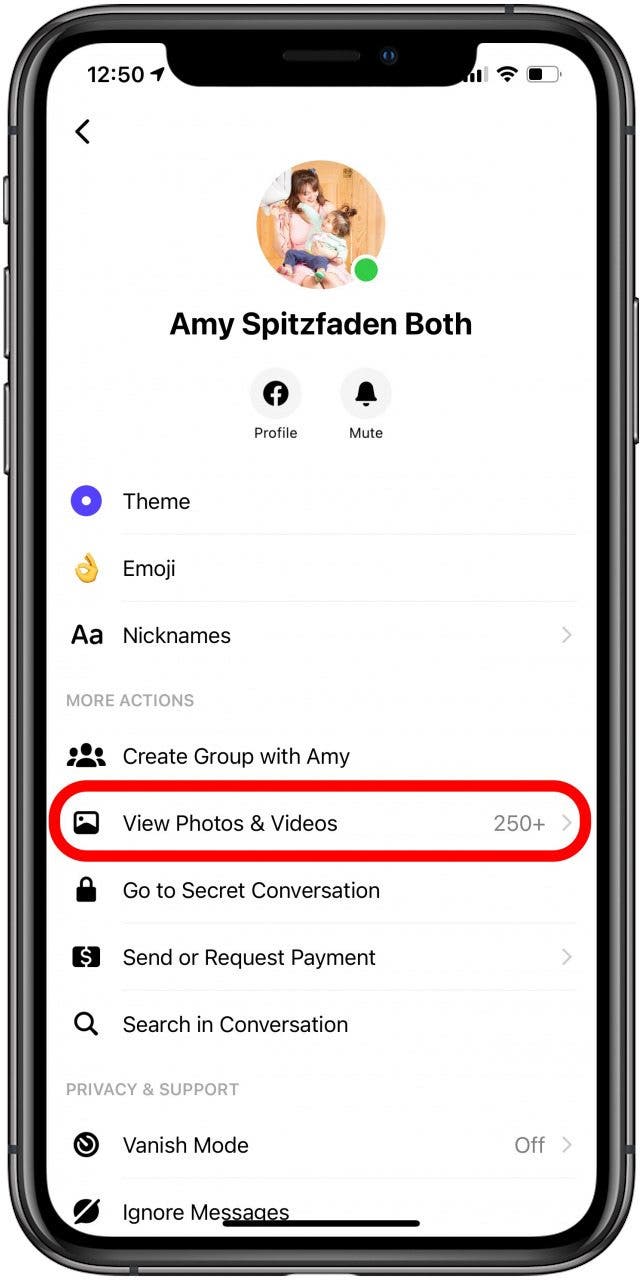
- You'll be presented with a contact information card.
- Tap View Photos & Videos.
![Tap View Photos & Videos in Facebook Messenger]()
- Tap on the image you want to save.
![Tap on the image you want to save.]()
- Tap on More in the bottom-left corner of the screen.
![Tap the More icon in the bottom-left corner of the screen.]()
- Tap Save.
![Tap Save.]()

Unfortunately, you cannot select and save more than one photo at a time. Hopefully, Facebook will add this feature in the future! Until they do, you can at least see all your photos in the same place with this tip.
Now you know how to download all photos from Facebook, Facebook Messenger, and Messages App on your iPhone! Learning how to transfer photos can be helpful if you accidentally lost some images that you've sent in Messages or published on social media. Next, learn how to screen share via Facebook Messenger.