Your iPhone has a variety of free ringtones to peruse, and the iTunes Store has a gigantic selection of iPhone ringtones to purchase, but what if you want to make your own custom ringtone? Good news! You can make phone ringtones free using already purchased songs from your iTunes library. All you need is your iPhone, a Mac or PC, a Lightning cable, 20–30 seconds of your favorite song, a little bit of time, and a willingness to try something new. Let's get started learning how to make your own custom free ringtones for iPhone with iTunes!
Related: How to Change Your Default Ringtone on iPhone
Why You Should Avoid Free Ringtones Apps
There are free ringtone apps available in the Apple App Store, but most of them require purchases to enable all the features. And regardless of whether you purchase the ringtone from iTunes or get it from an app, you can't choose which snippet of the song to use. So why bother spending money when you can make your own ringtone from songs you've already purchased and select the exact section of the song you want to use? Once you've gotten the hang of this process on iTunes, you'll never need another method to make ringtones again.

Prepare to Make Your iPhone Ringtone
- Prior to getting started, there are a few preliminary steps you'll want to take:
- Make sure that you've updated to the latest version of iTunes on your computer to avoid any tech snafus along the way.
- Next, you need to choose an already purchased song from your iTunes library and download it to your computer.
- Then you'll want to select the part of the song you'd like to use. Ideally, you'll want your ringtone to last 20–30 seconds. Snippets shorter than 20 seconds can't be used. For this tutorial, I selected the first 30 seconds of "Trouble Will Soon be Over" by Sinead O'Connor. Play around until you've found the exact snippet you plan on using for your ringtone. I'll explain below how to save only that section.
- Make sure you have a Lightning cable handy.
Pep Talk
If you glance at this entire article, you may be tempted to give up before you begin. There are a lot of steps to go through, and it looks complicated. Give it a try, though, and focus on one step at a time; when you have your new ringtone on your iPhone and have mastered this process you'll feel like the king or queen of iPhone geeks!
Creating Your Free Ringtone in iTunes with a PC or a Mac
To begin:
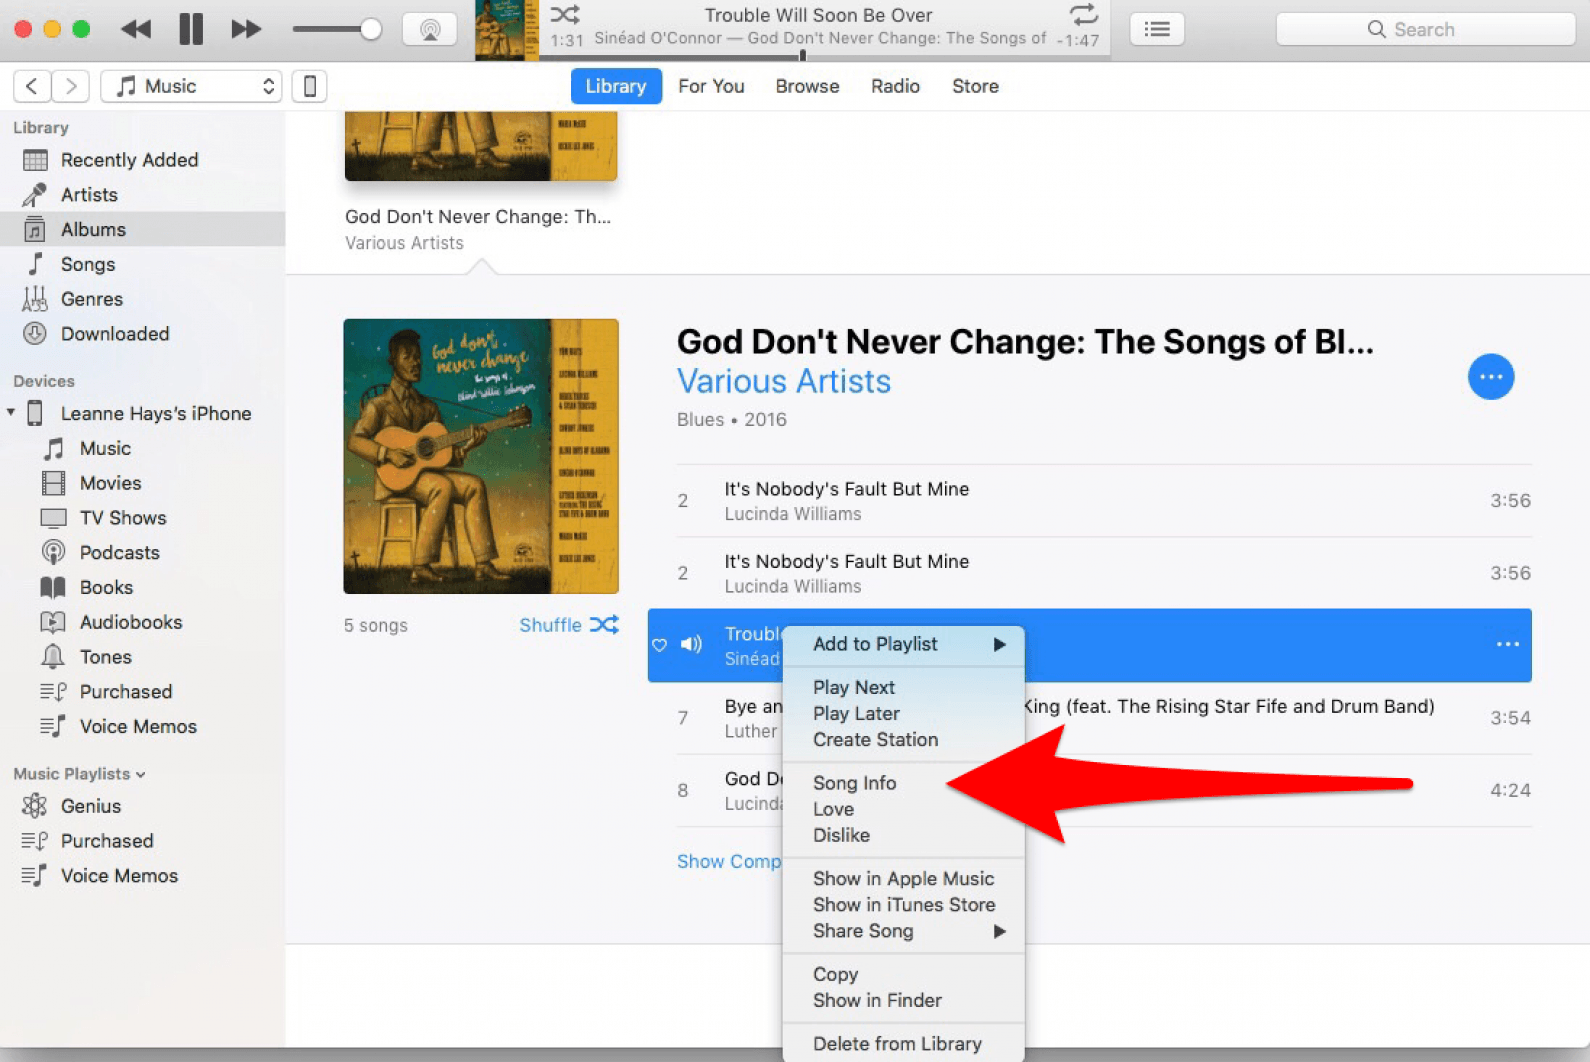
- Open iTunes on your Mac or PC, then right click the song you'd like to make a ringtone from.
- Click Song Info from the drop-down menu that pops up.
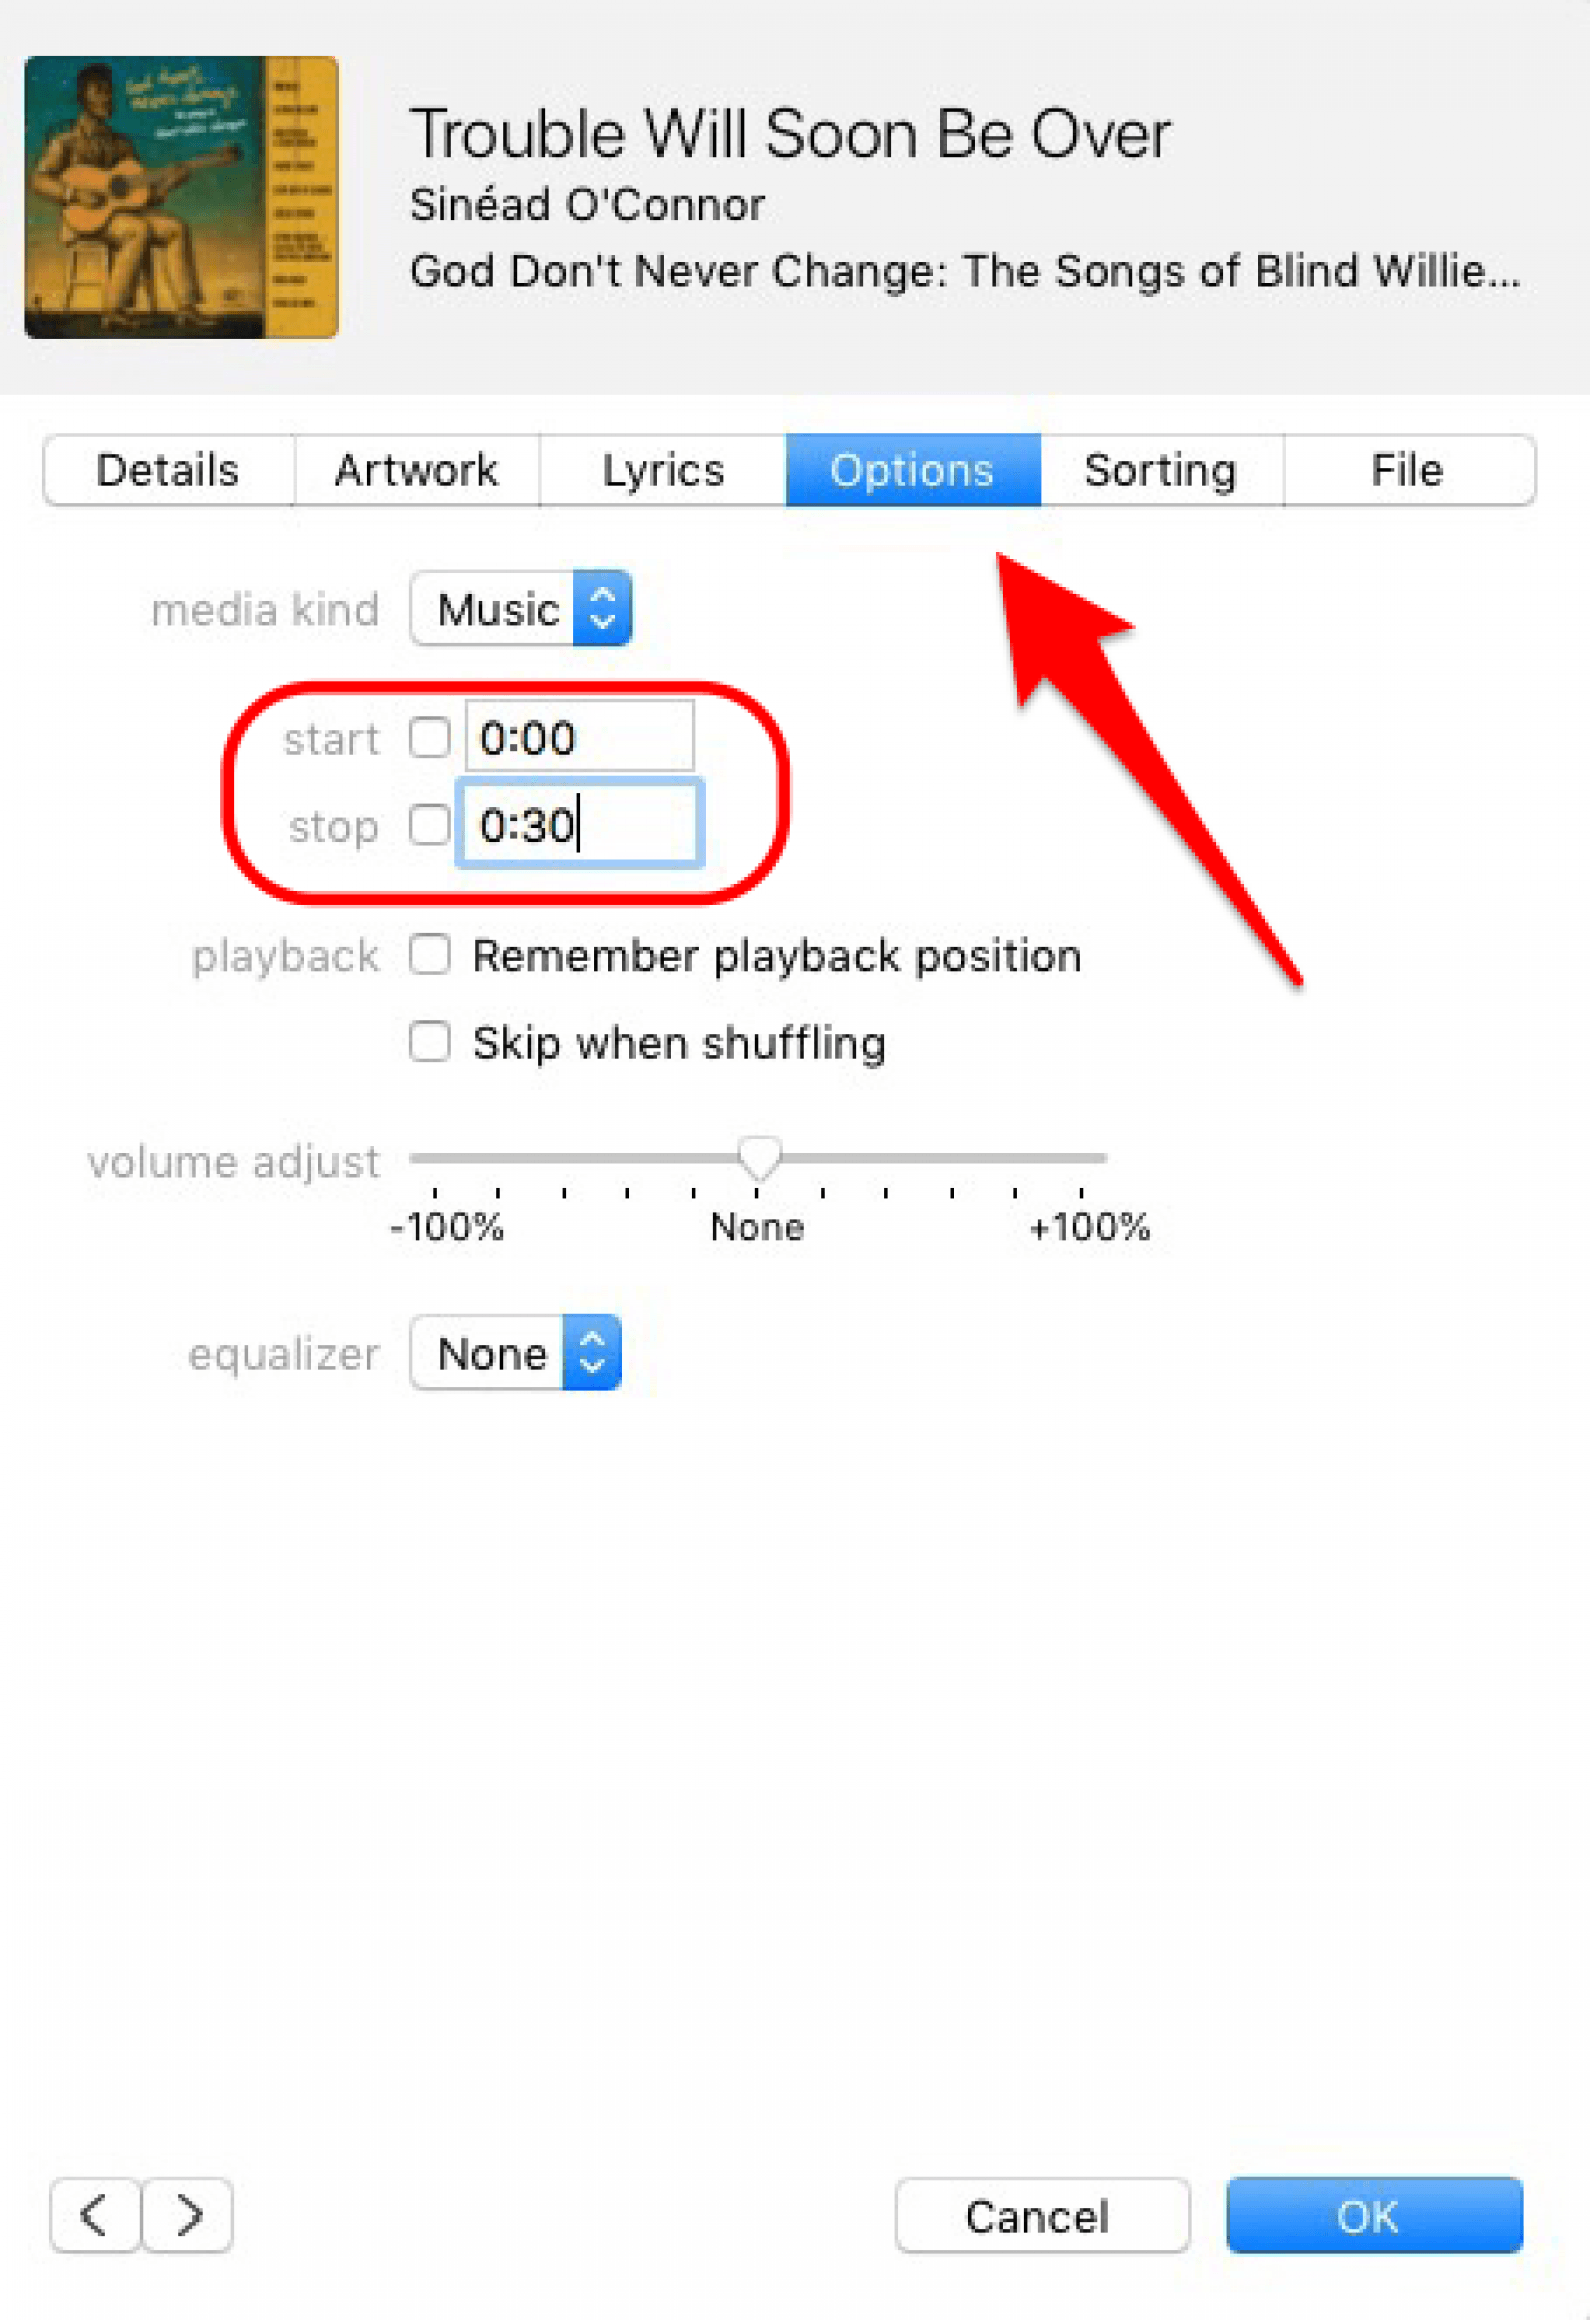
- From there, click on the Options tab.
- Now add the start and stop times to choose the section of the song you'd like to use (for reference, I have my song starting at 0:00 and ending at 0:30.)
- Click OK once you've chosen the 30 seconds that you plan on using for your ringtone. Be sure to play the segment back for accuracy and adjust start and stop times accordingly. You can use decimals to get very precise. For example, I could choose to stop the song at 0:29.57. You'll want to make sure these times are just right before converting the file type.
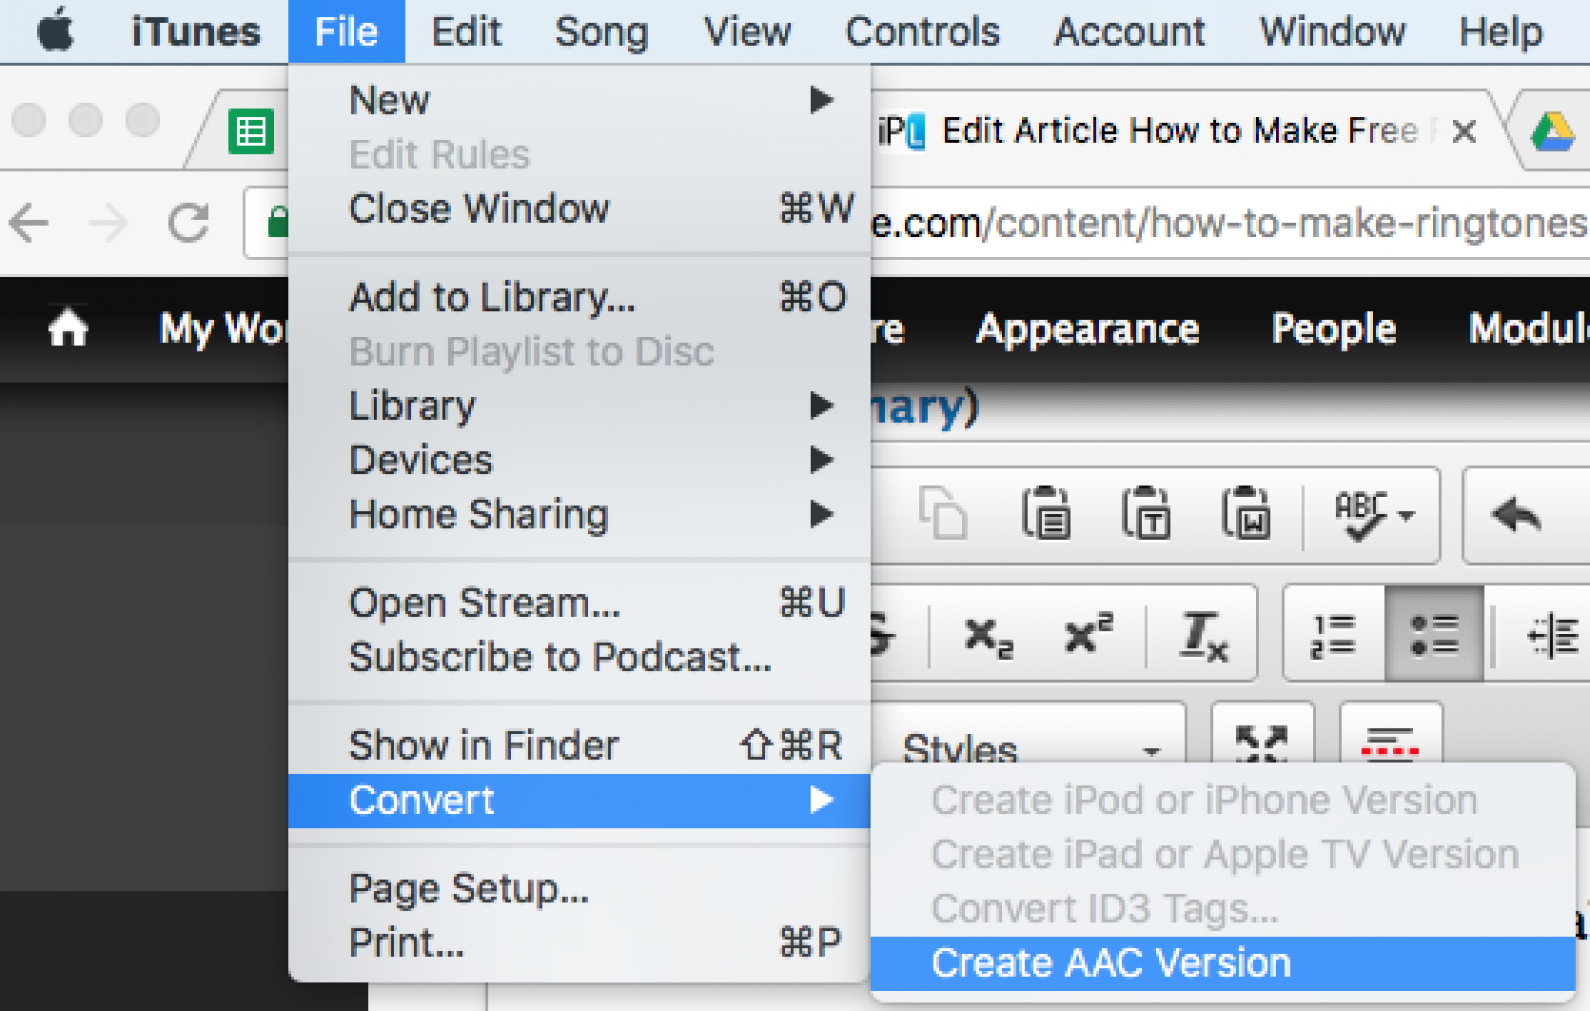
Make sure the song is highlighted in blue, then:
- To convert the file type, go to File and click on Convert. Then select Create AAC Version.
- Beneath the original song, you'll now see the ringtone version of the song.
- Once you've created an AAC version, you should go back to the original copy of your song and make sure the start and stop times are un-checked. (Otherwise, you'll only hear the selected 30 seconds of your song any time you play it.)
How to Find Your Custom Ringtones
With a PC:
- If you're using a PC, Select "Show in Windows Explorer" to easily find this song on your computer.
- Right click on the song and select "Rename."
- Note: In Windows 10, you may not see the file name extension listed. To change the view to show the "m4a" extension, click on the "View" tab and check the box for "File name extensions" to make those viewable.
- Your song ringtone should currently end with ".m4a." Change this to ".m4r."
- Windows will ask if you're sure you want to change the file name. Click Yes, and your file will be renamed as a .m4r file.
With a Mac:
- Once you've created your custom ringtone, right click on it and select Show in Finder.
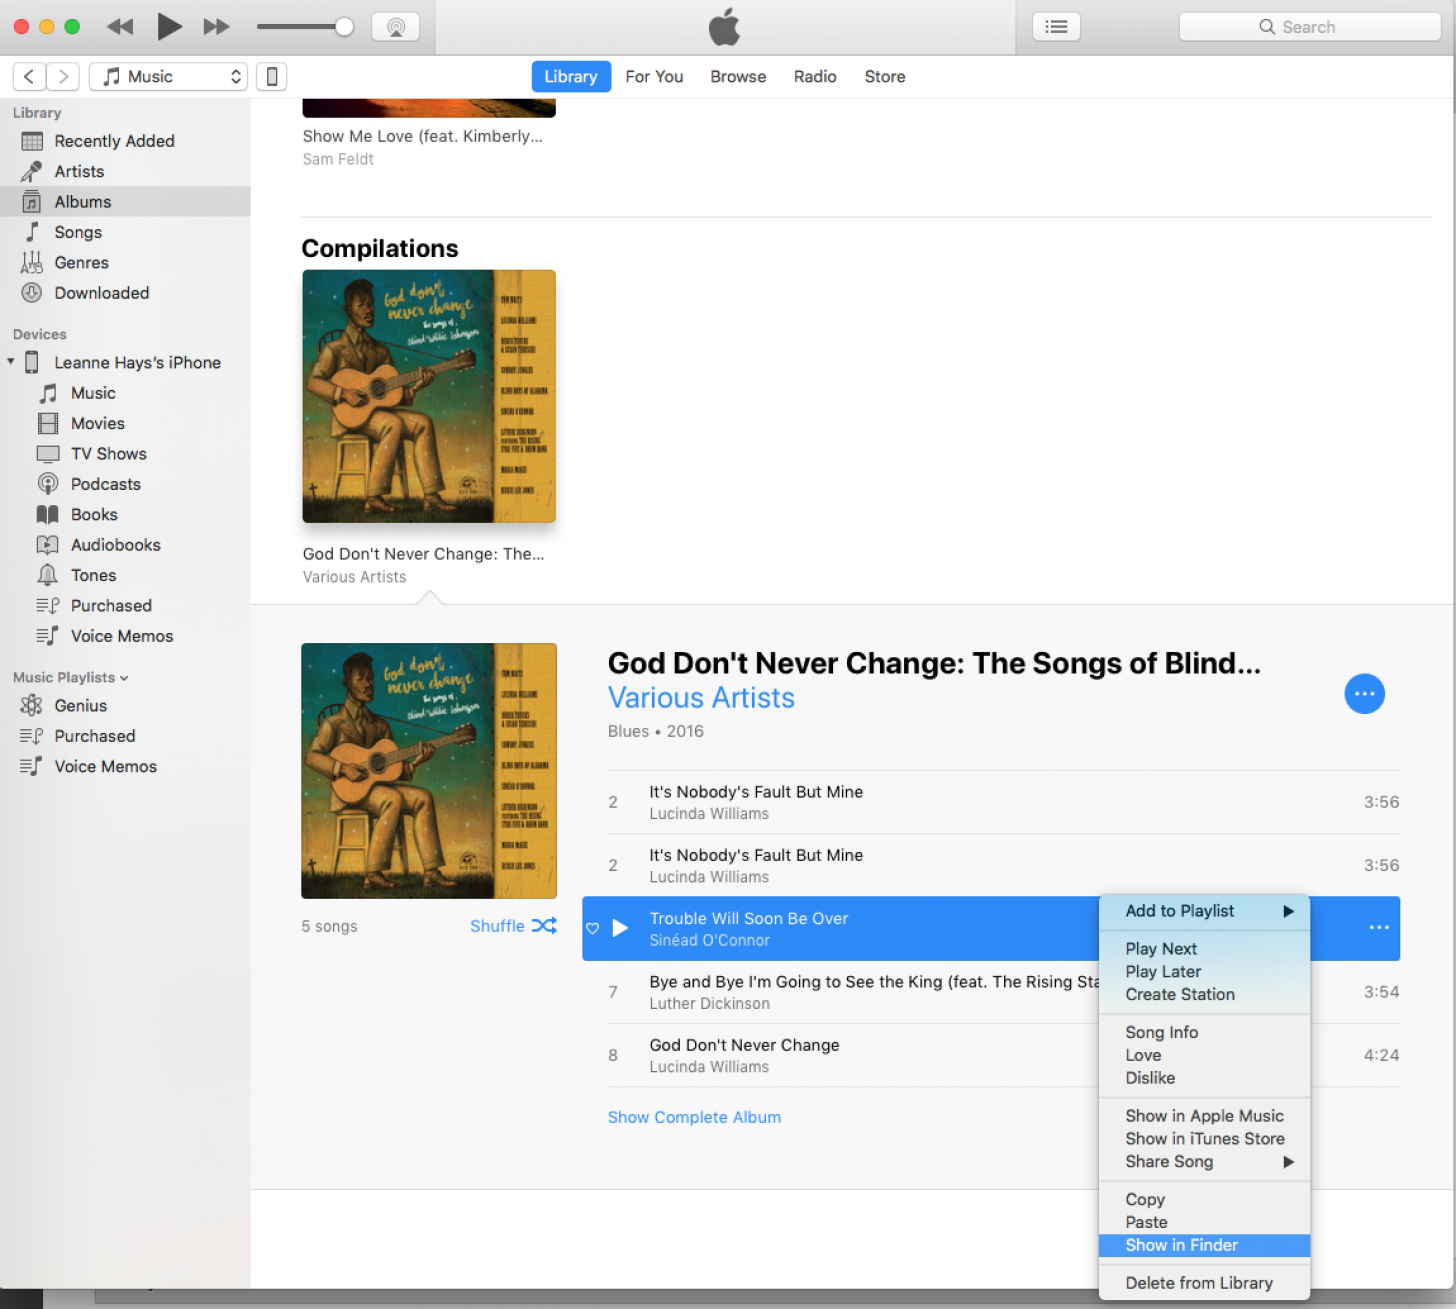
- This will automatically take you to a new window, where you'll see your ringtone highlighted in blue.
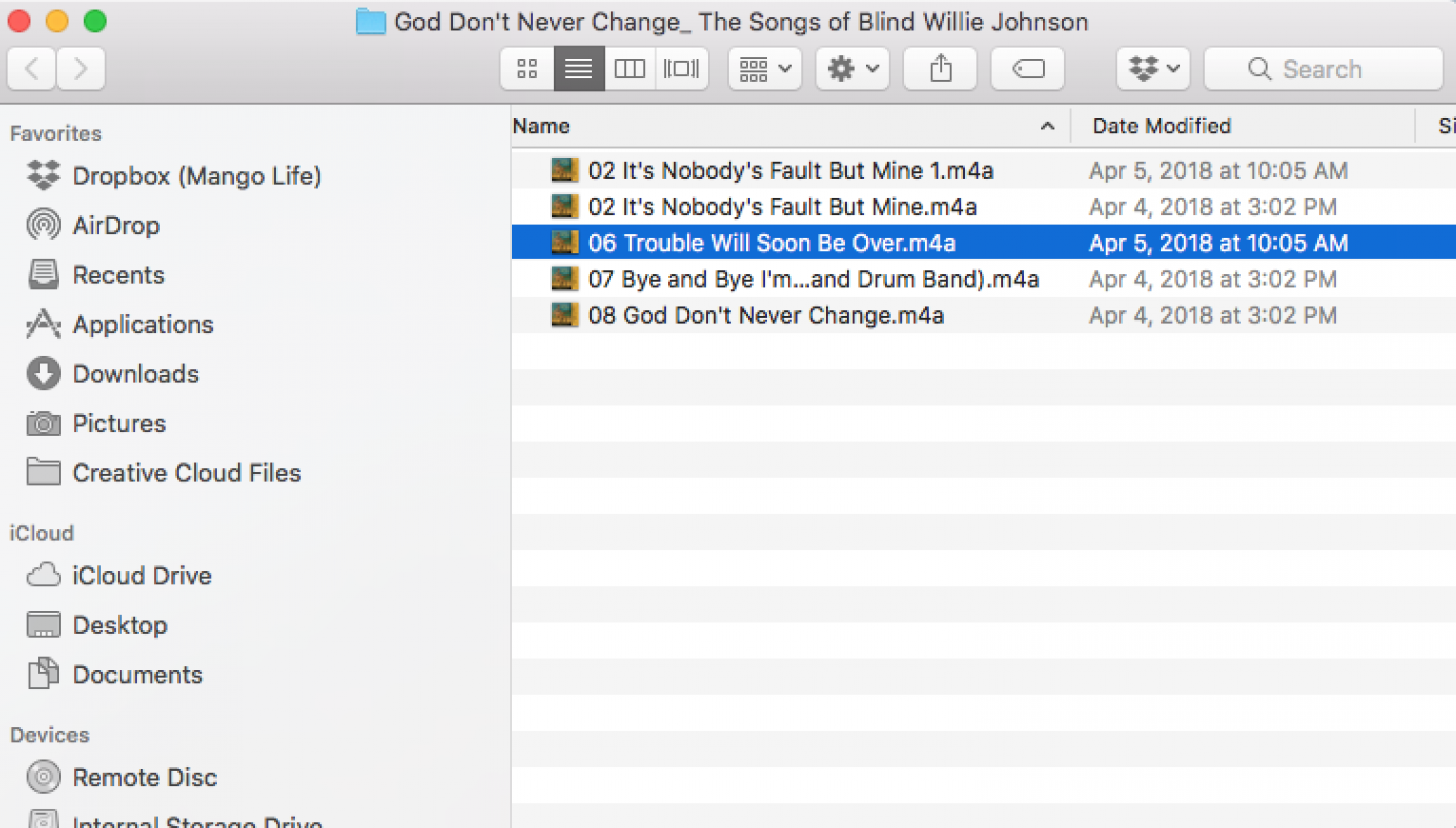
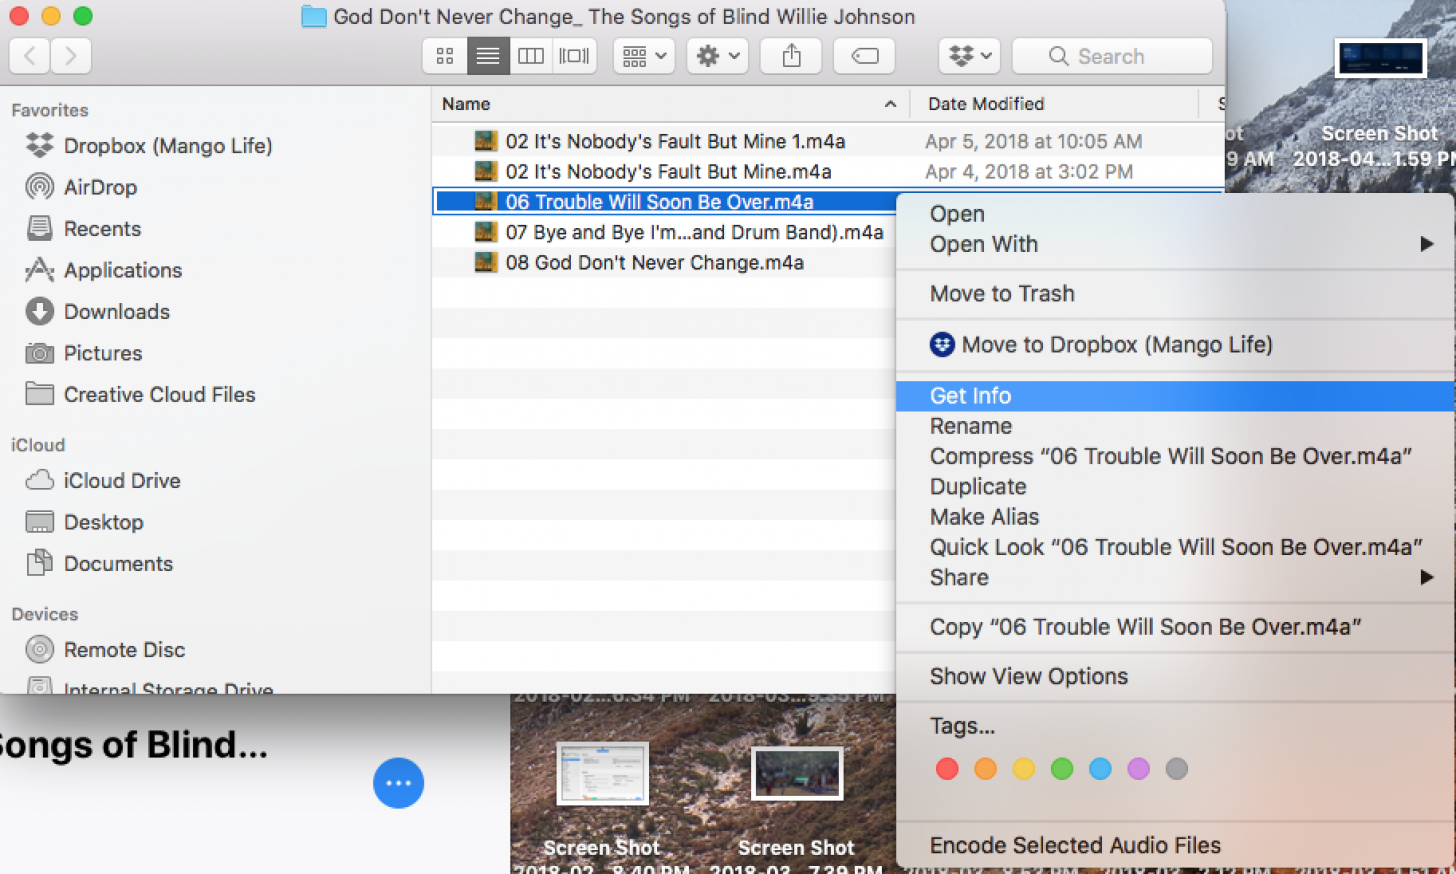
- Right click on your song snippet and click on Get Info.
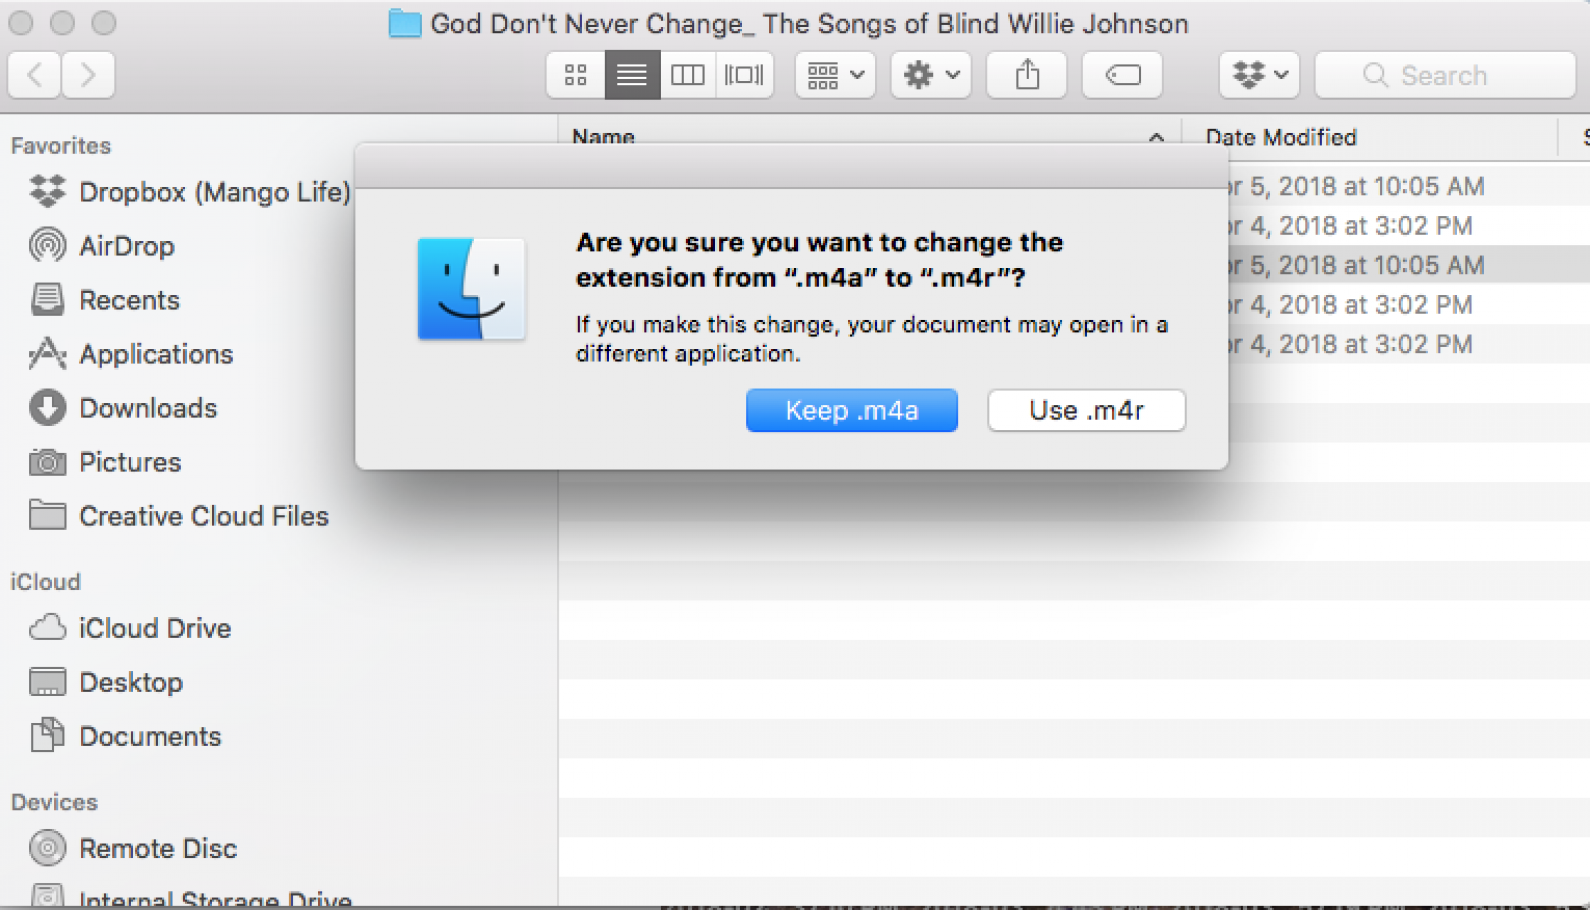
- Change your file extension to .m4r, then select Use .m4r to confirm.
- Drag and drop the .m4r file to your desktop.
- Go to iTunes and delete the snippet you created by right clicking on it and choosing Delete.
- Plug your iPhone into your computer. Your iPhone will appear in the lefthand iTunes menu under Devices
- Now drag and drop the .m4r file of your song snippet from your Desktop to your iPhone in iTunes.
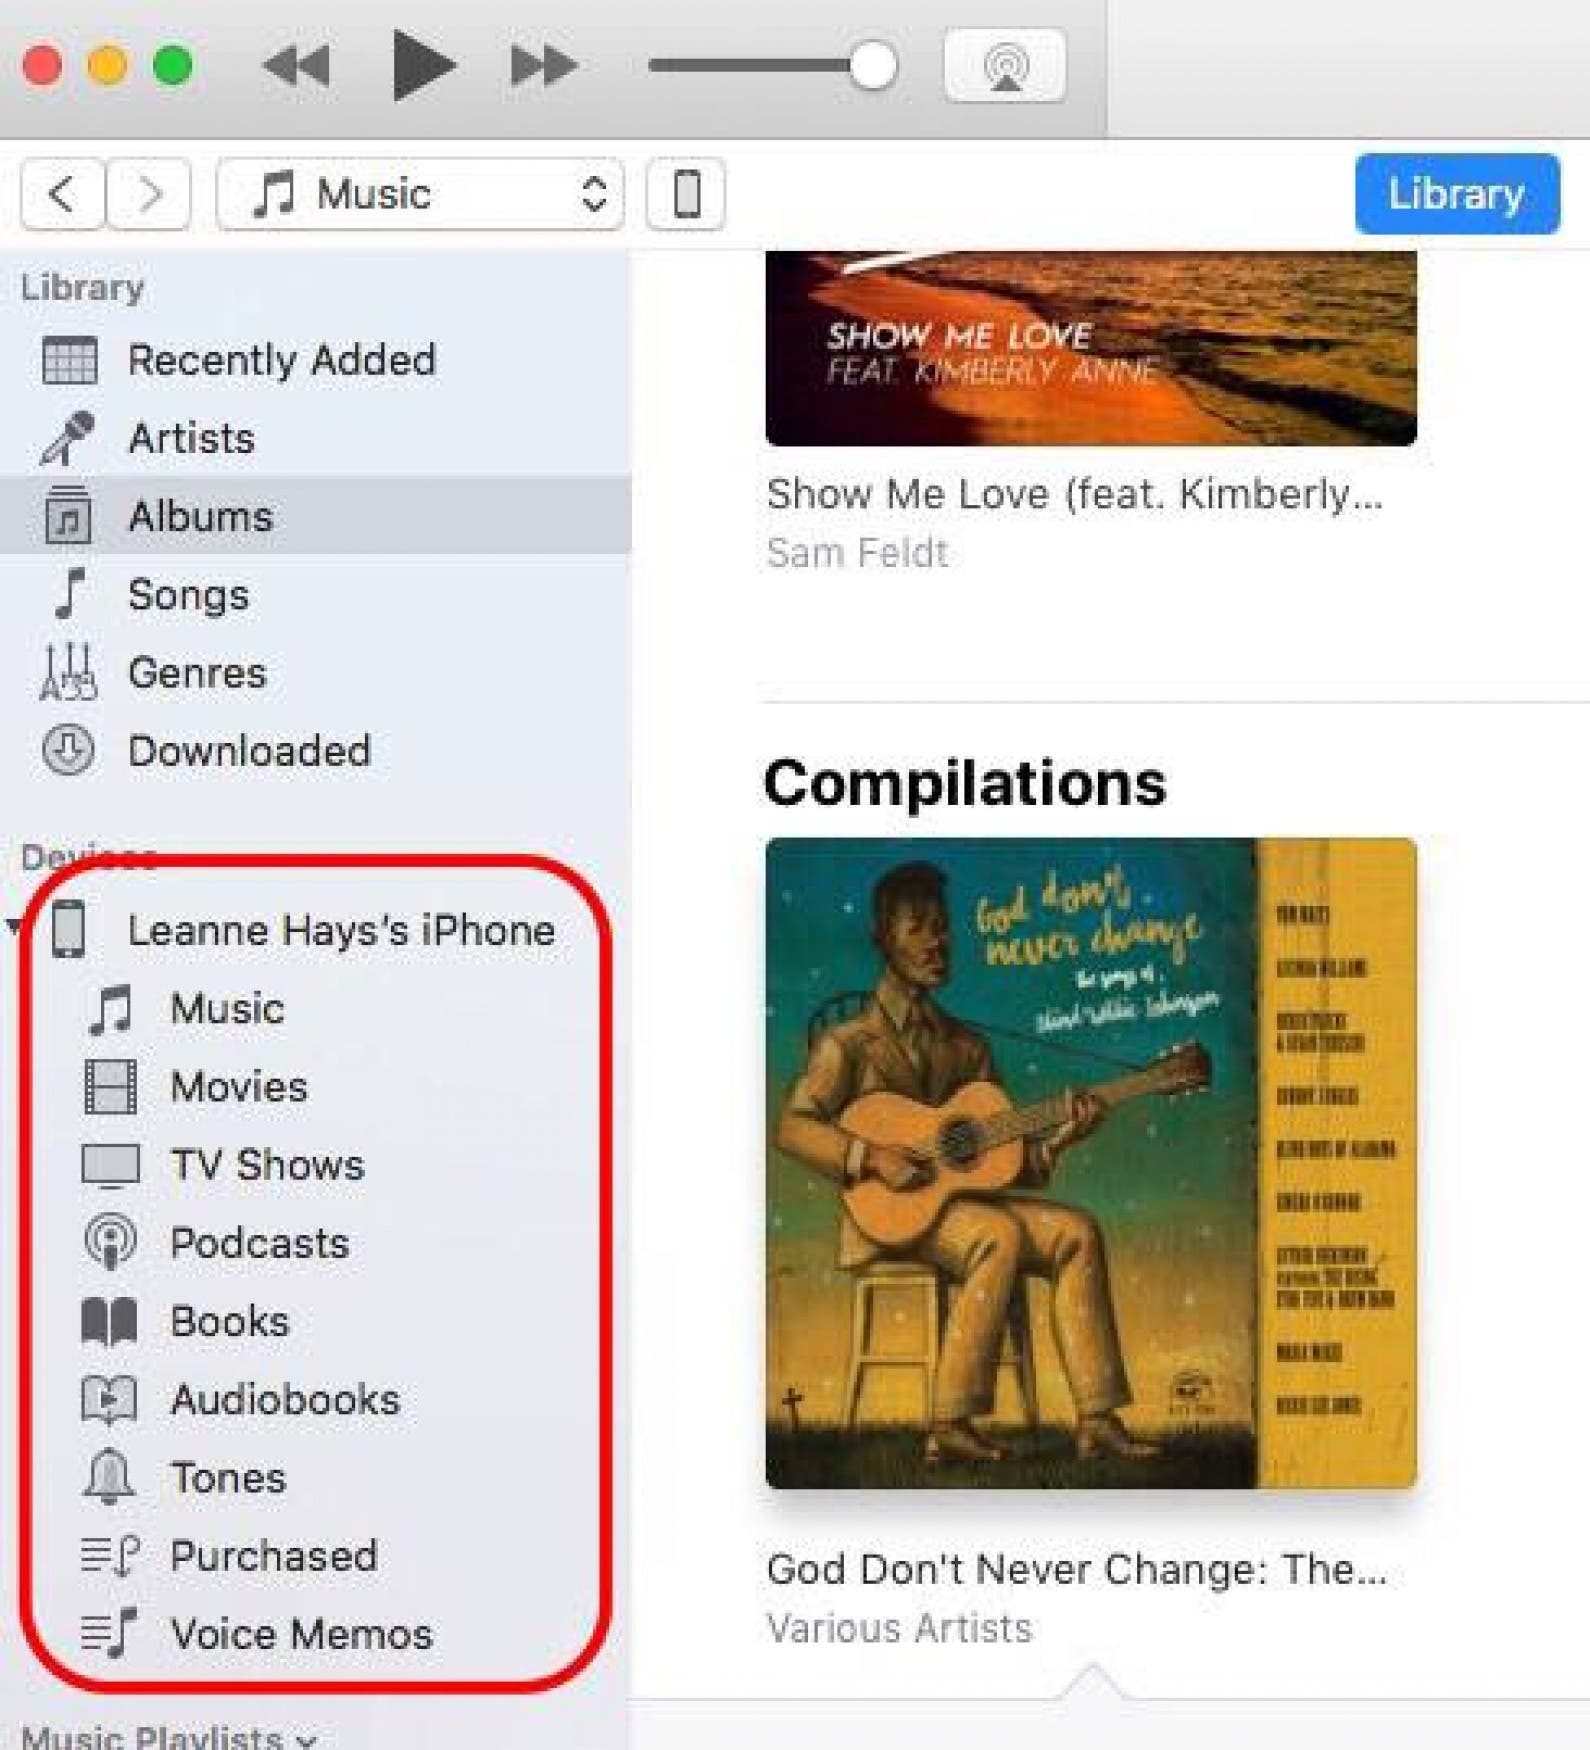
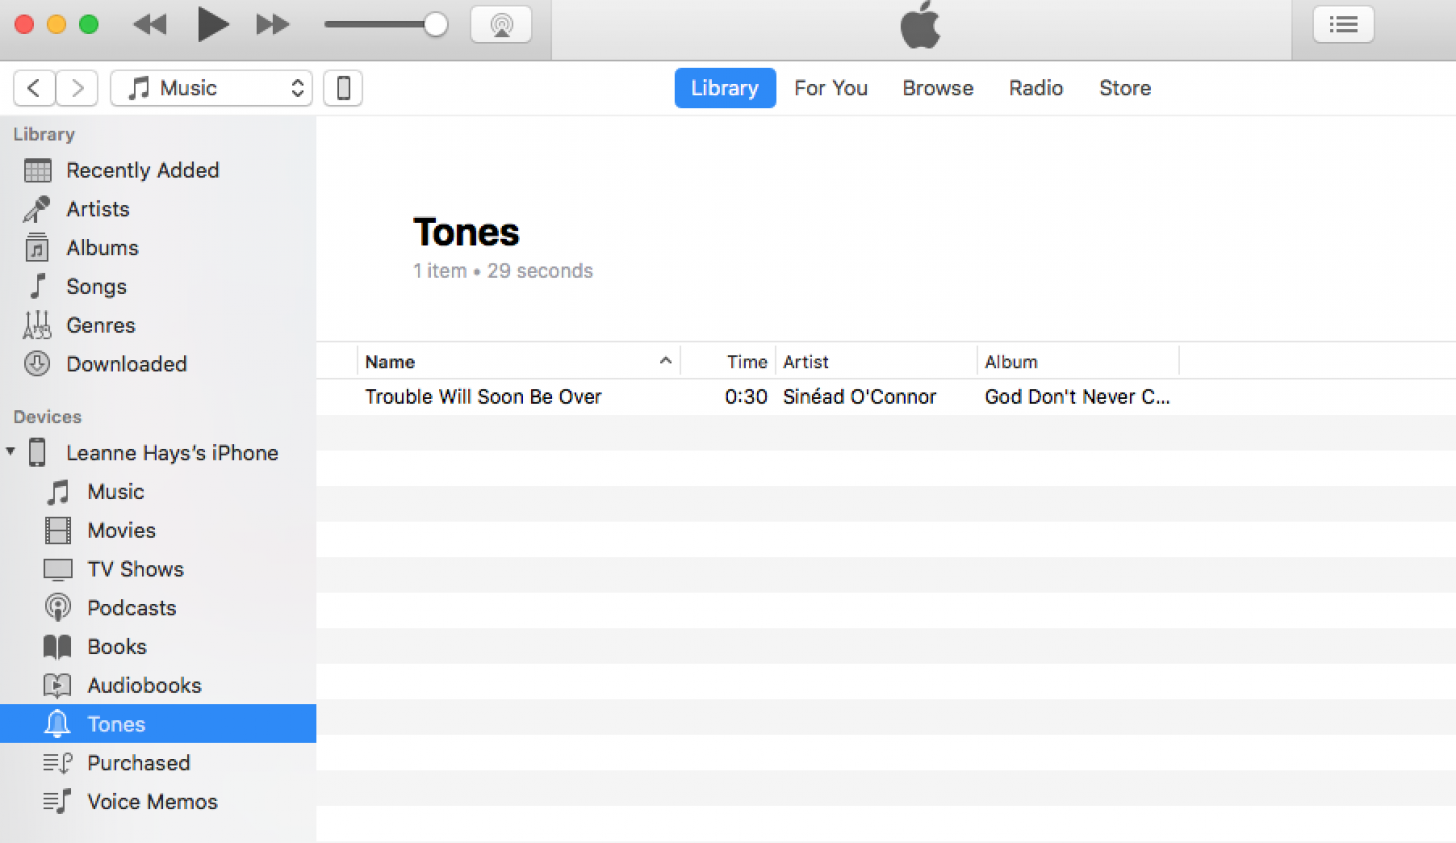
Now when you click on Tones, you'll see your ringtone!
How to Download Your Ringtone to iTunes for PC
If you have a Mac, you can skip this step, but if you have a PC, you'll need to complete these steps to get your ringtone into the Tones section of iTunes.
- Return to iTunes and add the renamed file back into iTunes library. To do this, either drag the file from Windows Explorer into iTunes or go to File and then Add File to Library within iTunes. This will add the .m4r version of your song back into iTunes.
- Back in iTunes, switch from "Music" to "Tones" from the list in the top left corner of your screen below the menu bar. Under Tones, you should see your ringtone file.
How to Put Your Newly Created Ringtones on Your iPhone With a PC
- Plug in your iPhone to your PC with a USB cable.
- Drag your ringtone file from iTunes to your iPhone icon.
If you have a Mac, your ringtone will already be on your iPhone. As you see in the picture above, Tones in the drop-down menu under my device, "Leanne Hays's iPhone." Hooray!
How to Start Using Your New iPhone Ringtone
On your iPhone:
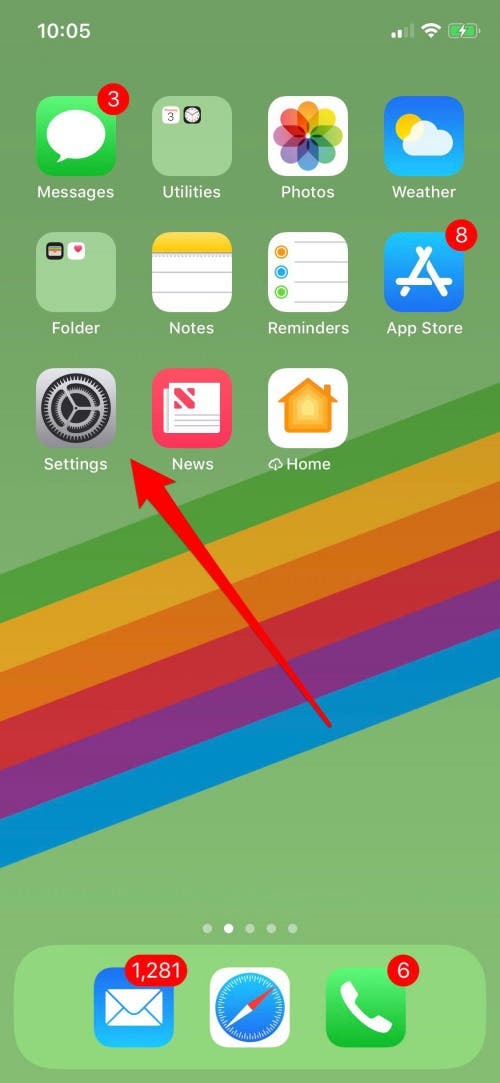
- Open the Settings app.
- Tap Sounds & Haptics.
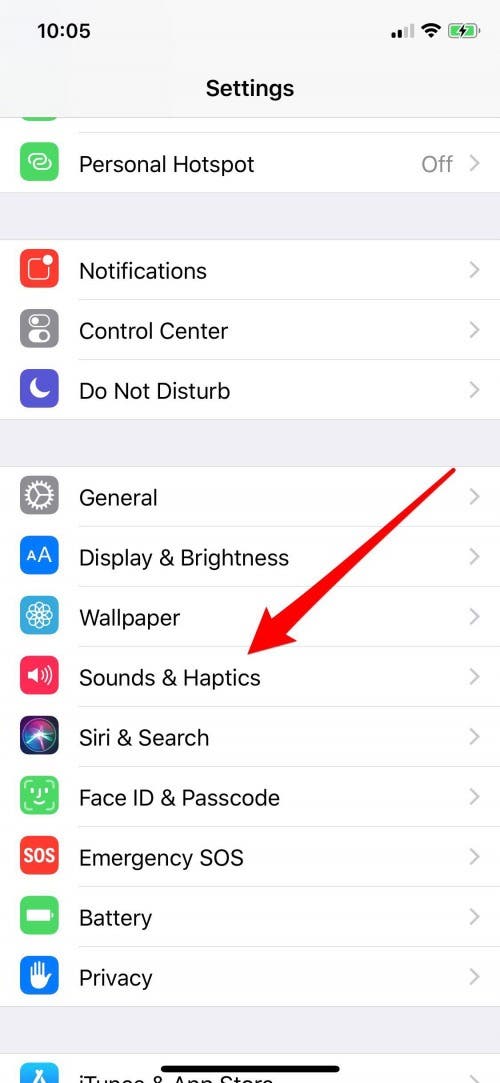
- Tap Ringtone.
- Under Ringtones, you should see your ringtone file as an option. Select it, and a sample will play for you, You now you have your very own customized ringtone!
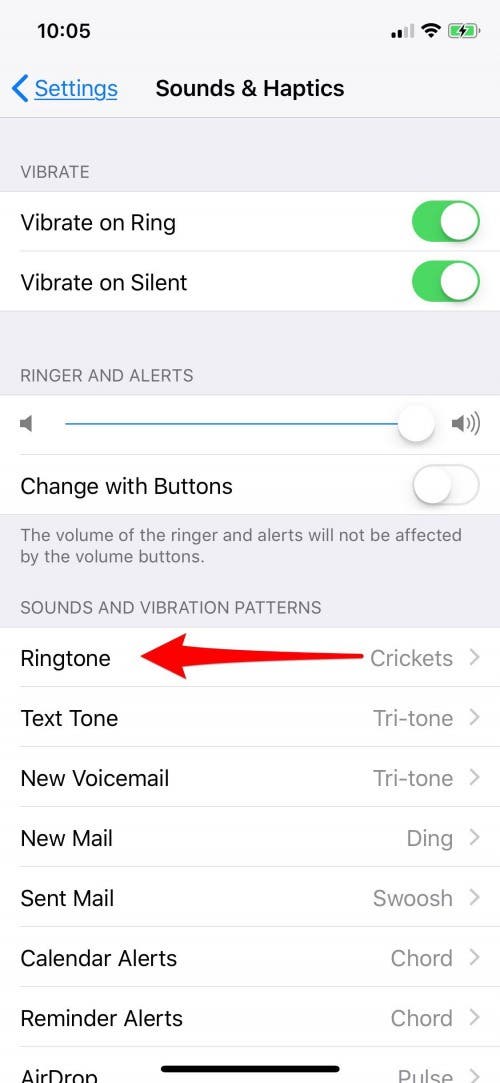
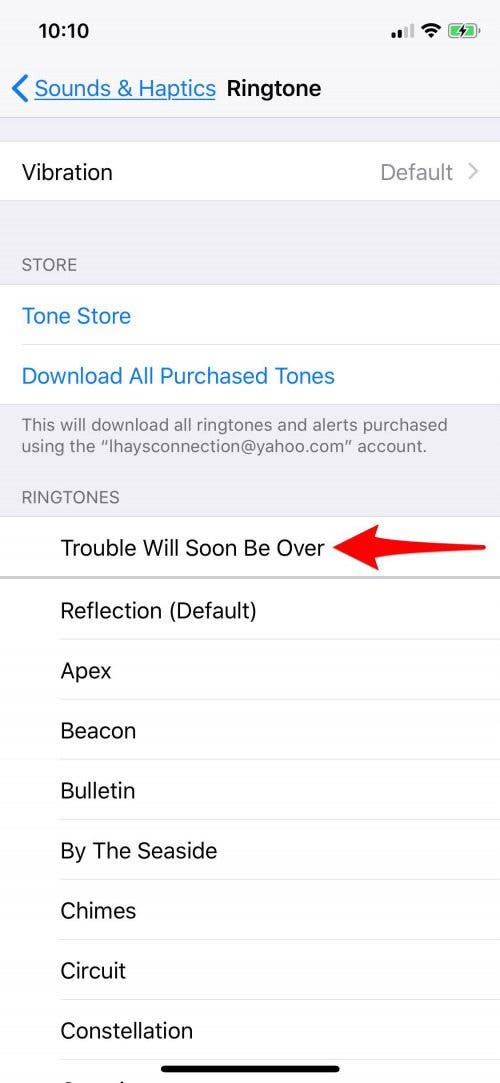
The next time your iPhone rings, you'll hear your custom ringtone. Have a friend call you to try it out!
Note: You can also assign your newly created ringtone to just one contact following the steps in this article.
Top image credit: leungchopan / Shutterstock.com


