Are you considering using your iPad for business, or has your employer given you an iPad for work? They can be versatile tools, lighter and more portable even than a laptop, but if you’ve never used one for work before, working on an iPad might take a little getting used to. We’re here to help you hit the ground running.
Jump To:
- How to Set Up Your iPad
- Get an External Keyboard
- How to Use Your On-Screen Keyboard as a Trackpad
- Apps for Work
- Going Online
How to Set Up Your iPad for Business Use
When setting up an iPad for business use, unless given other instructions by your employer, start the way you would with a new iPhone. You can set up your new device using the Setup Assistant. If you have an iCloud or iTunes backup of another Apple device, you can restore apps and data that way.
iPad for Business: Get an External Keyboard
As accessible as the iPad’s built-in keyboard might be, I still haven’t figured out how to master home-row typing on one. If you’re using your iPad for work, you are probably going to want to invest in an external keyboard. Once you have your external keyboard set up, you’ll probably want to learn some keyboard shortcuts to make navigating your iPad without a trackpad or mouse easier. If your work requires precision (for instance, if you’ll be doing any kind of designing), you might also want to consider an Apple Pencil. With all this set up, you can all but turn your iPad into a laptop. For more tips on iPad accessibility, consider signing up for our free Daily Tip newsletter.

How to Use Your On-Screen Keyboard as a Trackpad
Your iPad doesn’t have its own mouse or trackpad, but you can use the on-screen keyboard as a trackpad. Here’s how to enable this feature:
- Place two fingers on the keyboard and wait for the keys to turn gray. Now you can move both fingers to act as a cursor in any editable field.
![Trackpad mode]()
- To select text, use this method, then hold one of your fingers in place while moving the other to drag your cursor across the text you would like to select.
![Manually select text]()
Setting Up an iPad for Business Use: Download Apps for Work
You may need a variety of different apps, depending on the work you do, but here are some that are helpful no matter what you do for a living.
If you’re using your iPad for work, you’ll undoubtedly need access to your work email. You can get to your email much quicker through the Mail app than using your browser.
- Tap the Mail app in your dock on the Home Screen.
![Find the Mail app]()
- Select the service you’d like to sign in through. I’m using Google.
![Select email provider]()
- Confirm that you will allow the Mail app to share information with your email provider.
![Tap continue]()
- Now follow the instructions on your screen to finish setting up your email for iPad.
Storing & Accessing Files in the Cloud
Google’s productivity suite includes Google Drive, Docs, Sheets, and Slides. These apps allow you to collaborate with your work team on documents, spreadsheets, and slideshows. You may already be using them, and if so, getting setup with your existing Google Drive account is as easy as downloading the app in your App Store. We’ll go over this process step-by-step, so that you’ll know what to do when installing other apps for work (or for fun), too.
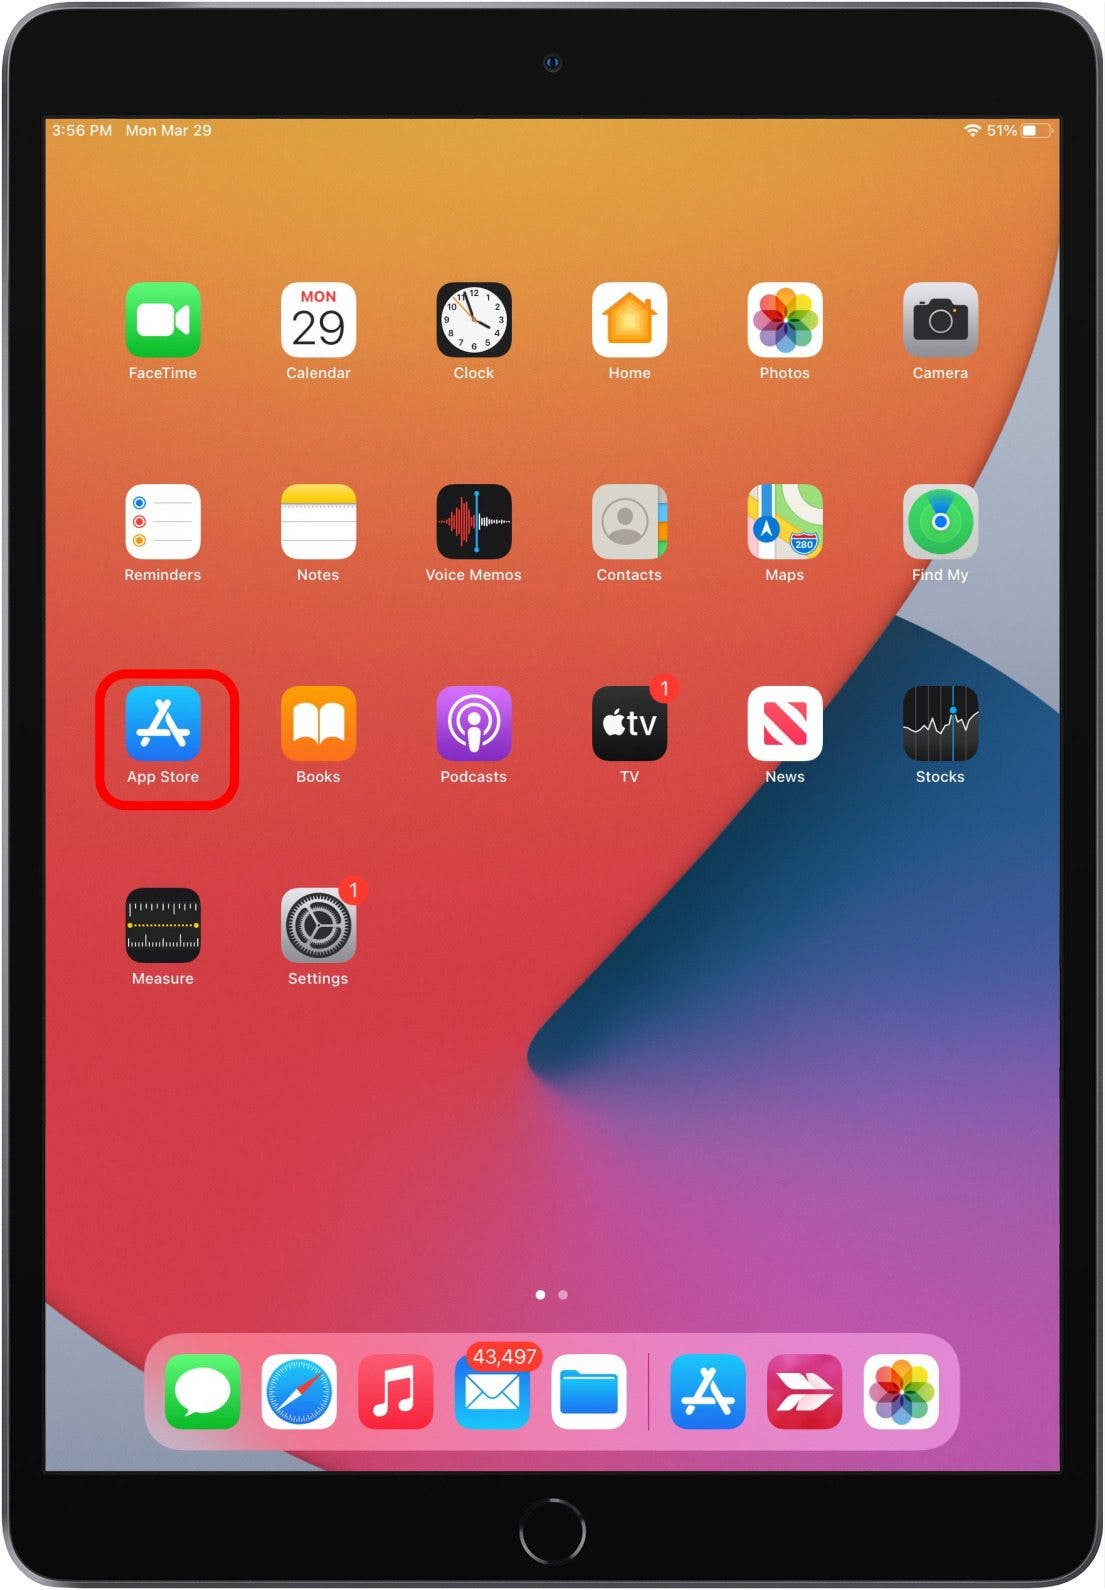
- Find the App Store on your Home Screen.
![Open App Store]()
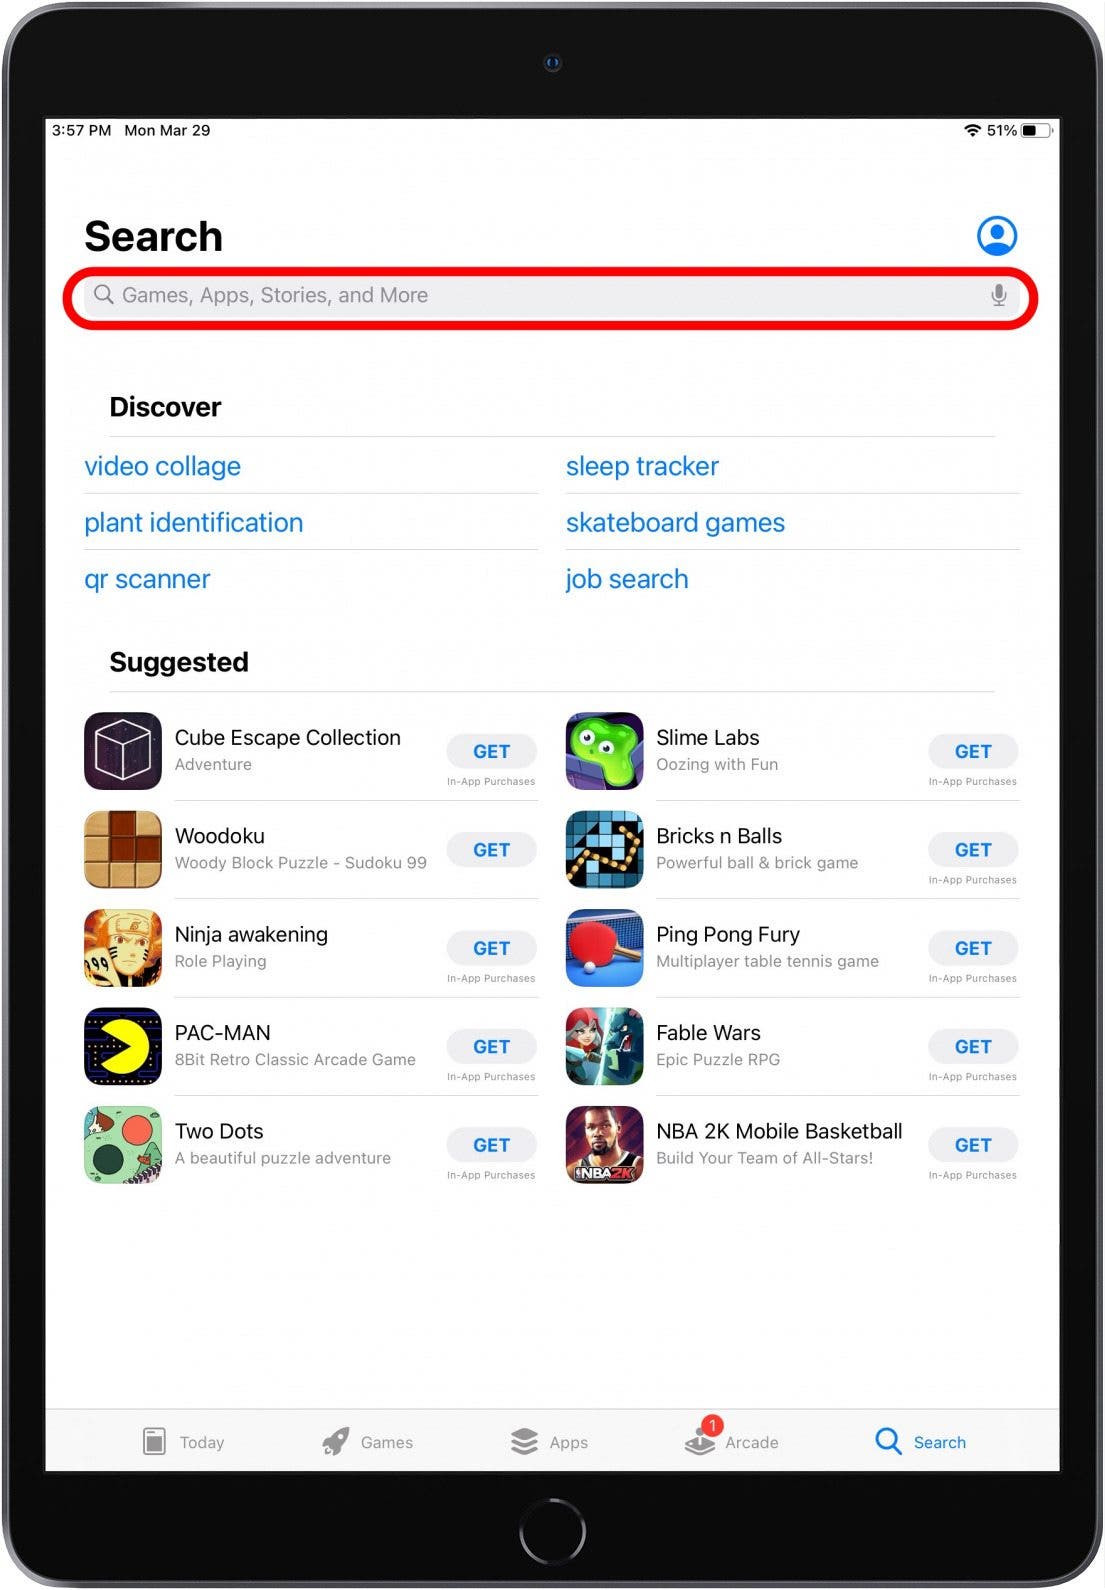
- Search for Google Drive.
![Search App Store]()
- Tap Get.
![Tap Get]()
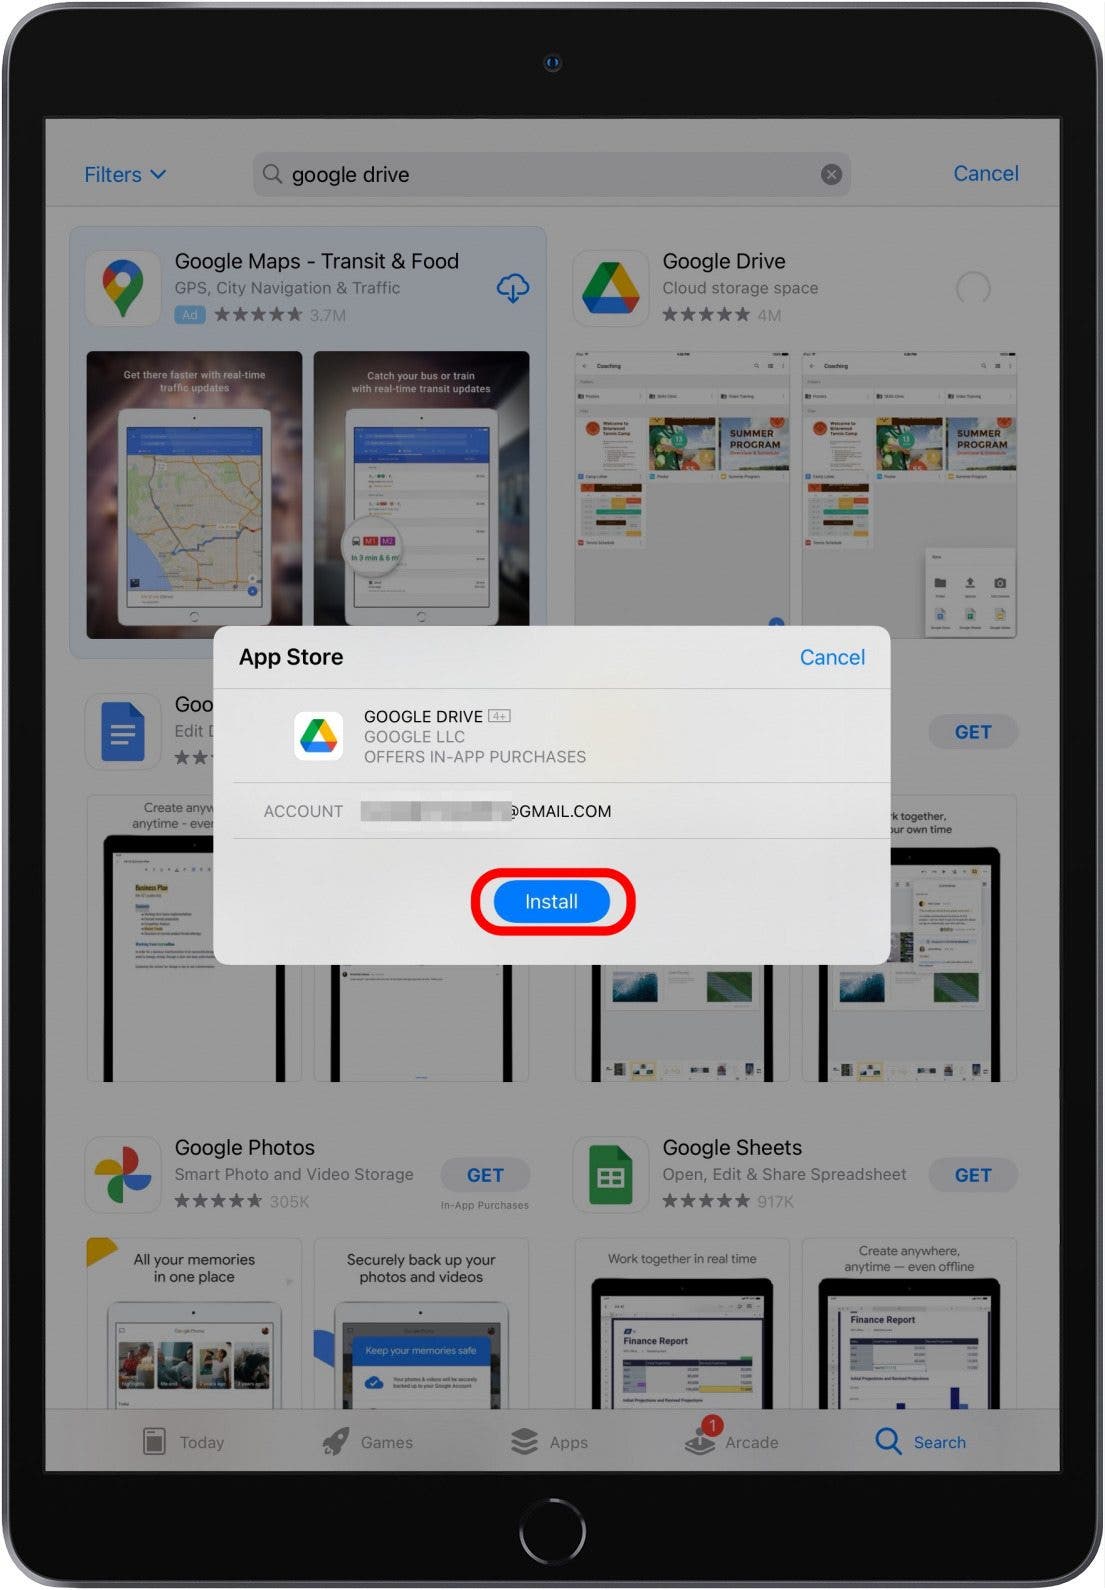
- Tap Install.
![Tap Install]()
- Sign in with your Apple ID to authorize the free download.
![Sign in with Apple ID]()
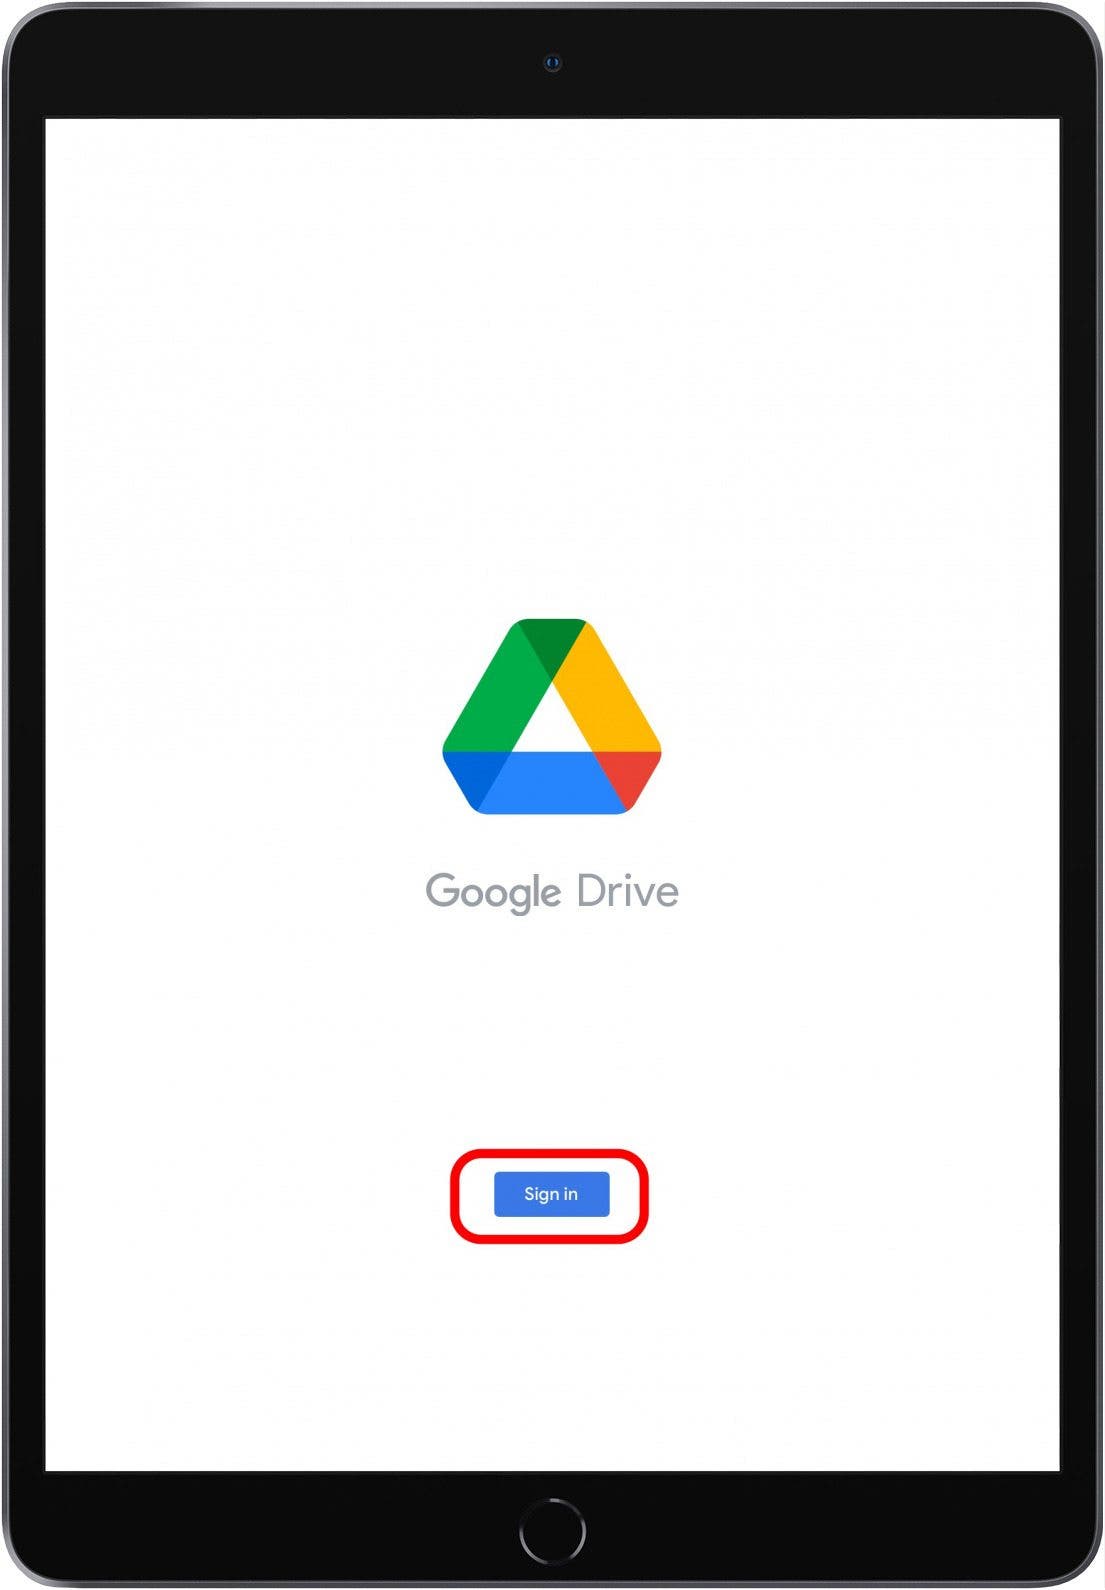
- Tap Sign in.
![Tap Sign In]()
- Tap Continue to authorize the Google Drive app to sign in.
![Tap Continue]()
- Then follow the instructions on-screen to verify your sign-in. Now you should be in your Google Drive. From here, you can edit and share all of your Google Docs, Sheets, and Slides with your whole team.
Another popular option for sharing files with your team is Dropbox. It's likely as popular as it is because it’s utterly simple to set up and use. It integrates with many other apps (such as Microsoft Office 365) and services on your iPad, making it easy to save files to your Dropbox account with just a few taps. You can also set up the app to automatically back up all your photos and videos, if that’s a feature you’d like. For teamwork, the absence of online file collaboration is a real downside. You get 2 GB of free storage, or you can upgrade to Pro for $8.25/month and 1 terabyte of storage. You can find and install Dropbox in the App Store as well, and the installation and sign-in process will be very similar to what we went over above when installing Google Drive.
Using Microsoft Office Suite
If you’ve never used Microsoft Office Suite before, our professional lives have been very different indeed. Chances are, you’ve been using this suite of products to manage your work for years now. If not, you shouldn’t have much trouble getting started. Microsoft Office’s apps for the iPad are very well designed and optimized for tablets with split-view multitasking support. If you use just one of the Office apps, you can buy them a la carte with the ability to set them up on your desktop and several mobile devices. Since I use word processing often, buying Microsoft Word as a one-time purchase was a no brainer, and now I can access all my documents on my iPad, iPhone, and laptop. Documents sync using Microsoft’s cloud service called OneDrive. It also boasts Dropbox integration, so you can easily access and save Microsoft docs to your Dropbox account.
Scheduling & Taking Notes
Fantastical (free) is one of the most popular productivity apps. From the Calendar view, you will see your calendar and a list of your upcoming events. From the DayTicker view, you’ll see a scrolling week-view pane across the top and a list of your activities and reminders. Swipe down on the DayTicker to have a full-screen week view. Tapping on an event or a reminder allows you to view more information. You can add reminders and appointments by tapping the plus icon. Although the free version of Fantastical is great, if you want extra features such as Calendar sets, event and task templates, etc. then you’ll need Fantastical Premium.
There are lots of great note-taking apps for the iPad, but Microsoft OneNote (free) has a lot of features that make it especially useful. The ability to type, draw, and attach a whole slew of other documents is priceless. You can also create PDFs in your notebook, which you can annotate, draw, and type on to make it the most useful for you.
Use GoodReader ($5.99) to view, manage, and annotate PDFs. You can extract text, combine files, create ZIP archives, and even listen to audio files. It’s great for signing PDFs and managing large files. While the iPad’s Markup feature lets you do some of this, GoodReader is more full-featured.
NoteShelf ($9.99) provides a super smooth writing experience on the iPad. Create notebooks with personalized covers, take notes, and keep them organized. But that’s just to start. The app allows you to record audio, edit images, add shapes, annotate documents, and create sketches. It’s one of the best note-taking apps out there on iPad.
iPad for Business Use: Going Online
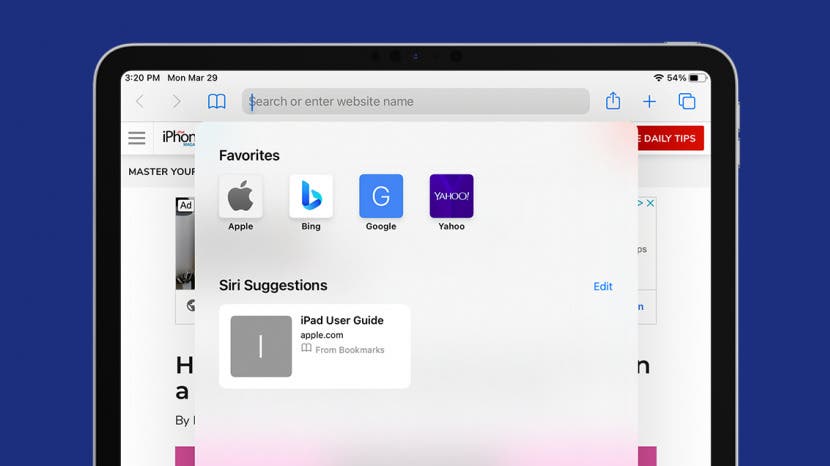
We’ve already covered a lot of ways you can turn your iPad into a work powerhouse. Here, we’ll cover how to tailor Safari to help you be more productive when going online. You’ll learn how to view desktop versions of sites as well as how to enable reading mode, to make your experience better depending on your task.
View the Desktop Versions of Sites
Mobile versions of sites are great in that they offer streamlined, simplified options. But when you’re using your iPad for work, sometimes you need all of a websites’ features. To do this, tap the double “aA” icon in the toolbar. This will bring up a few options. Select Request Desktop Website.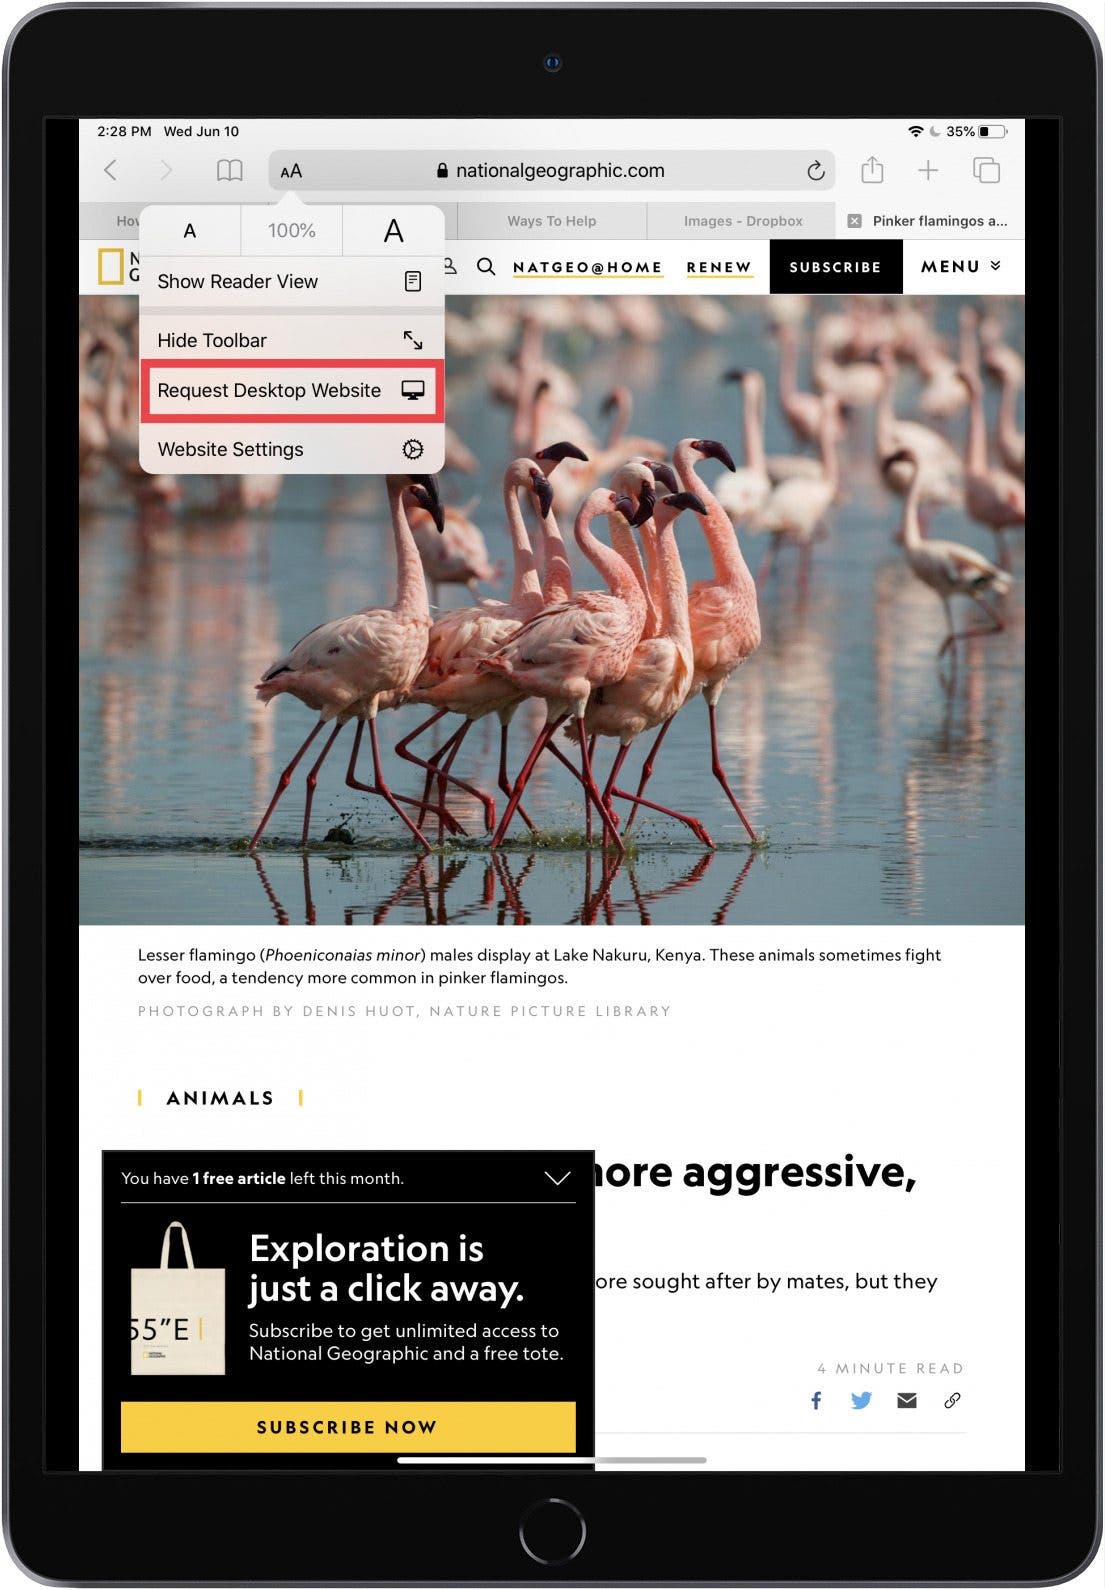
Reader View
If you want to do research on your iPad, you want the reading experience to be great. Since web pages are often cluttered with ads and menus, you can get distracted if you're just trying to focus on reading the text. Fortunately, Safari has a Reader Mode that removes all those distractions and presents the page's text and images in a simple and attractive fashion. To invoke Reader Mode, just tap the double “aA” icon next to the address bar. (Note: not all web pages can be viewed in Reader Mode.) To customize Reader Mode, select the double aA icon again. From. Here, you can change text style and color.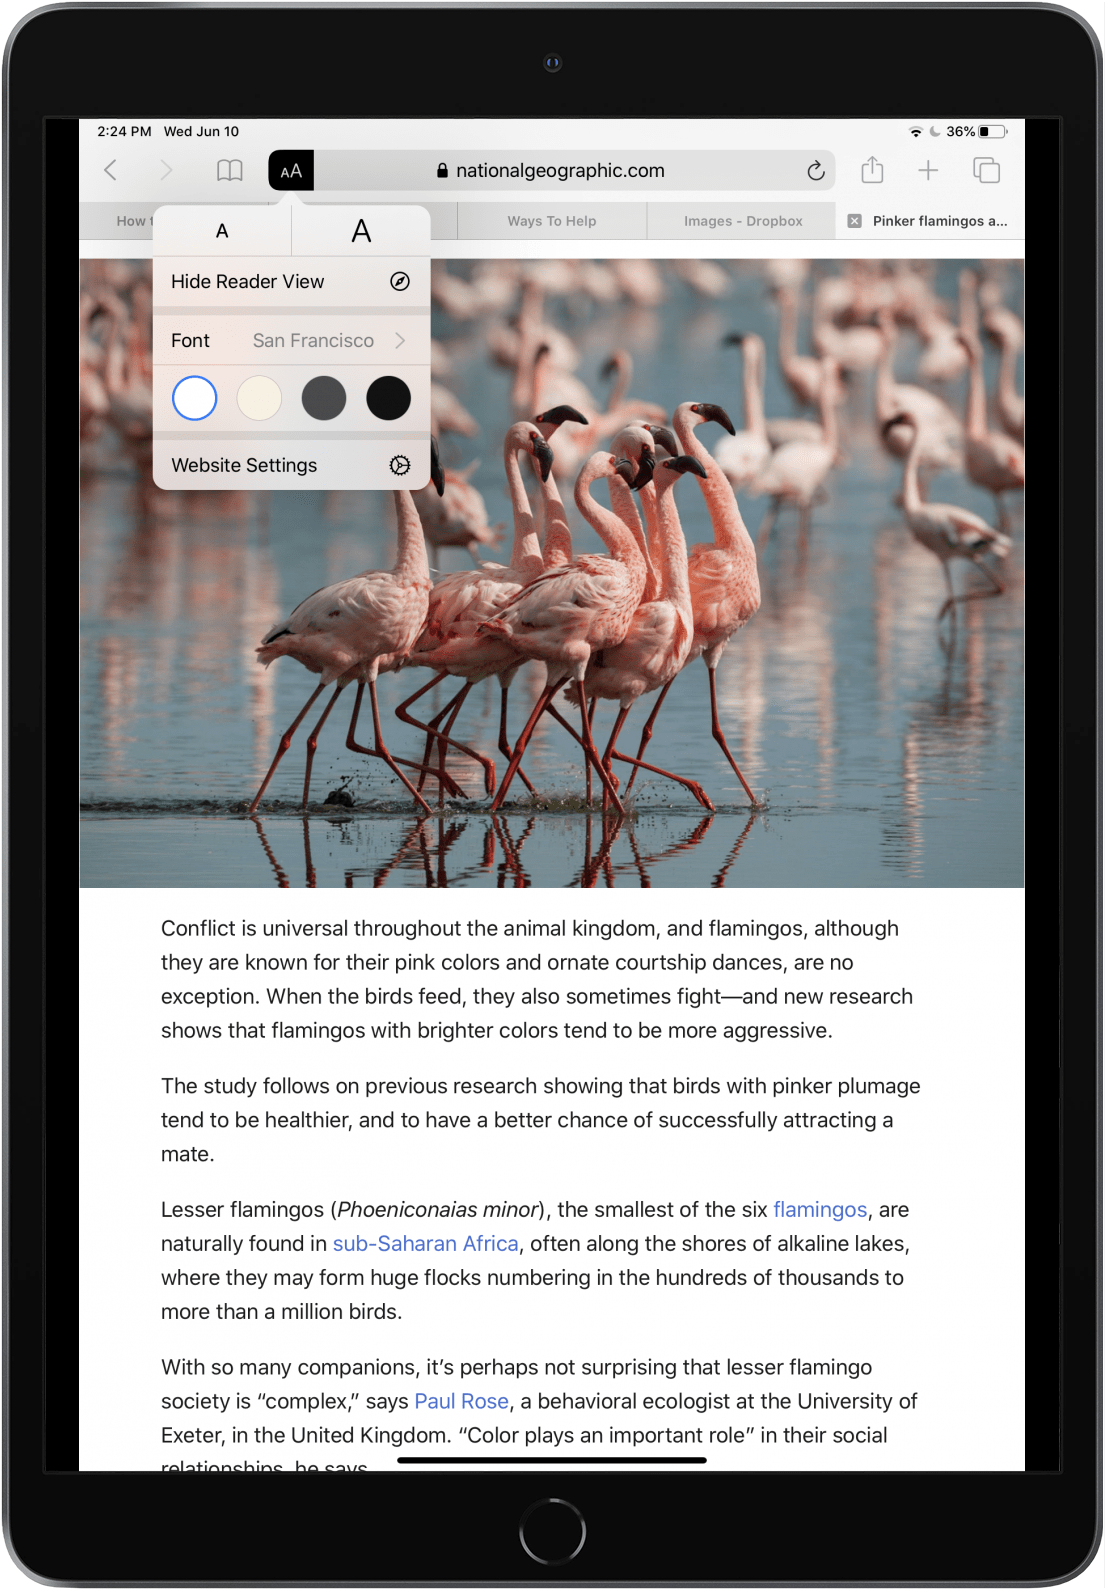
Download Manager
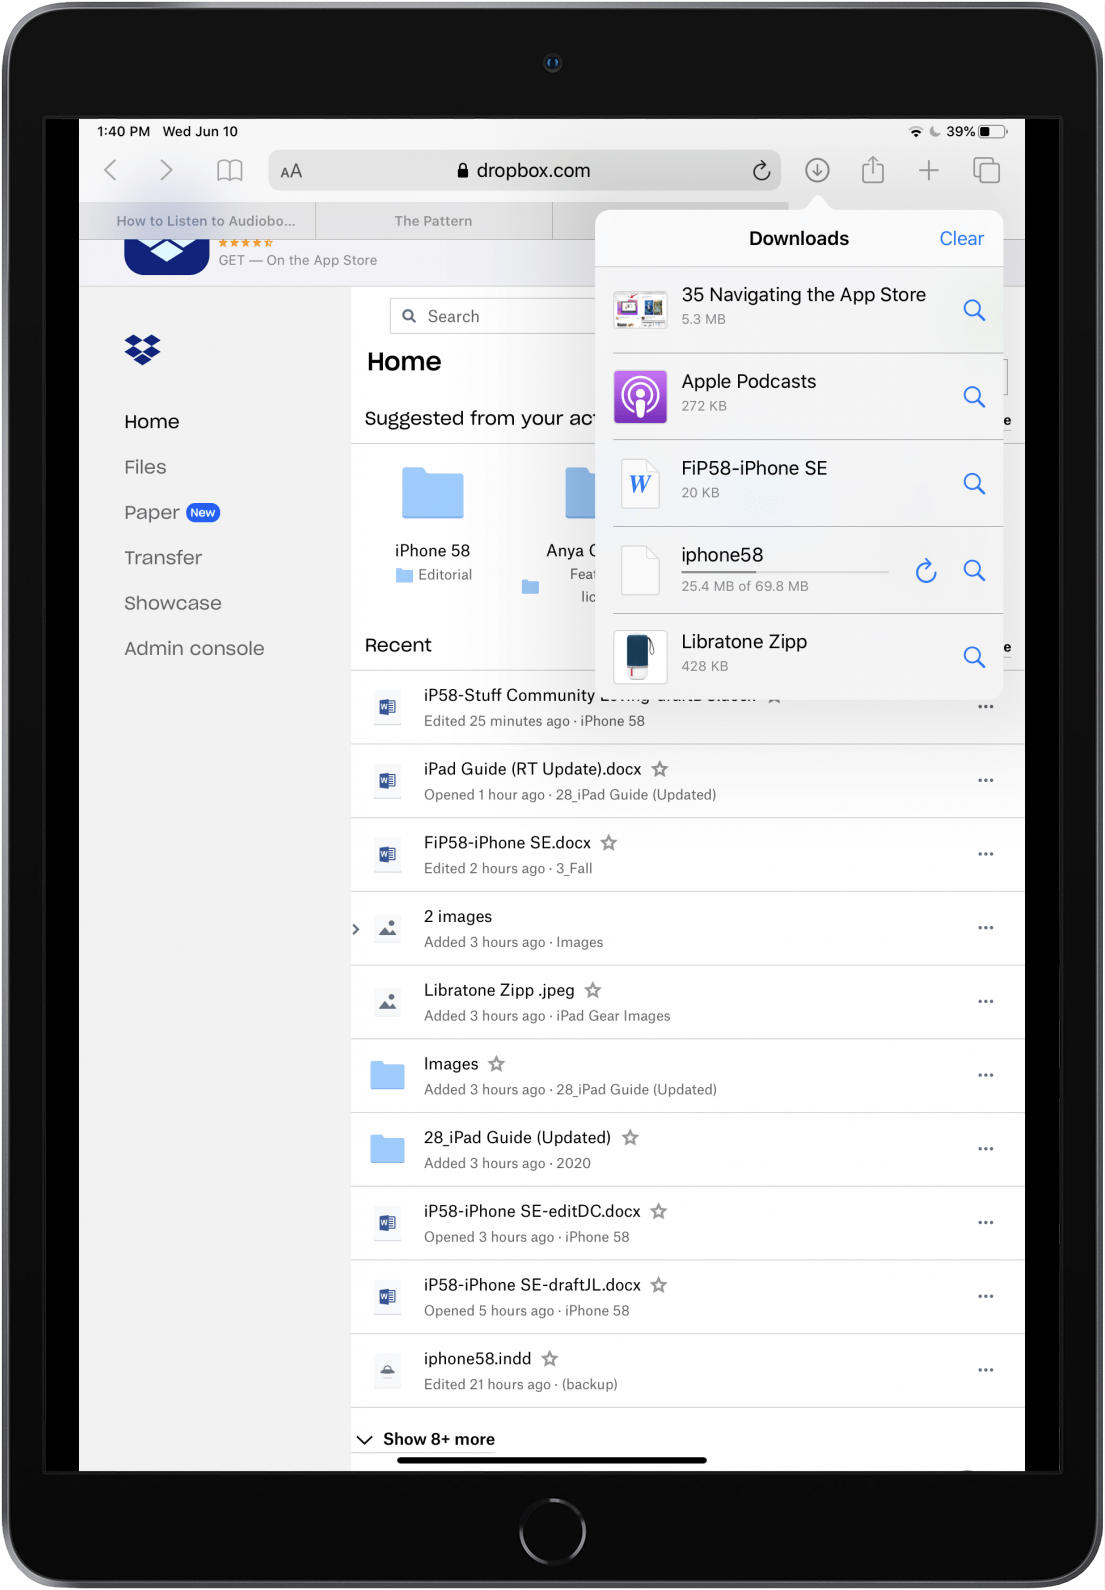
When you download something in Safari, you’ll notice a Download menu in the toolbar. When you click on this menu, you’ll be able to view your downloads the same way you would on your computer. You’ll see a list of your previous downloads, as well as current downloads. Tap the magnifying glass icon next to your download to view the folder it’s and move it where you like. Tap Clear to clear your downloads.
Upload Controls
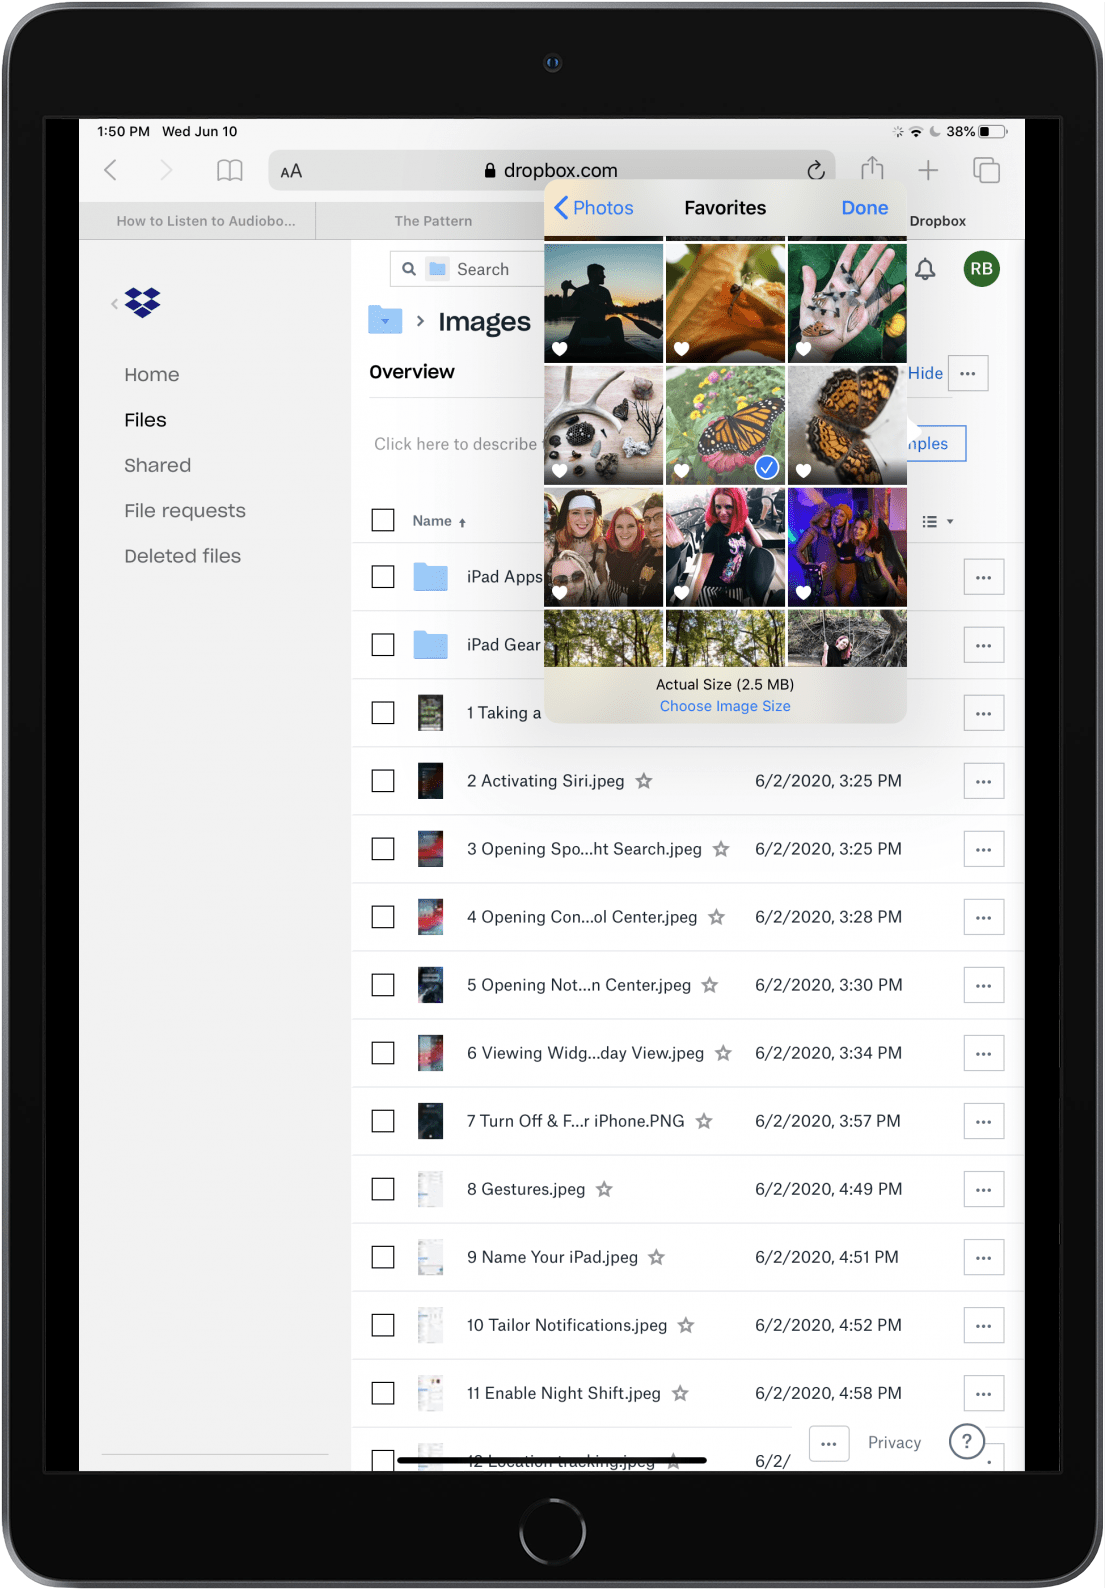
When you upload content online, you will have options to adjust the file size. If you choose to upload an image from your Photo Library, for instance, you’ll see Choose Image Size along the bottom of the window. You can then choose from the following options: Large, Medium, Small, or Actual Size. Choose the option you like.
Hidden Tab Options
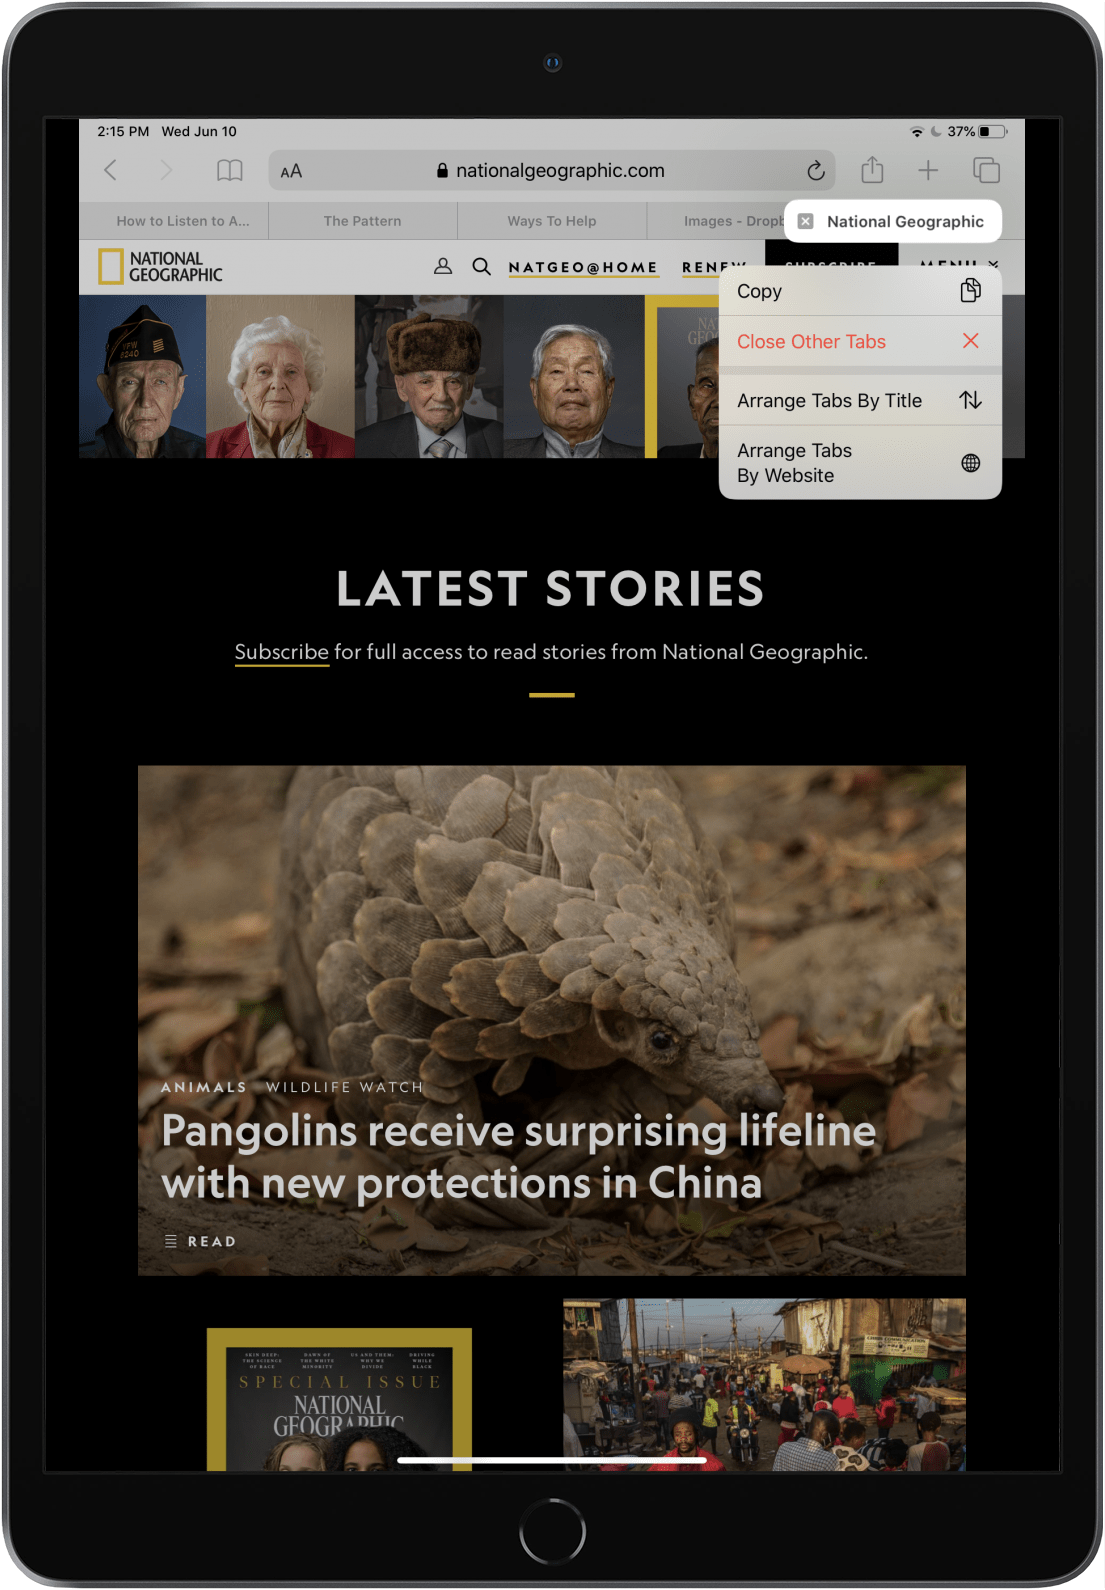
There are a variety of tab options in iPadOS. For example, if you have a bunch of tabs open and would like to quickly find the one you’re looking for, start typing a relevant term in the Search bar and you’ll see Switch to Tab in the list with the website listed beneath it. You can also tap and hold on individual tabs to view options such as Arrange Tabs By Title, Arrange Tabs By Website, Copy, and Close Other Tabs. You can also explore how to use Tab Groups for additional productivity options.
