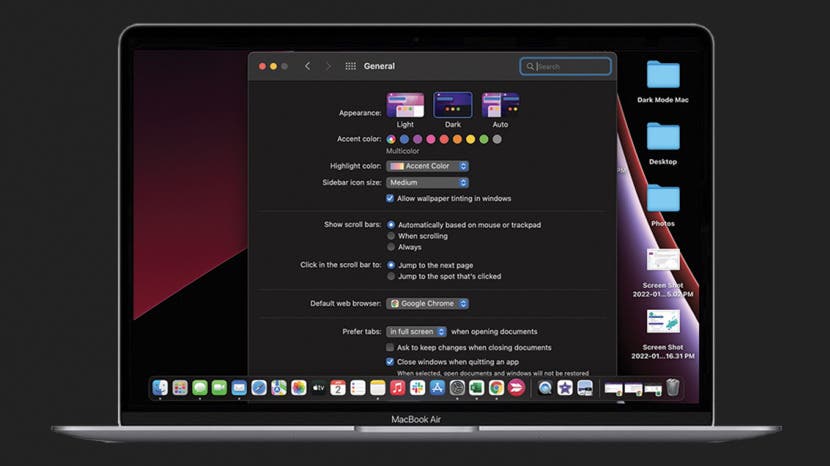
Dark Mode on Mac works just like Dark Mode on your iPhone and iPad, and the primary purpose is to help with eye strain by reducing blue light exposure which can reduce headaches. Others simply prefer the aesthetics of the dark color background and apps. I'll teach you how to enable Dark Mode on your Mac!
What's in This Article?
How to Enable Dark Mode Mac
Dark Mode, sometimes called Night Mode, uses darker colors and changes the look of your Mac system-wide. This means that it will affect native apps and some third-party apps if they choose to adopt it.
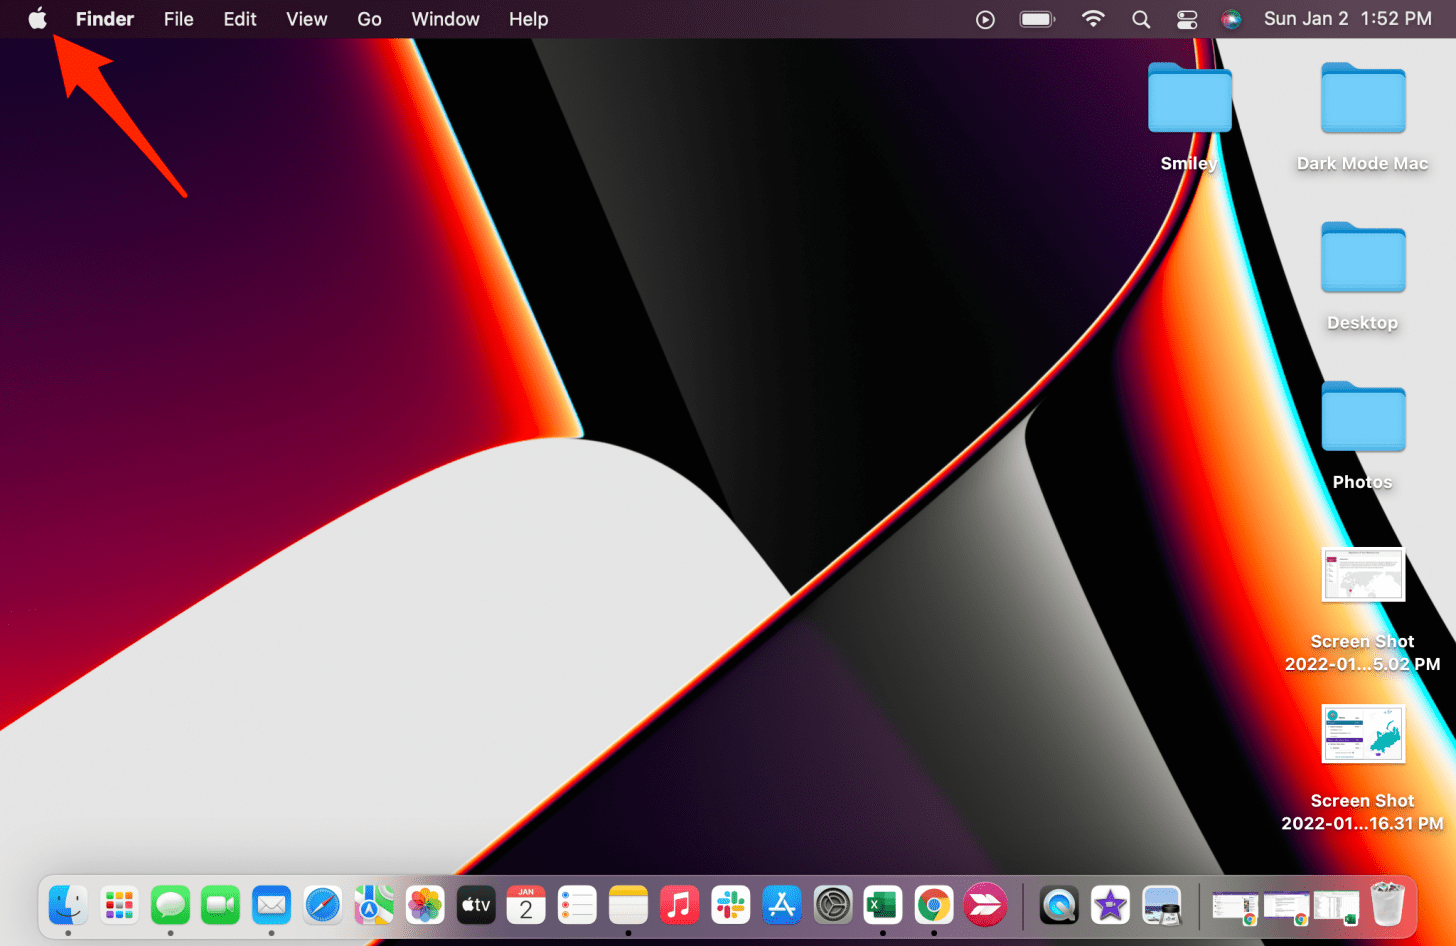
- Click on the Apple in the top left corner of your screen.
![Click on the Apple in the top left corner of your screen.]()
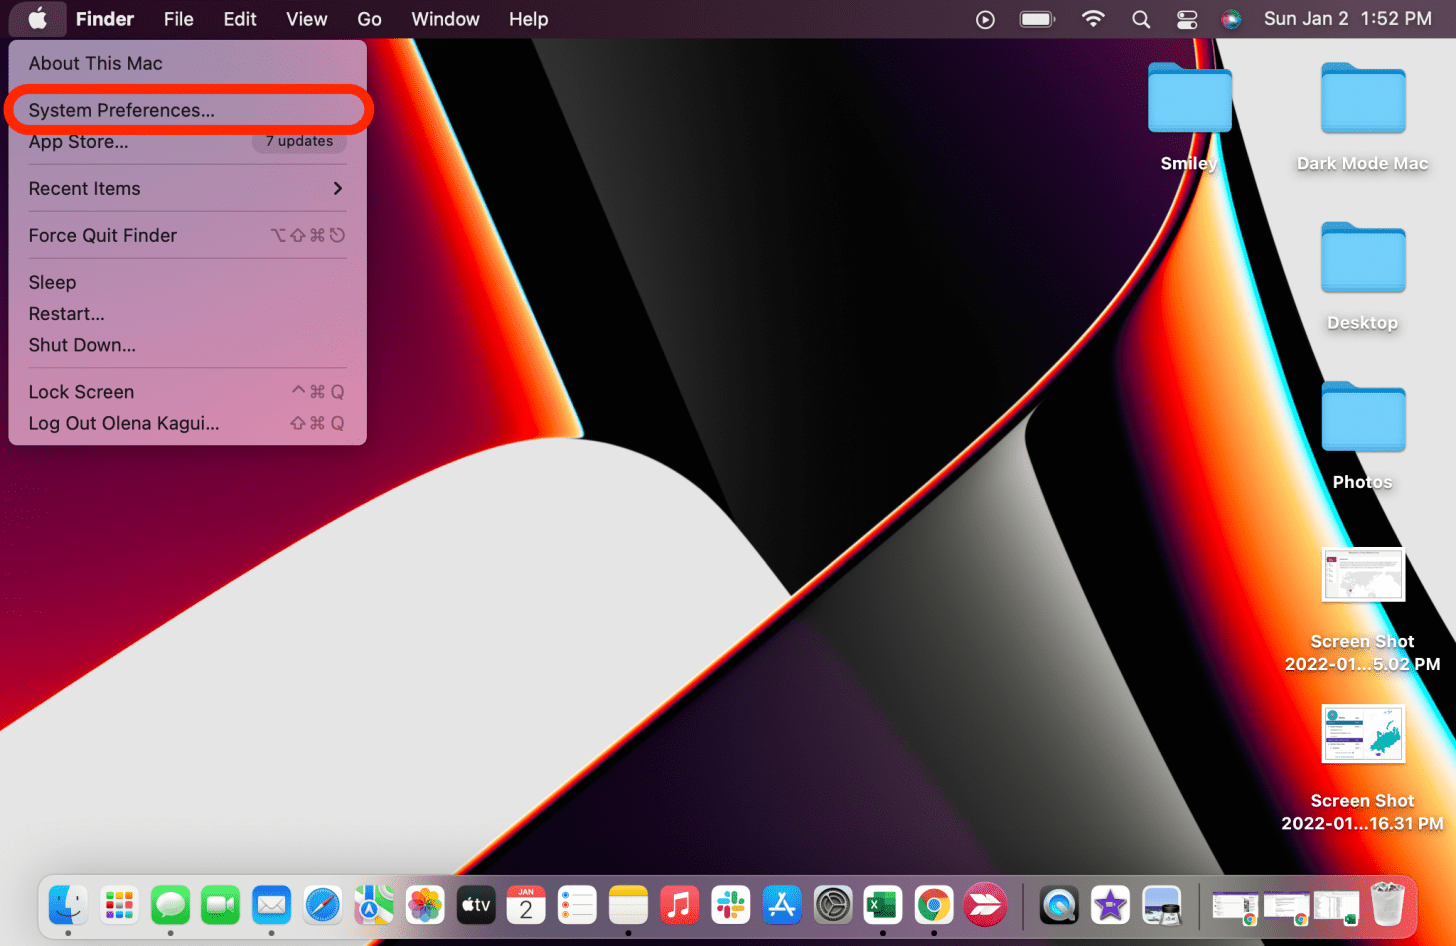
- Select System Preferences.
![Select System Preferences - dark black background]()
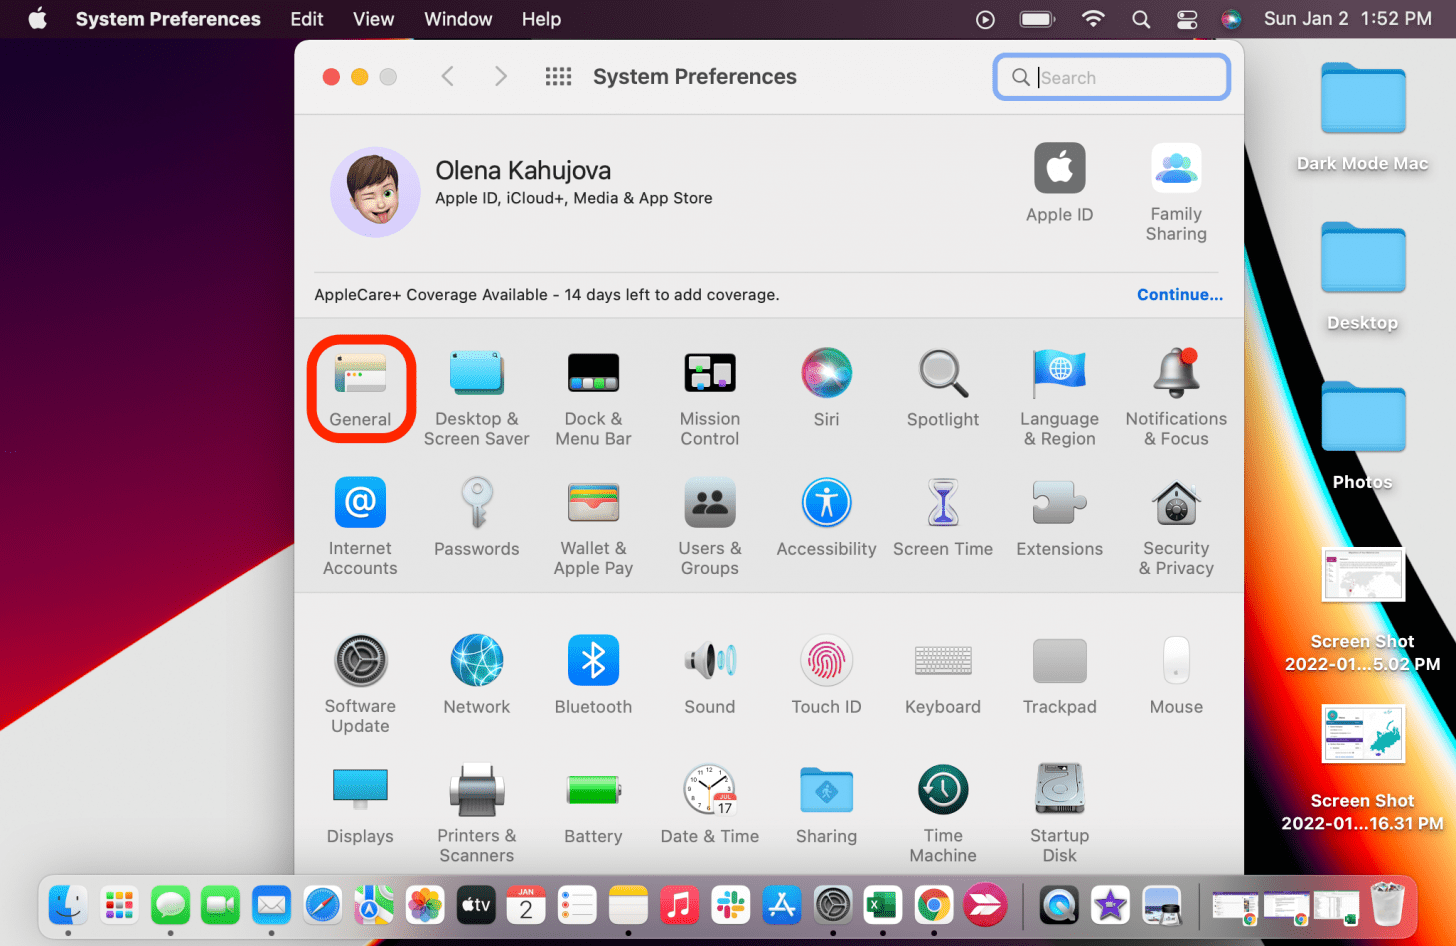
- Click on General.
![Click on General - mac change theme]()
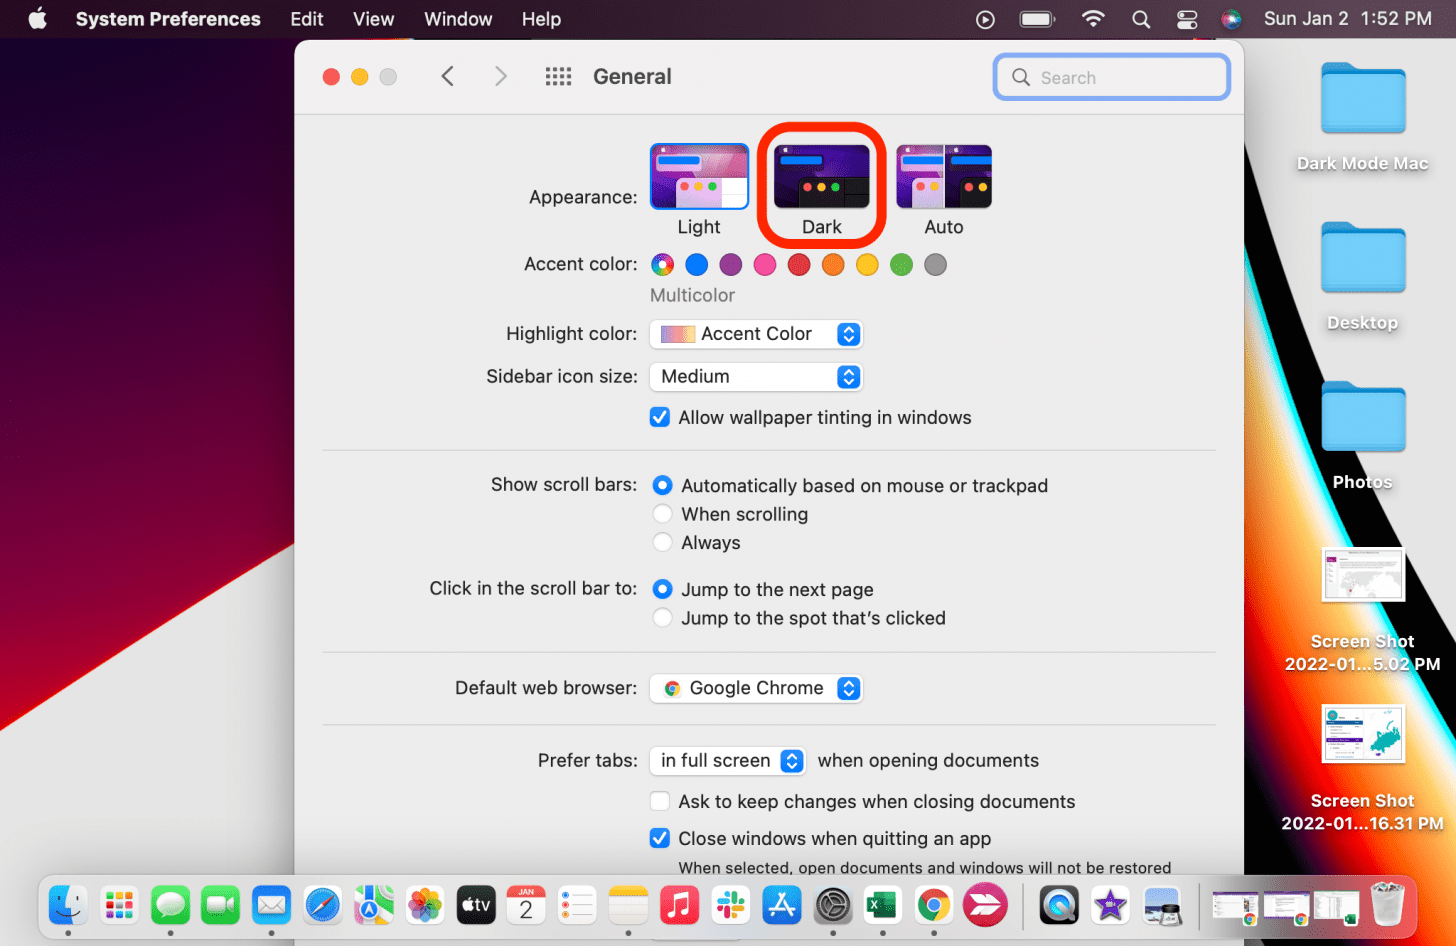
- Select Dark Mode. If you select Auto, Dark Mode will turn on automatically when it’s dark outside.
![Select Dark Mode.]()
If you have a Dynamic Desktop and turn Dark Mode on, your desktop may automatically chance to a still image. You can change it back to dynamic in the Desktop & Screen Saver settings in System Preferences. If you only want a dark color background, but to keep your apps in Light Mode, you can click on Desktop & Screen Saver and change just the desktop image.

Pro Tip: Some people like to enable the MacBook Pro dark screen to hide the new notch. While it doesn’t hide the bar completely, it does make it a lot less noticeable.
macOS Dark Mode Compatibility
Dark Mode is available on Macs running OS X 10.10 Yosemite or newer. However, some apps have specific Dark Mode features that vary based on your running software. You can learn more about these on Apple’s website, and keep in mind that some apps don't work well in Dark Mode. Users have experienced issues with some issues when using the Safari Dark Mode feature.
We hope you like these Night Mode Macbook tips! Alternatively, I explained how to enjoy dark computer backgrounds without enabling Dark Mode if you prefer not to have a system-wide darker color theme. For more great Mac tips, such as how to take a screenshot on Mac, sign up for our free Tip of the Day newsletter.
