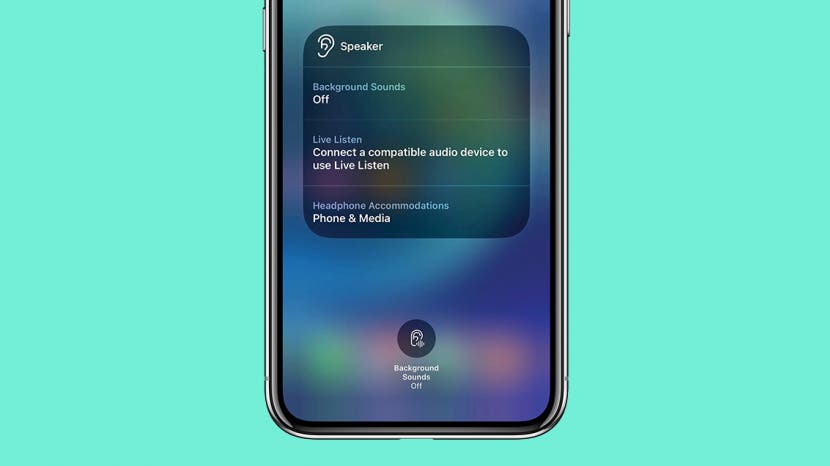
Live Listen is a clever feature that essentially turns your iPhone (or iPad/iPad touch) into a microphone and then amplifies the sounds it picks up through your Airpods. As long as your Airpods are in range of your phone, they essentially act like pseudo-hearing aids. Not only does this sound cool in theory, it actually works really well! Let's cover how to set up and use the Live Listen feature.
Jump To:
- How to Make AirPods into a Listening Device
- Part 1: How to Set Up Live Listen in Your Control Center
- Part 2: How to Turn On Live Listen
How to Make AirPods into a Listening Device
So, what is Live Listen? The Live Listen feature on your iPhone or iPad amplifies sounds in your nearby area to help you hear a conversation or someone speaking across a room. Setting up the Live Listen feature is a two-step process. First, you will need to add the Live Listen feature to your Control Center. Once that is in place, we'll show you how to quickly turn the Live Listen feature on and off from the Control Center. To use Live Listen, you will need to have installed iOS 14.3 or later software on your iPhone, or iPadOS 14.3 or later on your iPad. You will also need a pair of compatible Bluetooth headphones that can connect to your device. For your iPad or iPhone, Live Listen compatible headphones include: AirPods, AirPods Pro, AirPods Max, Powerbeats Pro, and Beats Fit Pro.
Related: AirPods Mic Not Working? Try These 6 Tips

Part 1: How to Set Up Live Listen in Your Control Center
Important Note: While this is a great method to help amplify sounds for mild hearing loss or noisy situations, it does not have the full capability of a professional hearing aid. For more nifty tips on your AirPods features, sign up for our free Tip of the Day Newsletter. Now, here's how to add the Live Listen feature to your Control Center:
- Tap the Settings app.
![Open the Settings app to turn on Live Listen.]()
- Scroll down and tap Control Center.
![Airpods as hearing aids Step 1.2- Control Center]()
- Under the More Controls section, tap the green plus sign next to Hearing. This is the Live Listen feature.
![Airpods as hearing aids Step 1.3 - Tap Hearing]()
- Scroll back up to confirm that Hearing is now listed in the Included Controls section.
![Airpods as hearing aids Step 1.4 - Confirm Included Controls]()
Now you can close the Settings app. You're now ready to access the Control Center and turn on Live Listen!
Part 2: How to Turn On Live Listen
Before enabling the Live Listen, you'll want to put your AirPods in your ears and make sure they are connected to your iPhone or iPad. Then, follow the steps below:
- On a newer iPhone without a Home button, swipe down from the top-right corner of the screen to access your Control Center. (If you have an older iPhone with a Home button, swipe up from the bottom of the screen.)
![Swipe down to access the Control Center on iPhones without a Home button.]()
- Tap the Hearing icon.
![Airpods as hearing aids Step 2.3 - Tap hearing icon in control center]()
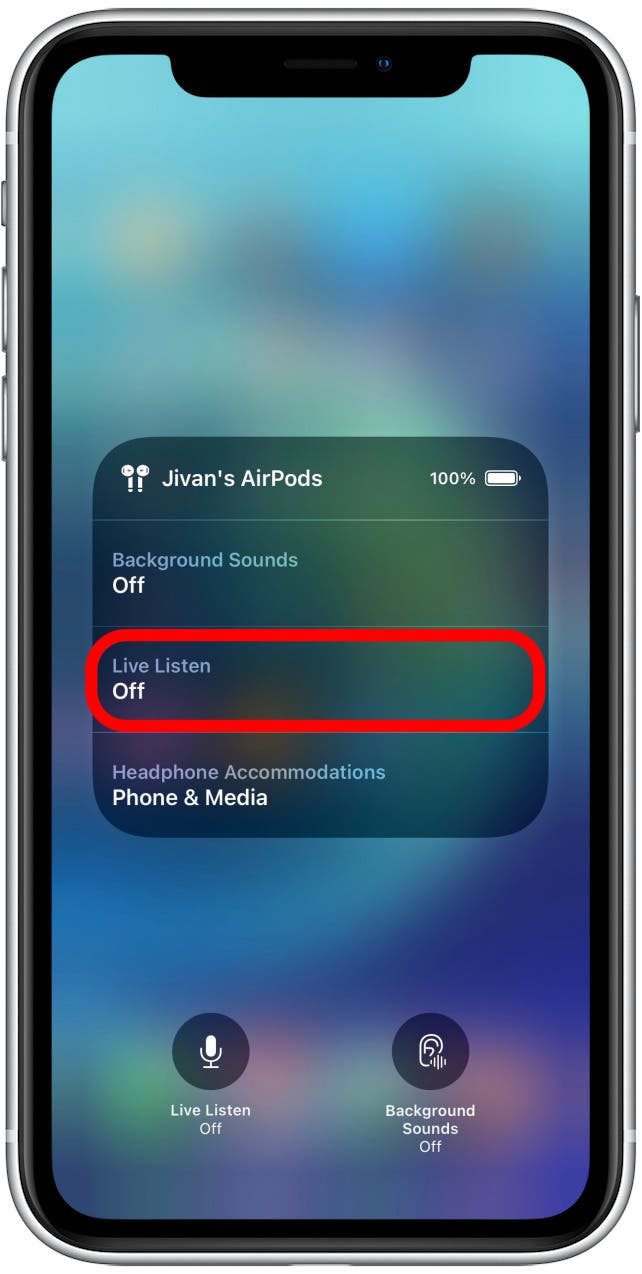
- Tap Live Listen to turn it on.
![Airpods as hearing aids Step 2.5 - Tap live listen to turn on]()
- Alternatively, you can also tap the microphone icon to enable Live Listen.
![]()
- Now put your iPhone or iPad in front of the audio source that you would like to hear.
- You can press the volume buttons on the side of your device to increase or decrease the decibel level, which is displayed beneath Headphone Level.
![Airpods as hearing aids Step 2.8 - Adjust volume]()
- To turn off the feature, tap Live Listen again, or tap the microphone icon to turn it off.
![Airpods as hearing aids Step 2.9 - Tap microphone to turn off]()
Pro Tip: To hear your AirPods better, a good fit is a must! If your AirPods Pro don't fit well, try changing the tips for a larger or smaller size.
What I love about this hack is that if you already own an iPhone and AirPods, you won’t have to shell out any more money for this. Just put your iPhone next to the audio source you want to pick up and pop in your AirPods. Enjoy!


