What to Know
- When you work with multiple printers, you can save time by setting your most-used printer as the default option.
- Avoid accidental or wasteful prints on a higher-end printer by setting up an everyday printer as your default.
Once you've learned how to print from your Mac, you may be looking for ways to make the process faster and easier. I find learning how to set a default printer on my Mac and iMac really helpful to not only save time but to avoid wasting ink and paper by accidentally printing on the wrong printer.
How to Set a Default Printer on Your Mac
In order to set a default printer, your printer of choice should already be set up on your Mac. If you haven’t done that yet, make sure to read our article on how to print on Mac first. For more printing tips, such as how to print without ads from Safari, sign up for our free Tip of the Day newsletter! Once set up, I’ll show you how to set a printer as a default option:
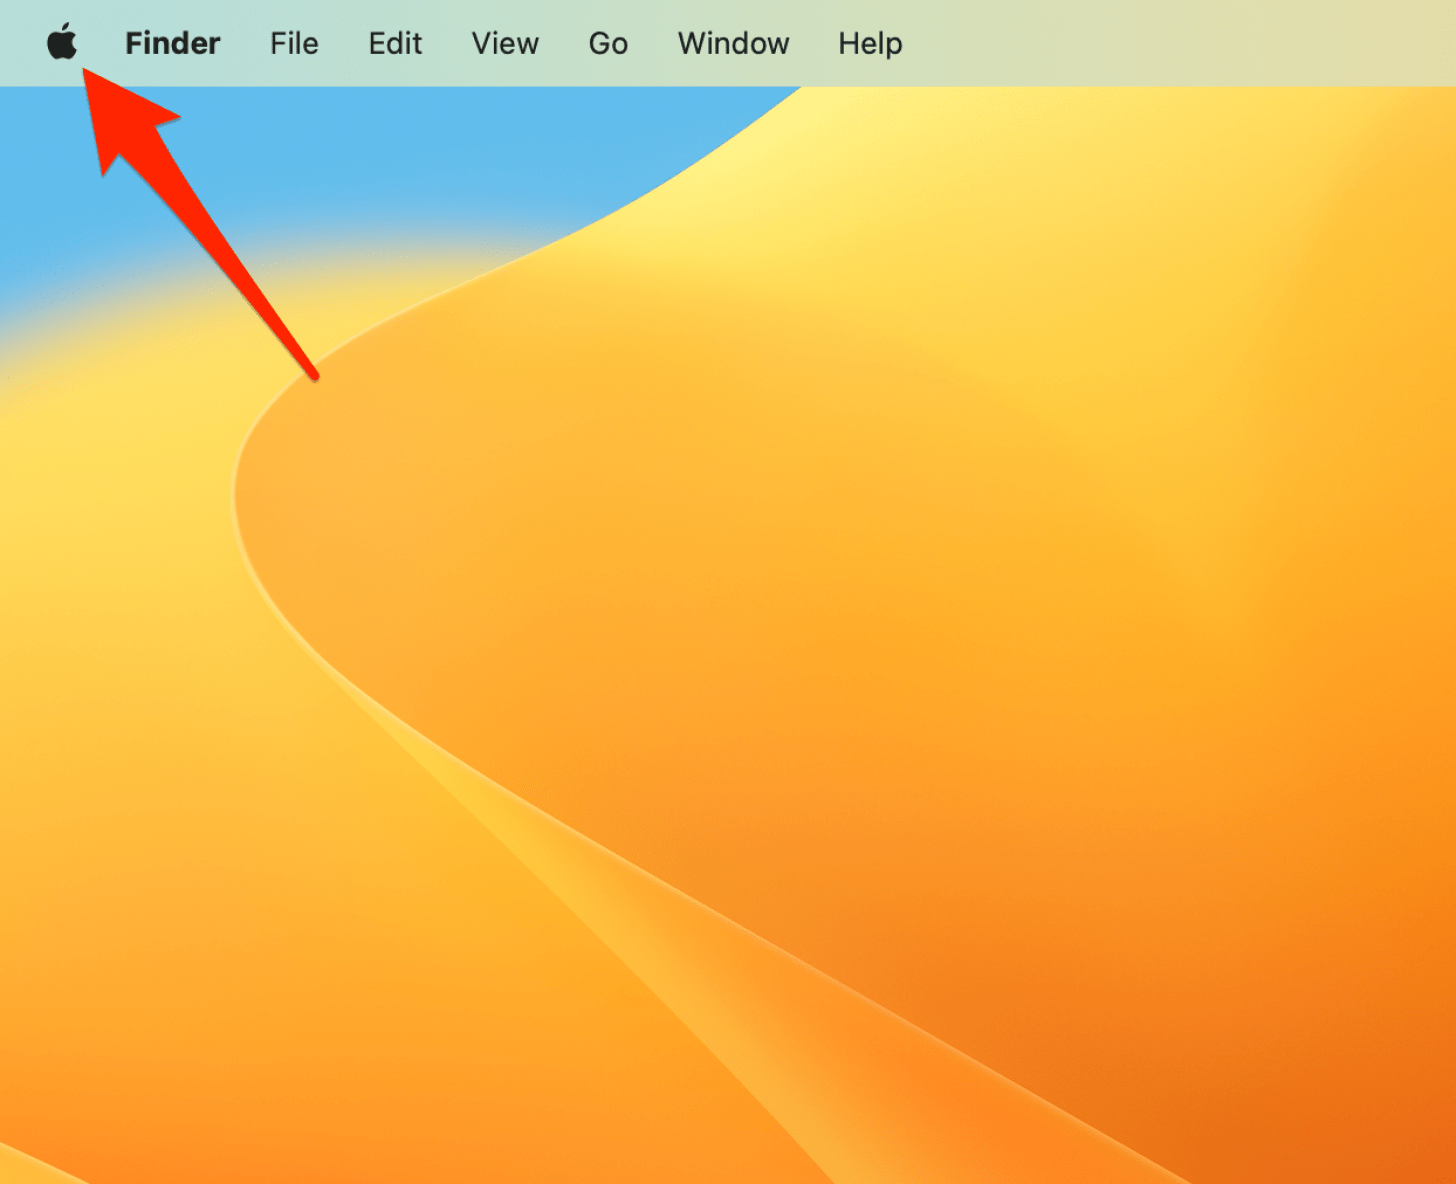
- To set up a default printer, click the Apple icon in the top left corner.
![To set up a default printer, click the Apple icon in the top left corner.]()
- Tap System Settings (on an older Mac, this is called System Preferences).
![Tap System Settings]()
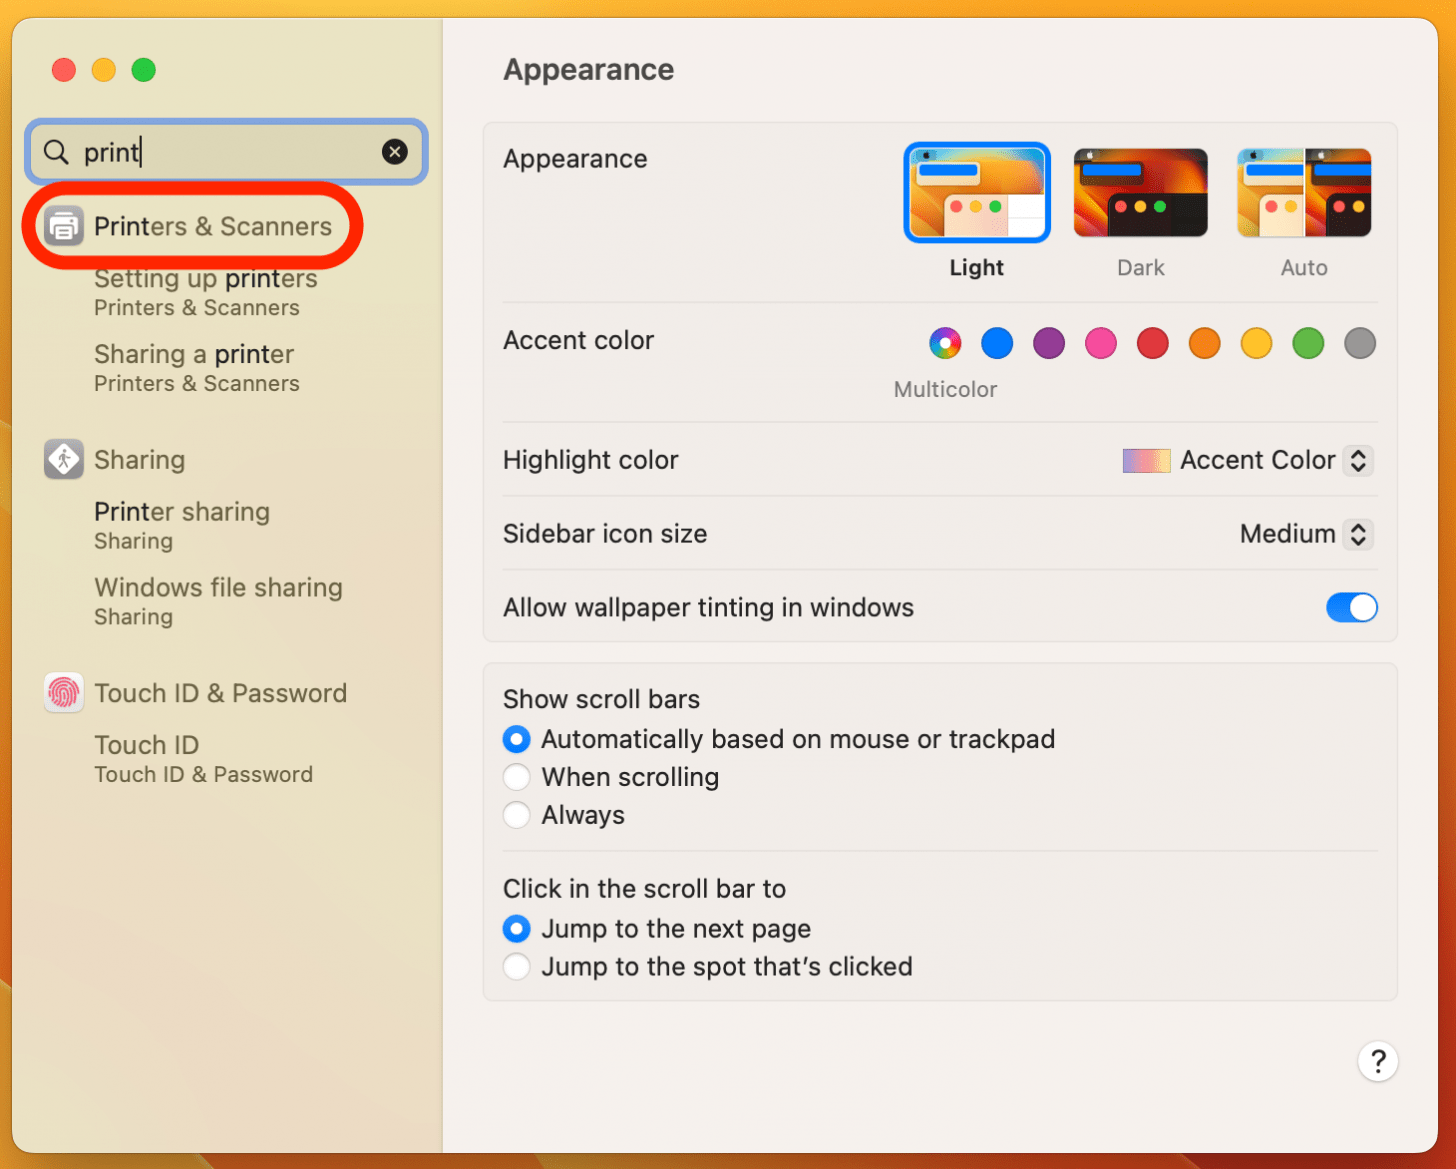
- In the search bar, type “print.”
![In the search bar, type “print.”]()
- Open Printers and Scanners.
![Open Printers and Scanners.]()
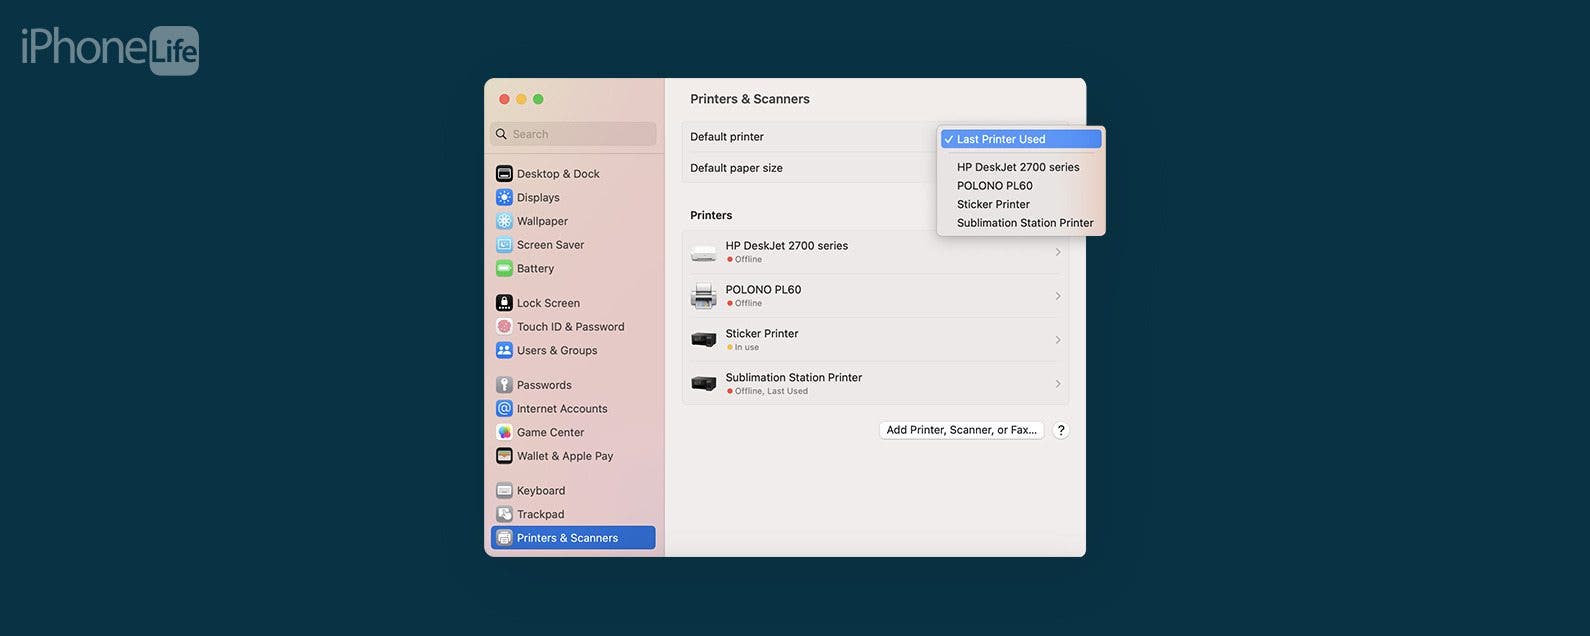
- Next to Default Printer, tap the up and down arrows.
![Next to Default Printer tap the up and down arrows.]()
- Select the printer you wish to set as your default.
![Select the printer you wish to set as your default.]()
On a Mac running macOS Monterey or earlier, step 5 will look like this: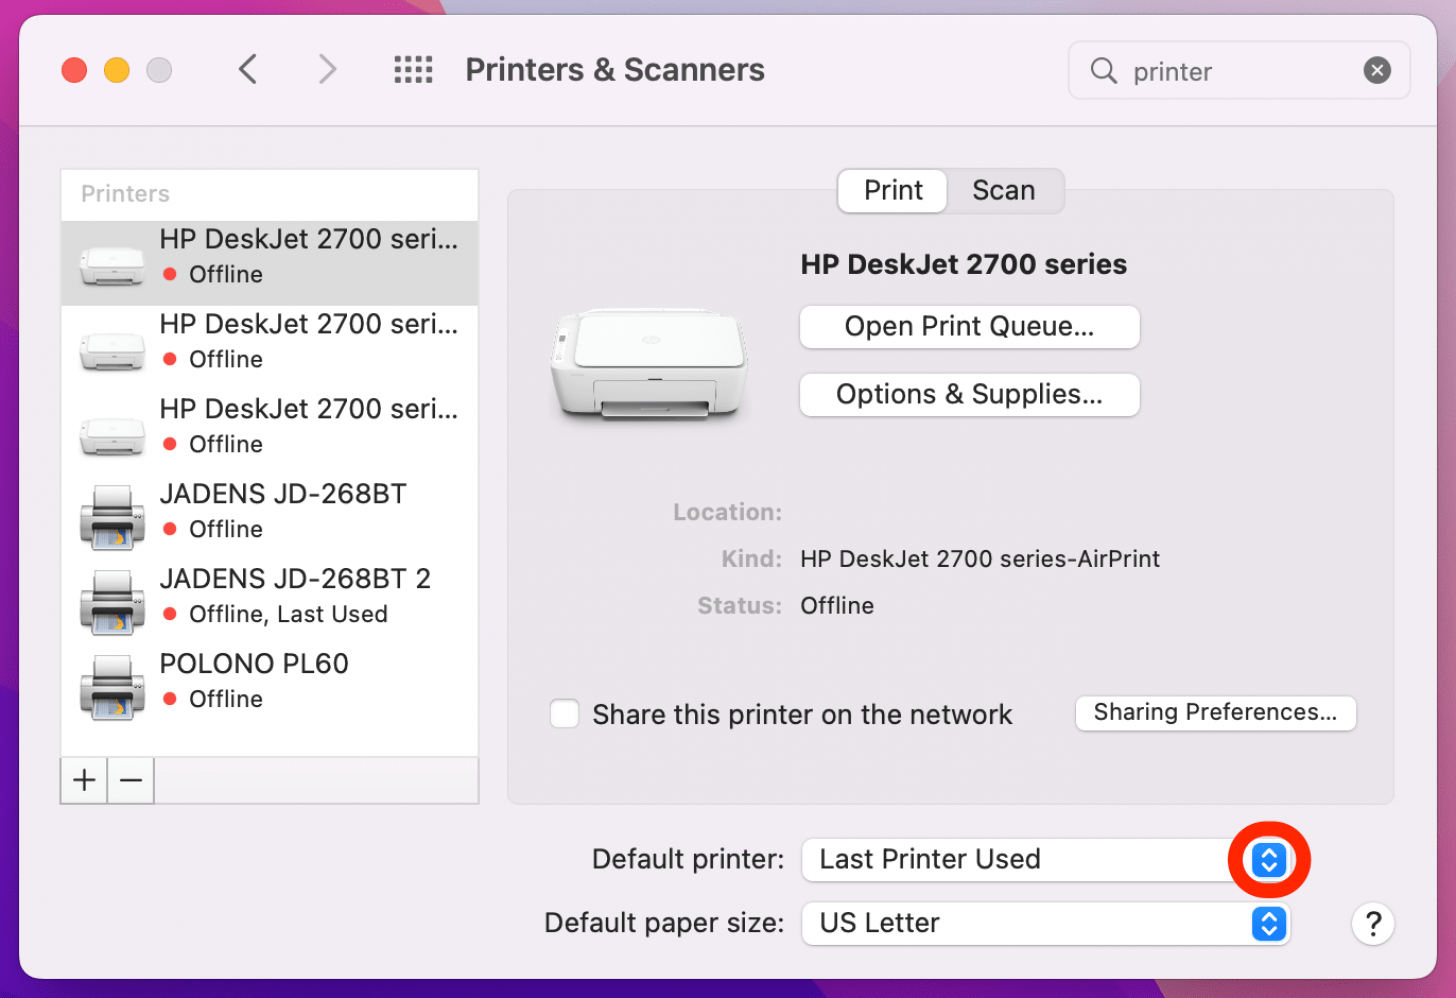

Pro Tip:
If your default printer is set to “Last Printer Used,” this doesn’t mean that your print job will automatically go there. Each time you print a file, you will be able to pick a different printer; whatever you set as default will simply be the automatically-selected option.
Now you know how to set a default printer on your Mac! Next, learn how to print from iPhones and iPads, but keep in mind that it isn't possible to set a default printer from these Apple devices. The best way to deal with multiple printers on an iPhone or iPad is to delete any printers that you no longer use to avoid confusion.
