* This article is from our Tip of the Day newsletter. Sign Up. *
For those adventurous enough to want to branch out onto new terrain but cautious enough to want a digital guide, I have good news for you: you can now create a custom route on Apple Maps. It's easy to create and easy to manage and will keep you from getting lost on your walk, hike, or run. Let's dive into how to create a route on Apple Maps.
Why You'll Love This Tip:
- Learn how to make your own route on Apple Maps to explore new ground without getting lost.
- See distance, elevation gain, and more.
- Easily save your custom route maps for offline use.
How to Create a Route on Apple Maps
System Requirements
This tip requires an iPhone running iOS 18 or later. Learn how to update to the latest iOS.
Can you make your own route on Apple Maps? With iOS 18, you can! Learn how to customize your own route for walking, running, and hiking. For more great Apple customization options, check out our free Tip of the Day newsletter.

- Open Maps and long press on where you want to start your route.
![]()
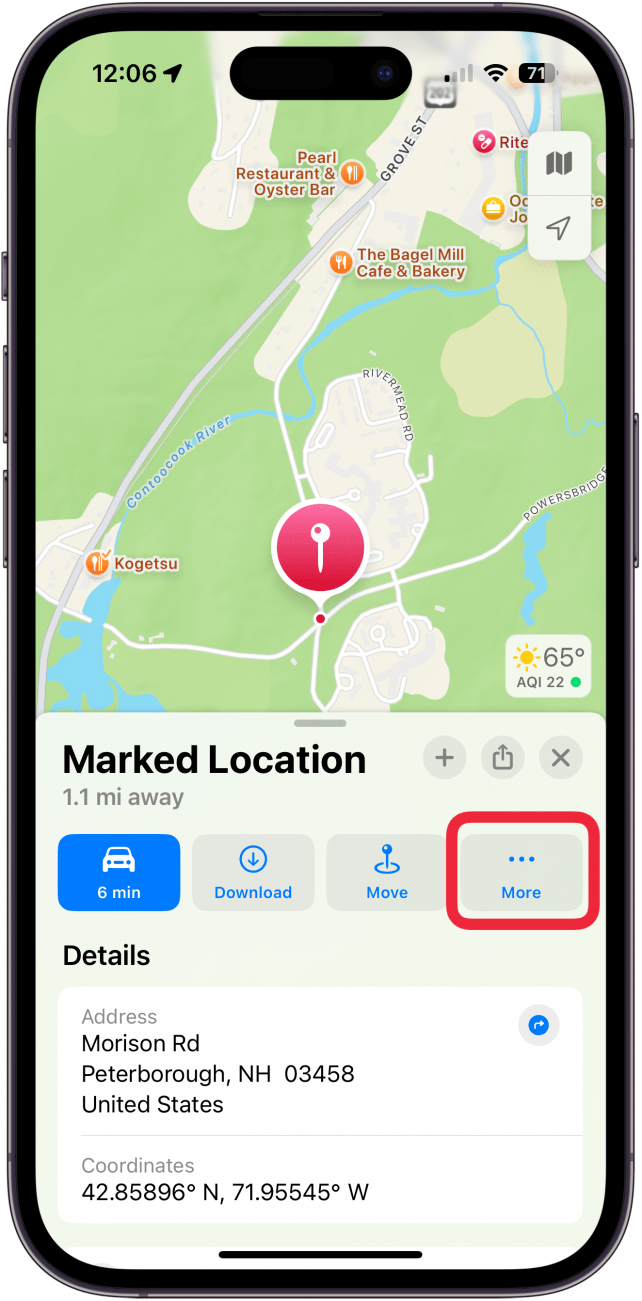
- Tap More.
![how to create a route on apple maps]()
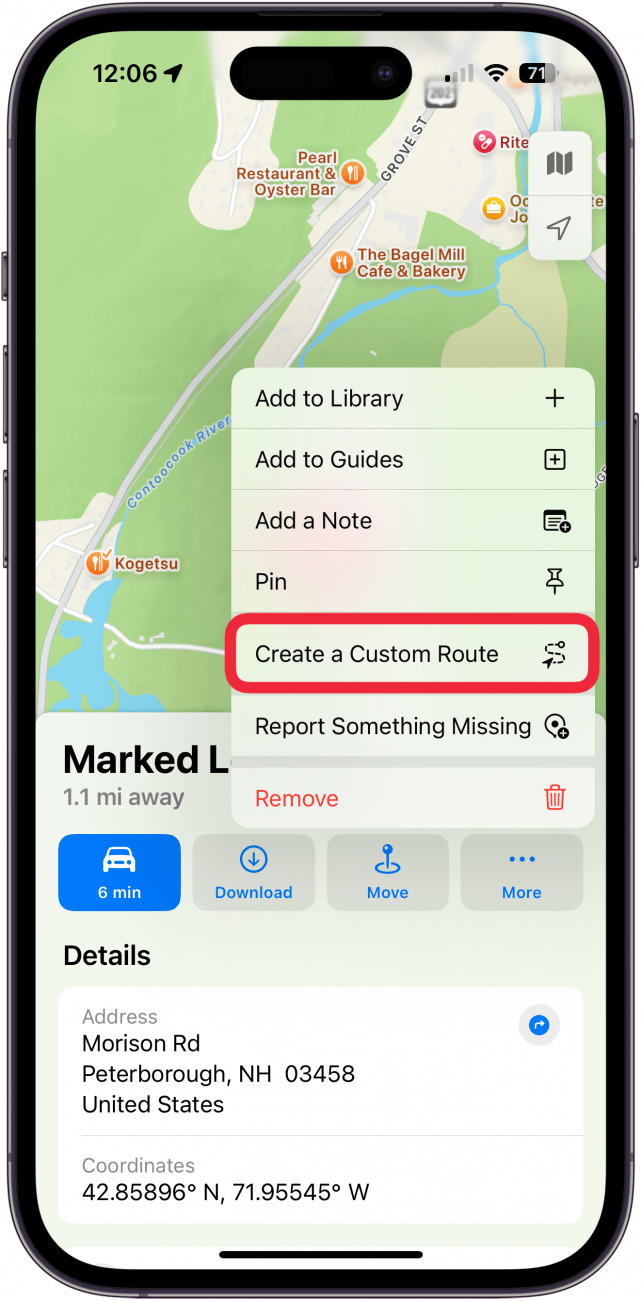
- Tap Create a Custom Route.
![can you make your own route on apple maps]()
- Tap the map to add points to your route.
![how to create a route on apple maps]()
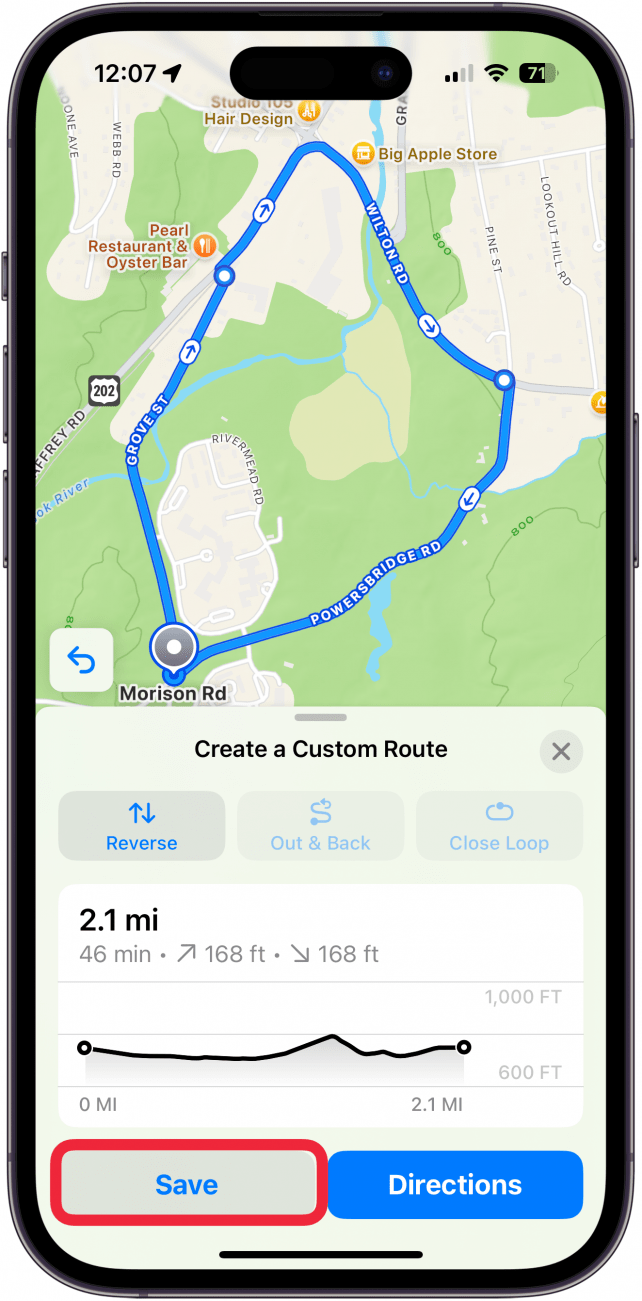
- Tap Reverse to swap the starting and end point of the route, Out & Back to mark the route as one where you turn around once you reach the end and go back to the beginning, or Close Loop to turn the route into a loop.
![custom route map]()
- Tap Save.
![how to make your own route on apple maps]()
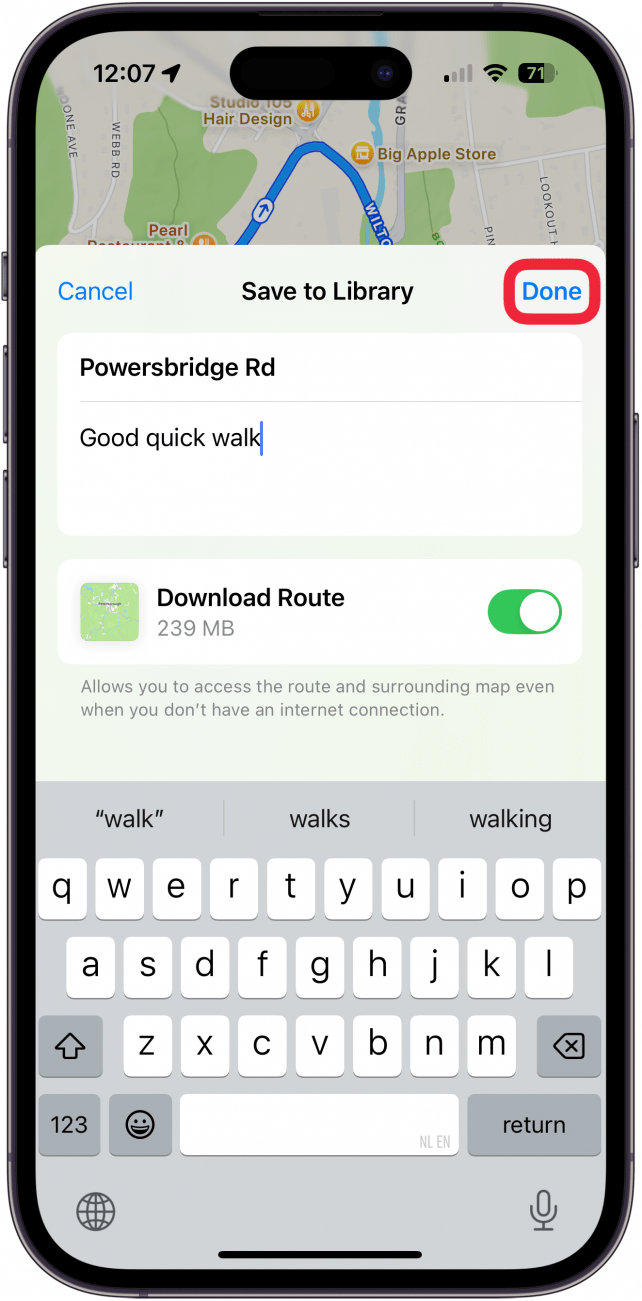
- Name your route and add any relevant note then tap Done.
![how to make a custom route on apple maps]()
And there you have it! Now you can even access the map offline and see the distance, elevation gain, and more.

